The Ultimate 7 Layer Bean Dip: Perfect Party Appetizer Every Time
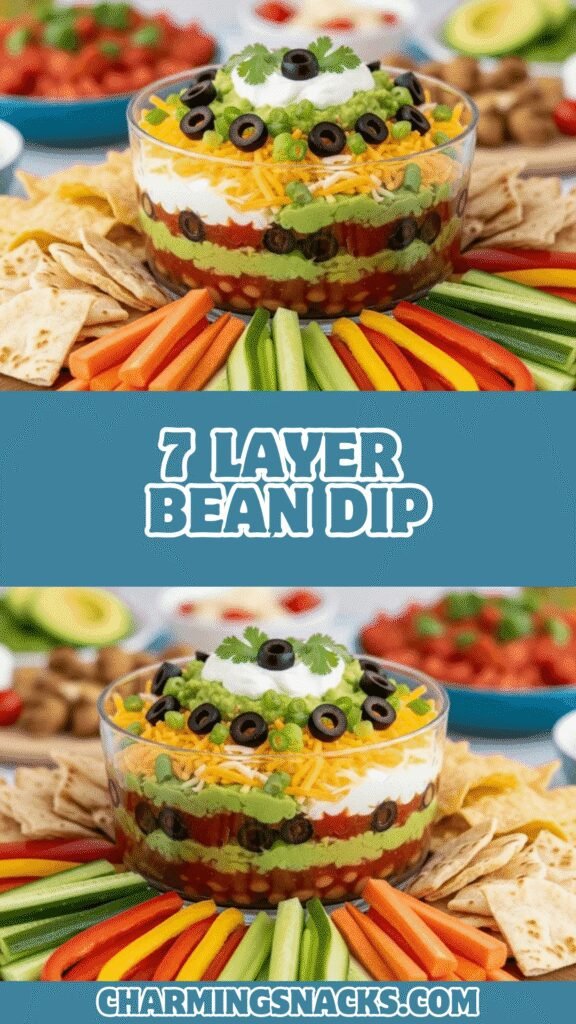
Seven layer bean dip is the undisputed champion of party appetizers—a colorful, flavor-packed crowd-pleaser that disappears faster than you can say “pass the chips!” This iconic Mexican-inspired dip features seven delicious layers stacked in perfect harmony: creamy refried beans, zesty sour cream, smooth guacamole, fresh salsa, melted cheese, crisp lettuce, and juicy tomatoes. Each scoop delivers a perfect bite with every single layer in one chip.
What makes this classic 7 layer bean dip so irresistible is the combination of textures and flavors. You get creamy, crunchy, fresh, and savory all at once. It’s the kind of appetizer that brings everyone together around the table, chips in hand, diving in for “just one more bite” until the entire dish is gone. Whether you’re hosting a Super Bowl party, planning a Cinco de Mayo celebration, bringing a dish to a potluck, or just having friends over for game night, this easy 7 layer dip is always the star of the show.
The best part? This Mexican layer dip requires zero cooking and comes together in about 20 minutes. It’s endlessly customizable, budget-friendly, and feeds a crowd with minimal effort. Serve it cold or at room temperature with tortilla chips, and watch it become the most popular dish at any gathering!
History / Background
The seven layer dip, also known as seven layer bean dip or Mexican layer dip, is a beloved American creation that emerged during the 1970s and 1980s when Tex-Mex cuisine was exploding in popularity across the United States. While Mexico has countless layered dishes and dips in its rich culinary tradition, this particular seven-layer version is distinctly American, created to bring Mexican-inspired flavors to casual entertaining.
The recipe gained widespread popularity in the American Southwest, particularly in Texas and California, where Mexican culinary influence is deeply woven into the food culture. Home cooks loved that it could be made ahead, served cold, looked impressive when presented in a clear glass dish (showing off those beautiful layers!), and required no cooking whatsoever—perfect for hot summer days and busy hosts.
By the 1980s and 1990s, seven layer dip had become a staple at Super Bowl parties, potlucks, and family gatherings across the entire country. Its popularity coincided with the rise of casual entertaining and the growing availability of prepared Mexican-inspired ingredients in American supermarkets. Suddenly, every grocery store carried refried beans, salsa, and jarred jalapeños, making this dip accessible to home cooks everywhere.
The “seven layers” became somewhat standardized over time, though regional variations exist. Some versions add black olives as a layer, while others include seasoned taco meat or black beans. The beauty of this dip is its flexibility—it’s more of a formula than a strict recipe, allowing cooks to customize based on preferences and what’s available.
Today, seven layer bean dip remains a party favorite precisely because it represents everything we love about casual, crowd-pleasing food: it’s easy to make, visually appealing, delicious, and brings people together. It’s become so iconic that it’s inspired countless variations, from seven layer hummus dip to dessert versions, but the original bean dip remains the gold standard.
Why You’ll Love This Recipe
This easy 7 layer bean dip is about to become your most-requested recipe for every single gathering, and once you see how simple it is to make (and how quickly it disappears!), you’ll understand why it’s been a party staple for decades. This isn’t just any dip—it’s the dip that saves the day when you need something impressive with minimal effort.
Here’s why this recipe is absolutely perfect:
- No Cooking Required – Seriously! Just layer and serve. No stove, no oven, no stress.
- Ready in 20 Minutes – From start to finish, including prep, you can have this gorgeous dip assembled and ready.
- Always a Crowd-Pleaser – I’ve never been to a party where this dip had leftovers. Everyone loves it from kids to adults.
- Perfect for Any Gathering – Game day, holidays, potlucks, pool parties, Taco Tuesday—this dip fits every occasion.
- Budget-Friendly – Makes a huge amount that feeds 12-15 people for under $15 in ingredients.
- Make-Ahead Friendly – Prep it hours (or even a day!) ahead so you can focus on other things.
- Visually Stunning – Those colorful layers look absolutely gorgeous when served in a clear glass dish.
- Easily Customizable – Add meat, change up ingredients, make it spicier or milder—totally flexible.
- Naturally Gluten-Free – Perfect for guests with gluten sensitivities (just use certified GF chips).
- Great for Large Groups – This recipe easily scales up or down depending on your crowd size.
- Kid-Friendly – Even picky eaters love this dip, and you can control the spice level perfectly.
Ingredient Notes
The beauty of seven layer bean dip lies in the simplicity of store-bought ingredients that layer together to create something truly spectacular. Understanding each component helps you build the best version.
Refried Beans: This is your foundation layer and provides that hearty, protein-rich base. Traditional refried beans (pinto beans) work perfectly, but black refried beans are equally delicious and add visual contrast. Look for smooth, spreadable beans—not too thick or too watery. Seasoning tip: Mix in a packet of taco seasoning or add cumin, garlic powder, and a squeeze of lime to elevate store-bought beans. Substitutions: Black bean dip, homemade refried beans, or even pinto beans mashed with a fork work great. For a healthier option, use fat-free refried beans.
Sour Cream: Creates that cool, creamy layer that balances the richness of beans and cheese. Full-fat sour cream tastes best and has the right consistency for spreading. Season it with taco seasoning, lime juice, or a pinch of cumin for extra flavor. Substitutions: Greek yogurt (plain, full-fat works best), Mexican crema for authentic flavor, or a dairy-free sour cream alternative for vegan versions.
Guacamole: Adds fresh, creamy avocado goodness with a burst of flavor. You can use store-bought guacamole for convenience (totally acceptable!) or make quick homemade guac with mashed avocados, lime juice, salt, cilantro, and diced onion. Substitutions: Mashed avocado seasoned with salt and lime if you don’t have guac, or skip this layer entirely and add extra sour cream if avocados aren’t available or you’re not a fan.
Salsa: Provides that tangy, fresh tomato flavor with a little kick. Use your favorite salsa—mild, medium, or hot depending on your crowd. Chunky salsa (pico de gallo) works beautifully, but smooth salsa is fine too. Pro tip: Drain your salsa slightly if it’s very watery to prevent making other layers soggy. Substitutions: Fresh pico de gallo, salsa verde for a different flavor profile, or canned diced tomatoes with green chiles.
Shredded Cheese: The essential melty, salty layer that everyone loves. Mexican cheese blend (a mix of cheddar, Monterey Jack, and sometimes queso quesadilla) is ideal. Freshly shredded cheese tastes better and melts more smoothly than pre-shredded. Substitutions: Sharp cheddar, Monterey Jack, Colby Jack, pepper jack for spice, or a dairy-free cheese alternative.
Shredded Lettuce: Adds crucial crunch and freshness that contrasts with the creamy layers. Iceberg lettuce is traditional and stays crisp longest, but romaine works too. Shred it finely so it’s easy to scoop with chips. Substitutions: Shredded cabbage for longer-lasting crunch, or skip this layer if serving immediately (lettuce wilts over time).
Diced Tomatoes: The fresh, juicy finishing touch that adds color and brightness. Use Roma tomatoes for less juice and seeds, or any ripe tomato you prefer. Dice them small so they distribute evenly on chips. Substitutions: Grape or cherry tomatoes halved, or use extra salsa instead.
Optional Toppings: Sliced black olives, sliced green onions, fresh cilantro, jalapeño slices, or diced red onion add extra flavor and visual appeal.
Equipment Needed
You need almost no special equipment for this no-cook dip—just basic items you definitely already own:
- 9×13 inch baking dish or clear glass dish – The classic choice that shows off your beautiful layers (clear glass is especially impressive!)
- Medium mixing bowl – For seasoning your sour cream layer
- Can opener – For opening your beans
- Rubber spatula or spoon – For spreading each layer evenly
- Cutting board and knife – For chopping tomatoes, lettuce, and any fresh ingredients
- Measuring cups – For portioning ingredients
- Cheese grater – If shredding your own cheese (highly recommended!)
- Serving spoon or spatula – For scooping dip onto plates
Optional but nice: a clear trifle bowl or individual clear cups for single-serving portions that look extra fancy and are perfect for parties where people are standing and mingling.
Print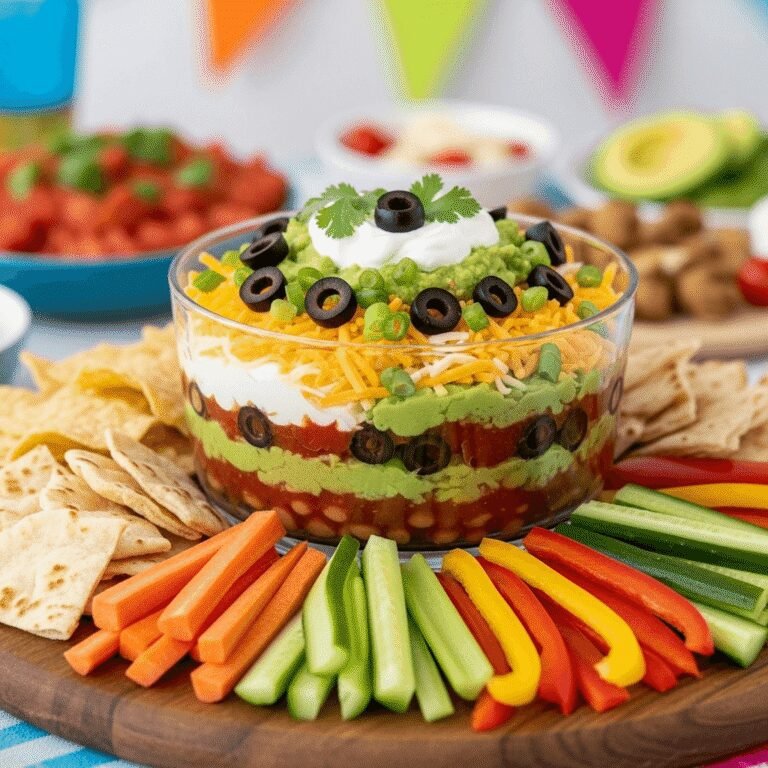
7 Layer Bean Dip
This classic 7 Layer Bean Dip is the ultimate party appetizer featuring seven delicious layers: refried beans, seasoned sour cream, guacamole, salsa, cheese, lettuce, and tomatoes. Ready in just 20 minutes with no cooking required, this colorful Mexican-inspired dip is perfect for game day, potlucks, and any gathering. Serve with tortilla chips and watch it disappear!
- Total Time: 20 minutes
- Yield: 12-15 servings 1x
Ingredients
Layer 1 – Bean Base:
- 1 can (16 oz) refried beans (about 2 cups)
- 1 packet (1 oz) taco seasoning, divided
- 2 tablespoons lime juice
Layer 2 – Sour Cream:
- 1 cup sour cream (8 oz)
- Half the taco seasoning packet (reserved from layer 1)
Layer 3 – Guacamole:
- 1½ cups prepared guacamole (store-bought or homemade)
Layer 4 – Salsa:
- 1 cup salsa (your preferred heat level)
Layer 5 – Cheese:
- 2 cups shredded Mexican cheese blend (8 oz)
Layer 6 – Lettuce:
- 2 cups shredded iceberg or romaine lettuce
Layer 7 – Tomatoes:
- 1 cup diced tomatoes (about 2 medium tomatoes)
Optional Toppings:
- ½ cup sliced black olives
- ½ cup sliced green onions
- ¼ cup fresh cilantro, chopped
- Sliced jalapeños
- Tortilla chips for serving
Instructions
- Prepare your dish: Choose a 9×13 inch baking dish or clear glass serving dish. Clear glass is ideal because it beautifully showcases all seven colorful layers, making your dip as visually appealing as it is delicious.
- Make the bean layer: In a medium bowl, mix the refried beans with 2 tablespoons lime juice and half of the taco seasoning packet. Stir until smooth and well combined. Spread this mixture evenly across the bottom of your dish, creating a smooth, even layer that covers the entire bottom. Use a rubber spatula to spread it all the way to the edges.
- Create the sour cream layer: In a clean bowl, mix the sour cream with the remaining half of the taco seasoning packet. Stir until fully incorporated and the sour cream is evenly colored. Carefully spread this over the bean layer, being gentle so you don’t mix the two layers together. Use the back of a spoon to create a smooth, even surface.
- Add the guacamole layer: Spoon the guacamole over the sour cream layer. Gently spread it evenly, working from the center outward. If using store-bought guacamole, this layer is effortless. If making your own, mash 3 ripe avocados with lime juice, salt, diced onion, cilantro, and a diced tomato.
- Spread the salsa layer: Drain your salsa slightly if it’s very watery (just pour off excess liquid). Spoon the salsa evenly over the guacamole layer. Spread gently to cover completely without disturbing the layer beneath.
- Add the cheese layer: Sprinkle the shredded cheese evenly over the salsa, making sure to cover all the way to the edges. Freshly shredded cheese distributes more evenly and tastes better than pre-shredded. This layer should be generous—cheese is what everyone loves!
- Top with lettuce: Sprinkle the shredded lettuce evenly over the cheese. Make sure the lettuce is dry (excess moisture makes it soggy faster). Distribute it evenly for both appearance and so every scoop gets some fresh crunch.
- Finish with tomatoes: Scatter the diced tomatoes evenly across the top. This is your final main layer and it adds beautiful color and fresh flavor.
- Add optional garnishes: If using, top with sliced black olives, green onions, cilantro, jalapeños, or any other toppings you love. These add extra flavor and make the presentation even more impressive.
- Serve or refrigerate: Serve immediately with plenty of tortilla chips arranged around the dish, or cover tightly with plastic wrap and refrigerate for up to 8 hours before serving. If refrigerating, wait to add the lettuce and tomatoes until just before serving for the freshest texture.
- Enjoy! Provide a serving spoon and encourage guests to scoop deep so they get all seven layers in every bite. That’s where the magic happens!
Notes
- Drainage matters: If your salsa is very watery, drain off some liquid to prevent soggy layers.
- Lettuce timing: For best results, add lettuce and tomatoes within 2-3 hours of serving to keep them fresh and crisp.
- Scaling up or down: This recipe doubles easily for larger crowds. For smaller gatherings, make it in an 8×8 dish and cut ingredient amounts in half.
- Customize layers: Feel free to add a layer of seasoned ground beef, shredded chicken, black beans, or corn for extra substance.
- Make it spicy: Use hot salsa, add jalapeños, include pepper jack cheese, or mix hot sauce into your sour cream layer.
- Storage: Cover tightly and refrigerate for up to 2 days. The lettuce will wilt, so it’s best eaten within 24 hours.
- Serving tip: Use thick, sturdy tortilla chips that won’t break when scooping through all those layers.
- Prep Time: 20 minutes
- Cook Time: 0 minutes
- Category: Appetizer
- Method: No-Cook/Assembly
- Cuisine: American
- Diet: Vegetarian
Nutrition
- Serving Size: ¾ cup dip (1/12 of recipe, not including chips)
- Calories: 198
- Sugar: 3g
- Sodium: 486mg
- Fat: 14g
- Saturated Fat: 6g
- Unsaturated Fat: 7g
- Trans Fat: 0g
- Carbohydrates: 13g
- Fiber: 4g
- Protein: 8g
- Cholesterol: 28mg
Tips & Variations
The wonderful thing about seven layer bean dip is how easily you can customize it to match your taste, dietary needs, or what you have in the pantry. Here are endless ways to make this recipe your own:
Protein-Packed Variations:
- Taco Beef Layer: Add a layer of seasoned ground beef between the beans and sour cream. Brown 1 pound ground beef with taco seasoning and let cool before adding.
- Shredded Chicken: Layer in 1½ cups shredded rotisserie chicken mixed with taco seasoning for a heartier dip.
- Chorizo Spice: Cook and crumble Mexican chorizo, drain well, and add as an extra layer for incredible flavor.
- Black Bean Addition: Mix black beans (drained and rinsed) with the refried beans for extra protein and texture.
Veggie-Loaded Versions:
- Corn Layer: Add a layer of drained canned corn or fresh roasted corn kernels for sweetness and texture.
- Bell Peppers: Dice colorful bell peppers and mix into your salsa layer or sprinkle on top.
- Black Olives: Add a whole layer of sliced black olives between the cheese and lettuce.
- Jalapeños: Fresh or pickled jalapeño slices add spicy kick throughout.
Cheese Alternatives:
- Queso Twist: Replace the shredded cheese layer with warm queso dip for an ultra-creamy version.
- Cotija Crumbles: Top with crumbled cotija cheese instead of shredded cheese for authentic Mexican flavor.
- Vegan Version: Use dairy-free sour cream, vegan cheese, and ensure your guacamole has no dairy additions.
Make It Lighter:
- Use fat-free refried beans and reduced-fat sour cream
- Replace sour cream with plain Greek yogurt
- Use less cheese or opt for a reduced-fat Mexican blend
- Add more vegetable layers and reduce beans/cheese portions
- Serve with baked tortilla chips or fresh vegetables
Spice Level Adjustments:
- Mild: Use mild salsa, omit jalapeños, and use regular cheese
- Medium: Mix mild and medium salsa, add some green onions
- Hot: Use hot salsa, add fresh or pickled jalapeños, include some pepper jack cheese, and mix hot sauce into the sour cream layer
Regional Twists:
- California Style: Add a layer of mashed avocado instead of guacamole, top with sprouts, and serve with veggie chips
- Texas Style: Add seasoned ground beef and extra cheese, use hot salsa, top with pickled jalapeños
- Green Version: Use salsa verde, green enchilada sauce, and cilantro-lime sour cream for a tangy twist
Pro Chef Tips
Want to take your seven layer bean dip from good to absolutely legendary? Here are insider secrets that make all the difference:
The Secret to Perfect Layers: Each layer should be spread completely to the edges of your dish, creating distinct, even layers. Use the back of a spoon or offset spatula to spread gently and methodically. If you rush and plop ingredients carelessly, your layers will look messy when you scoop. Take your time with each layer—it only adds a minute or two but makes the final presentation stunning.
Temperature Matters: Serve this dip slightly chilled or at cool room temperature, not ice cold. Cold dip straight from the refrigerator has muted flavors. Remove it from the fridge about 20-30 minutes before serving to let the flavors come alive. The exception: if you’re serving outdoors in hot weather, keep it chilled to prevent food safety issues.
Drain Everything: This is crucial! Drain your salsa of excess liquid. Pat your tomatoes dry with paper towels after dicing. Make sure beans aren’t too watery. Excess moisture is the enemy of layered dips—it causes layers to bleed into each other and creates a soupy mess instead of distinct, beautiful layers.
Season Every Layer: Don’t just season the beans—add flavor to each component. Mix taco seasoning into your sour cream, make sure your guacamole is well-salted and lime-y, season your tomatoes with a pinch of salt, and don’t use bland salsa. Every layer should taste delicious on its own so the combination is phenomenal.
The Chip Test: Use thick, sturdy restaurant-style tortilla chips, not thin, delicate ones. Your chips need to be strong enough to scoop through multiple layers without breaking. Nothing ruins a party faster than weak chips that snap under the weight of the dip. Scoop’s tortilla chips or thick restaurant-style chips work perfectly.
Presentation Power: Serve in a clear glass dish whenever possible. Seeing all seven colorful layers is part of the appeal and makes the dip irresistible. If you want to get really fancy, make individual portions in small clear cups—it looks amazing and is perfect for parties where people are standing and mingling.
Fresh Beats Prepared: While store-bought components work perfectly, fresh-made guacamole and pico de gallo elevate this dip to restaurant quality. The flavor difference is noticeable and worth the extra 5 minutes of prep if you have time.
Common Mistakes to Avoid
Even though this is one of the easiest recipes ever, there are a few pitfalls that can affect your results. Here’s what to watch out for:
1. Adding the Lettuce Too Early: This is the number one mistake! Lettuce wilts when it sits on the other layers for too long, especially if there’s any moisture from salsa or tomatoes. If you’re making this dip more than 2-3 hours ahead, wait to add the lettuce and tomatoes until just before serving. Your dip will look fresh and crisp instead of sad and soggy.
2. Using Watery Ingredients Without Draining: Salsa, tomatoes, and even guacamole can have excess liquid that seeps into other layers, creating a soupy mess. Always drain salsa slightly, pat tomatoes dry, and if your guacamole looks watery, give it a gentle stir and pour off any liquid. Dry ingredients = distinct, beautiful layers.
3. Not Spreading to the Edges: When you don’t spread each layer all the way to the edge of your dish, people who scoop from the sides don’t get all seven layers. The whole point is getting every layer in one bite! Take an extra 30 seconds to spread each component completely edge-to-edge for even distribution.
4. Using Beans That Are Too Thick: If your refried beans are paste-thick, they’re impossible to spread smoothly and you’ll end up with gaps. Mix in a tablespoon or two of water, lime juice, or even salsa to thin them to a spreadable consistency—like thick hummus. They should spread easily without tearing.
5. Serving with Weak Chips: Thin, delicate tortilla chips cannot handle the weight of seven layers. They’ll break off in the dip, leaving you eating layers with your fingers (not cute at a party!). Invest in thick, restaurant-style tortilla chips that can scoop deeply without snapping. It makes all the difference in the eating experience.
6. Forgetting to Season: Store-bought refried beans can be bland on their own. Plain sour cream is boring. Season each layer! A little taco seasoning, salt, lime juice, or cumin goes a long way. Taste as you go and add enough flavor so each layer is delicious on its own.
Storage & Meal Prep
Seven layer bean dip is naturally make-ahead friendly, which is part of why it’s such a beloved party dish. Here’s how to handle storage and prep:
Storing Assembled Dip:
Once your seven layer dip is fully assembled, cover it tightly with plastic wrap, pressing the wrap directly onto the surface to prevent air exposure (this prevents the guacamole from browning). Refrigerate for up to 24-48 hours. The dip is best within the first day—after that, the lettuce wilts and the layers start to get slightly soggy, though it’s still totally edible and delicious for up to 2-3 days.
Best Make-Ahead Strategy:
For optimal freshness, assemble the first five layers (beans through cheese) up to 24 hours ahead. Cover and refrigerate. Just before serving, add the lettuce, tomatoes, and fresh toppings. This keeps everything crisp and fresh while still giving you the make-ahead convenience.
Component Prep:
You can prep individual components even further in advance:
- Refried beans mixed with seasoning: 3-4 days refrigerated
- Seasoned sour cream: 5-7 days refrigerated
- Shredded cheese: 5-7 days refrigerated (or buy pre-shredded)
- Diced tomatoes: 1-2 days refrigerated in airtight container
- Shredded lettuce: 2-3 days refrigerated in paper towel-lined container
Leftover Dip:
Store leftover dip covered tightly in the refrigerator for up to 3 days. Be aware the lettuce will be wilted and the texture less appealing, but the flavor is still great. Leftovers are perfect for:
- Spreading on tortillas for quick quesadillas
- Topping for taco salads
- Filling for burritos or burrito bowls
- Served over baked potatoes
- Mixed into scrambled eggs for breakfast
Freezing:
I don’t recommend freezing assembled seven layer dip. The sour cream, lettuce, and tomatoes don’t freeze well and become watery and separated when thawed. However, you can freeze the bean layer by itself for up to 3 months—thaw overnight in the refrigerator and proceed with the recipe.
Make-Ahead & Freezer Notes
Planning ahead makes hosting so much easier, and seven layer dip is perfect for advance preparation. Here’s your complete make-ahead strategy:
Day-of Timeline:
- Morning of party: Assemble all seven layers completely, cover tightly, and refrigerate until 20-30 minutes before serving.
- 30 minutes before serving: Remove from refrigerator to take the chill off.
- Right before serving: Add any fresh herb garnishes, give it a final check, and arrange chips around it.
24 Hours Ahead:
- Assemble the first five layers (everything except lettuce and tomatoes)
- Cover tightly and refrigerate
- Prep lettuce and tomatoes separately; store in refrigerator
- Just before serving, add lettuce and tomatoes
2-3 Days Ahead:
- Prep all individual components (mix seasoned beans, season sour cream, shred cheese, dice tomatoes, shred lettuce)
- Store each component separately in airtight containers
- Assemble the dip the day of your event
Week Ahead:
- Buy all ingredients
- Shred cheese if using block cheese
- Make homemade taco seasoning if desired
- Prep and freeze the bean layer only (thaw 24 hours before assembly)
Freezing Notes: While the complete dip doesn’t freeze well, you can freeze certain components:
- Refried beans: Freeze in an airtight container for up to 3 months. Thaw overnight in refrigerator and stir in taco seasoning when ready to use.
- Guacamole: Technically freezable for 3-4 months (press plastic wrap directly on surface), though texture may change slightly. Thaw in refrigerator and stir well.
- Cheese: Shredded cheese freezes beautifully for up to 3 months. No need to thaw—use directly from frozen.
Do NOT freeze: Sour cream, lettuce, tomatoes, or assembled dip. These ingredients become watery and separated when frozen and thawed.
Best Reheating Method (If Desired):
Seven layer dip is traditionally served cold, but if you prefer warm dip, bake the first four layers (beans through salsa) in a 350°F oven for 15-20 minutes until heated through. Remove from oven, add cheese, return for 5 minutes until melted, then top with cold lettuce and tomatoes. This creates a warm-cold contrast that’s absolutely delicious!
Serving Suggestions
Seven layer bean dip is usually the star of the show, but pairing it with the right accompaniments makes your spread even better. Here’s how to serve it perfectly:
Chips & Dippers:
- Tortilla Chips: The classic choice—use thick, restaurant-style chips for best scooping
- Blue Corn Chips: Add beautiful color contrast and slightly nutty flavor
- Pita Chips: For a fun twist that holds up well to the dip
- Plantain Chips: Sweet and crunchy, perfect for tropical gatherings
- Fresh Vegetables: Bell pepper strips, cucumber slices, celery sticks, and carrot sticks for a lighter option
- Crackers: Wheat Thins or Triscuits work surprisingly well
Beverages to Serve:
- Beer: Mexican lagers (Corona, Modelo, Pacifico) or light beers
- Margaritas: Classic lime, strawberry, or mango frozen margaritas
- Micheladas: Beer cocktails with lime and spices
- Agua Fresca: Refreshing fruit waters (watermelon, cucumber-lime, pineapple)
- Iced Tea: Sweet or unsweetened, with lime wedges
- Mexican Sodas: Jarritos or Mexican Coke
- Wine: Crisp whites like Sauvignon Blanc or light reds like Pinot Noir
Complete Party Spread: Serve your seven layer dip alongside:
- Additional Dips: Queso dip, salsa verde, or corn dip
- Appetizers: Mini tacos, taquitos, quesadilla triangles, or nachos
- Fresh Options: Mexican street corn salad, jicama sticks with lime, or a simple garden salad
- Main Dishes: If serving as part of a meal, pair with tacos, burritos, fajitas, or enchiladas
- Desserts: Churros, tres leches cake, or Mexican chocolate brownies
Presentation Ideas:
- Serve in a clear glass dish to show off the beautiful layers
- Arrange chips in a circle around the dip on a large platter
- Provide small appetizer plates so guests can scoop a serving rather than repeatedly dipping
- Make individual portions in clear plastic cups for easy serving at large parties
- Garnish with fresh cilantro, lime wedges, or extra jalapeños for color
- Place serving spoons or spatulas nearby for easy scooping
Themed Party Integration:
- Super Bowl/Game Day: Serve alongside other finger foods, wings, and sliders
- Cinco de Mayo: Part of a full Mexican feast with tacos, margaritas, and festive decorations
- Pool Party: Keep chilled in a cooler, serve with fresh fruit and cold drinks
- Potluck: Transport in the dish you’ll serve it in, covered tightly with plastic wrap
- Casual Dinner: Serve as an appetizer before fajitas or taco night
FAQs Section
Q: Can I make seven layer dip the night before?
A: Absolutely! Assemble the first five layers (beans through cheese) the night before, cover tightly, and refrigerate. Add the lettuce, tomatoes, and fresh toppings just before serving to keep them crisp and fresh. If you must add them the night before, expect the lettuce to wilt slightly, but the dip will still taste delicious for up to 24 hours.
Q: How do I keep the guacamole from turning brown?
A: Press plastic wrap directly onto the surface of your dip, eliminating as much air as possible. This prevents oxidation that causes browning. Adding a squeeze of lime juice to your guacamole also helps. If some browning occurs, simply stir the top layer—the taste isn’t affected. For best color, add the guacamole layer within 4-6 hours of serving.
Q: Can I use Greek yogurt instead of sour cream?
A: Yes! Plain, full-fat Greek yogurt works beautifully as a sour cream substitute. It’s tangier and has more protein, making it a healthier option. Mix it with taco seasoning just like you would with sour cream. It may be slightly thicker, so you could thin it with a tiny splash of milk if needed for easier spreading.
Q: What size dish should I use for seven layer dip?
A: A 9×13 inch baking dish is standard and serves 12-15 people generously. For smaller gatherings, use an 8×8 or 9×9 inch dish and halve the ingredients (serves 6-8). For large parties, double the recipe and use two 9×13 dishes or a very large serving platter. Clear glass dishes show off the layers beautifully!
Q: Why is my dip watery or runny?
A: Excess moisture from salsa, tomatoes, or beans is the culprit. Always drain salsa slightly if it’s very watery, pat diced tomatoes dry with paper towels, and make sure your refried beans are thick enough to spread (not soup-like). Each ingredient should be relatively dry. Also, letting the dip sit too long allows moisture to seep between layers—it’s best eaten within 4-6 hours of assembly.
Q: Can I add meat to seven layer dip?
A: Definitely! Seasoned ground beef, shredded chicken, or cooked chorizo make excellent additions. Brown 1 pound of ground beef with taco seasoning, let it cool completely, then add it as a layer between the beans and sour cream. Make sure it’s fully cooled before adding, or it will melt your other layers and make everything runny.