Loaded Tater Tot Skewers Recipe (The Ultimate Party Appetizer!)

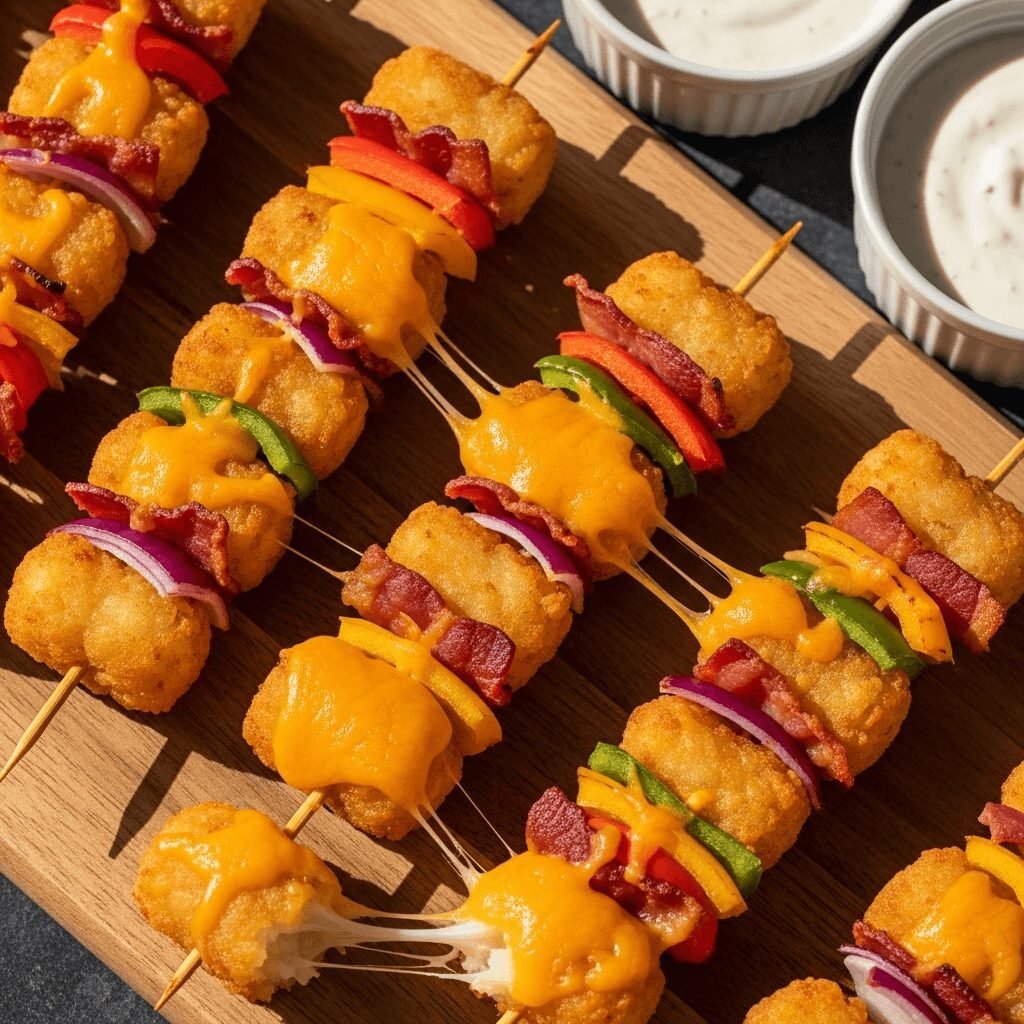
Get ready for the most fun, crowd-pleasing appetizer you’ll ever make! These loaded tater tot skewers take everyone’s favorite crispy potato bites and transform them into an Instagram-worthy party food that disappears in minutes. Imagine golden, extra-crispy tater tots threaded onto skewers with chunks of savory bacon, colorful bell peppers, and melty cheese, all served with your favorite dipping sauces. It’s finger food elevated to an art form!
What makes these tater tot skewers so irresistible is the perfect combination of textures and flavors in every bite. The crispy exterior and fluffy interior of the tater tots contrast beautifully with smoky bacon, tender-crisp vegetables, and gooey cheese. Plus, the skewer format makes them incredibly easy to grab and go – no plates or forks required, which is perfect for parties, game day gatherings, or any casual get-together.
These easy tater tot skewers are ideal for Super Bowl parties, birthday celebrations, graduation parties, backyard BBQs, potlucks, tailgating, movie nights, or anytime you want to serve something fun that gets everyone excited. Kids absolutely love them (what’s not to love about tater tots on a stick?), and adults appreciate the nostalgic comfort food vibe with a creative twist. They’re also surprisingly simple to customize based on your guests’ preferences or dietary needs.
History / Background
Tater tots have been an American comfort food staple since 1953, when the Grigg brothers at Ore-Ida created them as a way to use leftover potato scraps from their french fry production. The name “tater tot” comes from combining “tater” (slang for potato) with “tot” (meaning small child), reflecting their small, bite-sized shape. What started as a creative solution to minimize waste became one of the most beloved frozen foods in America.
Throughout the 1960s and 70s, tater tots became a cafeteria staple and family dinner side dish, beloved for their crispy exterior and soft, potato-y interior. They represented convenience and comfort during the golden age of frozen foods, when American families embraced quick-cooking solutions for busy weeknight dinners.
The concept of food on skewers has ancient origins – humans have been cooking food on sticks over fire for thousands of years. Skewers appear in cuisines worldwide, from Middle Eastern kebabs to Japanese yakitori to Spanish pintxos. The skewer format makes food portable, easy to share, and fun to eat, which is why it’s endured across cultures and centuries.
The modern trend of “loaded” foods – taking a simple base ingredient and piling it high with toppings and flavors – exploded in American food culture in the 2010s. We saw loaded fries, loaded nachos, loaded everything! This trend coincided with the rise of food Instagram and Pinterest, where visually exciting, over-the-top creations garnered millions of likes and shares.
Loaded tater tot skewers represent the perfect marriage of these American food trends: the nostalgic comfort of tater tots, the shareability of skewered foods, and the visual appeal of loaded dishes. They began appearing at creative restaurants and food trucks before home cooks started adapting the concept for parties and gatherings. Today, they’re a Pinterest favorite and party planning essential, proving that sometimes the best recipes come from combining familiar favorites in new, exciting ways.
Why You’ll Love This Recipe
These party-ready tater tot skewers are about to become your secret weapon for any gathering! They’re incredibly fun to make and even more fun to eat, with that perfect combination of crispy, savory, and cheesy that makes them absolutely addictive. The skewer presentation makes them feel special and party-worthy, even though they’re made with simple, affordable ingredients.
Here’s why this recipe will be your new party MVP:
- Unbelievably easy to make – No complicated techniques or fancy skills required, just thread and bake!
- Kid and adult approved – Appeals to all ages and even picky eaters love them
- Perfect for parties – Portable, no utensils needed, and looks impressive on any spread
- Customizable for everyone – Easy to adapt for vegetarians, different flavor profiles, or dietary restrictions
- Budget-friendly appetizer – Uses affordable ingredients that feed a crowd without breaking the bank
- Make-ahead friendly – Assemble in advance and bake just before serving for stress-free entertaining
- Interactive and fun – Guests love the hands-on, playful nature of food on a stick
- Freezer-friendly option – Make a double batch and freeze for future parties or quick snacks
- Minimal cleanup – One baking sheet is all you need, and skewers make serving easy
- Endlessly versatile – Change up ingredients, toppings, and dipping sauces for different occasions
- Instagram-worthy presentation – These skewers photograph beautifully for your social media posts
Ingredient Notes
The beauty of this recipe is its flexibility, but understanding each component helps you create the best possible skewers:
Frozen Tater Tots – The star of the show! Any brand works, but crispy varieties or extra-crunchy versions are ideal. You’ll need regular-sized tater tots, not mini ones, as they need to be sturdy enough to thread onto skewers. Don’t thaw them before using – they go straight from freezer to skewer. For a homemade touch, you can use fresh tater tots from the deli section.
Bacon – Thick-cut bacon works best as it holds up better on skewers and provides substantial, meaty bites. Pre-cook the bacon until it’s about 80% done (still slightly floppy) so it finishes cooking with the skewers without burning. Regular or center-cut bacon both work fine. For turkey bacon, reduce the initial cooking time slightly as it cooks faster.
Bell Peppers – Use a colorful mix of red, yellow, and orange bell peppers for the prettiest presentation. These peppers are sweeter than green peppers and roast beautifully. Cut them into 1-inch chunks so they’re roughly the same size as the tater tots. The peppers add freshness, color, and a slight sweetness that balances the savory bacon.
Red Onion – Provides a sharp, slightly sweet flavor that mellows as it roasts. Cut into similarly-sized chunks. Red onion is preferred over yellow or white because it has a milder flavor and beautiful purple color. If you’re not an onion fan, you can omit it or substitute with cherry tomatoes.
Shredded Cheese – Cheddar is classic, but pepper jack, Mexican blend, or mozzarella all work wonderfully. The cheese gets sprinkled over the skewers during the last few minutes of baking, creating melty, gooey goodness. Pre-shredded cheese works fine, but freshly shredded melts more smoothly.
Seasonings – Garlic powder, onion powder, paprika, and black pepper add extra flavor to the tater tots. Smoked paprika is especially delicious if you have it. You can also use your favorite seasoning blend like Cajun seasoning, ranch seasoning, or taco seasoning.
Olive Oil or Cooking Spray – Helps everything get extra crispy and prevents sticking. Spray or brush the assembled skewers lightly before baking.
Optional Toppings – Sour cream, ranch dressing, BBQ sauce, hot sauce, chopped green onions, crispy bacon bits, jalapeños, or fresh chives for serving.
Equipment Needed
Gathering your equipment before starting makes the process smooth and enjoyable:
- Wooden or metal skewers (10-12 inch length works best, you’ll need 8-12 skewers)
- Large baking sheet with a rim (to catch drips)
- Parchment paper or aluminum foil (for easy cleanup)
- Sharp knife and cutting board (for chopping vegetables and bacon)
- Large skillet (for pre-cooking bacon)
- Paper towels (for draining bacon)
- Tongs or fork (for handling skewers)
- Pastry brush or cooking spray (for oiling skewers)
- Small bowls (for seasonings and toppings)
- Oven mitts (for handling hot baking sheets)
Note on skewers: If using wooden skewers, soak them in water for 20-30 minutes before using to prevent burning. Metal skewers don’t require soaking and are reusable, making them more eco-friendly
Print
Loaded Tater Tot Skewers Recipe
These loaded tater tot skewers are the ultimate party appetizer! Crispy tater tots threaded with bacon, colorful peppers, and melted cheese create an irresistible finger food that’s perfect for any gathering. Easy to make, fun to eat, and always a crowd-pleaser!
- Total Time: 45 minutes
- Yield: 8-12 skewers (serves 4-6 as appetizer) 1x
Ingredients
For the Skewers:
- 32-40 frozen tater tots (about 3-4 per skewer)
- 8-10 slices thick-cut bacon, pre-cooked to 80% done and cut into 1-inch pieces
- 1 large red bell pepper, cut into 1-inch chunks
- 1 large yellow or orange bell pepper, cut into 1-inch chunks
- ½ red onion, cut into 1-inch chunks (optional)
- 1½ cups shredded cheddar cheese (or cheese of choice)
- 2 tablespoons olive oil or cooking spray
- 1 teaspoon garlic powder
- ½ teaspoon onion powder
- ½ teaspoon smoked paprika
- ½ teaspoon black pepper
- ¼ teaspoon salt
For Serving:
- Ranch dressing (for dipping)
- Sour cream (for dipping)
- BBQ sauce (optional)
- Chopped green onions (for garnish)
- Extra bacon bits (for garnish)
Instructions
- Preheat the oven: Set your oven to 425°F (220°C). Line a large baking sheet with parchment paper or aluminum foil, then place a wire rack on top if you have one (this helps air circulate for crispier results, but it’s not mandatory).
- Cook the bacon: In a large skillet over medium heat, cook the bacon slices until they’re about 80% done – they should be cooked through but still slightly floppy, not fully crispy. This takes about 6-8 minutes. Transfer to paper towels to drain. Once cool enough to handle, cut each strip into roughly 1-inch pieces. Set aside.
- Prep the vegetables: While the bacon cooks, cut your bell peppers and red onion into 1-inch chunks, roughly the same size as your tater tots. Try to keep pieces uniform for even cooking. Pat the vegetables dry with paper towels to remove excess moisture.
- Prepare skewers: If using wooden skewers, make sure they’ve been soaking in water for at least 20 minutes. Shake off excess water before threading.
Assemble the Skewers:
- Thread ingredients: Now for the fun part! Thread the ingredients onto each skewer in a pattern, leaving about 1 inch at the bottom for holding. A good pattern is: tater tot, bacon piece, bell pepper, tater tot, onion (if using), tater tot, bacon, bell pepper, tater tot. You should fit 3-4 tater tots and several pieces of bacon and vegetables on each skewer. Don’t pack them too tightly – leave a little space between items for even cooking and crisping.
- Arrange on baking sheet: Place the assembled skewers on your prepared baking sheet in a single layer. They can be close together but shouldn’t overlap. Make sure the tater tots aren’t touching the pan directly if possible (this is where a wire rack helps).
Season and Bake:
- Season the skewers: In a small bowl, mix together the garlic powder, onion powder, smoked paprika, black pepper, and salt. Lightly spray or brush the skewers with olive oil, then sprinkle the seasoning mixture evenly over all the skewers. Use your hands or a pastry brush to make sure everything is coated.
- First bake: Place the baking sheet in the preheated oven and bake for 20 minutes, flipping the skewers halfway through (at the 10-minute mark) for even browning. The tater tots should be starting to turn golden brown and the vegetables should be tender-crisp.
- Add cheese: Remove the baking sheet from the oven. Sprinkle the shredded cheese generously over each skewer, focusing on the tater tots but letting some fall on the bacon and vegetables too. Return to the oven and bake for an additional 3-5 minutes, just until the cheese is melted, bubbly, and starting to brown in spots.
Serve:
- Garnish and serve: Remove from the oven and transfer the skewers to a serving platter. Garnish with chopped green onions and extra bacon bits if desired. Serve immediately while hot with ranch dressing, sour cream, or your favorite dipping sauces on the side. Watch them disappear!
Notes
- Skewer spacing: Don’t pack ingredients too tightly on the skewers – leave small gaps for air circulation and even cooking.
- Bacon pre-cooking: The bacon must be pre-cooked before threading, or it won’t finish cooking properly. Aim for about 80% done – cooked but still pliable.
- Tater tot variety: Extra crispy or seasoned tater tots work great for added flavor and crunch.
- Vegetarian option: Omit the bacon and add more vegetables like cherry tomatoes, zucchini chunks, or mushroom pieces.
- Cheese timing: Don’t add the cheese too early or it will burn. Add it only in the last 3-5 minutes.
- Preventing burning: If the tips of wooden skewers start to brown too much, tent them with small pieces of foil.
- Size matters: Try to keep all ingredients roughly the same size for even cooking.
- Prep Time: 20 minutes
- Cook Time: 25 minutes
- Category: Appetizer
- Method: Baking
- Cuisine: American
- Diet: Vegetarian
Nutrition
- Serving Size: 2 skewers
- Calories: 385
- Sugar: 3g
- Sodium: 725mg
- Fat: 24g
- Saturated Fat: 9g
- Unsaturated Fat: 13g
- Trans Fat: 0g
- Carbohydrates: 28g
- Fiber: 3g
- Protein: 15g
- Cholesterol: 45mg
Tips & Variations
Flavor Variations:
- BBQ Ranch Skewers: Brush assembled skewers with BBQ sauce before baking and serve with ranch dressing. Use cheddar and pepper jack cheese blend.
- Breakfast Skewers: Add scrambled egg chunks and breakfast sausage pieces instead of bacon. Top with cheddar and serve with hot sauce.
- Buffalo Style: Toss baked skewers with buffalo sauce and top with blue cheese crumbles. Serve with ranch or blue cheese dressing.
- Pizza Skewers: Add pepperoni chunks and cherry tomato halves. Use mozzarella cheese and serve with marinara for dipping.
- Southwest Skewers: Season with taco seasoning, add jalapeño slices, use Mexican cheese blend, and serve with salsa and guacamole.
- Loaded Baked Potato Style: Top finished skewers with sour cream, chives, extra bacon, and a sprinkle of cheddar – just like a loaded baked potato!
- Mediterranean Twist: Replace bacon with grilled chicken chunks, use feta cheese, add cherry tomatoes and red onion. Serve with tzatziki.
Dietary Modifications:
- Vegetarian: Omit bacon and add more vegetables like mushrooms, zucchini, cherry tomatoes, or seasoned tofu cubes.
- Turkey Bacon: Substitute turkey bacon for regular bacon for a leaner option. Pre-cook it the same way.
- Gluten-Free: Check that your tater tots are certified gluten-free (most are, but some contain wheat starch).
- Dairy-Free: Use dairy-free cheese alternatives or omit cheese entirely and add extra seasonings.
- Lower-Calorie: Use turkey bacon, light cheese, and cooking spray instead of oil. Bake on a rack so excess fat drips away.
Pro Chef Tips
The double-bake secret: For ultra-crispy tater tots, partially bake them alone on the baking sheet for 10 minutes before assembling the skewers. This gives them a head start and ensures they’re super crunchy by the time everything else is done. Just let them cool slightly before threading to avoid burning your fingers.
Master the threading technique: Thread ingredients through their sturdiest parts. For tater tots, go through the middle lengthwise. For bacon, pierce through the meatiest part. For vegetables, aim for the thickest section. This prevents ingredients from spinning around on the skewer and ensures everything stays in place.
Create a flavor gradient: Alternate ingredients strategically so you get different flavor combinations in different bites. For example: start with a savory note (bacon), then a sweet note (pepper), then the main event (tater tot). This creates a more interesting eating experience than random placement.
The cheese blanket method: Instead of just sprinkling cheese on top, create a “cheese blanket” by laying a thin strip of sliced cheese (like a cheese stick cut lengthwise) over the tater tots before the final bake. This creates an even layer of melted cheese that looks more professional.
Broiler finish for extra crispness: After baking, turn on the broiler for the last 1-2 minutes to get those beautiful brown, crispy spots on the cheese and tater tots. Watch carefully so nothing burns – broilers work fast!
Rotate for even coloring: Rotate your baking sheet 180 degrees halfway through cooking, not just the individual skewers. Ovens have hot spots, and this ensures everything browns evenly.
Rest before serving: Let the skewers rest for 2-3 minutes after coming out of the oven. This allows the cheese to set slightly so it’s gooey but not drippy, making them easier to handle and less messy to eat.
Sauce station setup: Create a dipping sauce station with small bowls of various sauces. This makes serving more elegant and prevents double-dipping. Include at least two contrasting flavors like ranch (cool and creamy) and hot sauce (spicy and tangy).
Common Mistakes to Avoid
Threading frozen tater tots too forcefully: Frozen tater tots can break if you push the skewer through too hard. The trick is to use a gentle twisting motion as you push the skewer through. If a tot breaks, no worries – just thread the pieces on or grab a new one. Slightly thawing the tots for 5 minutes makes threading easier, but don’t fully thaw or they’ll become mushy.
Skipping the bacon pre-cook: Raw bacon will not cook properly in the oven at 425°F in just 25 minutes, especially when it’s threaded on a skewer with other ingredients blocking heat. You’ll end up with undercooked, chewy bacon. Always pre-cook bacon to at least 80% done before threading. It should be cooked through but still flexible enough to thread without breaking.
Overcrowding the skewers: When you pack ingredients too tightly together, they steam instead of roast, resulting in soggy tater tots and limp vegetables. Leave small gaps (about ¼ inch) between each ingredient. This allows hot air to circulate around everything, creating that desirable crispy texture. Think breathing room, not sardines in a can!
Adding cheese too early: If you add cheese at the beginning or even midway through baking, it will burn and turn brown and crusty instead of melting into perfect gooey deliciousness. Cheese goes on in the last 3-5 minutes only, just long enough to melt but not long enough to burn.
Not using a liner: Baking these skewers directly on a bare baking sheet is a recipe for frustration when cleanup time comes. The cheese and bacon grease create a mess that’s difficult to scrub off. Always line your pan with parchment paper or foil (or use a silicone mat). Your future self will thank you!
Forgetting to soak wooden skewers: Dry wooden skewers will burn and char in a 425°F oven, potentially catching fire and definitely leaving burnt wood taste on your food. Always soak wooden skewers in water for at least 20 minutes before using. If you forget and they start to burn, wrap the exposed ends in small pieces of foil.
Storage & Meal Prep
Refrigerator Storage: Store leftover tater tot skewers in an airtight container in the refrigerator for up to 3 days. Layer them carefully with parchment paper between layers to prevent sticking. The tater tots will soften somewhat in the fridge, but they’re still delicious and can be re-crisped when reheating.
Reheating for Best Results: The oven method produces the best results. Preheat your oven to 375°F and place the skewers on a baking sheet. Heat for 10-12 minutes until the tater tots re-crisp and everything is heated through. You can also use an air fryer at 375°F for 5-7 minutes for exceptionally crispy results. Microwave reheating works in a pinch (2-3 minutes) but won’t restore the crispiness.
Meal Prep Strategy: These skewers work well for meal prep in a few ways. You can assemble the skewers completely (minus the cheese), store them covered in the refrigerator for up to 24 hours, then bake when needed. Alternatively, prep all your components separately (pre-cook bacon, cut vegetables, portion tater tots) and store in containers, then assemble and bake fresh.
Keeping Them Crispy: To maintain maximum crispiness during storage, place a paper towel in the bottom of your storage container to absorb excess moisture. Replace the paper towel if it becomes damp. This prevents the tater tots from becoming soggy.
Party Planning Timeline: For stress-free party hosting, pre-cook your bacon up to 2 days in advance. Cut vegetables up to 1 day ahead. Assemble skewers the morning of your event, cover with plastic wrap, and refrigerate. Pop them in the oven 30 minutes before guests arrive so they’re fresh, hot, and crispy when people start arriving.
Make-Ahead & Freezer Notes
Make-Ahead Assembly: You can assemble these skewers up to 24 hours in advance. Thread everything onto the skewers (except the cheese), place them on a baking sheet, cover tightly with plastic wrap, and refrigerate. When ready to bake, remove from the refrigerator while the oven preheats (let them sit out for about 15 minutes), then proceed with baking as directed. Add an extra 3-5 minutes to the cooking time since they’re starting cold.
Freezing Assembled Skewers: Freeze assembled (unbaked) skewers for up to 2 months. Arrange them on a baking sheet and freeze until solid (about 2 hours), then transfer to a freezer bag or container with parchment paper between layers. This prevents them from sticking together. To bake from frozen, add 10-15 minutes to the cooking time and don’t add cheese until the last 5 minutes.
Freezing Baked Skewers: You can freeze fully baked and cooled skewers, though they won’t be quite as crispy when reheated. Wrap individual skewers in plastic wrap, then place in a freezer bag. Freeze for up to 1 month. Reheat in a 375°F oven for 15-20 minutes from frozen.
Component Freezing: For maximum flexibility, freeze just the pre-cooked bacon pieces. They’ll keep for 2-3 months and you can pull them out whenever you want to make fresh skewers. Frozen tater tots are already frozen, of course, and vegetables are best used fresh for optimal texture.
Thawing Guidelines: If you’ve frozen assembled skewers, you can bake them directly from frozen (just add extra time), or thaw them overnight in the refrigerator before baking. Never thaw at room temperature as this can promote bacterial growth, especially with the bacon.
Best Reheating from Frozen: Place frozen skewers on a baking sheet and bake at 375°F for 20-25 minutes, flipping once halfway through. Add cheese during the last 5 minutes. They won’t be quite as crispy as fresh, but they’ll still be delicious and much better than microwaving.
Serving Suggestions
These fun tater tot skewers are versatile enough to work in various serving situations, from casual game day spreads to more elevated party presentations.
Dipping Sauce Station: Set up an array of dipping sauces to let guests customize their experience. Essential sauces include ranch dressing (the classic), sour cream (cool and tangy), BBQ sauce (sweet and smoky), honey mustard (sweet and sharp), buffalo sauce (spicy and vinegary), cheese sauce (extra indulgent), and sriracha mayo (spicy and creamy). Present sauces in small bowls with spoons so guests can take what they want.
Party Platter Presentation: Arrange skewers on a large wooden board or slate platter standing upright in a tall glass or vase filled with rice or beans to hold them stable. This creates a dramatic, Instagram-worthy display that’s also practical. Scatter extra toppings like bacon bits, green onions, and cherry tomatoes around the base for color.
Game Day Spread: Serve alongside other finger foods like buffalo wings, mozzarella sticks, sliders, chips and dip, and veggie platters. These skewers complement other game day favorites perfectly and add a unique element to your spread.
Main Course Option: Serve 3-4 skewers per person as a main course alongside a simple green salad or coleslaw, corn on the cob, baked beans, or mac and cheese for a fun, casual dinner that kids will especially love.
Beverage Pairings: These savory skewers pair well with cold beer (especially lagers or pale ales), hard cider, lemonade, iced tea, or cola. For an adult gathering, consider offering craft beers or a signature cocktail. For families, have a variety of sodas and flavored sparkling water available.
Kids’ Party Favorite: These are perfect for kids’ birthday parties. Set up a “build your own” station where kids can watch you assemble skewers with their favorite ingredients (under supervision, of course). They’ll love the hands-on aspect and be more likely to eat vegetables when they’re part of a fun skewer!
Tailgating Champion: These travel well in a cooler when pre-assembled. Bring a portable grill or small oven if available, or prep them fully at home and keep them warm in an insulated container. They’re perfect for parking lot parties before the big game.
FAQs Section
Can I make these without a skewer?
Absolutely! You can make “loaded tater tots” instead of skewers. Simply arrange all the ingredients – tater tots, pre-cooked bacon pieces, chopped peppers, and onions – on a baking sheet in a single layer. Season and bake at 425°F for 20-25 minutes, then top with cheese and bake for 3-5 more minutes. Serve in bowls with toothpicks for easy eating. The presentation won’t be as fun, but the flavors will be just as delicious.
Do I have to use bacon?
No, bacon is totally optional! For vegetarian versions, omit the bacon entirely and add more vegetables like mushrooms, zucchini, or cherry tomatoes. You could also substitute cooked chicken pieces, ham cubes, or turkey bacon. The skewers will be less smoky and rich without bacon, so consider adding extra seasonings or a drizzle of BBQ sauce before baking.
Can I use an air fryer instead of the oven?
Yes! Air fryers work wonderfully for this recipe. Cook the skewers in batches at 400°F for 12-15 minutes, flipping halfway through. In the last 2-3 minutes, add the cheese. You may need to cook in several batches depending on your air fryer size, and make sure skewers aren’t overlapping or touching. The air fryer actually produces extra crispy results!
Why are my tater tots not getting crispy?
Several factors affect crispiness. First, make sure you’re not overcrowding the skewers or the baking sheet – tater tots need space for air circulation. Second, don’t skip the oil spray or brush – fat helps them crisp up. Third, use a wire rack on your baking sheet if possible so air circulates underneath. Finally, make sure your oven is fully preheated to 425°F before baking. If they’re still not crispy enough, try the double-bake method mentioned in the pro tips.
Can kids help make these?
Yes, with supervision! Kids can help thread the softer ingredients like peppers and pre-cooked bacon onto skewers (metal skewers are safer than wooden ones with pointed tips for young children). An adult should handle cutting vegetables, cooking bacon, and all oven work. This is a great recipe for teaching kitchen skills and getting kids excited about cooking!
How do I prevent wooden skewers from burning?
Soak wooden skewers in water for at least 20-30 minutes before using. If the exposed ends start to darken during baking, wrap them with small pieces of aluminum foil. Alternatively, use metal skewers which don’t burn and are reusable. Some cooks keep their skewers longer and let the exposed ends hang off the edge of the baking sheet where they’re not directly exposed to heat.
Can I make these ahead for a party?
Yes! Assemble the skewers (minus the cheese) up to 24 hours ahead, cover tightly, and refrigerate. About 45 minutes before serving, preheat your oven and bake the skewers as directed, adding a few extra minutes since they’re starting cold. Add cheese in the last 3-5 minutes. This allows you to enjoy your party instead of being stuck in the kitchen assembling skewers while guests arrive.
Conclusion
And there you have it – the ultimate guide to making loaded tater tot skewers that will absolutely steal the show at your next gathering! These fun, flavorful skewers prove that party food doesn’t have to be complicated to be impressive. With just a few simple ingredients and minimal prep work, you can create an appetizer that has everyone asking for the recipe.
The best part about these easy tater tot skewers is how adaptable they are to your specific needs. Feeding vegetarians? No problem – skip the bacon. Want them spicier? Add jalapeños and pepper jack cheese. Hosting a crowd? Double or triple the recipe effortlessly. They’re truly the Swiss Army knife of party appetizers!
Whether you’re planning a Super Bowl bash, hosting a birthday celebration, contributing to a potluck, or just want to make dinner more fun for your family, these skewers deliver every single time. Kids think they’re the coolest thing ever (food on a stick!), and adults appreciate the nostalgic comfort food vibes with a creative presentation that feels special.
So grab those tater tots from your freezer, thread some skewers, and get ready to become the party MVP. Your guests are going to be seriously impressed, and you’ll know the secret: it was actually super easy and fun to make!
Ready to try these amazing skewers? Save this recipe to your Pinterest boards so you can find it for your next party, and drop a comment below telling me what ingredients you’re most excited to thread onto your skewers! Don’t forget to snap a photo and tag me when you make them – I absolutely love seeing your creations!