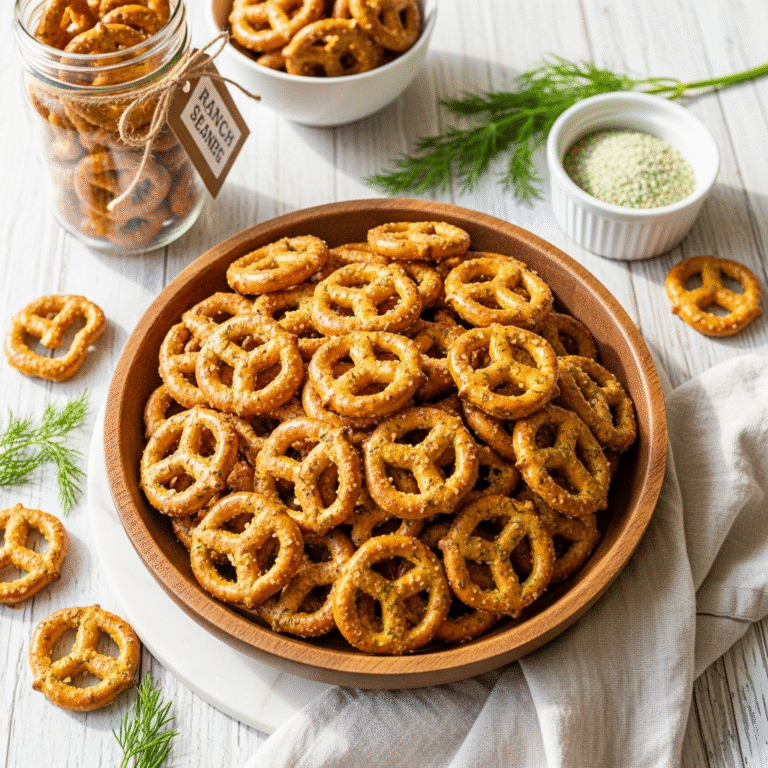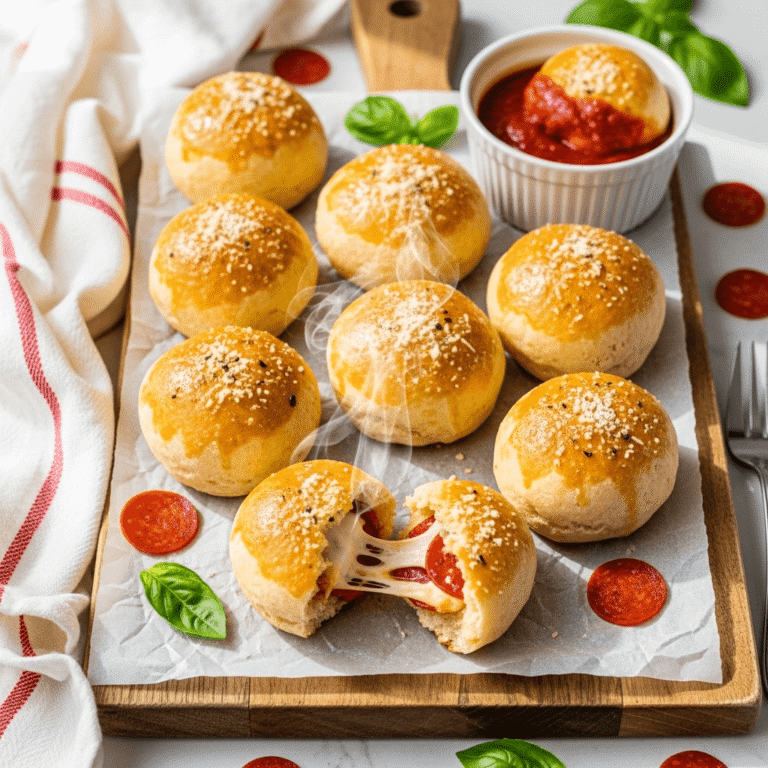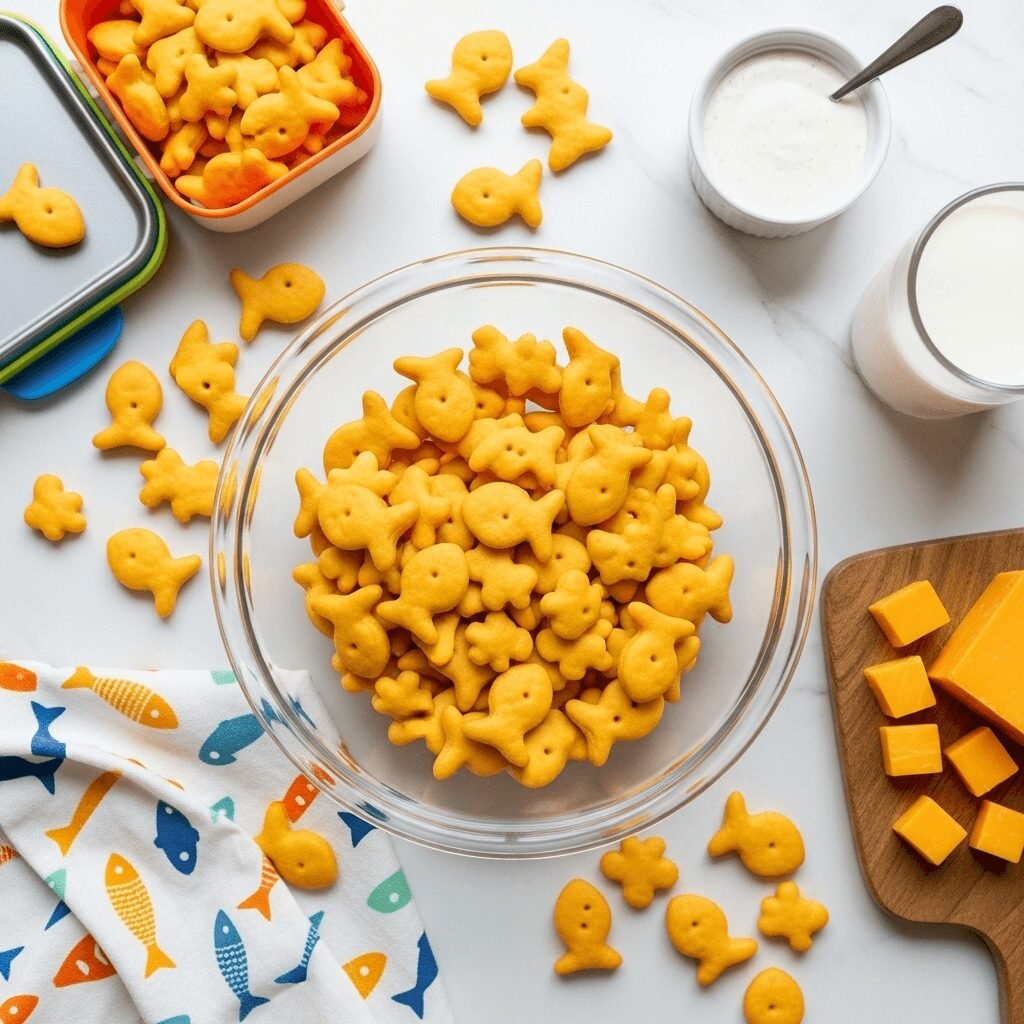
Homemade Goldfish Crackers: Easy, Cheesy, Kid-Approved Snack Recipe

Remember opening that iconic cardboard carton and hearing the satisfying crunch of those tiny, smiling goldfish crackers? Now imagine making that same beloved snack at home with real cheese, simple ingredients, and absolutely no artificial colors or preservatives. These Homemade Goldfish Crackers are about to become your family’s new favorite snack—and trust me, they taste even better than the store-bought version!
Perfect for lunchboxes, after-school snacks, road trips, or even adult wine and cheese nights (yes, really!), these easy homemade goldfish crackers are a fun weekend baking project that kids absolutely love helping with. They’re crunchy, cheesy, buttery, and completely customizable to your family’s taste preferences. Plus, you’ll actually know exactly what’s going into your children’s snacks—just real cheddar cheese, butter, flour, and a few pantry staples.
Whether you’re a parent looking for healthier snack options, someone who loves DIY kitchen projects, or just a goldfish cracker enthusiast who wants the freshest, most flavorful version possible, this recipe delivers on all fronts. They take about an hour from start to finish (including baking time), and you’ll end up with several cups of irresistibly crunchy, golden crackers that disappear almost as quickly as you can make them. Get ready to be everyone’s favorite person when you show up with a batch of these homemade cheese crackers!
History / Background
The iconic Goldfish cracker we all know and love has a charming origin story that begins not in America, but in Switzerland. In 1958, a Swiss biscuit maker named Oscar J. Kambly created a fish-shaped cracker as a birthday surprise for his wife, whose astrological sign was Pisces. He crafted these golden, cheese-flavored crackers in the shape of a fish, and they became an instant hit in European markets under the name “Goldfischli.”
The crackers caught the attention of Margaret Rudkin, the founder of Pepperidge Farm bakery in Connecticut, during one of her European travels in the early 1960s. Recognizing the potential for these whimsical crackers in the American market, she brought the concept back to the United States. Pepperidge Farm began producing Goldfish crackers in 1962, marketing them initially as a sophisticated soup cracker for adults—quite different from their current identity as a children’s snack!
The familiar smiling face that makes Goldfish crackers so recognizable wasn’t added until 1997, giving these little crackers even more personality and appeal to children. The smile was a brilliant marketing move that transformed Goldfish from a simple cheese cracker into an iconic, friendly snack that generations of American children have grown up with.
Today, Goldfish crackers are one of the most popular snack crackers in America, with families consuming millions of packages each year. The homemade version of these beloved crackers has gained tremendous popularity in recent years as parents become more conscious of ingredients and seek out ways to recreate their children’s favorite foods with better-quality, real ingredients. Making goldfish crackers from scratch connects us to the tradition of home baking while giving us control over exactly what goes into our families’ snacks—a perfect blend of nostalgia and modern mindful eating.
Why You’ll Love This Recipe
These Homemade Goldfish Crackers aren’t just a fun kitchen project—they’re genuinely delicious and surprisingly simple to make. Once you try this recipe, you’ll understand why so many families are ditching the store-bought version in favor of these fresh, flavorful homemade cheese crackers.
Making your own goldfish crackers at home means you control every ingredient that goes into this beloved snack, creating a healthier option without sacrificing any of that addictive cheesy crunch we all crave.
Here’s why this easy goldfish cracker recipe will become a family favorite:
- Real Ingredients Only – Made with actual sharp cheddar cheese, real butter, and simple pantry staples—no artificial colors, preservatives, or unpronounceable ingredients
- Kid-Friendly Activity – Children absolutely love helping cut out the fish shapes, making this a perfect weekend baking project that keeps little hands busy and engaged
- Incredibly Customizable – Adjust the cheese type, add different seasonings, or change the shapes to suit your family’s preferences and dietary needs
- Budget-Friendly – A single batch costs less than buying multiple boxes of store-bought crackers and yields several cups of fresh, crunchy snacks
- Allergy-Friendly Options – Easily adapt this recipe for various dietary restrictions by using gluten-free flour or dairy-free cheese alternatives
- Better Taste – The fresh, homemade flavor is noticeably superior to packaged crackers, with a buttery richness and sharp cheese taste that’s incredibly satisfying
- Perfect Portion Control – Make exactly the amount you need and store the dough for future batches, preventing overbuying and waste
- Freezer-Friendly Dough – Prepare the dough in advance and freeze it for quick, fresh-baked crackers whenever cravings strike
- Impressive Yet Simple – Guests are always amazed when you mention these are homemade, yet the recipe requires no special skills or complicated techniques
The satisfaction of pulling a tray of golden, perfectly crispy homemade goldfish crackers from your oven—knowing exactly what went into them—makes this recipe worth every minute. Plus, the smile on your kids’ faces when they realize they helped make their favorite snack? Absolutely priceless.
Ingredient Notes
Understanding your ingredients helps you create the best possible homemade goldfish crackers and troubleshoot any issues. Here’s what you need to know:
Sharp Cheddar Cheese – This is the star of your crackers, providing that distinctive cheesy flavor. Use freshly grated sharp or extra-sharp cheddar for the best taste and texture. Pre-shredded cheese contains anti-caking agents that prevent the dough from coming together properly, so avoid it if possible. The sharper the cheddar, the more pronounced the cheese flavor in your finished crackers. White or orange cheddar both work perfectly—orange creates that classic goldfish color.
Unsalted Butter – Adds richness, flavor, and helps create the perfect tender-crispy texture. The butter must be very cold when you start, as this creates the flaky texture that makes these crackers so addictive. Using unsalted butter lets you control the salt level precisely. If you only have salted butter, reduce the added salt by half.
All-Purpose Flour – Provides structure and the crispy texture we’re after. All-purpose flour works perfectly for this recipe. For gluten-free goldfish crackers, use a 1:1 gluten-free baking flour blend designed to replace all-purpose flour in recipes.
Salt – Enhances all the flavors and gives these crackers their characteristic savory taste. Don’t skip it, even though you’re using cheese—the salt is essential for bringing out the full flavor profile.
Garlic Powder – Adds depth and a subtle savory note that complements the cheese beautifully. You can substitute onion powder or leave it out entirely for a simpler cheese flavor, but I highly recommend including it.
Cold Water – Brings the dough together without adding any extra flavor. Ice water works best as it keeps the butter cold throughout the mixing process, which is crucial for the right texture.
Optional: Paprika or Cayenne – A small pinch adds visual appeal and a subtle warmth. Smoked paprika creates a slightly different flavor profile that’s delicious and sophisticated.
Equipment Needed
You’ll need just a few basic kitchen tools to make these adorable homemade crackers:
- Food Processor – Makes mixing the dough incredibly quick and ensures even distribution of butter throughout the flour (you can also use a pastry cutter or two knives if you don’t have a processor)
- Rolling Pin – For rolling the dough thin and even; a marble or wooden rolling pin works best
- Small Fish-Shaped Cookie Cutter – The classic 1-inch goldfish cutter creates authentic-looking crackers (available online or at kitchen stores)
- Baking Sheets – You’ll need 2-3 sheets depending on your oven size
- Parchment Paper or Silicone Baking Mats – Prevents sticking and ensures even baking
- Sharp Knife or Pizza Cutter – If you don’t have fish cutters, you can cut the dough into small squares or rectangles
- Measuring Cups and Spoons – For accurate ingredient amounts
- Cheese Grater – For grating fresh cheddar cheese
- Small Fork – For poking holes in crackers to prevent puffing (optional but recommended)
- Wire Cooling Rack – Allows air circulation so crackers stay crispy as they cool
- Airtight Container – For storing your finished crackers

Homemade Goldfish Crackers
These Homemade Goldfish Crackers are crunchy, cheesy, and made with real ingredients—no artificial colors or preservatives! Perfect for lunchboxes, snacking, or as a fun weekend baking project with kids. They taste even better than store-bought and you’ll know exactly what’s in every bite.
- Total Time: 35 minutes
- Yield: About 4 cups (approximately 8 servings of ½ cup each) 1x
Ingredients
- 8 oz sharp cheddar cheese, freshly grated (about 2 cups)
- 4 tablespoons unsalted butter, cold and cut into small cubes
- ¾ cup all-purpose flour (plus extra for rolling)
- ½ teaspoon salt
- ½ teaspoon garlic powder
- 2-3 tablespoons ice cold water
- Optional: pinch of paprika or cayenne pepper for color and subtle heat
Instructions
- Prepare Your Workspace – Preheat your oven to 350°F (175°C). Line two large baking sheets with parchment paper or silicone baking mats. Have your fish-shaped cookie cutter ready and lightly dust your work surface with flour.
- Grate the Cheese – Using a box grater or food processor with a grating attachment, grate 8 oz of sharp cheddar cheese. Let it come to room temperature slightly while you prepare other ingredients—this helps it incorporate better into the dough.
- Mix Dry Ingredients – In a food processor, combine the flour, salt, and garlic powder. Pulse 2-3 times to mix everything evenly.
- Cut in the Butter – Add the cold butter cubes to the flour mixture. Pulse 10-15 times until the mixture resembles coarse crumbs with some pea-sized butter pieces remaining. These butter pieces create the flaky texture we want.
- Add the Cheese – Add the grated cheddar cheese to the food processor. Pulse another 10-15 times until the cheese is evenly distributed throughout the flour mixture. The mixture should look crumbly but be starting to clump together slightly.
- Form the Dough – With the processor running, slowly drizzle in 2 tablespoons of ice water through the feed tube. Process until the dough just starts to come together in a ball, adding the additional tablespoon of water only if needed. The dough should hold together when pinched but shouldn’t be wet or sticky.
- Chill the Dough – Turn the dough out onto a piece of plastic wrap. Shape it into a flat disk about 1 inch thick, wrap tightly, and refrigerate for 15-20 minutes. This rest period makes the dough easier to roll and helps develop the texture.
- Roll Out the Dough – Remove the chilled dough from the refrigerator. On a well-floured surface, roll the dough to about ⅛-inch thickness (very thin—this is important for crispy crackers). Keep the work surface and rolling pin floured to prevent sticking.
- Cut Out Shapes – Using your fish-shaped cookie cutter, cut out as many crackers as possible, placing them on your prepared baking sheets about ½ inch apart. Gather scraps, re-roll once, and cut more shapes. Avoid re-rolling more than twice as the dough becomes tough.
- Dock the Crackers – Using a toothpick or small fork, poke a tiny hole in the center of each cracker. This prevents them from puffing up too much during baking and helps them stay flat and crispy.
- Bake First Batch – Bake for 12-15 minutes, rotating the pan halfway through, until the crackers are golden brown around the edges and firm to the touch. Keep a close eye on them during the last few minutes as they can go from perfect to burnt quickly.
- Cool Completely – Transfer the crackers to a wire cooling rack immediately. They will crisp up further as they cool. Let them cool completely before storing—this usually takes about 15 minutes.
- Bake Remaining Batches – While the first batch cools, prepare and bake any remaining crackers using the same method
Notes
- The dough must be rolled very thin (⅛ inch or less) for properly crispy crackers
- Cold ingredients are essential for the right texture—don’t skip the chilling steps
- Crackers will firm up significantly as they cool, so don’t overbake
- If you don’t have a fish-shaped cutter, cut into small squares or use any small cookie cutter
- For extra flavor, sprinkle crackers with a tiny bit of flaky sea salt before baking
- Store in an airtight container at room temperature for up to 2 weeks
- Prep Time: 20 minutes
- Cook Time: 15 minutes
- Category: Snack
- Method: Baking
- Cuisine: American
- Diet: Vegetarian
Nutrition
- Serving Size: ½ cup (approximately 30-35 crackers)
- Calories: 185
- Sugar: 0g
- Sodium: 245mg
- Fat: 13g
- Saturated Fat: 8g
- Unsaturated Fat: 4g
- Trans Fat: 0g
- Carbohydrates: 11g
- Fiber: 0g
- Protein: 7g
- Cholesterol: 35mg
Tips & Variations
The beauty of homemade goldfish crackers is how easily you can customize them to suit your family’s tastes:
Different Cheese Varieties – While sharp cheddar is classic, try mixing in Parmesan for a nuttier flavor, pepper jack for spice, or Gruyere for sophistication. A 50/50 blend of cheddar and Parmesan creates an especially delicious, complex flavor.
Pizza Flavor Goldfish – Add 1 teaspoon Italian seasoning, ½ teaspoon dried oregano, and a pinch of red pepper flakes to the dough. These taste like mini pizza crackers and kids go crazy for them!
Ranch Flavored – Mix 1 tablespoon ranch seasoning powder into the flour before adding butter for that addictive ranch taste.
Whole Wheat Version – Substitute half the all-purpose flour with whole wheat flour for added nutrition and a nuttier flavor. You may need slightly more water as whole wheat absorbs more liquid.
Extra Cheesy – Increase the cheese to 10 oz for an even more pronounced cheese flavor that true cheese lovers will appreciate.
Spicy Adult Version – Add ¼ teaspoon cayenne pepper and a pinch of smoked paprika for crackers with a grown-up kick, perfect for serving with wine or cocktails.
Gluten-Free Goldfish – Use a 1:1 gluten-free flour blend in place of all-purpose flour. The texture will be slightly different but still delicious. Add 1 teaspoon xanthan gum if your flour blend doesn’t contain it.
Different Shapes – Use any small cookie cutters you have—stars, hearts, circles, or squares all work beautifully. Small shapes bake best.
Herb-Enhanced – Add 1 teaspoon dried herbs like thyme, rosemary, or dill for an elegant, sophisticated cracker perfect for cheese boards.
Pro Chef Tips
Elevate your homemade goldfish crackers from good to absolutely perfect with these professional techniques:
Temperature Control is Everything – Keep your ingredients cold throughout the process. Cold butter creates steam pockets as it melts during baking, resulting in that perfect crispy, flaky texture. If your kitchen is warm, work quickly or chill the dough again if it becomes too soft while rolling.
Roll Thin, Really Thin – The number one mistake is rolling the dough too thick. These need to be about ⅛ inch or even slightly thinner for that authentic goldfish cracker crunch. If they’re too thick, they’ll be more like cheese cookies than crackers.
Use Freshly Grated Cheese Always – I cannot stress this enough: pre-shredded cheese contains cellulose (an anti-caking agent) that prevents the dough from coming together properly. Freshly grated cheese melts smoothly into the dough and creates superior flavor and texture.
Don’t Overwork the Dough – Once the dough comes together, stop mixing. Overworking develops gluten, which makes crackers tough rather than crispy. Handle the dough as little as possible when shaping and rolling.
Even Thickness Matters – Use rolling pin guides or rubber bands on your rolling pin to ensure even thickness across the entire sheet of dough. Uneven crackers mean some burn while others underbake.
Watch Them Like a Hawk – These small crackers go from perfectly golden to burnt in literally 60 seconds. Set your timer for 2 minutes before the minimum baking time and check frequently during the last few minutes.
Cool on Racks Immediately – Transfer baked crackers to cooling racks right away. Leaving them on hot baking sheets causes them to continue cooking and can lead to burnt bottoms or overly dark crackers.
Let Them Crisp Completely – Crackers seem soft when they first come out of the oven but crisp up dramatically as they cool. Don’t be tempted to bake them longer—just be patient during cooling.
Common Mistakes to Avoid
Even this relatively simple recipe has a few pitfalls. Here’s how to avoid them:
Using Pre-Shredded Cheese – As mentioned multiple times (because it’s that important!), pre-shredded cheese doesn’t melt properly into the dough due to anti-caking additives. Your dough will be crumbly, dry, and won’t hold together well. Always grate cheese fresh from a block for this recipe.
Rolling Too Thick – Thick crackers turn out more like soft cheese cookies rather than crispy crackers. They need to be genuinely thin—when you think it’s thin enough, roll it a bit more. Aim for translucent around the edges.
Adding Too Much Water – It’s tempting to add extra water when the dough looks crumbly, but resist! Add water very gradually, just until the dough barely comes together. Too much water creates tough, dense crackers and a sticky dough that’s difficult to work with.
Overbaking – These tiny crackers bake quickly and go from perfect to burnt fast. Remove them when they’re just golden around the edges and still look slightly underdone in the center. They’ll continue cooking on the hot pan and finish crisping as they cool.
Not Chilling the Dough – Skipping the refrigeration step makes the dough difficult to roll and results in crackers that spread too much during baking, losing their cute shapes. The 15-20 minute chill time is worth it.
Skipping the Docking Step – Those tiny holes poked in each cracker aren’t just decorative—they prevent the crackers from puffing up like pillows during baking. Take the extra minute to dock each cracker for professional-looking results.
Storage & Meal Prep
Proper storage keeps your homemade goldfish crackers crispy and delicious:
Room Temperature Storage – Once completely cooled, store crackers in an airtight container at room temperature for up to 2 weeks. Make absolutely sure they’re fully cooled before storing, or condensation will make them soggy. Add a small silica gel packet (like those found in store-bought crackers) to help maintain crispness.
Restoring Crispness – If crackers lose their crunch after a few days, spread them on a baking sheet and toast in a 250°F oven for 5-7 minutes. Let them cool completely and they’ll be crispy again.
Portion Control for Lunchboxes – Pre-portion crackers into small reusable containers or bags immediately after they cool for easy grab-and-go snacks throughout the week.
Humidity Considerations – These crackers are sensitive to humidity. In very humid climates, they may soften faster. Store with a desiccant packet and consume within one week for best results.
Make-Ahead & Freezer Notes
These crackers are perfect for advance preparation, making them ideal for busy families:
Freezing Unbaked Dough – The prepared dough freezes beautifully for up to 3 months. Wrap the disk of dough tightly in plastic wrap, then place in a freezer-safe bag with all air removed. Label with the date. To use, thaw overnight in the refrigerator, then roll and bake as directed.
Freezing Cut Shapes – For ultimate convenience, cut out all your cracker shapes, place them on parchment-lined baking sheets, and freeze until solid (about 1 hour). Transfer frozen crackers to freezer bags and store for up to 3 months. Bake directly from frozen, adding 2-3 minutes to the baking time.
Freezing Baked Crackers – Fully baked and cooled crackers freeze well for up to 2 months. Store in airtight containers or freezer bags. Thaw at room temperature for 30 minutes or refresh in a 250°F oven for 5 minutes.
Batch Preparation Strategy – Make a double or triple batch of dough, freeze in portions, and bake fresh crackers whenever you need them. Fresh-baked crackers always taste best!
Best Thawing Method – Always thaw frozen dough in the refrigerator overnight rather than at room temperature. This prevents the butter from becoming too soft and maintains the best texture.
Serving Suggestions
While these homemade goldfish crackers are perfect for snacking straight from the container, here are creative ways to serve them:
Lunchbox Additions:
- Pack alongside carrot sticks, apple slices, and string cheese
- Include with hummus or ranch dip in a small container
- Add to a homemade trail mix with pretzels and dried fruit
Party Presentations:
- Serve in a large glass bowl as part of a snack table
- Create individual snack cups with goldfish and other finger foods
- Arrange on a cheese board with grapes and sliced apples
Soup Toppers:
- Float on top of tomato soup for a fun twist on crackers and soup
- Serve alongside creamy broccoli cheddar soup
- Garnish French onion soup
Creative Combos:
- Make “ants on a log” by spreading peanut butter on celery and topping with goldfish
- Mix into kids’ homemade snack mix
- Serve with wine and fancy cheese for an ironic-but-delicious adult snack
Beverage Pairings:
- Cold milk (the classic choice!)
- Juice boxes for kids
- White wine or craft beer for adults
- Sparkling water with lemon
Dipping Options:
- Cream cheese dip
- Marinara sauce (especially for pizza-flavored versions)
- Ranch dressing
- Queso or warm cheese dip
FAQs Section
Can I make these without a food processor?
Yes! Use a pastry cutter or two knives to cut the cold butter into the flour until it resembles coarse crumbs, then stir in the grated cheese with a wooden spoon. Add water gradually while stirring until the dough comes together. It takes a bit more arm work but produces the same results.
Why do my crackers taste bland?
This usually means you didn’t use sharp enough cheddar or didn’t add enough salt. Make sure you’re using sharp or extra-sharp cheddar (not mild), and don’t reduce the salt in the recipe. You can also increase the cheese slightly for more pronounced flavor.
Can I make these ahead for a party?
Absolutely! Baked crackers stay fresh in an airtight container for up to 2 weeks, making them perfect for advance preparation. For the freshest taste, bake them 1-2 days before your event. You can also freeze the dough and bake fresh crackers the day of your party.
My dough is too crumbly and won’t come together. What happened?
You likely need a bit more water, or your cheese wasn’t incorporated well. Add water one teaspoon at a time until the dough just holds together when pinched. Make sure you’re using freshly grated cheese, not pre-shredded, as pre-shredded cheese prevents proper dough formation.
Can I use this recipe for different shapes?
Yes! Any small cookie cutter works beautifully. Keep shapes under 1.5 inches for best results—larger shapes may not bake evenly or become crispy enough. Simple shapes like circles, squares, or stars are easiest to cut and re-roll efficiently.
How do I make these extra crispy?
Roll the dough even thinner (closer to 1/16 inch if you can manage it), bake until fully golden brown, and make sure to dock each cracker with holes. Also, let them cool completely on wire racks—they crisp up significantly during cooling.
Are homemade goldfish crackers healthier than store-bought?
They contain real cheese, real butter, and no artificial preservatives, colors, or additives, which many consider healthier. However, they’re still a treat food with similar calories and fat. The main health benefit is knowing exactly what ingredients your family is consuming and controlling the salt content.
Conclusion
There’s something truly special about making Homemade Goldfish Crackers from scratch—whether it’s the joy on your children’s faces when they realize they helped create their favorite snack, the satisfaction of knowing exactly what ingredients went into each crunchy bite, or simply the nostalgic pleasure of eating a warm, fresh-from-the-oven version of a childhood classic.
These easy cheesy goldfish crackers prove that some of the best snacks don’t come from a box—they come from your own kitchen with ingredients you can pronounce and a little bit of love. Once you master this simple recipe, you’ll find yourself making batch after batch, experimenting with different flavors and enjoying the process just as much as the delicious results.
I hope this recipe brings as much joy to your kitchen as it has to mine! Have you tried making homemade goldfish crackers? What flavor variations did you create? I’d love to hear about your experience in the comments below—and don’t forget to rate this recipe! If you loved these homemade cheese crackers, please pin this recipe to your Pinterest boards so you can find it easily whenever snack time calls. Your family (and your lunchbox-packing future self) will thank you!
Happy baking, and here’s to delicious, homemade snacking! 🐠