Crispy Toasted Ravioli: The Ultimate St. Louis Appetizer Recipe

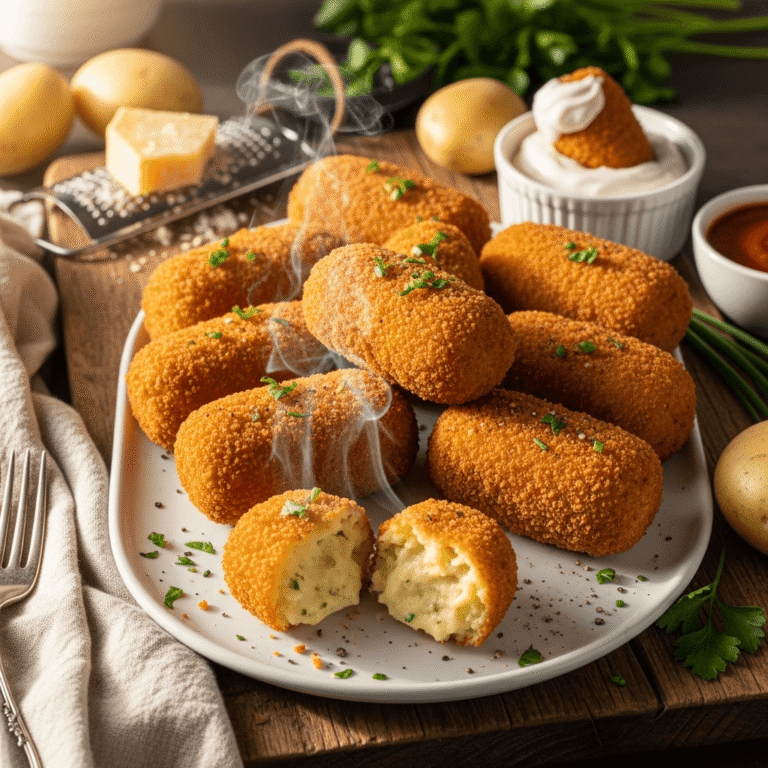
There’s something irresistibly satisfying about biting into a perfectly golden, crispy toasted ravioli—that satisfying crunch giving way to tender pasta filled with rich, melty cheese. These crispy Italian-American treats are the ultimate crowd-pleaser, transforming humble store-bought ravioli into an addictive appetizer that disappears in minutes. Whether you’re hosting game day, planning a casual dinner party, or just craving something indulgent for movie night, toasted ravioli (or “T-Ravs” as St. Louis locals affectionately call them) are guaranteed to be the star of your spread.
Introduction of Recipe
Toasted ravioli are breaded and deep-fried ravioli that create an incredibly crispy exterior while keeping the pasta pillowy and the cheese filling warm and gooey. Despite the name “toasted,” these aren’t actually toasted in an oven—they’re deep-fried or air-fried to golden perfection, then typically served hot with marinara sauce for dipping. The result is a hand-held Italian appetizer that combines all the comfort of pasta with the addictive crunch of fried food.
This recipe is beloved for good reason: it’s surprisingly easy to make at home, requires just a handful of ingredients, and delivers restaurant-quality results every single time. Toasted ravioli are perfect for parties, potlucks, and family gatherings where you need finger food that’s substantial enough to satisfy hungry guests. They’re also fantastic as a fun weeknight dinner when served alongside a fresh salad. Kids and adults alike love the crispy, cheesy goodness, making them one of those rare dishes that truly pleases everyone at the table.
History / Background
Toasted ravioli have a fascinating origin story that’s deeply rooted in St. Louis, Missouri’s Italian-American community. The dish was invented entirely by accident in the 1940s at Oldani’s Restaurant in an Italian neighborhood known as “The Hill.” According to local legend, a chef accidentally dropped fresh ravioli into hot oil instead of boiling water. Rather than discarding the mistake, he breaded and served them—and customers absolutely loved them.
Another version of the story credits Charlie Gitto (or his father) with the invention at Angelo’s Restaurant, also on The Hill. Regardless of which story is true, what’s certain is that toasted ravioli quickly became a St. Louis institution. The Hill neighborhood, settled by immigrants from Northern Italy in the late 1800s, became the epicenter of Italian cuisine in St. Louis, and toasted ravioli became the area’s signature contribution to American food culture.
Throughout the 1950s and 1960s, nearly every Italian restaurant in St. Louis added toasted ravioli to their menus. They became so beloved that they’re now considered St. Louis’s unofficial signature dish, right alongside gooey butter cake and St. Louis-style pizza. While toasted ravioli have spread beyond Missouri and can now be found in Italian-American restaurants nationwide, they remain most popular in their hometown, where locals order them with the same frequency that other cities order mozzarella sticks or chicken wings.
What makes this dish special isn’t just its accidental invention, but how it represents the American tradition of transforming traditional recipes into something entirely new. Italian immigrants brought ravioli to America, and through experimentation and a happy accident, created something uniquely Italian-American that’s now beloved across the country.
Why You’ll Love This Recipe
This homemade toasted ravioli recipe brings the taste of St. Louis right to your kitchen, and you’ll be amazed at how something so impressive requires so little effort. Using store-bought ravioli means you skip the labor-intensive pasta-making process, yet the results taste absolutely gourmet.
Here’s why this recipe will become your new favorite appetizer:
- Incredibly easy with minimal ingredients – Just ravioli, eggs, breadcrumbs, and oil—simple pantry staples create restaurant-worthy results
- Ready in under 30 minutes – From start to finish, including prep and frying time, you’ll have hot appetizers on the table fast
- Uses convenient store-bought ravioli – No pasta-making skills required; any frozen or refrigerated ravioli works beautifully
- Perfect for entertaining – Impressive enough for guests but easy enough to make stress-free
- Customizable filling options – Use cheese, meat, mushroom, or any ravioli variety you love
- Kid-approved and family-friendly – The crispy coating makes even picky eaters excited about pasta
- Budget-friendly appetizer – Makes a lot of servings for relatively little cost
- Freezer-friendly for meal prep – Bread them ahead and fry from frozen whenever cravings strike
- Versatile serving options – Works as an appetizer, snack, party food, or even a fun dinner with salad
Ingredient Notes
The beauty of toasted ravioli lies in its simplicity. Here’s what you need and why each component matters:
Ravioli – The star of the show! Use any variety you love: cheese ravioli (classic choice), beef ravioli, sausage and cheese, mushroom, spinach and ricotta, or even lobster for something fancy. Frozen ravioli works perfectly and is often more convenient than refrigerated. Look for medium-sized ravioli rather than jumbo—they cook more evenly and are easier to eat as finger food. Avoid fresh pasta-shop ravioli unless very sturdy, as delicate fresh pasta can fall apart during frying.
Eggs – Act as the binding agent that helps breadcrumbs adhere to the ravioli. Room temperature eggs mix more easily and create better coating. You’ll need them beaten well with a splash of water or milk to thin them slightly.
Italian Breadcrumbs – These create that signature golden, crunchy coating. Italian-seasoned breadcrumbs are traditional and add herbs and garlic flavor. You can also use plain breadcrumbs and add your own Italian seasoning, garlic powder, and Parmesan. Panko breadcrumbs create an even crispier texture if you prefer extra crunch.
Flour – The first step in the breading station. Flour helps the egg mixture stick to the ravioli and creates a base layer for the breadcrumbs to grip. All-purpose flour works perfectly.
Parmesan Cheese – Adding freshly grated Parmesan to your breadcrumb mixture enhances the Italian flavor and adds extra golden color. Freshly grated tastes significantly better than pre-grated.
Italian Seasoning – If using plain breadcrumbs, add dried Italian herbs (basil, oregano, thyme, parsley) for authentic flavor. Most Italian breadcrumbs already contain seasoning, but extra never hurts.
Garlic Powder – A little garlic powder in the breadcrumb mixture adds savory depth without overwhelming the ravioli filling.
Oil for Frying – Vegetable oil, canola oil, or peanut oil all work well. You need an oil with a high smoke point that can reach 350°F without burning. Avoid olive oil for deep frying as it has too low a smoke point.
Marinara Sauce – For serving and dipping. Use your favorite jarred marinara or make homemade. Warm it before serving for the best experience.
Equipment Needed
Having the right tools makes the toasted ravioli process smooth and safe:
- Large heavy-bottomed pot or Dutch oven – For deep frying; needs to be deep enough to hold 3-4 inches of oil safely
- Deep-fry or candy thermometer – Essential for monitoring oil temperature accurately
- Three shallow bowls or pie plates – For your breading station (flour, egg wash, breadcrumbs)
- Wire cooling rack set over baking sheet – For draining fried ravioli without them getting soggy
- Paper towels – Additional option for draining excess oil
- Spider strainer or slotted spoon – For safely lowering ravioli into hot oil and removing them
- Tongs – For turning ravioli while frying
- Large plate or baking sheet – For holding breaded ravioli before frying
- Measuring cups and spoons – For accurate ingredient measurements
- Whisk or fork – For beating eggs
- Small saucepan – For warming marinara sauce
- Air fryer (optional) – If you prefer air frying over deep frying

Crispy Toasted Ravioli
Crispy, golden toasted ravioli with a crunchy Italian breadcrumb coating and tender, cheesy center. This St. Louis specialty is easy to make at home and perfect for parties, game day, or whenever you’re craving a delicious appetizer. Served with warm marinara sauce for dipping!
- Total Time: 30 minutes
- Yield: 6-8 servings (about 24-30 ravioli) 1x
Ingredients
For the Toasted Ravioli:
- 1 pound frozen or refrigerated ravioli (cheese, beef, or your choice)
- 1 cup all-purpose flour
- 3 large eggs
- 2 tablespoons milk or water
- 2 cups Italian-seasoned breadcrumbs
- ½ cup freshly grated Parmesan cheese
- 1 teaspoon garlic powder
- ½ teaspoon dried Italian seasoning (if using plain breadcrumbs)
- ½ teaspoon salt
- ¼ teaspoon black pepper
- Vegetable oil for frying (about 2 quarts)
For Serving:
- 2 cups marinara sauce, warmed
- Fresh parsley, chopped (for garnish)
- Extra grated Parmesan cheese
- Fresh basil leaves (optional)
Instructions
Prepare Your Breading Station:
- Set up three stations: Place the flour in the first shallow bowl. In the second bowl, whisk together the eggs and milk until well combined and slightly frothy. In the third bowl, mix together the breadcrumbs, grated Parmesan cheese, garlic powder, Italian seasoning (if needed), salt, and pepper until evenly distributed.
- Prepare the ravioli: If using frozen ravioli, do not thaw them—working with frozen ravioli actually makes breading easier as they hold their shape better. If using refrigerated ravioli, make sure they’re cold from the fridge. Arrange them on a clean work surface.
- Create an assembly line: Position your bowls in order: flour, egg wash, breadcrumb mixture. Have a large plate or baking sheet lined with parchment paper ready for holding the breaded ravioli.
Bread the Ravioli:
- First coating – flour: Working with 4-5 ravioli at a time, place them in the flour and turn to coat both sides completely. Gently shake off any excess flour—you want a light, even coating, not clumps.
- Second coating – egg wash: Transfer the floured ravioli to the egg mixture. Turn them carefully to coat all sides, making sure they’re completely covered with egg. Let excess egg drip off for a moment before moving to the next step.
- Final coating – breadcrumbs: Place the egg-coated ravioli in the breadcrumb mixture. Press the breadcrumbs firmly onto both sides of each ravioli, making sure they’re thoroughly coated with no bare spots showing through. The coating should look even and generous. Place breaded ravioli on your prepared plate and repeat with remaining ravioli.
- Rest the breaded ravioli: Once all ravioli are breaded, let them rest for 5-10 minutes. This helps the coating adhere better and prevents it from falling off during frying. You can refrigerate them for up to 2 hours at this point if needed.
Fry the Ravioli:
- Heat the oil: In a large heavy-bottomed pot or Dutch oven, add enough vegetable oil to reach a depth of 3-4 inches. Heat over medium-high heat until the oil reaches 350°F (175°C). Use a deep-fry thermometer to monitor the temperature accurately—this is crucial for perfectly crispy ravioli.
- Test the oil: To ensure the oil is ready, drop a small pinch of breadcrumbs into it. If they sizzle immediately and float to the surface, the oil is hot enough. If they sink or brown too quickly, adjust the temperature accordingly.
- Fry in batches: Carefully lower 4-6 ravioli into the hot oil using a spider strainer or slotted spoon. Don’t overcrowd the pot, as this drops the oil temperature and results in greasy, soggy ravioli. Fry for 2-3 minutes, turning once halfway through with tongs, until both sides are deep golden brown and crispy.
- Drain and repeat: Remove the fried ravioli to a wire cooling rack set over a baking sheet (or paper towel-lined plate). The wire rack is better as it allows air circulation and prevents sogginess. Season immediately with a light sprinkle of salt while hot. Let the oil return to 350°F before frying the next batch. Repeat until all ravioli are fried.
- Serve immediately: While the last batch finishes frying, warm your marinara sauce in a small saucepan or microwave. Arrange the hot toasted ravioli on a serving platter, garnish with chopped fresh parsley and extra Parmesan if desired. Serve immediately with warm marinara sauce in small bowls for dipping.
Air Fryer Method (Alternative):
- Preheat air fryer: Set your air fryer to 400°F and let it preheat for 3 minutes.
- Arrange ravioli: Place breaded ravioli in a single layer in the air fryer basket, making sure they don’t touch or overlap. Spray generously with cooking spray or brush lightly with oil.
- Air fry: Cook for 8-10 minutes, flipping halfway through and spraying again with oil. They should be golden brown and crispy. Work in batches if needed.
Notes
- Don’t thaw frozen ravioli: Breading frozen ravioli works better than thawed—they hold their shape and the filling stays intact.
- Oil temperature is critical: Keep the oil between 345-355°F. Too hot and the coating burns before the filling warms; too cool and they absorb too much oil.
- Double-breading for extra crunch: For an even crispier coating, dip breaded ravioli back in egg wash and breadcrumbs a second time before frying.
- Make ahead: Bread the ravioli up to 2 hours ahead and refrigerate, or freeze for longer storage (see Make-Ahead section).
- Serving size: Plan for 4-5 ravioli per person as an appetizer, more if serving as a main course.
- Baking option: While not as crispy, you can bake breaded ravioli at 425°F for 15-20 minutes, flipping halfway and spraying with oil.
- Prep Time: 15 minutes
- Cook Time: 15 minutes
- Category: Appetizer
- Method: Deep Frying
- Cuisine: Italian-American
- Diet: Vegetarian
Nutrition
- Serving Size: 4-5 ravioli
- Calories: 285
- Sugar: 3g
- Sodium: 620mg
- Fat: 12g
- Saturated Fat: 3g
- Unsaturated Fat: 8g
- Trans Fat: 0g
- Carbohydrates: 32g
- Fiber: 2g
- Protein: 11g
- Cholesterol: 75mg
Tips & Variations
Filling Variations:
- Classic Cheese: Traditional cheese ravioli (ricotta, mozzarella, or four-cheese blend) is the most popular choice
- Meat Lovers: Use beef, sausage, or meat-filled ravioli for a heartier option
- Gourmet Options: Try lobster, crab, or butternut squash ravioli for elegant entertaining
- Vegetarian Delights: Spinach and ricotta, mushroom, or roasted vegetable ravioli work beautifully
- Four-Cheese: Extra cheesy filling makes for ultimate indulgence
Seasoning Variations:
- Spicy Kick: Add ½ teaspoon cayenne pepper or red pepper flakes to the breadcrumb mixture
- Herby: Mix fresh chopped basil or parsley into the breadcrumbs
- Garlic Parmesan: Double the Parmesan and garlic powder for intense flavor
- Cajun Style: Replace Italian seasoning with Cajun seasoning for a Louisiana twist
- Lemon Pepper: Add lemon zest and extra black pepper to the coating
Dipping Sauce Options:
- Classic marinara (traditional)
- Spicy arrabbiata sauce
- Creamy Alfredo sauce
- Pesto aioli
- Garlic butter sauce
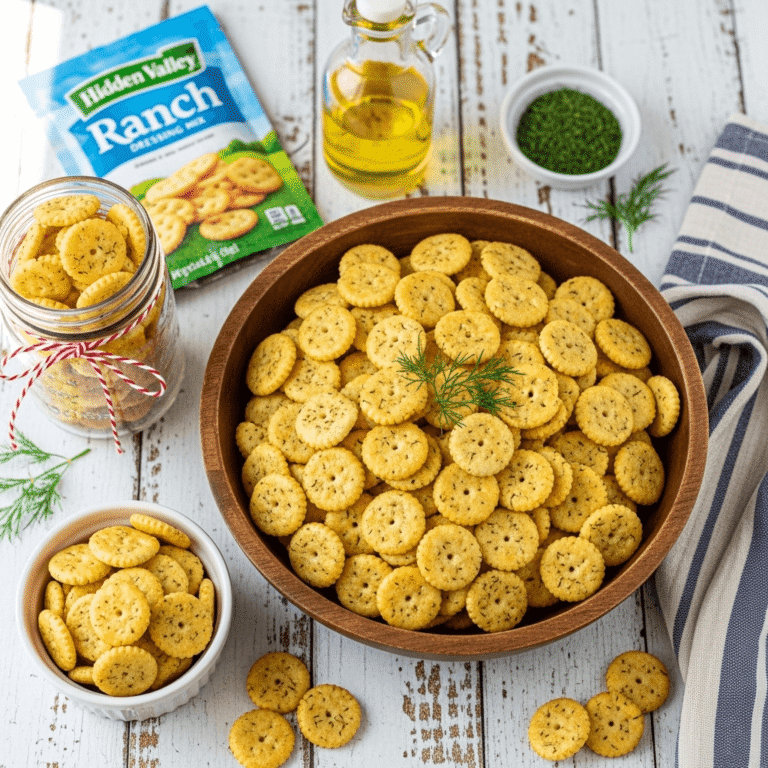
- Ranch dressing (very St. Louis!)
- Vodka sauce
- Roasted red pepper sauce
Healthier Modifications:
- Air fryer method: Significantly reduces oil for a lighter version
- Baked version: Bake at 425°F instead of frying, though texture won’t be quite as crispy
- Whole wheat breadcrumbs: Adds fiber and nutrients
- Reduced-fat cheese ravioli: Cuts calories without sacrificing much flavor
Pro Chef Tips
Temperature Control is Everything: The single most important factor in perfect toasted ravioli is maintaining consistent oil temperature at 350°F. When you add ravioli to the oil, the temperature will drop slightly. Fry in small batches and give the oil time to recover between batches. If the oil is too hot (above 365°F), the outside burns before the filling warms through. Too cool (below 340°F), and they absorb excess oil and become greasy instead of crispy.
The Press-and-Pat Technique: When coating ravioli in breadcrumbs, don’t just dip them—really press the breadcrumbs firmly onto both sides and even around the edges. This creates a thicker, more substantial coating that stays attached during frying and delivers that satisfying crunch. Pat any loose breadcrumbs onto bare spots to ensure complete coverage.
Rest Time Matters: After breading, let the ravioli rest for at least 5-10 minutes before frying. This allows the coating to set and adhere better, reducing the likelihood of breadcrumbs falling off in the oil. Professional kitchens often refrigerate breaded items for 30 minutes before frying for maximum adhesion.
Use a Wire Rack: Always drain fried foods on a wire cooling rack set over a baking sheet rather than paper towels. Paper towels trap steam underneath, which softens the coating. A wire rack allows air circulation all around, keeping the bottom as crispy as the top.
Season Immediately: Salt toasted ravioli the moment they come out of the hot oil while they’re still glistening. The salt sticks better to hot, slightly oily surfaces and the seasoning penetrates the coating more effectively. Waiting until they cool means less flavorful results.
Double-Dip for Maximum Crunch: For an extra-thick, ultra-crispy coating that rivals the best restaurants, do a double breading: flour, egg, breadcrumbs, then dip back in egg and breadcrumbs again. This creates a substantial, crunchy shell that stays crispy longer.
Common Mistakes to Avoid
Using Thawed Frozen Ravioli: Many home cooks make the mistake of thawing frozen ravioli before breading, thinking it’ll make the process easier. Actually, the opposite is true. Frozen ravioli hold their shape better during breading and frying, while thawed ravioli become soft, sticky, and more likely to tear or fall apart. The filling can also leak out more easily from thawed ravioli. Always bread frozen ravioli directly from the freezer.
Overcrowding the Frying Pot: Adding too many ravioli at once causes the oil temperature to plummet, resulting in greasy, soggy appetizers instead of crispy golden ones. The ravioli also stick together when overcrowded. Fry in small batches of 4-6 ravioli maximum, depending on your pot size, and be patient between batches while the oil returns to temperature.
Skipping the Flour Layer: Some people try to skip straight to the egg wash to save time, but the flour coating is crucial. It creates a dry surface that helps the egg adhere, which in turn helps the breadcrumbs stick. Without flour, you’ll end up with bare patches and uneven coating. The flour also helps seal the ravioli and prevent the filling from leaking.
Not Checking Oil Temperature: Guessing at oil temperature instead of using a thermometer is one of the biggest mistakes. Even experienced cooks can’t accurately judge oil temperature by sight. Too-hot oil creates a dark, burnt exterior with a cold center; too-cool oil produces greasy, pale, soggy ravioli. A $10 thermometer ensures perfect results every time.
Forgetting to Warm the Marinara: Serving cold marinara sauce with hot toasted ravioli creates a jarring temperature contrast and actually cools down your ravioli faster. Always warm your dipping sauce before serving—it should be hot enough to stay warm alongside the fried ravioli and enhance the overall eating experience.
Storage & Meal Prep
Refrigerator Storage: Cooked toasted ravioli can be stored in an airtight container in the refrigerator for up to 3 days, though they’re definitely best enjoyed fresh. The coating will soften significantly in the refrigerator, losing that signature crispiness. To refresh leftovers, reheat in a 375°F oven or air fryer rather than the microwave.
Reheating Instructions: Never microwave toasted ravioli—this makes them soggy and sad. Instead, reheat them in a preheated 375°F oven for 8-10 minutes until heated through and the coating crisps up again. Even better, use an air fryer at 375°F for 5-6 minutes, which restores much of the original crispiness. Arrange ravioli in a single layer with space between them for best results.
Storing Breaded Uncooked Ravioli: If you’ve breaded ravioli but don’t want to fry them all immediately, you can refrigerate them for up to 2 hours on a parchment-lined baking sheet, uncovered. Any longer and the coating becomes soggy from moisture. For longer storage, freeze them instead (see Make-Ahead section).
Sauce Storage: Store leftover marinara sauce separately in an airtight container in the refrigerator for up to 5 days. Reheat on the stovetop or in the microwave before serving.
Make-Ahead & Freezer Notes
Freezing Breaded Uncooked Ravioli: This is the absolute best make-ahead method for toasted ravioli and works incredibly well. After breading, arrange ravioli in a single layer on a parchment-lined baking sheet, making sure they don’t touch. Freeze until completely solid (2-3 hours). Once frozen solid, transfer to freezer bags or airtight containers, removing as much air as possible. They’ll keep beautifully for up to 3 months.
Frying From Frozen: One of the best things about toasted ravioli is that you can fry them directly from frozen with no thawing required! Simply add 30-60 seconds to the frying time (so 3-4 minutes total instead of 2-3 minutes). The frozen ravioli will cool the oil more than room-temperature ones, so be extra careful not to overcrowd and watch your temperature closely.
Party Prep Strategy: For stress-free entertaining, bread a large batch of ravioli up to a month ahead and freeze them. On party day, fry them in batches as guests arrive, and everyone enjoys them hot and crispy. You can keep finished batches warm in a 200°F oven for up to 20 minutes while you fry more, though they’re absolutely best straight from the fryer.
Freezing Cooked Ravioli: While you can freeze already-fried toasted ravioli, they won’t be as crispy when reheated compared to freezing them uncooked. If you do freeze cooked ones, cool completely, then freeze in a single layer before transferring to containers. Reheat from frozen in a 400°F oven for 15-18 minutes.
Meal Prep for Weeknight Dinners: Bread a large batch on the weekend and freeze them in portion-sized bags. On busy weeknights, you can fry or air fry just the amount you need for a quick dinner or after-school snack.
Serving Suggestions
Toasted ravioli are incredibly versatile and can be served in many different ways:
Classic Appetizer Spread: Arrange hot toasted ravioli on a large platter with warm marinara sauce in the center for dipping. Add small bowls of other dipping sauces (Alfredo, pesto aioli, ranch) for variety. Garnish with fresh parsley and serve with small appetizer plates and napkins. This is perfect for parties, game day, or casual entertaining.
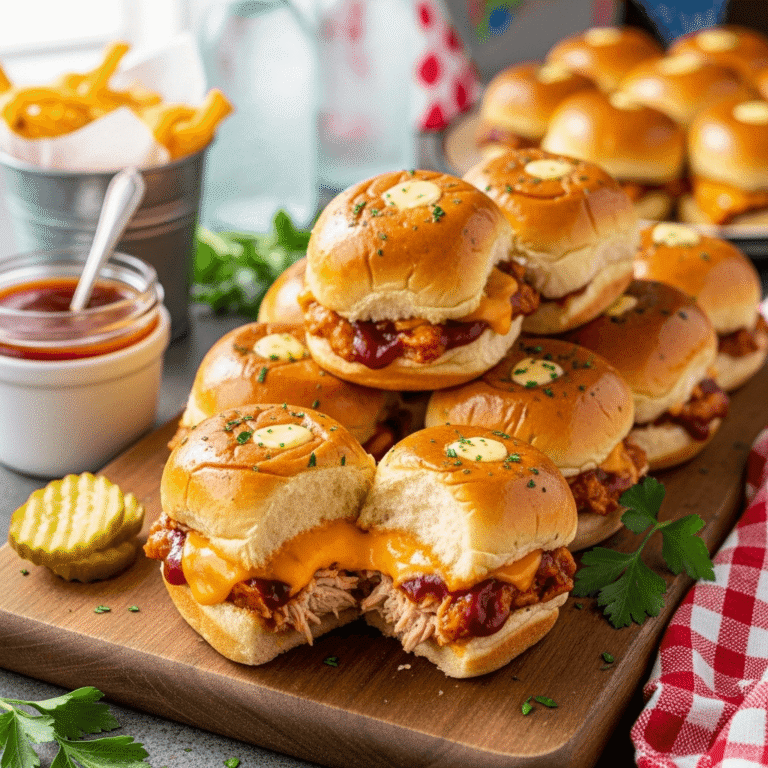
Game Day Spread: Create an Italian-themed game day spread by serving toasted ravioli alongside other crowd-pleasers like mozzarella sticks, garlic bread, wings, and Italian sausage sliders. Provide multiple dipping sauces and keep ravioli warm in a low oven between batches.
Italian Appetizer Platter: Serve toasted ravioli as part of an antipasto spread with cured meats, marinated olives, fresh mozzarella, bruschetta, caprese skewers, and crusty bread. This makes an impressive spread for dinner parties or holiday entertaining.
Main Course Option: Serve 8-10 toasted ravioli per person as a main course alongside a crisp Italian salad (mixed greens with red onion, tomatoes, and Italian dressing), garlic bread, and roasted vegetables. This makes a fun, casual dinner that kids especially love.
Complementary Sides:
- Caesar salad with homemade croutons
- Caprese salad with fresh basil
- Italian pasta salad
- Roasted garlic green beans
- Sautéed broccoli rabe
- Antipasto salad
- Minestrone soup
Beverage Pairings:
- Italian red wine (Chianti, Montepulciano)
- Cold Italian beer (Peroni, Moretti)
- Italian sodas (San Pellegrino, Aranciata)
- Prosecco for elegant entertaining
- Classic lemonade for casual gatherings
St. Louis Style: In St. Louis, toasted ravioli are often served with ranch dressing alongside or instead of marinara sauce. While this might seem unusual, the cool, creamy ranch provides a delicious contrast to the hot, crispy ravioli and is worth trying!
FAQs Section
Can I bake toasted ravioli instead of frying them? Yes, though they won’t be quite as crispy as fried versions. Arrange breaded ravioli on a parchment-lined baking sheet in a single layer. Spray generously with cooking spray or brush with oil. Bake at 425°F for 15-20 minutes, flipping halfway through and spraying again with oil. The air fryer method produces better results than oven-baking if you’re trying to avoid deep frying.
Do I need to thaw frozen ravioli before breading? No—absolutely not! In fact, you should never thaw frozen ravioli before making toasted ravioli. Working with frozen ravioli makes breading easier because they hold their shape better and the filling is less likely to leak out. Bread them directly from the freezer and they’ll cook perfectly during frying.
Why did my breadcrumb coating fall off during frying? This usually happens for a few reasons: the ravioli weren’t properly dried before breading, you skipped the flour coating, the breadcrumbs weren’t pressed firmly enough, or the oil temperature was wrong. Make sure to coat thoroughly in flour first, press the breadcrumbs firmly onto all surfaces, and maintain oil temperature at exactly 350°F for best results.
Can I use fresh ravioli from the pasta section? Yes, but be aware that delicate fresh ravioli can be trickier to work with than frozen. Fresh ravioli are softer and more prone to tearing during the breading process. If using fresh, handle them very gently and make sure they have a sturdy construction. Refrigerated ravioli from brands like Buitoni work well and are sturdier than fresh pasta shop varieties.
What’s the best oil for frying toasted ravioli? Vegetable oil, canola oil, and peanut oil all work excellently for frying toasted ravioli. These oils have high smoke points (around 400°F) and neutral flavors that won’t interfere with the Italian seasonings. Avoid olive oil, which has a lower smoke point and can burn at frying temperatures. You need enough oil for the ravioli to float freely—usually about 3-4 inches deep.
How do I keep toasted ravioli crispy for a party? The best strategy is to fry them in batches as guests arrive rather than making them all ahead. However, if you need to hold them, keep finished ravioli warm in a 200°F oven on a wire rack set over a baking sheet (never in a covered container, which creates steam and sogginess). They’ll stay reasonably crispy for about 20-30 minutes. For longer parties, consider setting up a frying station and making batches throughout the event.
Can I use homemade ravioli for this recipe? Absolutely! Homemade ravioli work beautifully for toasted ravioli, though you’ll want to make sure they’re very well-sealed and sturdy enough to withstand frying. Let homemade ravioli dry slightly (about 15 minutes) before breading so the pasta isn’t too moist. The coating adheres better to slightly dried pasta. Just be extra gentle during the breading process since fresh homemade pasta is more delicate than frozen.
Conclusion
There’s something truly magical about serving a platter of golden, crispy toasted ravioli at your next gathering and watching them disappear in minutes. These St. Louis-style Italian appetizers perfectly combine crispy, crunchy coating with tender pasta and melty cheese filling—it’s a textural experience that keeps people coming back for “just one more” until the platter is empty. And the best part? They’re so much easier to make at home than you might think.
Whether you’re a St. Louis native feeling nostalgic for T-Ravs from The Hill, or you’re discovering this addictive appetizer for the first time, this recipe delivers authentic flavor and satisfying crunch with every bite. The make-ahead and freezer-friendly nature means you can always have a batch ready to fry for last-minute guests, game day gatherings, or those nights when you just want something special and indulgent.
So grab a bag of your favorite ravioli, set up your breading station, and get ready to create the ultimate crowd-pleasing appetizer that’ll have everyone asking for the recipe. Don’t forget to take photos of your beautiful golden toasted ravioli before they disappear—they’re definitely Pinterest-worthy! And when you make this recipe, I’d love to hear about it. Leave a comment below sharing your experience, which ravioli filling you chose, or any creative variations you tried. Pin this recipe to your appetizer board so you can find it easily whenever toasted ravioli cravings strike. Happy frying, and enjoy every crispy, cheesy bite!