The Best Homemade Hummus Recipe: Creamy, Smooth & Restaurant-Quality!

Get ready to experience homemade hummus like never before! This ultra-creamy, silky-smooth hummus recipe is so much better than anything you’ll find at the store, and it’s surprisingly easy to make in your own kitchen. With just a handful of simple ingredients and about 10 minutes of active time, you’ll create the most luscious, flavorful hummus that rivals your favorite Mediterranean restaurant.
Perfect as a healthy snack with fresh vegetables, pita bread, or chips, this easy homemade hummus recipe is also fantastic as a spread for sandwiches and wraps, a creamy base for Mediterranean bowls, or an elegant appetizer for entertaining. The best part? Once you master this basic recipe, you can customize it with endless flavor variations to keep things exciting.
Whether you’re meal prepping for the week, hosting a party, looking for healthy after-school snacks, or simply craving that addictive chickpea dip, this recipe delivers restaurant-quality results every single time. Say goodbye to grainy, bland store-bought hummus and hello to the creamiest, most luxurious hummus you’ve ever tasted!
History / Background
Hummus has a rich and fascinating history that spans thousands of years across the Middle Eastern region. The word “hummus” literally means “chickpea” in Arabic, though the full name “hummus bi tahini” translates to “chickpeas with tahini,” perfectly describing this beloved dish’s two star ingredients.
While the exact origin of hummus is hotly debated among historians and food scholars (with countries like Lebanon, Israel, Palestine, Syria, Egypt, and Jordan all claiming ownership), what we do know is that chickpeas have been cultivated in the Middle East for at least 10,000 years. The earliest known recipes that resemble modern hummus date back to 13th-century Cairo, appearing in cookbooks from the Ayyubid period.
The combination of chickpeas and tahini (sesame seed paste) was revolutionary because it created a complete protein source, making hummus not just delicious but nutritionally significant for populations where meat was expensive or scarce. The addition of garlic, lemon juice, and olive oil enhanced both flavor and preservation, making hummus a practical, shelf-stable food in pre-refrigeration times.
Throughout history, hummus remained primarily a regional specialty until the late 20th century when Middle Eastern immigration and the growing interest in Mediterranean cuisine brought it to Western attention. The 1990s and 2000s saw hummus explode in popularity across the United States and Europe as consumers embraced its health benefits, versatility, and incredible flavor.
Today, hummus is a global phenomenon found in virtually every grocery store, restaurant menu, and home kitchen. The hummus industry is worth billions of dollars worldwide, with countless flavor variations and innovations. Yet despite all these commercial options, nothing beats the pure, authentic taste of homemade chickpea hummus made from scratch in your own kitchen—which is exactly what we’re making today!
Why You’ll Love This Recipe
This isn’t just any hummus recipe—this is the ultimate creamy hummus that will completely change how you think about this classic dip. I’ve tested countless methods and techniques to bring you the absolute best version that’s foolproof, fast, and phenomenally delicious.
Here’s why this recipe will become your new obsession:
- Restaurant-Quality Texture – Unbelievably smooth and creamy, without any graininess or chunks that plague most homemade versions
- Ready in 10 Minutes – Faster than running to the store, with minimal active preparation time
- Incredibly Affordable – Costs just a fraction of store-bought hummus and makes a generous batch
- Healthier Than Store-Bought – No preservatives, stabilizers, or unnecessary additives—just pure, wholesome ingredients
- Customizable – Once you master the base, create endless flavor variations from roasted red pepper to spicy harissa
- Perfect Every Time – Foolproof method with specific techniques that guarantee success even for beginners
- Naturally Allergen-Friendly – Vegan, dairy-free, gluten-free, and nut-free, making it suitable for almost any dietary restriction
- Protein-Packed – Each serving delivers plant-based protein and fiber to keep you satisfied
- Meal Prep Hero – Stays fresh for up to a week, making it perfect for healthy snacking and quick meals
- Crowd-Pleaser – Even picky eaters and hummus skeptics are converted by the incredible texture and flavor
- Versatile Uses – Works as a dip, spread, sandwich filling, salad topping, or bowl base
- Impressive Yet Easy – Guests will think you’re a culinary genius when you casually mention it’s homemade
Ingredient Notes
The secret to extraordinary hummus lies in understanding each ingredient’s role and using the best quality you can find. Let’s break down what makes this recipe so special:
Chickpeas (Garbanzo Beans) – The foundation of your hummus. While dried chickpeas that you cook yourself produce the absolute best texture and flavor, canned chickpeas work beautifully and save significant time. The game-changing secret? Removing the skins! Yes, it’s an extra step, but peeling the chickpeas creates that ultra-smooth, luxurious texture. For the best results, warm your canned chickpeas slightly before blending—this helps create creamier hummus.
Tahini – This sesame seed paste is absolutely essential for authentic hummus. Not all tahini is created equal! Look for a smooth, pourable tahini (stir well before using as it separates naturally). Middle Eastern brands like Soom, Al Arz, or Seed + Mill tend to be less bitter than some grocery store varieties. Never substitute with peanut butter or other nut butters—tahini’s distinctive flavor is what makes hummus taste like hummus.
Fresh Lemon Juice – Please, please use fresh-squeezed lemon juice! Bottled juice simply doesn’t provide the bright, vibrant acidity that makes hummus sing. You’ll need about 2-3 lemons for this recipe. The lemon juice not only adds flavor but also helps emulsify the mixture and keeps the hummus from oxidizing and turning brown.
Garlic – Fresh garlic cloves provide the perfect pungent kick. Raw garlic can be quite strong, so we start with 1-2 cloves and adjust to taste. For milder garlic flavor, you can roast the garlic first or use garlic powder (though fresh is definitely best).
Ground Cumin – This warm, earthy spice is traditional in many hummus recipes and adds depth without overwhelming the chickpea flavor. Freshly ground cumin is more aromatic, but pre-ground works perfectly fine.
Salt – Essential for bringing out all the flavors. Start with the amount listed and adjust to taste. Kosher salt or sea salt works best.
Ice Water – The secret ingredient that many recipes don’t mention! Adding ice-cold water while blending creates an incredibly light, whipped texture. The cold temperature prevents the tahini from seizing up and helps incorporate air for that restaurant-quality fluffiness.
Extra Virgin Olive Oil – Used both in the hummus itself and as a finishing drizzle. Good quality olive oil makes a noticeable difference in flavor. Reserve your very best, most peppery olive oil for drizzling on top where you can really taste it.
Baking Soda (Optional but Recommended) – Adding a pinch of baking soda when warming canned chickpeas helps break down their skins further and creates an even creamier texture. It’s a pro trick that makes a real difference!
Equipment Needed
Making perfect hummus requires the right tools, but nothing too specialized. Here’s what you’ll need:
- Food Processor or High-Speed Blender – A food processor is ideal for achieving the perfect texture. A powerful blender (like a Vitamix) also works beautifully. A standard blender can work but may require more stopping and scraping.
- Medium Saucepan – For warming the chickpeas (if using canned) or cooking dried chickpeas
- Colander or Strainer – For draining and rinsing canned chickpeas
- Can Opener – If using canned chickpeas
- Measuring Cups and Spoons – For accurate ingredient portions
- Citrus Juicer – Makes extracting lemon juice much easier, though you can squeeze by hand
- Rubber Spatula – For scraping down the sides of your food processor
- Small Bowl – For the ice water
- Serving Bowl or Plate – For presenting your beautiful hummus
- Kitchen Towel – Optional, for peeling chickpeas if you choose to do this step
- Garlic Press (optional) – Makes mincing garlic easier and creates a finer texture
Homemade Hummus Recipe
This ultra-creamy homemade hummus recipe is smooth, silky, and absolutely addictive! Made with simple ingredients and ready in just 10 minutes, it’s healthier and more delicious than any store-bought version. Perfect for snacking, entertaining, or meal prep!
- Total Time: 10 minutes
- Yield: 2 cups (8 servings) 1x
Ingredients
For the Hummus:
- 1 can (15 oz) chickpeas (garbanzo beans), or 1½ cups cooked chickpeas
- ⅓ cup tahini (well-stirred)
- 3 tablespoons fresh lemon juice (about 1½ lemons)
- 2 cloves garlic, minced
- ½ teaspoon ground cumin
- ¾ teaspoon salt (adjust to taste)
- 2-4 tablespoons ice water (more as needed for desired consistency)
- 2 tablespoons extra virgin olive oil (plus more for serving)
- ⅛ teaspoon baking soda (optional, for extra creaminess)
For Serving:
- 2 tablespoons extra virgin olive oil
- Paprika or za’atar (for sprinkling)
- Fresh parsley, chopped
- Whole chickpeas (reserved from the can)
- Pine nuts (optional)
Instructions
- Prepare the Chickpeas: Open your can of chickpeas and drain the liquid (aquafaba) into a small bowl—save this for later as it can be useful for adjusting consistency. Rinse the chickpeas thoroughly under cold running water to remove excess sodium and any tinny flavor. For the absolute creamiest hummus, take the extra 5 minutes to peel the chickpeas: gently squeeze each chickpea between your fingers to slip off the transparent skin. This step is optional but highly recommended for restaurant-quality texture! Reserve 2 tablespoons of whole chickpeas for garnish.
- Warm the Chickpeas (Game-Changer Step): Place the peeled chickpeas in a medium saucepan with enough water to cover them by about an inch. Add the baking soda if using. Bring to a gentle simmer over medium heat and cook for 5 minutes. This softens the chickpeas further and helps create incredibly smooth hummus. Drain well and let cool for 2-3 minutes (they should be warm but not piping hot).
- Blend the Tahini Base First: This is a crucial technique! In your food processor, combine the tahini and lemon juice. Process for about 1 minute, stopping to scrape down the sides as needed. The mixture will seize up and look grainy at first—this is normal! Continue processing and it will transform into a light, whipped, creamy paste. This pre-blending emulsifies the tahini and creates the silky foundation for your hummus.
- Add Aromatics: Add the minced garlic, ground cumin, and salt to the whipped tahini mixture. Process for 30 seconds to incorporate. You’ll notice the mixture is still quite thick and paste-like at this point.
- Add Chickpeas: Add about half of the warm, drained chickpeas to the food processor. Process for 1 minute, then add the remaining chickpeas. Continue processing for 1-2 minutes, scraping down the sides several times. The mixture should be becoming smoother but will still be quite thick.
- Stream in Ice Water: With the food processor running, slowly drizzle in the ice water, 1 tablespoon at a time. Process for at least 2-3 minutes after the water is added. This is the secret to achieving that incredibly light, fluffy texture! The hummus should become noticeably paler, fluffier, and smoother. Add more ice water 1 tablespoon at a time if needed to reach your desired consistency—you want it smooth and spreadable but not runny.
- Add Olive Oil: Drizzle in the 2 tablespoons of olive oil while the processor is running. Process for another 30 seconds to fully incorporate. At this point, your hummus should be silky, smooth, and absolutely luxurious.
- Taste and Adjust: Stop the processor and taste your hummus. This is your chance to make it perfect! Add more salt if needed, more lemon juice for brightness, more garlic for punch, or more cumin for earthiness. Remember that flavors will develop and mellow slightly as the hummus sits, so it should taste just slightly more assertive than your target flavor.
- Serve with Style: Transfer your beautiful hummus to a shallow serving bowl or plate. Use the back of a spoon to create a shallow well or swirl pattern in the center. Drizzle generously with good quality olive oil, letting it pool in the center. Sprinkle with paprika, za’atar, or sumac. Garnish with the reserved whole chickpeas, chopped fresh parsley, and pine nuts if using. Serve immediately with warm pita bread, fresh vegetables, or your favorite dippers!
Notes
- Peeling Chickpeas: While optional, peeling chickpeas makes a dramatic difference in texture. If you’re short on time, skip this step—your hummus will still be delicious!
- Tahini Quality Matters: Use a high-quality, runny tahini for best results. If your tahini is very thick and dry, your hummus will be too thick.
- Consistency Control: The amount of ice water needed varies based on your chickpeas and tahini thickness. Add gradually until you achieve your preferred consistency.
- Flavor Development: Hummus tastes even better after sitting for 30 minutes as flavors meld. Make it ahead if possible!
- Using Dried Chickpeas: Soak 1 cup dried chickpeas overnight, then simmer with ½ teaspoon baking soda for 45-60 minutes until very tender. This method produces the absolute best texture.
- Serving Temperature: Hummus is best served at room temperature or slightly chilled, not ice-cold straight from the fridge.
- Prep Time: 10 minutes
- Cook Time: 0 minutes
- Category: Appetizer
- Method: Food Processor
- Cuisine: Middle Eastern
- Diet: Gluten Free
Nutrition
- Serving Size: ¼ cup
- Calories: 145
- Sugar: 1g
- Sodium: 245mg
- Fat: 10g
- Saturated Fat: 1.5g
- Unsaturated Fat: 8g
- Trans Fat: 0g
- Carbohydrates: 11g
- Fiber: 3g
- Protein: 4g
- Cholesterol: 0mg
Tips & Variations
Roasted Red Pepper Hummus: Add ½ cup drained roasted red peppers (from a jar) to the food processor along with the chickpeas. The result is a gorgeous coral-colored hummus with sweet, smoky flavor.
Spicy Hummus: Stir in 1-2 teaspoons harissa paste, a pinch of cayenne pepper, or some diced jalapeños for a fiery kick. Start small and adjust to your heat preference.
Roasted Garlic Hummus: Replace raw garlic with a whole head of roasted garlic (cut off the top, drizzle with oil, wrap in foil, roast at 400°F for 40 minutes). The flavor is sweet, mellow, and absolutely divine.
Herb-Loaded Hummus: Add 1 cup fresh herbs (cilantro, parsley, or basil) to the processor for a bright green, garden-fresh variation.
Sun-Dried Tomato Hummus: Add ¼ cup oil-packed sun-dried tomatoes for intense, concentrated tomato flavor and a beautiful russet color.
Beet Hummus: Blend in 1 small roasted beet for stunning magenta color and subtle earthy sweetness. Perfect for entertaining!
Lemon-Herb Hummus: Double the lemon juice and add 2 tablespoons fresh dill or 1 teaspoon lemon zest for bright, Mediterranean flavor.
Caramelized Onion Hummus: Top with sweet, jammy caramelized onions for an elegant variation that’s perfect for entertaining.
Smoky Hummus: Add 1 teaspoon smoked paprika and a dash of liquid smoke for BBQ-inspired flavor.
Chocolate Dessert Hummus: Yes, really! Reduce chickpeas to 1 cup, omit garlic and cumin, add ¼ cup cocoa powder, ¼ cup maple syrup, and 1 teaspoon vanilla for a sweet treat.
Extra Protein: Stir in 2 tablespoons hemp seeds or ground flaxseed for additional nutrition and a slight nutty flavor.
Pro Chef Tips
The Tahini-First Method is Non-Negotiable: Always blend tahini and lemon juice together first before adding anything else. This pre-emulsification creates the creamy base that makes truly spectacular hummus. It seems like an unnecessary extra step, but the difference is night and day.
Temperature is Your Secret Weapon: Warm chickpeas blend infinitely smoother than cold ones. The heat softens them further and makes them more pliable. This is why freshly cooked chickpeas make better hummus than cold canned ones (though warming canned ones bridges this gap beautifully).
Process Longer Than You Think: Most home cooks don’t process their hummus long enough. After all ingredients are added, let that processor run for a full 3-4 minutes, scraping down sides as needed. The longer processing time incorporates air, breaks down the chickpeas more completely, and creates that signature silky texture.
Ice Water Creates Magic: The ice-cold water serves multiple purposes: it loosens the consistency, the cold prevents tahini from seizing, and the streaming motion while processing incorporates air for a lighter, fluffier texture. This is a restaurant technique that makes a dramatic difference.
Reserve Some Chickpea Liquid (Aquafaba): That viscous liquid from canned chickpeas is gold! It’s a better consistency adjuster than water because it’s already flavored and adds body. Use it in place of ice water if you prefer.
Quality Tahini is Worth It: Cheap, bitter tahini will make bitter hummus. Invest in a good Middle Eastern brand. Stir it well before using (the oil separates naturally), and if it’s very thick, thin it with a little neutral oil before adding to your recipe.
Layer Your Salt: Add most of the salt early in processing, but reserve a pinch to add at the very end after tasting. This layering technique ensures proper seasoning throughout while allowing final adjustments.
The Swirl Matters: When plating hummus, use the back of a spoon to create a shallow well with swirled edges. This isn’t just aesthetic—the well holds the olive oil and toppings, ensuring every scoop includes all those delicious elements.
Common Mistakes to Avoid
Using Poor Quality or Thick Tahini: If your tahini is grainy, separated, or paste-like, your hummus will inherit these qualities. Always stir tahini well before using, and if it’s very thick, thin it with a tablespoon of neutral oil. The texture should be pourable like honey, not thick like peanut butter.
Not Processing Long Enough: The most common mistake! Many people stop processing as soon as the mixture looks combined, but you need to continue for several more minutes to achieve that restaurant-quality smoothness. If you think you’ve processed enough, process for another minute. The texture should be silky and absolutely smooth, with no graininess whatsoever.
Adding All Liquid at Once: Dumping all the ice water in at once can make your hummus too thin and prevents proper emulsification. Always add liquid gradually while the processor is running, allowing each addition to fully incorporate before adding more. This streaming technique creates better texture and lets you control the final consistency precisely.
Skipping the Tahini-Lemon Pre-Blend: This step seems fussy but it’s genuinely transformative. When you blend tahini and lemon juice together first, they emulsify into a light, fluffy base that creates the silky texture you’re after. Skipping this means you’ll never achieve that professional quality, no matter how long you process.
Using Ice-Cold Ingredients: Cold chickpeas and cold tahini don’t blend well together—they create a thick, grainy, paste-like texture that’s impossible to smooth out. Room temperature or slightly warm ingredients blend infinitely better and create creamier results with less processing time.
Over-Salting or Under-Salting: Chickpeas need more salt than you’d expect, but it’s easy to overshoot. Always start with less salt than you think you need, blend completely, then taste and adjust. Remember that flavors mellow as hummus sits, so it should taste just slightly over-seasoned when freshly made.
Not Tasting and Adjusting: Every can of chickpeas, every lemon, and every batch of tahini is slightly different. What worked perfectly last time might need tweaking this time. Always taste your hummus before serving and adjust lemon juice, salt, garlic, or cumin to achieve perfect balance.
Storage & Meal Prep
Refrigerator Storage: Transfer your homemade hummus to an airtight container and store in the refrigerator for up to 7 days. For maximum freshness, smooth the surface flat and drizzle a thin layer of olive oil over the top before sealing—this prevents oxidation and keeps the hummus from drying out or developing a crust.
The Browning Issue: Hummus naturally oxidizes and may develop a slightly darker surface when exposed to air. This is completely harmless! Simply stir it back in or scrape off the top layer before serving. The olive oil layer helps prevent this significantly.
Consistency Changes: Hummus thickens considerably as it sits in the refrigerator. This is normal! Simply stir in a tablespoon or two of cold water, ice water, or reserved aquafaba to loosen it back to your preferred consistency. You may need to let it sit at room temperature for 15-20 minutes before serving for the best texture and flavor.
Preventing Flavor Fade: The bright, fresh flavors of lemon and garlic can mellow over time. When serving leftover hummus, freshen it up with a squeeze of fresh lemon juice and a small drizzle of good olive oil stirred through. This revives the flavors beautifully.
Meal Prep Strategy: Hummus is an absolute meal prep superstar! Make a double or triple batch on Sunday and portion into individual containers with cut vegetables for easy grab-and-go snacks all week. It’s perfect for lunch boxes, afternoon snacks, and quick appetizers.
Travel and Transport: Hummus travels well since it requires no heating or cooling immediately. For picnics or potlucks, keep it in a cooler with ice packs. Transport garnishes separately and add them just before serving to keep everything looking fresh.
Serving Leftovers: Don’t serve leftover hummus straight from the fridge—it will be too thick and the flavors will be muted. Always let it sit at room temperature for 15-20 minutes, stir well, adjust consistency with a splash of water if needed, and refresh the top with a drizzle of olive oil and fresh garnishes.
Make-Ahead & Freezer Notes
Make-Ahead Timeline: Hummus is actually better when made ahead! The flavors meld and develop beautifully over time. Make it 1-2 days in advance for the best flavor, storing it in an airtight container with an olive oil layer on top. Just remember to bring it to room temperature and adjust consistency before serving.
Maximum Make-Ahead: You can prepare hummus up to 5-7 days ahead, though the flavors will be most vibrant in the first 3-4 days. After day 5, you may want to refresh it with a squeeze of lemon juice and fresh garlic.
Component Prep: If you want to get ahead but prefer the freshest flavor, you can peel and warm chickpeas, make the tahini-lemon base, and prep all ingredients up to 2 days ahead. Store components separately and blend everything together the day you plan to serve.
Freezing Hummus: Yes, hummus freezes surprisingly well for up to 4 months! The texture may separate slightly upon thawing, but a good stir usually brings it back together. Freeze in airtight containers or freezer bags, leaving about an inch of headspace for expansion. For easy portioning, freeze in ice cube trays, then transfer the frozen cubes to a freezer bag—perfect for popping out single servings!
Thawing Instructions: Transfer frozen hummus to the refrigerator and let it thaw overnight (8-12 hours). Avoid thawing at room temperature as this can affect food safety. Once thawed, the texture may appear grainy or separated—this is normal. Let it come to room temperature, then whisk vigorously or briefly pulse in the food processor to re-emulsify.
Post-Freeze Texture Fix: If your thawed hummus is too thick or slightly grainy, blend it in the food processor with 2-3 tablespoons of ice water and an extra tablespoon of olive oil. This refreshes the texture and brings back that creamy consistency.
What Not to Freeze: Don’t add garnishes (olive oil, paprika, herbs, pine nuts) before freezing—add these fresh after thawing and just before serving for the best presentation and flavor.
Freezer Meal Prep: Make multiple batches in different flavors, freeze in individual portions, and you’ll have healthy snacks ready to go for months. Label clearly with the flavor and date!
Serving Suggestions
Hummus is incredibly versatile and can be enjoyed in so many delicious ways beyond the classic dip-and-chip scenario! Here are my favorite serving ideas:
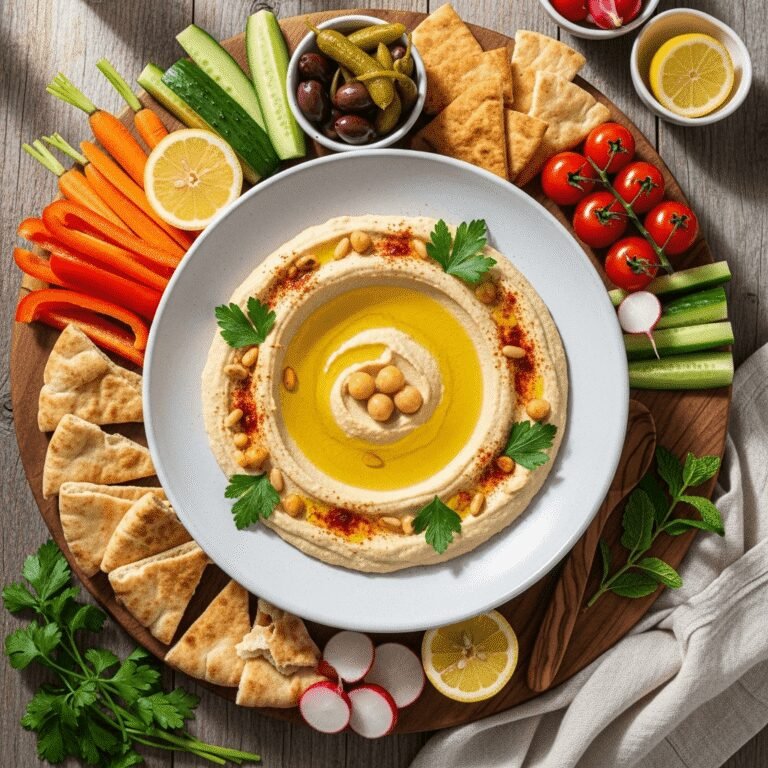
Classic Mediterranean Spread: Serve your creamy homemade hummus on a large platter with an assortment of fresh vegetables (cucumber spears, carrot sticks, bell pepper strips, cherry tomatoes, radishes), warm pita bread triangles, pita chips, or crispy lavash crackers. Add some marinated olives, pickled vegetables, and feta cheese cubes for a complete mezze platter.
The Perfect Hummus Bowl: Create a gorgeous Mediterranean bowl with hummus as the creamy base, topped with warm quinoa or farro, roasted chickpeas, diced cucumbers and tomatoes, red onion, crumbled feta, and a drizzle of olive oil and lemon juice.
Sandwich and Wrap Spread: Replace mayo with a thick layer of hummus on sandwiches, wraps, and paninis. It’s especially delicious with roasted vegetables, grilled chicken, falafel, or turkey.
Breakfast Enhancement: Spread hummus on toasted whole grain bread or English muffins, top with sliced avocado, a fried egg, and everything bagel seasoning for a protein-packed breakfast.
Salad Dressing Base: Thin your hummus with lemon juice and water to create a creamy, dairy-free salad dressing that’s infinitely better than store-bought options.
Baked Potato Topping: Skip the sour cream and butter—top baked sweet potatoes or regular potatoes with hummus, roasted vegetables, and fresh herbs for a healthy, satisfying meal.
Pizza or Flatbread Base: Use hummus instead of tomato sauce on flatbreads or pizza dough, top with roasted vegetables, arugula, and a balsamic drizzle.
Snack Plate Pairings:
- Fresh vegetables: cucumber, carrots, celery, bell peppers, snap peas, cherry tomatoes
- Warm or toasted pita bread, naan, or flatbread
- Sturdy crackers, pita chips, or bagel chips
- Pretzels or breadsticks
- Apple slices or jicama sticks for a sweet-savory combination
- Roasted or raw broccoli and cauliflower florets
Complete Meal Pairings:
- Falafel with tahini sauce and Israeli salad
- Grilled lamb kebabs or chicken shawarma
- Greek salad with kalamata olives and feta
- Tabbouleh or fattoush salad
- Roasted or grilled vegetables with za’atar
- Stuffed grape leaves (dolmas)
- Mediterranean lentil soup
Beverage Pairings: Serve with iced mint tea, cucumber water, sparkling water with lemon, or a crisp white wine like Sauvignon Blanc or Pinot Grigio.
FAQs Section
Why is my hummus grainy and not smooth?
Graininess usually comes from one of three issues: not processing long enough, not removing the chickpea skins, or using cold ingredients. The solution is to process for a full 3-4 minutes after adding all ingredients (much longer than most people think), use warm or room-temperature chickpeas, and consider taking the extra time to peel them. Also ensure you’re blending the tahini and lemon juice first—this pre-emulsification is key to smoothness. If your hummus is already made and grainy, try adding 2-3 tablespoons of ice water and processing for another 2-3 minutes.
Can I make hummus without tahini?
Technically yes, but it won’t be authentic hummus—tahini is the defining ingredient that gives hummus its characteristic flavor and creamy texture. If you can’t find tahini or have a sesame allergy, you can substitute with sunflower seed butter or cashew butter thinned with a bit of olive oil, but the flavor will be noticeably different. For a nut-free, tahini-free option, try blending in some Greek yogurt (though this makes it non-vegan) or extra olive oil, but again, it’s really not traditional hummus without tahini.
How can I make my hummus thicker or thinner?
To thhinken hummus, add more chickpeas or tahini, or simply let it sit in the refrigerator uncovered for 30 minutes—it will naturally thicken and firm up as it chills. To thin hummus, add liquid gradually (ice water, reserved aquafaba, or fresh lemon juice) while the food processor is running, one tablespoon at a time until you reach desired consistency. Remember that hummus thickens significantly in the refrigerator, so aim for slightly thinner than your target consistency when freshly made.
Should I use canned or dried chickpeas?
Both work! Dried chickpeas that you soak and cook yourself produce the absolute best texture and flavor—they’re creamier, less grainy, and blend more smoothly. However, canned chickpeas are far more convenient and still make excellent hummus, especially if you warm them and peel them. The difference is noticeable but not dramatic. If you’re new to making hummus, start with canned chickpeas and graduate to dried once you’ve mastered the technique. One 15-ounce can equals about 1½ cups cooked dried chickpeas.
Why does my hummus taste bitter?
Bitterness almost always comes from your tahini—some brands (especially cheaper ones) have a bitter flavor from over-roasted sesame seeds or hulls left in. The solution is to buy a better quality tahini from a Middle Eastern market or specialty store. Brands like Soom, Al Arz, or Seed + Mill are reliably smooth and not bitter. You can also reduce bitterness by using less tahini (start with ¼ cup instead of ⅓ cup), adding a bit more lemon juice and a pinch of sugar to balance flavors, or roasting your garlic instead of using it raw.
How do I prevent hummus from turning brown?
Hummus browns due to oxidation when exposed to air—it’s completely harmless but not attractive. Prevent browning by smoothing the surface flat and pouring a thin layer of olive oil over the top before storing (this creates a barrier). Always store in an airtight container, and press plastic wrap directly onto the surface before lidding for maximum protection. The lemon juice in your recipe also helps slow browning. If the surface does brown, simply stir it back in or scrape off the top layer.
Can I make hummus in a regular blender instead of a food processor?
Yes, but it requires more patience! A high-powered blender (like a Vitamix) works excellently and often creates even smoother hummus than a food processor. A standard blender works too but may require more stopping and scraping, and you might need to add a bit more liquid to get the mixture moving. Use the tamper if your blender has one. Start on low speed and gradually increase, stopping frequently to scrape down sides. Add liquid gradually to help the blending process. A food processor is still my preferred tool for ease of use, but blenders definitely work!
How long does homemade hummus last?
Properly stored in an airtight container in the refrigerator, homemade hummus lasts 5-
7 days. The flavors are actually best on days 2-3 as they meld together. Watch for signs of spoilage like off smells, mold, or unusual discoloration beyond normal surface oxidation. The olive oil layer on top helps extend freshness. If you notice your hummus developing a slightly sour smell or taste after 5 days, it’s time to discard it. Frozen hummus lasts up to 4 months in the freezer.
Conclusion
And there you have it—the ultimate guide to making restaurant-quality homemade hummus that’s infinitely better than anything you’ll find at the store! This recipe proves that with just a handful of simple ingredients, the right techniques, and a little bit of patience with your food processor, you can create something truly extraordinary in your own kitchen.
What I absolutely love about this easy homemade hummus recipe is how it transforms simple chickpeas into something utterly luxurious and addictive. The silky-smooth texture, the bright lemony flavor, the nutty richness from tahini, and that beautiful golden color make this such a joy to both make and eat. Plus, knowing exactly what goes into your hummus—no preservatives, no stabilizers, no mysterious additives—just pure, wholesome ingredients you can feel good about.
Whether you’re meal prepping healthy snacks for the week, hosting a Mediterranean-themed dinner party, looking for allergen-friendly appetizers, or simply craving that creamy chickpea goodness, this recipe has you covered. And once you’ve mastered this basic version, the world of flavored hummus variations is yours to explore—roasted red pepper, spicy harissa, herb-loaded, beet hummus, and so many more delicious possibilities!
The beauty of homemade chickpea hummus is that it’s not just delicious—it’s practical, affordable, and nutritious. It keeps for a week in the fridge, costs a fraction of store-bought versions, and provides plant-based protein and fiber that keeps you satisfied. It’s the kind of recipe that works hard for you, serving as a snack, sandwich spread, salad topping, bowl base, or party dip with equal excellence.
I’d love to hear about your hummus-making adventures! Did you try any of the flavor variations? What’s your favorite way to serve it? Do you have any pro tips or family traditions around hummus? Drop a comment below and share your experience—I read every single one and love connecting with fellow home cooks in our community!
Don’t forget to PIN this recipe to your Pinterest boards! Save it to “Healthy Snacks,” “Mediterranean Recipes,” “Meal Prep Ideas,” “Appetizers,” or “Dips and Spreads” so you can find it easily whenever you need it. Trust me, once you make this hummus, you’ll be coming back to this recipe again and again!
If you loved this recipe, be sure to check out my other Mediterranean favorites on the blog—homemade falafel, Greek salad, baba ganoush, and tzatziki sauce are all waiting for you! And if you try this hummus, please leave a comment and rating below—it helps other home cooks find this recipe and means the world to me.
Now grab those chickpeas and get blending—your smoothest, creamiest, most delicious homemade hummus awaits! 🥙