Fried Pickles Recipe – Easy Southern Appetizer in 10 Minutes

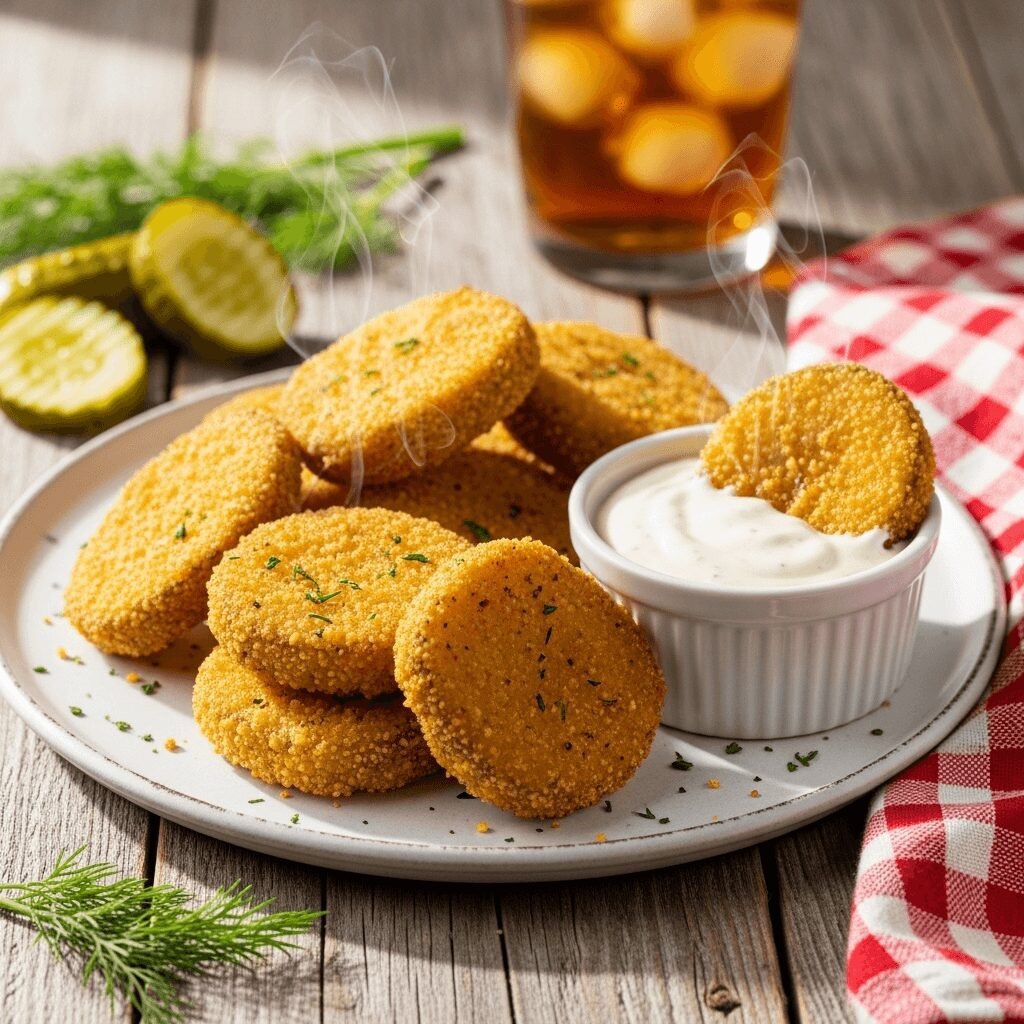
If you’ve never tried fried pickles, you’re in for a tangy, crunchy, absolutely addictive treat! These golden, crispy dill pickle slices are coated in a perfectly seasoned breading and fried until they’re irresistibly crunchy on the outside while staying juicy and tangy on the inside. Fried pickles are the ultimate crowd-pleasing appetizer that disappears in minutes at parties, game day gatherings, and family cookouts.
This homemade fried pickle recipe is surprisingly easy to make right in your own kitchen, and trust me, once you try these hot and fresh from the fryer, you’ll never want the frozen store-bought version again. Serve them with a cool, creamy ranch or spicy comeback sauce for dipping, and watch them vanish before your eyes. Whether you’re hosting a Super Bowl party, need a quick snack for movie night, or want to impress guests at your next barbecue, these crispy fried pickles are always a guaranteed hit.
The best part? You only need about 10 minutes and a handful of simple ingredients to create restaurant-quality fried pickles at home. They’re budget-friendly, customizable to your taste preferences, and so much better than anything you’ll find in the frozen food aisle.
History / Background
Fried pickles, also known as “frickles” in some Southern circles, have a rich history deeply rooted in American cuisine, particularly in the Southern United States. While the exact origin is debated, most food historians credit the Duchess Drive-In in Atkins, Arkansas, with inventing this iconic snack in 1963. Owner Bernell “Fat Man” Austin reportedly came up with the idea during the annual Picklefest celebration, and the crispy creation became an instant local sensation.
The concept spread throughout Arkansas and eventually across the Deep South, where fried foods are practically a food group of their own. Southern cooks have long embraced the art of battering and frying just about anything, and pickles were a natural candidate given their popularity in the region. By the 1970s and 1980s, fried pickles had become a staple at county fairs, roadside diners, and BBQ joints throughout Arkansas, Mississippi, Tennessee, and Texas.
The dish gained mainstream popularity in the 2000s when chain restaurants like Sonic Drive-In added them to their menus nationwide. Today, fried pickles have transcended their Southern roots and can be found everywhere from upscale gastropubs in New York City to casual sports bars in California. Food Network chefs and home cooks alike have embraced this tangy, crunchy snack, experimenting with different breading techniques, pickle varieties, and dipping sauces.
What makes fried pickles so special is how they perfectly balance contrasting flavors and textures—the crispy, savory coating against the cool, tangy, slightly sweet pickle inside creates an absolutely irresistible bite. They represent Southern ingenuity and the American love affair with fried foods, comfort cooking, and turning simple ingredients into something extraordinary.
Why You’ll Love This Recipe
This homemade fried pickle recipe is about to become your new favorite appetizer, and here’s why: it combines restaurant-quality results with simple home cooking techniques that anyone can master. You don’t need any special culinary training or fancy equipment—just a deep pot or skillet and the willingness to get a little adventurous in the kitchen.
Here’s what makes this recipe absolutely irresistible:
- Quick and easy – Ready in just 20 minutes from start to finish, making them perfect for last-minute entertaining or spontaneous snack cravings
- Budget-friendly – Uses inexpensive, everyday ingredients you probably already have in your pantry, with a jar of pickles costing just a few dollars
- Crowd-pleaser guaranteed – I’ve never served these to anyone who didn’t immediately ask for the recipe; they appeal to kids and adults alike
- Customizable heat level – Adjust the spices to make them mild for kids or add cayenne and hot sauce to the batter for spice lovers
- Better than restaurant versions – Homemade fried pickles are fresher, crunchier, and you control the quality of ingredients (no mystery freezer-burnt pickles here!)
- Perfect for parties – They’re finger food that needs no utensils, travels well to potlucks, and can be made in large batches
- Addictively crunchy – The double-dip coating method creates an extra-thick, super crispy breading that stays crunchy even as they cool
- Versatile serving options – Delicious on their own, as a burger topping, in a fried pickle sandwich, or alongside your favorite dipping sauces
Whether you’re a fried pickle fanatic or a curious first-timer, this recipe delivers that perfect combination of tangy pickle flavor and satisfying crunch that keeps people coming back for more.
Ingredient Notes
Let’s break down what makes these fried pickles so delicious and talk about the key ingredients you’ll need to create that perfect crispy coating:
Dill Pickle Chips – The star of the show! Use dill pickle chips (hamburger-style slices) rather than whole pickles or spears for even cooking and easy eating. I recommend using regular dill pickles rather than bread-and-butter pickles because you want that tangy, savory flavor rather than sweet. Drain them extremely well and pat completely dry with paper towels—this is crucial for getting the breading to stick. If you prefer pickle spears, you can use those instead, just adjust cooking time slightly.
All-Purpose Flour – Creates the base for both the dredging station and the wet batter. The flour helps the coating adhere to the pickles and creates that crispy exterior when fried. You can substitute with gluten-free all-purpose flour if needed.
Buttermilk – Adds tanginess and helps the breading stick to the pickles while creating a tender coating. If you don’t have buttermilk, make your own by adding 1 tablespoon of white vinegar or lemon juice to regular milk and letting it sit for 5 minutes. You could also use pickle juice mixed with milk for extra pickle flavor!
Eggs – Acts as a binder in the wet batter, helping create that thick, clingy coating that fries up beautifully golden and crispy.
Cornmeal – This is the secret ingredient that gives fried pickles their signature crunch and slightly coarse texture. I use fine or medium-ground yellow cornmeal. The cornmeal adds texture that flour alone can’t achieve. Don’t skip it!
Panko Breadcrumbs – Optional but highly recommended for extra crunch. Panko breadcrumbs are Japanese-style breadcrumbs that are lighter and crispier than regular breadcrumbs. You can mix them with the flour coating or use all panko for maximum crispiness.
Seasonings – Garlic powder, onion powder, paprika, cayenne pepper (optional for heat), salt, and black pepper create a well-seasoned coating that complements the tangy pickles. Cajun seasoning or Old Bay are also excellent additions for extra flavor complexity.
Vegetable Oil for Frying – You need an oil with a high smoke point like vegetable, canola, or peanut oil. Avoid olive oil as it has a lower smoke point and distinct flavor. You’ll need enough to fill your pot 2-3 inches deep for proper frying.
Equipment Needed
Having the right tools makes this recipe even easier and ensures perfect results every time:
- Large, heavy-bottomed pot or Dutch oven – For deep frying; cast iron works beautifully because it maintains consistent heat
- Deep-fry or candy thermometer – Essential for monitoring oil temperature (350°F is the sweet spot)
- Three shallow bowls or pie plates – For your breading station (dry flour, wet batter, dry coating)
- Wire cooling rack set over a baking sheet – For draining fried pickles so they stay crispy (better than paper towels which can make them soggy)
- Slotted spoon or spider strainer – For safely removing pickles from hot oil
- Paper towels – For drying pickles before breading
- Tongs – For handling pickles during the breading process
- Measuring cups and spoons – For accurate ingredient measurements

Fried Pickles Recipe
Crispy, golden fried pickles with a perfectly seasoned cornmeal breading that’s crunchy on the outside and tangy on the inside. This easy Southern appetizer is ready in just 20 minutes and pairs perfectly with ranch or spicy dipping sauce!
- Total Time: 20 minutes
- Yield: 4-6 servings 1x
Ingredients
For the Pickles:
- 1 (32-ounce) jar dill pickle chips, thoroughly drained and patted dry
- Vegetable oil for frying (about 4 cups)
For the Breading Station:
- 1 cup all-purpose flour, divided
- 1 cup buttermilk
- 2 large eggs
- ½ cup cornmeal (fine or medium-ground)
- ½ cup panko breadcrumbs
- 1 teaspoon garlic powder
- 1 teaspoon onion powder
- 1 teaspoon paprika
- ½ teaspoon cayenne pepper (optional, for heat)
- 1 teaspoon salt
- ½ teaspoon black pepper
- 2 tablespoons dill pickle juice (from the jar)
For Serving:
- Ranch dressing, comeback sauce, or spicy mayo for dipping
Instructions
Step 1: Prepare the Pickles
Remove pickle chips from the jar and spread them on several layers of paper towels. Pat them thoroughly dry—this is crucial! Any excess moisture will prevent the breading from sticking properly and cause oil splattering. Let them sit on the paper towels for about 5 minutes while you set up your breading station.
Step 2: Set Up Your Breading Station
Arrange three shallow bowls in a row. In the first bowl, add ½ cup flour. In the second bowl, whisk together buttermilk, eggs, and pickle juice until smooth. In the third bowl, combine the remaining ½ cup flour, cornmeal, panko breadcrumbs, garlic powder, onion powder, paprika, cayenne (if using), salt, and black pepper. Mix the dry coating thoroughly.
Step 3: Heat the Oil
Pour vegetable oil into a large, heavy-bottomed pot or Dutch oven to a depth of about 2-3 inches. Heat over medium-high heat until the oil reaches 350°F on a deep-fry thermometer. This temperature is crucial—too low and your pickles will be greasy; too high and they’ll burn before cooking through.
Step 4: Bread the Pickles
Working with one pickle chip at a time, dredge it in plain flour (first bowl), shaking off excess. Dip it into the buttermilk mixture (second bowl), letting excess drip off. Finally, press it into the cornmeal mixture (third bowl), coating both sides thoroughly. Place breaded pickles on a clean plate. For extra crispy pickles, you can double-dip: after the final coating, dip back in buttermilk and cornmeal mixture once more.
Step 5: Fry the Pickles
Carefully add 5-6 breaded pickle chips to the hot oil—don’t overcrowd the pot or the temperature will drop. Fry for 2-3 minutes, flipping halfway through, until golden brown and crispy on both sides. The breading should be deep golden, not pale.
Step 6: Drain and Season
Using a slotted spoon or spider strainer, remove fried pickles from the oil and transfer to a wire rack set over a baking sheet. Immediately sprinkle with a tiny pinch of salt while still hot. Repeat frying process with remaining pickles, allowing oil to return to 350°F between batches.
Step 7: Serve Immediately
Serve fried pickles hot with your favorite dipping sauce. Ranch dressing, spicy mayo, comeback sauce, or honey mustard all work beautifully!
Notes
- Pickle dryness is critical – The drier your pickles, the better the breading will stick. Don’t rush this step!
- Oil temperature matters – Invest in a thermometer. If oil is too cool, pickles absorb excess oil and become soggy. If too hot, breading burns before pickles heat through.
- Don’t overcrowd the pot – Fry in small batches to maintain consistent oil temperature.
- Make them extra spicy – Add hot sauce to the buttermilk mixture or increase cayenne in the breading.
- Baked option – For a lighter version, bake breaded pickles at 425°F on a greased baking sheet for 15-20 minutes, flipping halfway.
- Air fryer adaptation – Cook at 400°F for 8-10 minutes, flipping halfway, spraying with oil spray before cooking.
- Prep Time: 10 minutes
- Cook Time: 10 minutes
- Category: Appetizer
- Method: Deep Frying
- Cuisine: American
- Diet: Vegetarian
Nutrition
- Serving Size: About 6 pickle chips
- Calories: 245
- Sugar: 2g
- Sodium: 875mg
- Fat: 12g
- Saturated Fat: 2g
- Unsaturated Fat: 9g
- Trans Fat: 0g
- Carbohydrates: 28g
- Fiber: 2g
- Protein: 6g
- Cholesterol: 65mg
Tips & Variations
Make Them Spicy:
Add 1-2 tablespoons of hot sauce to the buttermilk mixture and increase cayenne pepper to 1 teaspoon in the dry coating. You can also sprinkle finished pickles with Cajun seasoning or chili powder for extra heat.
Lighter Baked Version:
Skip the deep frying and bake breaded pickles on a greased baking sheet at 425°F for 15-20 minutes, flipping halfway through. Spray lightly with cooking spray before baking for extra crispiness. They won’t be quite as crunchy as fried, but they’re still delicious and lower in fat.
Air Fryer Fried Pickles:
Arrange breaded pickles in a single layer in your air fryer basket (don’t overlap). Spray generously with cooking spray. Air fry at 400°F for 8-10 minutes, flipping and spraying with more oil halfway through cooking time.
Try Different Pickles:
Experiment with pickle spears, whole baby pickles, or even fried jalapeño slices for a different twist. Bread-and-butter pickle chips create a sweet-and-savory version that some people love, though traditionalists prefer dill.
Gluten-Free Option:
Substitute all-purpose flour with your favorite gluten-free flour blend (1:1 ratio) and use certified gluten-free cornmeal and breadcrumbs. The texture will be nearly identical.
Add Fresh Herbs:
Mix 2 tablespoons of chopped fresh dill or parsley into your dry breading mixture for extra flavor that complements the pickles beautifully.
Cheese Lover’s Version:
Add ½ cup grated Parmesan cheese to the dry coating mixture for savory, cheesy fried pickles that taste absolutely incredible.
Pro Chef Tips
Maintain Consistent Oil Temperature:
The biggest mistake home cooks make is not monitoring oil temperature between batches. Always let the oil return to 350°F before adding the next batch. If the oil is too cool, your pickles will absorb excess oil and turn greasy instead of crispy. Use a reliable thermometer—it’s worth the investment.
Create an Assembly Line:
Set up your breading station efficiently with the bowls arranged in order from left to right. Use one hand for the dry ingredients (flour and cornmeal mixture) and the other hand for wet ingredients (buttermilk). This prevents your fingers from getting completely coated and helps you work faster.
Double-Dip for Maximum Crunch:
For restaurant-level crispiness, do a double coating. After the initial flour-buttermilk-cornmeal process, dip each pickle back into the buttermilk and then back into the cornmeal mixture. This creates an extra-thick coating that stays incredibly crunchy.
Season While They’re Hot:
Salt and any finishing seasonings should go on immediately after frying while the pickles are still hot. The heat helps the seasonings stick and the salt enhances all the flavors. Wait too long and seasonings will just fall off.
Use Fresh Oil:
Old, previously used oil can impart off-flavors and won’t crisp up the coating as effectively. If you’re making multiple batches, strain the oil between uses to remove any burnt bits of breading that can make your oil taste bitter.
Test Your Oil Temperature:
Don’t have a thermometer? Drop a small piece of breading into the oil. If it sizzles immediately and floats to the surface, the oil is ready. If it sinks and doesn’t sizzle much, the oil is too cold. If it browns within seconds, it’s too hot.
Let Breaded Pickles Rest:
After breading all your pickles, let them sit for 5 minutes before frying. This rest time helps the coating adhere better and prevents it from sliding off during frying.
Common Mistakes to Avoid
Not Drying the Pickles Thoroughly:
This is the number one mistake! Wet pickles will not hold breading, and the excess moisture will cause dangerous oil splattering. Take your time patting every pickle completely dry with paper towels. It seems tedious, but it’s absolutely essential for success.
Overcrowding the Frying Pot:
When you add too many pickles at once, the oil temperature drops dramatically, resulting in soggy, greasy pickles instead of crispy ones. Fry only 5-6 pieces at a time, even if it means making more batches. Patience pays off with crispier results.
Using Oil That’s Too Cold or Too Hot:
Incorrect oil temperature is a recipe for disaster. Too cold and your pickles absorb excess oil and turn limp and greasy. Too hot and the breading burns before the inside heats through, leaving you with bitter, dark coating and cold pickles. Invest in a $10 thermometer—it’s a game-changer.
Skipping the Buttermilk:
Some recipes suggest using just eggs, but buttermilk makes a huge difference. It adds tanginess that complements the pickles, tenderizes the coating, and helps the breading adhere better than eggs alone. Don’t skip it!
Draining on Paper Towels Only:
While paper towels absorb oil, they also trap steam underneath your fried pickles, making the bottom soggy. Always use a wire cooling rack set over a baking sheet so air can circulate around all sides, keeping the entire pickle crispy.
Not Seasoning the Breading Enough:
Plain breading is boring! Your coating needs garlic powder, onion powder, paprika, and plenty of salt to create flavor that complements the tangy pickles. Don’t be shy with seasonings—the pickle itself is salty, so the coating needs to match that intensity.
Storage & Meal Prep
Storing Leftovers:
Let fried pickles cool completely, then store them in an airtight container lined with paper towels (to absorb any excess oil). They’ll keep in the refrigerator for up to 3 days, though they’re definitely best within the first 24 hours. The breading will soften as they sit, but you can recrisp them.
Reheating for Best Results:
Never microwave fried pickles—they’ll turn soggy and rubbery. Instead, reheat them in a 400°F oven for 5-7 minutes, or in an air fryer at 375°F for 3-4 minutes. This will crisp up the breading nicely, though they won’t be quite as crunchy as fresh.
Room Temperature Storage:
If you’re serving these at a party and need them to sit out for a couple hours, they’ll be fine at room temperature. Keep them on a wire rack (not a plate) so air circulates. They’ll gradually lose crispness but are still tasty for 2-3 hours.
Shelf Life:
Honestly, fried pickles are a “make and eat immediately” type of food. While you can store them, they’re at their absolute best straight from the fryer. Plan to serve them within 30 minutes of frying for optimal crunchiness.
Make-Ahead & Freezer Notes
Freezing Breaded (Uncooked) Pickles:
This is the best make-ahead method! Bread all your pickles completely, then arrange them in a single layer on a parchment-lined baking sheet. Freeze until solid (about 2 hours), then transfer to a freezer bag or container. They’ll keep for up to 3 months. Fry directly from frozen, adding an extra minute to the cooking time. This is perfect for parties where you can prep days ahead.
Freezing Already-Fried Pickles:
You can freeze already-fried pickles, but they won’t be quite as crispy when reheated. Let them cool completely, freeze in a single layer, then store in an airtight container for up to 2 months. Reheat in a 400°F oven or air fryer to crisp them up.
Make-Ahead Breading Station:
You can mix your dry coating mixture up to 3 days ahead and store it in an airtight container at room temperature. The buttermilk mixture can be whisked together and refrigerated for up to 24 hours before using.
Best Reheating from Frozen:
For frozen uncooked breaded pickles, fry at 350°F for 3-4 minutes (one extra minute). For frozen cooked pickles, bake at 400°F for 10-12 minutes or air fry at 375°F for 8-10 minutes until heated through and crispy.
Party Planning Tip:
Bread all your pickles an hour or two before guests arrive and keep them refrigerated on a baking sheet. Then fry them in batches as people arrive, so you’re serving them fresh and hot throughout your party rather than making them all at once.
Serving Suggestions
Fried pickles are incredibly versatile and pair beautifully with so many dishes and dipping sauces! Here’s how to serve them for maximum deliciousness:
Classic Dipping Sauces:
Ranch dressing is the traditional choice and for good reason—the cool, creamy ranch perfectly contrasts the hot, crunchy, tangy pickles. Other excellent options include comeback sauce (a Southern favorite with mayo, ketchup, and spices), spicy mayo, honey mustard, blue cheese dressing, or remoulade sauce. Set out 2-3 different sauces and let guests choose their favorite.
As a Side Dish:
Fried pickles make an excellent side for burgers, pulled pork sandwiches, BBQ chicken, fish and chips, or fried chicken. They’re also fantastic alongside a big juicy steak or as part of a Southern-style spread with mac and cheese, coleslaw, and cornbread.
Game Day Spread:
Create an epic appetizer platter with fried pickles, buffalo wings, mozzarella sticks, loaded potato skins, and vegetable crudités with dips. Add some cold beers or sweet tea and you’ve got a winning combination for watching the big game.
Burger Topping:
Yes, really! Use fried pickles as a burger topping instead of plain pickle slices. Stack them on a juicy beef burger with lettuce, tomato, and special sauce for an unforgettable twist on a classic.
With Southern Sides:
Pair fried pickles with classic Southern comfort foods like baked beans, potato salad, coleslaw, cornbread, hush puppies, or mac and cheese for an authentic down-home feast.
Drinks to Serve:
Sweet tea is the obvious Southern pairing, but fried pickles also go great with ice-cold beer (especially light lagers or pilsners), lemonade, or even a crisp white wine like Sauvignon Blanc or Pinot Grigio.
FAQs Section
Can I use pickle spears instead of chips?
Absolutely! Pickle spears work great—just cut them into thirds if they’re very long so they’re easier to eat. The cooking time remains the same, about 2-3 minutes per batch. Spears give you more pickle to bite into, while chips are easier for dipping and usually crispier throughout.
Why won’t my breading stick to the pickles?
This almost always comes down to moisture. If your pickles aren’t completely dry, the breading will slide right off. Pat them thoroughly with paper towels and let them sit for 5 minutes before breading. Also make sure you’re coating them completely in flour first—that initial flour layer is what helps everything else adhere.
Can I make these in an air fryer?
Yes! Arrange breaded pickles in a single layer in your air fryer basket without overlapping. Spray generously with cooking oil spray. Air fry at 400°F for 8-10 minutes, flipping halfway through and spraying again. They won’t be quite as crispy as deep-fried but are still delicious and much lower in fat.
What’s the best oil for frying pickles?
Vegetable oil, canola oil, and peanut oil all work excellently because they have high smoke points and neutral flavors. Avoid olive oil (too low smoke point) or strongly flavored oils that would overpower the pickles. You need about 4 cups of oil to fill your pot 2-3 inches deep.
How do I keep fried pickles crispy?
Serve them immediately for maximum crunch. If you need to keep them warm for a party, place them on a wire rack in a 200°F oven—don’t cover them or the steam will make them soggy. The wire rack (not paper towels or a plate) is crucial for allowing air circulation.
Can I make these ahead of time?
The best make-ahead method is to bread all the pickles completely, freeze them on a baking sheet, then store frozen in bags for up to 3 months. Fry directly from frozen when ready to serve, adding just one extra minute to cooking time. Already-fried pickles can be reheated but won’t be as crispy.
What kind of pickles work best?
Dill pickle chips (hamburger-style slices) are traditional and work beautifully because they’re uniform in size and cook evenly. Regular dill pickles provide that classic tangy, savory flavor. Bread-and-butter pickles can be used if you prefer a sweeter version, and pickle spears work great if cut into manageable pieces.
Are fried pickles gluten-free?
Not as written, but you can easily make them gluten-free by using gluten-free all-purpose flour (1:1 substitute), gluten-free breadcrumbs, and making sure your cornmeal is certified gluten-free. The taste and texture will be nearly identical to the traditional version.
Conclusion
There you have it—the ultimate guide to making crispy, golden, restaurant-quality fried pickles right in your own kitchen! These tangy, crunchy bites are sure to become your new favorite appetizer for parties, game days, or whenever that craving for something salty and satisfying hits. The combination of that perfectly seasoned cornmeal breading with the juicy, tangy pickle inside is absolutely irresistible.
The beauty of this recipe is how simple it truly is. With just 20 minutes and a handful of pantry staples, you can create something that tastes like it came straight from your favorite Southern restaurant. Whether you serve them with classic ranch, spicy comeback sauce, or experiment with your own dipping creations, these fried pickles never disappoint.
I’d love to hear how your fried pickles turn out! Drop a comment below with your favorite dipping sauce combination or any fun variations you tried. And if you loved this recipe, please share it on Pinterest so other home cooks can discover how easy and delicious homemade fried pickles can be. Pin it to your appetizer board, game day spread board, or Southern recipes collection—your followers will thank you!
Now grab that jar of pickles from your fridge and get frying. Your taste buds are about to experience pure crispy, tangy, golden perfection. Happy cooking, y’all!