Cheeseburger Sliders Recipe – Easy Baked Sliders for Parties in 30 Minutes

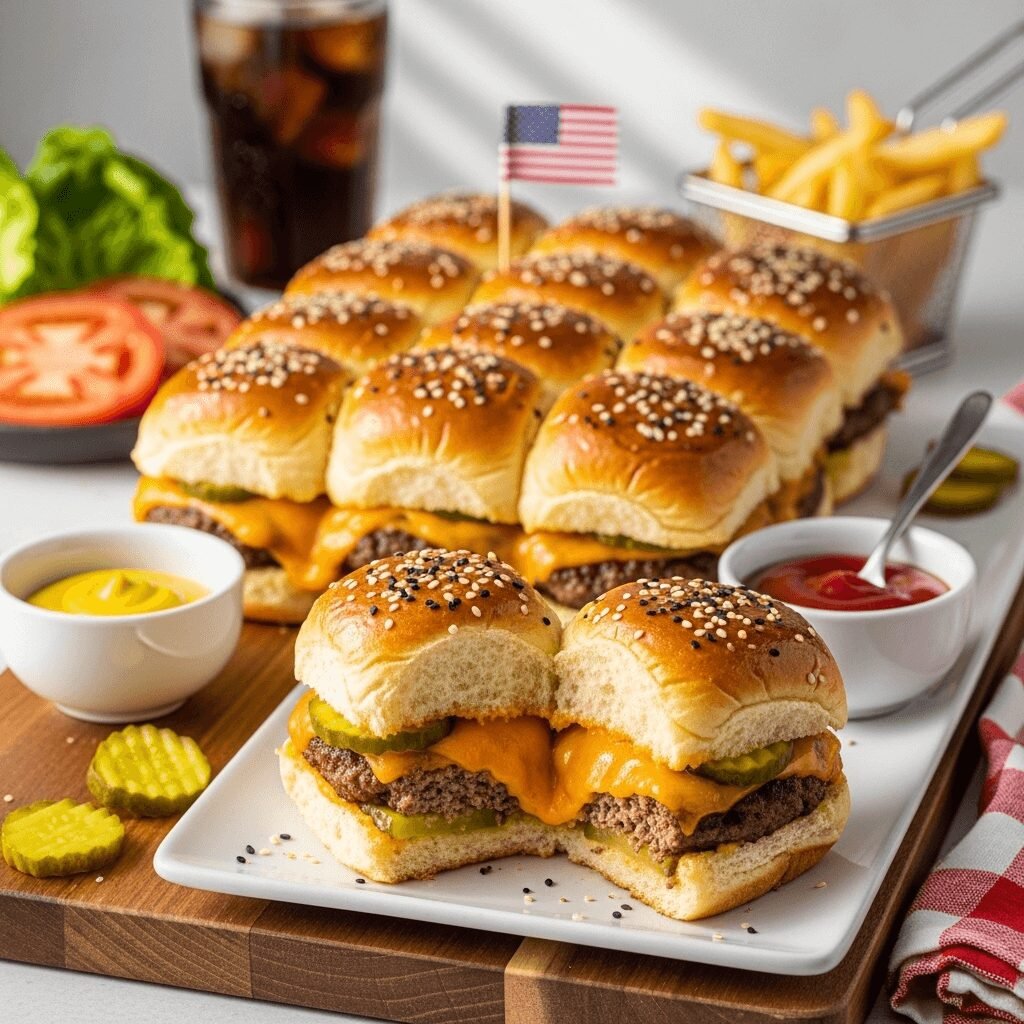
Cheeseburger sliders are the ultimate crowd-pleasing comfort food that transforms the classic American cheeseburger into perfectly portioned, irresistibly delicious mini sandwiches. These easy baked sliders feature seasoned ground beef patties, melted cheese, and all your favorite burger toppings nestled between soft, buttery slider buns that are baked together in one pan until golden and slightly crispy on top. The result? Juicy, cheesy, flavor-packed little burgers that disappear within minutes of hitting the table.
What makes these cheeseburger sliders so incredibly popular is their perfect combination of convenience and crowd appeal. Unlike traditional burgers that require individual cooking and assembly, these sliders are made all at once in a baking dish, making them ideal for feeding a crowd without standing over a hot grill for hours. They’re the perfect size for kids and adults alike—substantial enough to satisfy hunger but small enough that everyone can (and will!) go back for seconds and thirds.
These easy slider recipes are perfect for virtually any occasion: game day parties, birthday celebrations, potlucks, family dinners, Super Bowl gatherings, graduation parties, or casual weeknight meals when you want something special. They take just 10 minutes to prep and 20 minutes to bake, meaning you can have hot, delicious mini cheeseburgers on the table in 30 minutes flat. Whether you’re feeding a dozen people or meal prepping for the week, these baked cheeseburger sliders are guaranteed to become your go-to recipe. The whole family will love them, they’re budget-friendly, and they’re so easy that even beginner cooks can master them on the first try!
History / Background
The cheeseburger itself is an iconic American creation, with several different cities and restaurants claiming to have invented it in the 1920s and 1930s. The most widely accepted origin story credits Lionel Sternberger, a teenage fry cook in Pasadena, California, who in 1924 experimented by placing a slice of American cheese on a hamburger patty. The combination was an instant hit, and the cheeseburger quickly became a staple of American cuisine, spreading from small diners to eventually becoming one of the most popular foods in the country.
The slider concept has different origin stories depending on who you ask. The term “slider” is most commonly associated with White Castle, the fast-food chain founded in 1921 in Wichita, Kansas. White Castle’s small, square hamburgers were steamed on a bed of onions and served on small buns, earning the nickname “sliders” reportedly because they were so small and greasy they would “slide” right down. These miniature burgers became hugely popular during the Great Depression because they were affordable, filling, and could be eaten quickly by workers on lunch breaks.
However, the modern baked slider recipe—where a dozen or more mini burgers are assembled together in a baking dish and baked as one unit—is a more recent innovation that gained popularity in the 2000s with the rise of food blogs, Pinterest, and home entertaining trends. This sheet pan approach was revolutionary because it eliminated the tedious process of forming and cooking individual burger patties, making it possible to serve a crowd with minimal effort.
The baked slider method became especially popular for tailgating and game day parties, where hosts needed to feed large groups efficiently. Food bloggers began experimenting with different flavor combinations—Hawaiian roll sliders with special sauces, variations with different cheeses, and creative toppings—but the classic cheeseburger slider remained the most beloved version. Today, these easy party sliders represent the perfect fusion of classic American comfort food and modern convenience cooking, honoring the traditional cheeseburger while adapting it for contemporary entertaining needs.
Why You’ll Love This Recipe
These baked cheeseburger sliders are about to revolutionize the way you think about feeding a crowd, and once you try them, they’ll become your most-requested recipe for every gathering. They deliver all the satisfaction of a classic cheeseburger with a fraction of the effort, making you look like a hosting hero without breaking a sweat.
Here’s what makes these cheeseburger sliders absolutely irresistible:
- Incredibly quick and easy – Just 30 minutes from start to finish, with only 10 minutes of hands-on prep time
- Perfect for feeding crowds – One batch makes 12 sliders, and the recipe doubles or triples easily for larger parties
- No grill required – Everything happens in your oven, making these ideal for any season and any weather
- Kid-approved favorite – Children love the mini size, and picky eaters enjoy customizing their own toppings
- Budget-friendly meal – Ground beef and slider buns are affordable, and you can feed a crowd for under $20
- Make-ahead friendly – Assemble hours ahead and bake when ready, or freeze unbaked for future quick meals
- Minimal cleanup – Everything cooks in one baking dish, meaning fewer pots and pans to wash
- Customizable to taste – Easy to adjust seasonings, cheese varieties, and toppings to suit any preference
- Always a crowd-pleaser – I’ve never served these without getting multiple recipe requests
- Great for meal prep – Make a batch for easy lunches or quick dinners throughout the week
- Foolproof results – These turn out perfect every time, even for novice cooks
- Restaurant-quality at home – Taste like they came from your favorite burger joint but cost a fraction of the price
Whether you’re hosting your first party or you’re a seasoned entertainer, these easy baked sliders give you confidence. They’re virtually impossible to mess up, and the results are always delicious!
Ingredient Notes
Let’s explore the simple ingredients that create these delicious sliders and discuss the best options and possible substitutions:
Ground Beef – The foundation of any great cheeseburger slider! I recommend using 80/20 ground beef (80% lean, 20% fat) for the juiciest, most flavorful burgers. The fat content keeps the meat moist during baking and adds incredible flavor. You can use 85/15 if you prefer slightly leaner meat, but avoid anything leaner than that or your sliders will be dry. Ground chuck is ideal. For the best texture, don’t buy pre-formed patties—you want loose ground beef that you can season and shape yourself. You can substitute ground turkey or chicken for a lighter option, though you’ll lose some of that classic burger flavor.
Slider Buns – Hawaiian sweet rolls are the most popular choice for sliders because their slight sweetness perfectly complements the savory beef and cheese. King’s Hawaiian brand is the gold standard, and they come in connected packs of 12, which is perfect for this recipe. The soft, pillowy texture and subtle sweetness make them irresistible. If you can’t find Hawaiian rolls, regular dinner rolls, potato rolls, or even small hamburger buns work fine—just adjust quantities as needed.
Cheese – American cheese is traditional and melts beautifully, creating that classic cheeseburger experience. Use sliced deli American cheese rather than pre-wrapped singles for better quality and flavor. However, you can absolutely use cheddar (sharp or mild), pepper jack for heat, Swiss for a different flavor profile, or even provolone. The key is using cheese that melts well. Avoid pre-shredded cheese for sliders as slices create better coverage.
Worcestershire Sauce – Adds deep, savory umami flavor to the ground beef. This ingredient is key to making the meat taste restaurant-quality. It contains anchovies, vinegar, molasses, and spices that enhance the beef’s natural flavors. If you don’t have it, you can substitute with soy sauce, though the flavor will be slightly different.
Seasonings – Salt, black pepper, garlic powder, and onion powder create a well-seasoned burger patty that tastes amazing. Don’t skip the seasonings—plain ground beef needs help! You can also add paprika, dried mustard powder, or your favorite burger seasoning blend.
Butter – Used to brush on top of the buns before baking, creating a golden, slightly crispy top that’s absolutely delicious. The butter also adds richness and helps the optional seasonings stick. Use real butter, not margarine, for the best flavor.
Optional Toppings – Classic burger toppings like pickles, lettuce, tomatoes, onions, ketchup, mustard, and mayo allow everyone to customize their sliders. You can also offer bacon, sautéed mushrooms, jalapeños, or special sauces.
Sesame Seeds and Everything Bagel Seasoning – Optional but highly recommended for sprinkling on the buttered tops before baking. They add visual appeal and extra flavor.
Equipment Needed
This recipe requires minimal equipment, making it accessible for any home kitchen:
- 9×13-inch baking dish – The standard size works perfectly for 12 slider buns; use a metal or ceramic dish
- Large mixing bowl – For combining and seasoning the ground beef
- Large skillet or frying pan – For browning the ground beef before assembling sliders
- Wooden spoon or spatula – For breaking up and stirring the ground beef
- Sharp serrated knife – For cutting the connected slider buns in half horizontally
- Small bowl – For melting butter and mixing with seasonings
- Pastry brush – For brushing melted butter on top of the buns
- Aluminum foil – For covering the baking dish during initial baking
- Measuring spoons – For accurate seasoning measurements
- Meat thermometer (optional) – To ensure beef reaches safe internal temperature

Cheeseburger Sliders Recipe
Juicy, cheesy baked cheeseburger sliders made with seasoned ground beef, melted cheese, and soft Hawaiian rolls. These easy party sliders are perfect for feeding a crowd and ready in just 30 minutes!
- Total Time: 30 minutes
- Yield: 12 sliders 1x
Ingredients
For the Sliders:
- 1½ pounds ground beef (80/20 blend recommended)
- 1 tablespoon Worcestershire sauce
- 1 teaspoon garlic powder
- 1 teaspoon onion powder
- 1 teaspoon salt
- ½ teaspoon black pepper
- 12 Hawaiian sweet rolls or slider buns (1 package, connected)
- 12 slices American cheese (or cheddar, your choice)
- Pickles, for topping (optional but recommended)
For the Butter Topping:
- 3 tablespoons butter, melted
- 1 teaspoon garlic powder
- 1 tablespoon sesame seeds (optional)
- 1 teaspoon everything bagel seasoning (optional)
For Serving:
- Ketchup, mustard, mayo
- Shredded lettuce
- Sliced tomatoes
- Sliced onions
Instructions
Step 1: Preheat and Prepare
Preheat your oven to 350°F (175°C). Lightly spray a 9×13-inch baking dish with cooking spray or grease it lightly with butter to prevent sticking.
Step 2: Cook the Ground Beef
Heat a large skillet over medium-high heat. Add the ground beef and break it up with a wooden spoon or spatula. Cook for 6-8 minutes, stirring occasionally and breaking the meat into small crumbles, until the beef is browned and cooked through with no pink remaining. Drain excess grease from the pan (leave about 1 tablespoon for flavor).
Step 3: Season the Beef
Return the drained beef to the skillet (off heat). Add Worcestershire sauce, garlic powder, onion powder, salt, and black pepper. Stir well to combine, ensuring all the meat is evenly seasoned. Taste and adjust seasonings if needed—this is your chance to make it perfect!
Step 4: Prepare the Buns
Without separating the individual rolls, use a sharp serrated knife to slice the entire block of connected slider buns in half horizontally, creating a complete “sheet” of bottom buns and a complete “sheet” of top buns. This keeps everything connected for easy assembly. Place the bottom half of the buns in your prepared baking dish.
Step 5: Assemble the Sliders
Spread the seasoned ground beef evenly over the bottom buns in the baking dish, creating an even layer that covers all 12 bun bottoms. Top the beef with cheese slices, arranging them to cover the entire surface (you may need to overlap slightly or tear slices to fit). If using pickles, layer them on top of the cheese now.
Step 6: Add the Top Buns
Place the connected sheet of top buns over the cheese and pickles, creating a complete sandwich “slab.” Everything should fit together perfectly since the buns are still connected.
Step 7: Make the Butter Topping
In a small bowl, combine melted butter with garlic powder. Stir well. Using a pastry brush, generously brush the butter mixture over the tops of the buns, making sure to cover the entire surface. Sprinkle with sesame seeds and everything bagel seasoning if using.
Step 8: Cover and Bake
Cover the baking dish tightly with aluminum foil. Bake in the preheated oven for 15 minutes. This covered baking time allows the cheese to melt completely and the sliders to heat through.
Step 9: Uncover and Finish
Remove the foil and bake for an additional 5-8 minutes, uncovered, until the tops of the buns are golden brown and slightly crispy. The butter should be absorbed and the buns should look toasted.
Step 10: Cool and Serve
Remove from the oven and let cool for 2-3 minutes. Using the serration lines on the buns as your guide, cut between each slider to separate them. Serve immediately with your favorite burger toppings and condiments on the side, letting everyone customize their sliders.
Notes
- Don’t skip draining the beef – Excess grease makes soggy sliders. Drain well but leave about 1 tablespoon for moisture.
- Keep buns connected – Don’t separate individual buns until after baking. The connected format makes assembly easier and helps sliders hold together.
- Cheese placement matters – Put cheese directly on the hot beef so it melts properly. Cold cheese on cold buns won’t melt well.
- Customize toppings – Add bacon, sautéed onions, or mushrooms to the beef layer before adding cheese.
- Make them ahead – Assemble completely, cover tightly, and refrigerate up to 4 hours before baking. Add 5 minutes to baking time if starting cold.
- Freeze for later – Assemble unbaked sliders, wrap tightly, and freeze up to 3 months. Bake from frozen at 350°F for 35-40 minutes (covered for 25, uncovered for 10-15).
- Prep Time: 10 minutes
- Cook Time: 20 minutes
- Category: Main Dish
- Method: Baking
- Cuisine: American
- Diet: Gluten Free
Nutrition
- Serving Size: 2 sliders
- Calories: 485
- Sugar: 8g
- Sodium: 875mg
- Fat: 24g
- Saturated Fat: 11g
- Unsaturated Fat: 11g
- Trans Fat: 0g
- Carbohydrates: 38g
- Fiber: 2g
- Protein: 28g
- Cholesterol: 85mg
Tips & Variations
Bacon Cheeseburger Sliders:
Cook 8-10 strips of bacon until crispy, chop into pieces, and mix with the seasoned ground beef before assembling. Or layer whole bacon strips over the cheese for extra indulgence. Bacon adds smoky, salty flavor that everyone loves.
BBQ Bacon Sliders:
Mix 2-3 tablespoons of BBQ sauce into the cooked ground beef along with crispy bacon pieces. Use cheddar cheese instead of American and add sliced red onion. Brush tops with BBQ sauce mixed with melted butter for extra flavor.
Mushroom Swiss Sliders:
Sauté sliced mushrooms and onions until caramelized, mix with the beef, and use Swiss cheese instead of American. These taste like restaurant-quality mushroom Swiss burgers!
Spicy Jalapeño Sliders:
Add diced jalapeños to the ground beef, use pepper jack cheese, and mix hot sauce into the melted butter topping. Perfect for heat lovers!
Big Mac Inspired Sliders:
Make a special sauce (mayo, ketchup, relish, onion powder, garlic powder, paprika), add shredded lettuce, pickles, and diced onions. Use sesame seed buns if possible. These taste remarkably like the famous burger!
California Style Sliders:
Top finished sliders with fresh avocado slices or guacamole, crispy bacon, lettuce, tomato, and chipotle mayo for a West Coast twist.
Lighter Version:
Use 93/7 ground turkey or chicken instead of beef, reduced-fat cheese, and skip the butter topping (or use cooking spray). They won’t be quite as indulgent but are still delicious.
Breakfast Sliders:
Use cooked breakfast sausage instead of ground beef, add scrambled eggs and cheese, and serve for brunch or breakfast-for-dinner.
Loaded Sliders:
Go all out with sautéed onions, mushrooms, bacon, extra cheese, and all the toppings piled high. These are messy but absolutely worth it!
Pro Chef Tips
Season Generously:
Ground beef needs more seasoning than you think because it’s quite bland on its own. Don’t be shy with the salt, pepper, and aromatics. The Worcestershire sauce is key—it adds that umami depth that makes restaurant burgers taste so good. Taste your seasoned beef (yes, taste a tiny cooked piece) and adjust before assembling.
Get Good Beef-to-Bun Ratio:
The secret to perfect sliders is ensuring the ground beef layer is even and reaches all the way to the edges. Press it gently into the corners of the bun layer so every bite has meat, not just bread on the edges. Nobody wants a slider that’s all bun in the middle!
Choose the Right Ground Beef:
Fat equals flavor and moisture. 80/20 ground beef is ideal for juicy sliders. If you use leaner beef (90/10 or higher), consider adding a tablespoon of olive oil or beef broth to the cooked meat to add back moisture, or your sliders will be dry.
Perfect the Butter Brush:
The buttered top is what makes these sliders special. Use a generous amount and make sure every square inch of the top buns gets brushed. This creates that golden, slightly crispy top that contrasts beautifully with the soft interior. Adding garlic powder to the butter takes them to the next level.
Master the Cut:
Use a very sharp serrated knife to cut the connected buns in half horizontally. Hold your non-knife hand flat on top of the buns to keep them stable and make one smooth, confident cut. Don’t saw back and forth too much or you’ll tear the soft bread.
Don’t Overbake:
Watch the timing carefully, especially in the uncovered phase. You want golden tops, not burnt ones. Every oven is different, so start checking at 5 minutes uncovered. If the tops are browning too quickly, tent loosely with foil.
Let Them Rest:
After removing from the oven, let the sliders sit for 2-3 minutes before cutting and serving. This allows the cheese to set slightly and makes them easier to cut cleanly. Cutting immediately can cause everything to slide apart.
The Assembly Line Approach:
When serving at a party, set up a topping bar with lettuce, tomatoes, onions, pickles, ketchup, mustard, and mayo so guests can customize their sliders. This keeps everyone happy and prevents you from having to make multiple batches with different toppings.
Common Mistakes to Avoid
Not Draining the Ground Beef:
This is the number one mistake! Ground beef releases a lot of grease during cooking, especially if using 80/20. If you don’t drain it before assembling sliders, that grease soaks into the bottom buns, creating an unpleasant, soggy mess. Always drain thoroughly, leaving just a tablespoon or so for moisture and flavor.
Separating the Buns Before Slicing:
Never pull apart the individual rolls before slicing horizontally! Keep them connected as one unit, slice through the entire block at once, and keep them connected during assembly. This makes everything easier and ensures your sliders bake evenly. You only separate them after baking.
Using Cheese That Doesn’t Melt Well:
Some cheeses just don’t melt nicely. Fresh mozzarella releases too much water, hard cheeses like aged Parmesan don’t melt smoothly, and some pre-shredded cheeses have anti-caking agents that prevent proper melting. Stick with American, cheddar, Swiss, pepper jack, or other good melting cheeses in slice form.
Skipping the Foil Cover:
The initial covered baking phase is crucial. It creates steam that melts the cheese perfectly and heats everything through. If you skip the foil, the tops brown too quickly while the insides remain cold and the cheese doesn’t melt properly. Always cover first, then uncover to brown.
Overcrowding the Pan:
The sliders should fit snugly in your 9×13-inch pan, but if you try to cram too many in or use buns that are too large, they’ll steam instead of bake and won’t develop that nice golden top. Use the right size pan for your bun quantity.
Not Seasoning the Beef Enough:
Plain ground beef is surprisingly bland. You need salt, pepper, garlic, onion powder, and Worcestershire at minimum. Taste the beef after seasoning (cook a tiny piece in the microwave if you’re nervous about tasting raw meat) and adjust. Under-seasoned beef makes mediocre sliders no matter how good everything else is.
Storage & Meal Prep
Refrigerator Storage:
Store leftover cheeseburger sliders in an airtight container in the refrigerator for up to 3-4 days. Keep them assembled if possible, or store components separately if you prefer. The buns will soften in the fridge but are still tasty.
Reheating Baked Sliders:
The best way to reheat is in a 300°F oven for 10-12 minutes, covered with foil to prevent drying out. You can also microwave for 30-60 seconds, though the buns won’t be as crispy. Air fryer at 320°F for 5-7 minutes works wonderfully for restoring texture.
Room Temperature Serving:
If serving at a party buffet, baked sliders can sit at room temperature for up to 2 hours. After that, refrigerate them for food safety. They’re delicious at room temperature, making them practical for casual entertaining.
Meal Prep Strategy:
Make a double batch on Sunday and portion into individual containers with toppings on the side for easy weekday lunches. Kids especially love finding these in their lunchboxes (they’re good at room temperature by lunchtime).
Pre-Cook the Beef:
You can cook and season the ground beef up to 2 days ahead. Store in an airtight container in the refrigerator, then assemble and bake when ready. This makes day-of prep even faster.
Make-Ahead & Freezer Notes
Assemble and Refrigerate:
The best make-ahead method for parties! Assemble the sliders completely (through step 7, with butter brushed on top), cover tightly with plastic wrap, and refrigerate for up to 4 hours before baking. When ready to serve, remove from fridge, let sit at room temperature for 10 minutes, then bake as directed, adding 5 extra minutes to account for starting cold.
Freeze Unbaked Sliders (Best Method):
Assemble completely, wrap the entire baking dish tightly with plastic wrap and then aluminum foil (double wrap), and freeze for up to 3 months. Label with baking instructions. To bake from frozen, remove plastic wrap, cover with foil, and bake at 350°F for 25 minutes covered, then 10-15 minutes uncovered until golden and heated through (internal temp 165°F). No thawing needed!
Freeze Individual Portions:
Assemble sliders in smaller portions (4-6 sliders) in disposable aluminum pans, wrap well, and freeze. This way you can bake only what you need for smaller meals.
Freeze Cooked Sliders:
You can freeze already-baked sliders, though they won’t be quite as perfect when reheated. Let them cool completely, wrap individually or in portions, and freeze for up to 2 months. Thaw in refrigerator overnight and reheat in a 300°F oven for 12-15 minutes.
Party Day Timeline:
For stress-free entertaining, cook and season the beef the night before. Morning of party, assemble sliders, cover, and refrigerate. Thirty minutes before guests arrive, preheat oven and bake. Your house will smell amazing and sliders will be hot and fresh!
Serving Suggestions
These versatile cheeseburger sliders pair beautifully with classic sides and work for any casual gathering:
Classic Sides:
Serve alongside traditional burger accompaniments like french fries (regular, sweet potato, or waffle), onion rings, tater tots, potato chips, coleslaw, or potato salad. These classic pairings feel familiar and satisfying.
Fresh and Light Options:
Balance the richness of sliders with lighter sides like green salad with vinaigrette, cucumber tomato salad, watermelon slices, fresh fruit platter, vegetable crudités with ranch dip, or corn on the cob.
Game Day Spread:
Create an epic game day table with sliders as the main attraction, plus buffalo wings, nachos, loaded potato skins, mozzarella sticks, jalapeño poppers, and plenty of cold drinks.
Picnic and Potluck Perfect:
These travel well! Pack in a covered dish for picnics, tailgates, or potlucks. Bring toppings in separate containers so guests can customize. They’re great at room temperature for up to 2 hours.
Make It a Slider Bar:
Set up a DIY topping station with multiple cheese options, various condiments (ketchup, mustard, mayo, special sauce, BBQ sauce), pickles, lettuce, tomatoes, onions, jalapeños, bacon, and sautéed mushrooms. Let guests build their perfect slider!
Beverage Pairings:
These pair perfectly with classic American drinks: cold beer, soda (Coke, root beer, or Dr. Pepper), milkshakes, lemonade, iced tea, or for adults, craft beer or a simple red wine like Merlot.
For Kids’ Parties:
Serve with kid-friendly sides like mac and cheese, fruit kabobs, veggie sticks with ranch, and juice boxes. The mini size is perfect for small hands!
FAQs Section
Can I use regular hamburger buns instead of Hawaiian rolls?
Yes! Regular slider buns, dinner rolls, or even cut-down regular hamburger buns work fine. The recipe is the same—just adjust quantities to match your bun count. Hawaiian rolls are preferred for their slight sweetness and soft texture, but any soft roll works.
Do I have to brown the beef first?
Yes, for best results. Pre-cooking ensures the beef is fully cooked and properly seasoned. Raw ground beef in the oven won’t cook evenly in the short baking time, and you’ll have grease pooling in your pan. Always brown and drain first.
Can I make these without an oven?
You’d need to adjust the method. You could assemble sliders and grill them in a grill basket, or cook beef, assemble individual sliders, and griddle them. But the one-pan oven method is what makes this recipe so easy and perfect for crowds.
What’s the best cheese for cheeseburger sliders?
American cheese is classic because it melts perfectly and has that nostalgic burger flavor. Sharp cheddar is a close second. Swiss, provolone, pepper jack, and even blue cheese all work depending on your preference. Use sliced cheese rather than shredded for best coverage.
How do I keep the bottom buns from getting soggy?
Drain the ground beef thoroughly—this is key! The excess grease is the culprit. Also, don’t add wet toppings like tomatoes before baking. Add juicy toppings after baking so they don’t make the bread soggy.
Can I use ground turkey or chicken instead of beef?
Absolutely! Ground turkey or chicken works well, though the flavor will be milder. Since poultry is leaner, add a tablespoon of olive oil or chicken broth to the cooked meat to prevent dryness. Season generously—poultry needs more seasoning than beef.
How far in advance can I assemble these?
You can assemble sliders up to 4 hours ahead and refrigerate before baking, or assemble and freeze for up to 3 months. If refrigerated, add 5 minutes to baking time. If frozen, bake directly from frozen (no thawing) for about 35-40 minutes covered, then 10-15 uncovered.
Why are my sliders dry?
Several reasons: using beef that’s too lean (use 80/20), overcooking the beef before assembling, baking too long, or not draining enough fat back into the meat (leave about 1 tablespoon for moisture). Also, skipping the butter on top can make them dry.
Conclusion
There you have it—everything you need to make irresistible, crowd-pleasing cheeseburger sliders that will have everyone asking for your recipe! These easy baked sliders prove that feeding a crowd doesn’t have to be complicated, time-consuming, or stressful. With just 30 minutes and simple ingredients, you can create restaurant-quality mini burgers that taste absolutely incredible.
Whether you’re hosting a Super Bowl party, planning a birthday celebration, bringing a dish to a potluck, or simply want an easy weeknight dinner the whole family will love, these baked cheeseburger sliders deliver every single time. The combination of juicy, seasoned beef, melted cheese, and buttery, golden buns is simply irresistible, and the best part is how foolproof and customizable this recipe is. Make them your own with different cheeses, add-ins, and toppings!
I’d love to hear how your cheeseburger sliders turned out! Drop a comment below and let me know what variations you tried, what occasion you served them for, and how many people asked for the recipe (because trust me, they will!). If you loved these easy party sliders, please share this recipe on Pinterest so other home cooks can discover how simple it is to feed a crowd with minimal effort. Pin it to your party food board, game day recipes, or family dinner ideas collection!
Now grab that ground beef and a package of Hawaiian rolls, and get ready to become the MVP of your next gathering. These sliders are calling your name! Happy cooking!