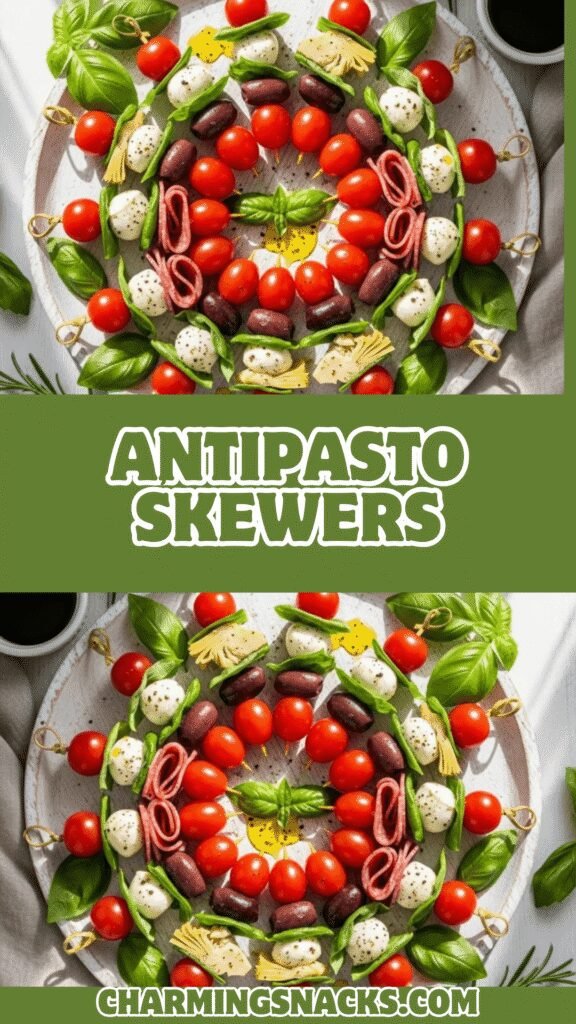
Easy Antipasto Skewers – The Perfect Party Appetizer Ready in 15 Minutes
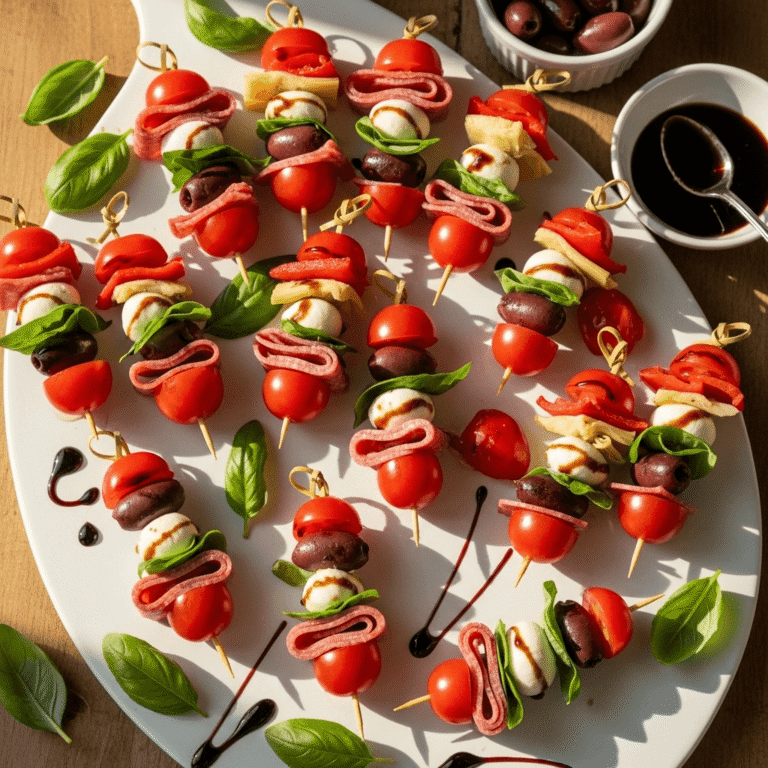
Let me tell you about one of my absolute favorite party appetizers that never fails to impress: Antipasto Skewers! These colorful, flavor-packed Italian appetizer skewers are essentially a traditional antipasto platter transformed into convenient, grab-and-go bites. Each skewer is threaded with marinated vegetables, Italian meats, cheeses, and olives – basically everything you love about an antipasto board, but so much prettier and easier to serve.
What makes these antipasto skewers truly special is their versatility. They’re perfect for holiday gatherings, game day parties, summer BBQs, baby showers, or even as a light lunch option. The best part? There’s absolutely no cooking required! These no-cook appetizer skewers come together in about 15 minutes, making them ideal for busy hosts who want to serve something impressive without spending hours in the kitchen.
Whether you’re planning an Italian-themed dinner party, need something easy for your next potluck, or simply want a fun way to enjoy charcuterie, these Mediterranean appetizer skewers are about to become your go-to recipe. They’re visually stunning (hello, Pinterest!), incredibly delicious, and so simple that even beginner cooks can master them on the first try.
History / Background
The antipasto tradition has deep roots in Italian culinary culture, dating back centuries. The word “antipasto” literally translates to “before the meal” in Italian – “anti” meaning “before” and “pasto” meaning “meal.” In traditional Italian dining, the antipasto course is served before the primo (first course, usually pasta) and is designed to stimulate the appetite with bold, savory flavors.
Historically, antipasto platters emerged from Italian families’ need to preserve seasonal vegetables, meats, and cheeses. Before refrigeration became common, Italians developed incredible preservation techniques – pickling vegetables, curing meats, aging cheeses, and marinating olives. These preserved foods would be proudly displayed on large platters during celebrations and family gatherings, showcasing the household’s culinary skills and hospitality.
The concept of serving these delicacies on individual skewers is a more modern American adaptation that gained popularity in the 1980s and 1990s as entertaining became more casual and interactive. Food stylists and caterers discovered that threading antipasto ingredients onto skewers or toothpicks created an elegant presentation while solving the practical problem of serving appetizers at standing cocktail parties.
Today, antipasto skewers have become a beloved staple at American gatherings, particularly popular in regions with strong Italian-American communities. They represent the beautiful marriage of Italian tradition and American convenience culture – honoring the flavors of the Old World while embracing the grab-and-go mentality of modern entertaining. The skewer format also democratized the antipasto experience, making it more accessible and less intimidating than arranging a traditional charcuterie board.
Why You’ll Love This Recipe
These Italian skewers are absolutely game-changing for anyone who loves to entertain but doesn’t want to spend all day in the kitchen. I’ve served these at countless gatherings, and they disappear within minutes every single time! The combination of salty, tangy, and savory flavors is simply irresistible, and the presentation always gets rave reviews.
Here’s why these antipasto kabobs will become your new favorite appetizer:
- Zero cooking required – Just assemble and serve! Perfect for hot summer days when you don’t want to turn on the oven
- Ready in 15 minutes – One of the fastest appetizers you can make, ideal for last-minute entertaining
- Customizable for everyone – Easily adapt for different dietary needs and taste preferences
- Make-ahead friendly – Prepare up to 24 hours in advance, making party day stress-free
- Budget-friendly – Use whatever’s on sale or already in your fridge; no expensive ingredients required
- Crowd-pleaser guarantee – I’ve never met anyone who doesn’t love these, from kids to picky eaters to food snobs
- Visually stunning – The colorful ingredients create Instagram and Pinterest-worthy photos
- Portion-controlled – Each person gets their own skewer, making serving and cleanup incredibly easy
- No double-dipping – Perfect for the post-pandemic world where individual portions feel more hygienic
- Transportable – These travel beautifully to potlucks, picnics, or tailgating events
Ingredient Notes
The beauty of these easy antipasto skewers lies in their flexibility. You can truly customize them based on what’s available at your local grocery store or deli counter. Here are the traditional ingredients and what makes them special:
Salami or Pepperoni: Italian dry-cured meats provide that essential savory, slightly spicy flavor. I prefer using Genoa salami for its authentic taste and perfect fat-to-meat ratio. You can fold each slice in half or quarters to create little “pockets” on the skewer. Substitution: Turkey pepperoni for a leaner option, or prosciutto for something more delicate.
Fresh Mozzarella: Look for the ciliegine (cherry-sized) or bocconcini (slightly larger) balls that come packed in water or brine. These provide a creamy, mild contrast to the bold flavors. Substitution: Cubed provolone, gouda, or even sharp cheddar work beautifully.
Cherry or Grape Tomatoes: These add freshness, color, and a juicy pop. Choose firm, ripe tomatoes for the best flavor. Substitution: Sun-dried tomatoes (drained if packed in oil) offer a more intense, concentrated flavor.
Marinated Artichoke Hearts: These bring a tangy, slightly acidic element that balances the richness of cheese and meat. Buy them pre-marinated in jars or cans. Substitution: Marinated mushrooms or roasted red peppers.
Kalamata or Black Olives: Olives provide that briny, salty punch that’s essential to antipasto. Kalamata olives have a more complex, wine-like flavor, while black olives are milder. Substitution: Green olives, Castelvetrano olives, or even pickled pepperoncini.
Fresh Basil Leaves: These aromatic leaves add a fresh, herbaceous note and beautiful green color. Substitution: Fresh spinach leaves or arugula for a peppery kick.
Tortellini (Optional): Some recipes include cooked, cooled cheese tortellini for extra heartiness. This turns the skewers into more of a meal. Substitution: Any small pasta like radiatore, rotini, or penne.
Italian Dressing or Marinade: A quick toss in Italian dressing before serving adds extra moisture and flavor. Substitution: Balsamic glaze, pesto, or a simple olive oil and herb drizzle.
Equipment Needed
The wonderful thing about these party skewers is that they require minimal equipment – you probably already have everything you need!
- Wooden or bamboo skewers (6-8 inches long) or cocktail picks/toothpicks for bite-sized versions
- Cutting board for preparing ingredients
- Sharp knife for cutting larger ingredients to size
- Serving platter or tray for presentation
- Small bowls for organizing prepped ingredients during assembly
- Paper towels for draining marinated items
- Measuring cups and spoons (optional, for more precise portions)
- Mixing bowl (optional, if tossing ingredients in dressing first)
Pro tip: If you’re making these for a large party, consider buying a variety pack of colorful skewers or decorative picks to add extra visual appeal!
Print
Easy Antipasto Skewers
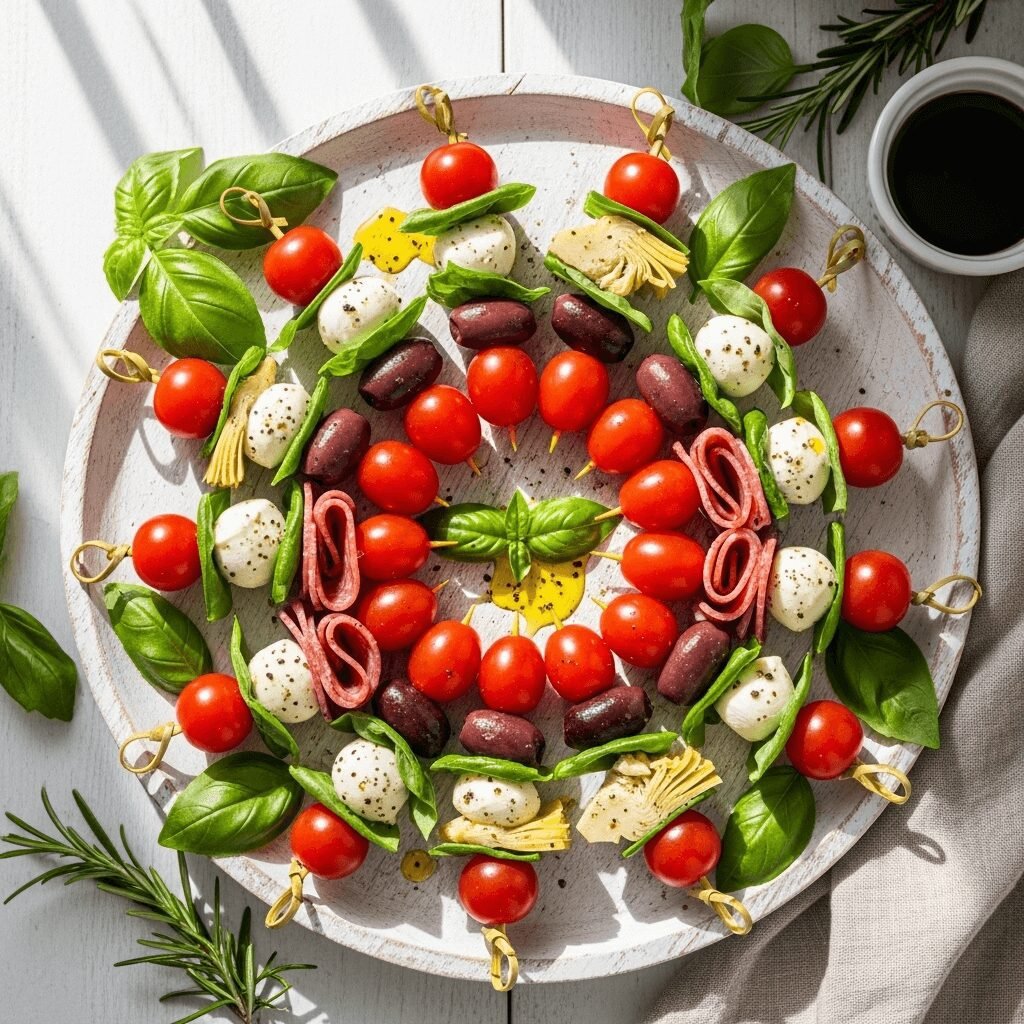
These colorful Antipasto Skewers are the ultimate easy party appetizer featuring Italian salami, fresh mozzarella, cherry tomatoes, marinated artichokes, olives, and fresh basil threaded onto skewers. Ready in just 15 minutes with no cooking required, these Mediterranean-inspired kabobs are perfect for holidays, game day, or any gathering!
- Total Time: 15 minutes
- Yield: 12 skewers (6 servings) 1x
Ingredients
- 12 wooden or bamboo skewers (6-8 inches)
- 24 slices Italian salami or pepperoni (about 6 ounces)
- 24 fresh mozzarella balls (ciliegine size, about 8 ounces)
- 24 cherry or grape tomatoes
- 1 jar (12 ounces) marinated artichoke hearts, drained and halved if large
- 24 Kalamata or black olives, pitted
- 24 fresh basil leaves
- 12 cooked cheese tortellini, cooled (optional)
- ½ cup Italian dressing or marinade
- Freshly cracked black pepper, to taste
- Optional: balsamic glaze for drizzling
Instructions
- Prepare your workspace: Lay out all your ingredients in small bowls or on a large cutting board. Drain the marinated artichoke hearts and olives, patting them dry with paper towels to prevent excess moisture on your skewers.
- Prep the salami: Fold each salami slice in half, then in half again to create a quartered piece that will thread easily onto the skewer. This creates a nice “ruffle” effect that looks professional and elegant.
- Start threading: Begin each skewer with a basil leaf (fold it gently so it doesn’t tear). This creates a nice base. Then add your first ingredient – I typically start with a mozzarella ball.
- Create your pattern: Thread ingredients in your preferred order. A classic combination is: basil, mozzarella, folded salami, tomato, artichoke heart, olive, and repeat. If using tortellini, add it in the middle of the skewer. Leave about 1 inch at the bottom for holding.
- Keep it balanced: Try to alternate colors and textures for visual appeal. Don’t pack ingredients too tightly – leave a little space between each item so they’re easy to bite.
- Complete all skewers: Repeat the threading process until all 12 skewers are assembled. Try to make them relatively uniform in size and ingredient distribution.
- Season and dress: Arrange completed skewers on a serving platter. Drizzle with Italian dressing or brush lightly with marinade. Sprinkle with freshly cracked black pepper.
- Chill or serve: You can serve immediately or cover with plastic wrap and refrigerate for up to 4 hours before serving. Let them sit at room temperature for 10 minutes before serving for best flavor.
- Final touches: Just before serving, you can drizzle with balsamic glaze for extra elegance and a sweet-tangy finish.
- Garnish and present: Arrange skewers on a large platter, garnish with extra fresh basil leaves or a small bowl of Italian dressing for dipping, and watch them disappear!
Notes
- Skewer length matters: Use 6-8 inch skewers for appetizer portions. Longer 10-12 inch skewers work better if serving as a light meal.
- Prevent browning: If making more than 2 hours ahead, brush mozzarella and tomatoes lightly with olive oil to prevent drying.
- Kid-friendly version: Use mild Italian meats and cheese cubes instead of soft mozzarella for easier eating.
- Vegetarian option: Simply omit the meat and double up on vegetables like roasted red peppers, mushrooms, and cucumbers.
- Tortellini tips: If using tortellini, cook according to package directions, rinse with cold water, and toss with a bit of olive oil to prevent sticking.
- Prep Time: 15 minutes
- Cook Time: 0 minutes
- Category: Appetizer
- Method: No-Cook Assembly
- Cuisine: Italian
- Diet: Gluten Free
Nutrition
- Serving Size: 2 skewers
- Calories: 285
- Sugar: 3g
- Sodium: 892mg
- Fat: 21g
- Saturated Fat: 8g
- Unsaturated Fat: 11g
- Trans Fat: 0g
- Carbohydrates: 9g
- Fiber: 2g
- Protein: 15g
- Cholesterol: 45mg
Tips & Variations
The versatility of these Italian appetizer skewers is truly endless! Here are some of my favorite ways to customize them:
Protein Variations:
- Use prosciutto instead of salami for a more delicate, sophisticated flavor
- Try soppressata for a spicier kick
- Add cooked, cooled shrimp for a seafood twist
- Use grilled chicken cubes for a lighter option
- Make them vegetarian by using marinated tofu cubes or extra cheese
Cheese Swaps:
- Substitute cubed provolone, fontina, or asiago for different flavor profiles
- Use feta cheese cubes for a Greek-inspired version
- Try smoked gouda for a unique, rich taste
- Mini cheese balls rolled in herbs add visual interest
Vegetable Add-Ins:
- Roasted red peppers add sweetness and smokiness
- Cucumber chunks provide refreshing crunch
- Pickled pepperoncini for heat lovers
- Marinated mushrooms offer an earthy element
- Grilled zucchini or eggplant for a summer BBQ version
Flavor Boosters:
- Toss ingredients in pesto before assembling for herbaceous flavor
- Use sun-dried tomato pesto as a marinade
- Add a small piece of pepperoni between each ingredient
- Drizzle with truffle oil for upscale entertaining
- Sprinkle with red pepper flakes for heat
Presentation Ideas:
- Arrange skewers standing upright in a tall glass for a dramatic display
- Lay them on a bed of fresh arugula or mixed greens
- Serve with small bowls of balsamic glaze, pesto, or marinara for dipping
- Use rainbow-colored skewers for kids’ parties
Pro Chef Tips
Having worked in Italian restaurants during my culinary journey, I’ve picked up some professional secrets that take these simple skewers from good to absolutely restaurant-quality:
Pat everything dry: This is the number one mistake home cooks make! Marinated items (artichokes, olives, sun-dried tomatoes) should be drained and patted completely dry with paper towels. Excess moisture will create a soggy mess and dilute flavors.
Quality ingredients matter: Since there’s no cooking to transform flavors, ingredient quality is paramount. Splurge on good imported salami, real Parmigiano-Reggiano, and high-quality olives. Your guests will taste the difference.
Temperature is key: Serve these at cool room temperature, not straight from the refrigerator. Cold mozzarella has muted flavor and an unpleasant rubbery texture. Remove from the fridge 20-30 minutes before serving.
Strategic layering: Place softer ingredients (basil, salami) between firmer ones (tomatoes, mozzarella) to prevent them from sliding down the skewer. The firm items act as “stoppers.”
Master the fold: When folding salami or prosciutto, create an accordion or ruffle by folding it back and forth before threading. This creates texture and makes the meat easier to bite through.
Don’t overdress: A light drizzle of dressing is all you need. Too much will make everything soggy and cause ingredients to slip off the skewers.
Uniform sizing: Cut all ingredients to similar sizes for even distribution and professional appearance. Cherry tomatoes should match the size of your mozzarella balls.
Assembly line method: Set up a production line with all ingredients in order. You’ll work much faster and create more uniform skewers than doing them one at a time.
The skewer soak: Soak wooden skewers in water for 10 minutes before using. This prevents them from splintering during assembly and makes them easier to handle.
Flavor marriage: If time allows, assemble skewers and refrigerate for 2-4 hours. The flavors will meld together beautifully as the ingredients marinate each other.
Common Mistakes to Avoid
Mistake #1: Overcrowding the skewer – Packing too many ingredients too tightly makes them difficult to eat and prevents proper flavor development. Leave small gaps between items and don’t fill the entire skewer length. Aim for 6-8 ingredients per 6-inch skewer.
Mistake #2: Using low-quality ingredients – Since this is a no-cook recipe, there’s nowhere to hide inferior products. Avoid pre-packaged, low-grade deli meats and cheese that contain fillers. The flavor difference between budget and quality ingredients is dramatic.
Mistake #3: Skipping the pat-dry step – Wet ingredients create a slippery, unappetizing mess. Always drain and thoroughly pat dry anything that comes from brine or marinade. This single step dramatically improves both presentation and taste.
Mistake #4: Making them too far in advance – While these are make-ahead friendly, assembling them more than 24 hours ahead causes tomatoes to release moisture and salami to dry out. The sweet spot is 4-8 hours before serving.
Mistake #5: Forgetting structural integrity – Putting all soft ingredients together (like salami, basil, and prosciutto) causes everything to slide off. Always sandwich soft items between firm ones like tomatoes, cheese balls, or olives.
Mistake #6: Using dull skewers – Cheap, dull-pointed skewers will smash tomatoes and tear mozzarella instead of piercing cleanly through. Invest in sharp-pointed bamboo or metal skewers for clean assembly.
Mistake #7: Neglecting presentation – Even though these are “simple,” presentation matters! Arrange them thoughtfully on your platter, add fresh herb garnish, and consider height variation for visual interest.
Storage & Meal Prep
Refrigerator Storage: These antipasto skewers keep beautifully when stored properly! Place assembled skewers in a single layer on a baking sheet or large platter. Cover tightly with plastic wrap, making sure the wrap touches the surface to prevent air exposure. They’ll stay fresh for up to 2 days in the refrigerator, though they’re best within 24 hours. The mozzarella may firm up and tomatoes might release some juice after 48 hours, but they’re still perfectly safe and delicious to eat.
Reheating: These are meant to be served cold or at room temperature – never reheat them! The cheese will melt, tomatoes will turn mushy, and the overall texture will be ruined. If they’ve been refrigerated, simply remove them 20-30 minutes before serving to take the chill off.
Meal Prep Strategy: The smartest approach is to prep all your ingredients separately and store them in individual airtight containers. Cut cheese, drain olives and artichokes, wash tomatoes, fold salami, and store everything ready to go. The morning of your party, assembly takes just 15 minutes. This method also allows you to make multiple batches quickly if you’re entertaining a large crowd.
Transport Tips: If bringing these to a potluck or party, transport them in a shallow, covered container lined with paper towels to absorb any moisture. You can also stick the pointed end of each skewer into a foam block or arrange them standing up in a cup to prevent ingredients from sliding during transport.
Leftover Solutions: If you have leftover assembled skewers, slide all the ingredients off into a bowl and toss with extra Italian dressing. This creates an instant antipasto salad that’s perfect over pasta, in a wrap, or served on crusty bread as a panini filling!
Make-Ahead & Freezer Notes
Make-Ahead Timeline:
2-3 days before: Shop for ingredients, ensuring everything is fresh with good expiration dates. Don’t buy ultra-fresh mozzarella that’s dated for the day of your party – you want a few days of shelf life remaining.
1 day before: Drain all marinated items (artichokes, olives) and store in airtight containers. Fold salami and store between layers of parchment paper. Wash and dry tomatoes. Measure out everything so it’s grab-and-go.
4-8 hours before: This is the ideal window for assembly. Complete all skewers, arrange on your serving platter, cover tightly, and refrigerate.
30 minutes before serving: Remove from refrigerator, drizzle with fresh Italian dressing, add any final garnishes, and let come to room temperature for optimal flavor.
Freezer-Friendly? Unfortunately, these are NOT freezer-friendly due to the fresh ingredients. Freezing would destroy the texture of mozzarella (it becomes grainy and crumbly), turn tomatoes to mush, and compromise the quality of fresh basil. The marinated vegetables might survive freezing, but the overall result would be disappointing.
What CAN You Freeze? If you’ve purchased too much meat or cheese, you can freeze those components separately:
- Sliced salami: Freeze with parchment paper between slices for up to 2 months
- Hard cheeses like provolone: Freeze cubed or sliced for up to 3 months (texture changes slightly but works fine for skewers)
- Fresh mozzarella: Not recommended, but if necessary, freeze and use only for cooked dishes after thawing
Best Reheating After Make-Ahead: Again, these should never be heated! Serve cold or at room temperature. If you’ve prepped them the night before, simply remove from the fridge 20-30 minutes prior to serving for the best taste and texture.
Serving Suggestions
These antipasto kebabs are incredibly versatile and pair beautifully with so many foods and occasions! Here are my favorite serving ideas:
Classic Italian Spread: Serve alongside bruschetta, a caprese salad, garlic bread, focaccia, and a big bowl of marinara for dipping. Add a large Caesar salad and you’ve got an incredible Italian feast without turning on the oven!
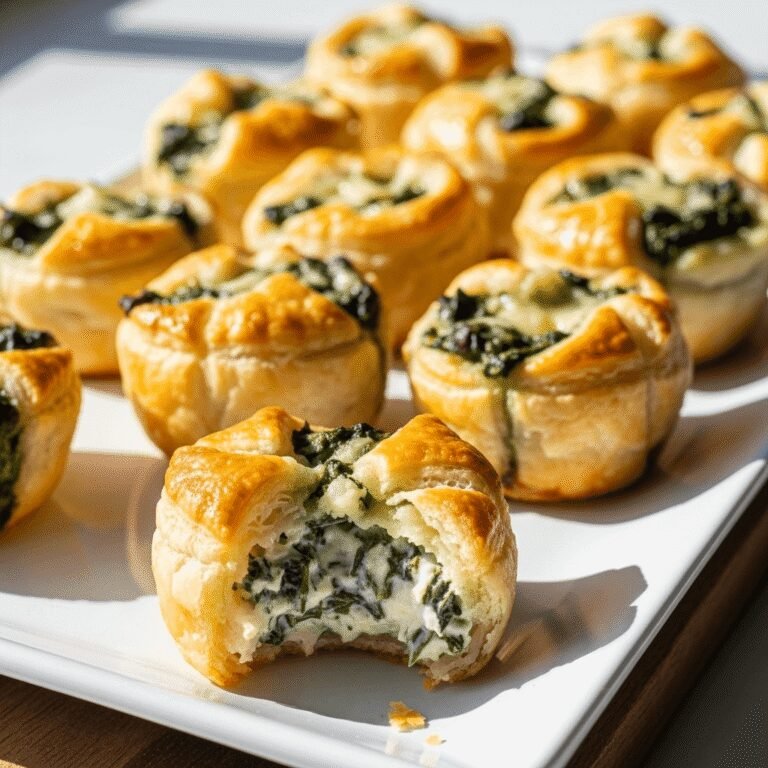
Game Day Table: Perfect alongside buffalo wings, mozzarella sticks, pizza, spinach artichoke dip, and a veggie tray. Offer multiple dipping sauces like ranch, marinara, and pesto for variety.
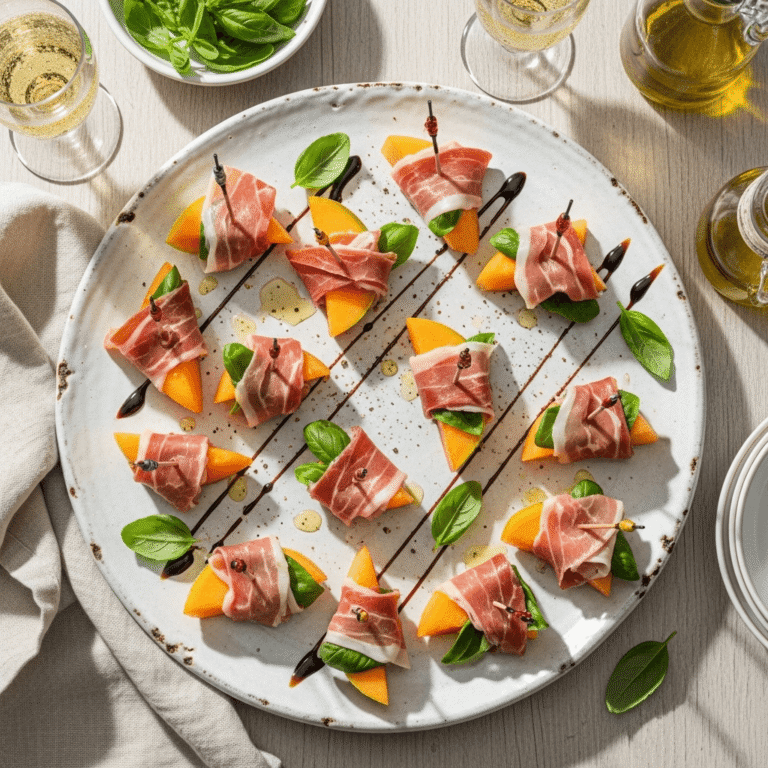
Elegant Cocktail Party: Pair with smoked salmon canapés, stuffed mushrooms, prosciutto-wrapped melon, and a selection of artisan crackers and cheese. Serve with prosecco, Italian wine, or Aperol spritzes.
Summer BBQ: These are fantastic at outdoor gatherings! Serve with grilled vegetables, pasta salad, coleslaw, and fresh watermelon. They’re refreshing and don’t require heating, which is perfect for hot weather entertaining.
Light Lunch or Dinner: Serve 3-4 skewers per person alongside a big Italian chopped salad, minestrone soup, and crusty bread for a light but satisfying meal. Add a simple pasta like aglio e olio to make it heartier.
Beverage Pairings:
- Red wine: Chianti, Sangiovese, or Pinot Noir
- White wine: Pinot Grigio, Vermentino, or Sauvignon Blanc
- Beer: Light Italian lager or crisp pilsner
- Non-alcoholic: Italian lemon soda, sparkling water with lemon, or iced tea
Dipping Sauce Bar: Set up a little sauce station with:
- Warm marinara sauce
- Balsamic reduction
- Basil pesto
- Sun-dried tomato pesto
- Creamy Italian dressing
- Garlic aioli
Presentation Platters: Arrange your skewers on a rustic wooden board with fresh rosemary sprigs tucked around the edges. Add small bunches of grapes, fresh figs, or strawberries to fill empty spaces. Include a small bowl of extra olives and a dish of good olive oil with cracked pepper for bread dipping.
FAQs Section
Q: Can I make these antipasto skewers the night before my party? A: Absolutely! These are actually perfect make-ahead appetizers. Assemble them up to 24 hours before your event, cover tightly with plastic wrap, and refrigerate. Just remember to let them sit at room temperature for 20-30 minutes before serving so the cheese softens and flavors fully develop. If you’re worried about tomatoes releasing moisture, wait to add them until a few hours before serving.
Q: What size skewers should I use for antipasto skewers? A: For appetizers, 6-8 inch wooden or bamboo skewers work perfectly. If you want to serve these as a light meal or lunch, go with 10-12 inch skewers so you can fit more ingredients. For cocktail parties where guests are standing, shorter 4-inch cocktail picks or toothpicks are ideal – just use fewer ingredients per stick.
Q: How do I keep the ingredients from sliding off the skewers? A: The key is strategic layering! Always place soft ingredients (like folded salami and basil) between firmer items (like cherry tomatoes, cheese balls, and olives). The firm ingredients act as “stoppers” that prevent everything from sliding down. Also, don’t leave too much space at the bottom of the skewer – start threading about 1-1.5 inches from the bottom for a secure hold.
Q: Can I make vegetarian or vegan antipasto skewers? A: Yes! For vegetarian versions, simply omit the meat and add more vegetables like roasted red peppers, marinated mushrooms, cucumber chunks, or pickled vegetables. For vegan skewers, swap the mozzarella for marinated tofu cubes, vegan cheese, or just load up on colorful vegetables. You can also add white beans or chickpeas for protein.
Q: What’s the best way to transport antipasto skewers to a party? A: I’ve found the best method is to use a shallow container with a lid (like a large tupperware or disposable aluminum pan with plastic cover). Line the bottom with paper towels to absorb any moisture. Arrange skewers in a single layer – don’t stack them or the ingredients will get smashed. You can also arrange them on a serving platter, cover tightly with plastic wrap, and carefully transport. Keep them cold with ice packs if it’s a hot day.
Q: How many skewers should I make per person? A: For appetizers at a party with multiple food options, plan for 2-3 skewers per person. If these are the main appetizer or you’re serving them as a light lunch, plan for 4-5 skewers per person. I always make a few extra because they tend to disappear quickly! For a party of 20 people, I’d recommend making 50-60 skewers to be safe.
Q: Can I use mozzarella cheese sticks instead of fresh mozzarella balls? A: Yes! Mozzarella string cheese cut into 1-inch chunks works well and is actually easier for kids to eat. The texture is slightly different from fresh mozzarella (a bit firmer and less creamy), but the flavor is still delicious. Cubed provolone, gouda, or cheddar are also excellent alternatives if you can’t find mozzarella balls.
Q: Do I need to cook the tortellini if I’m adding it to my skewers? A: Yes, absolutely! If you’re including tortellini, cook it according to package directions, then immediately drain and rinse with cold water to stop the cooking process. Toss the cooled tortellini with a little olive oil to prevent sticking, then let it cool completely before threading onto skewers. Refrigerate until assembly time. Never use uncooked tortellini – it will be hard and inedible!
Conclusion
And there you have it – everything you need to know about creating absolutely stunning, delicious antipasto skewers that’ll make you the star of every gathering! Whether you’re hosting a casual backyard BBQ, an elegant cocktail party, or just looking for an easy weeknight dinner solution, these colorful Italian skewers deliver on flavor, presentation, and convenience.
The beauty of this recipe is its incredible flexibility. Once you master the basic technique, you can customize these skewers to suit any dietary preference, season, or occasion. Use what’s fresh at your farmers market, what’s on sale at your local grocery store, or whatever your family happens to love. There’s truly no wrong way to make them!
I hope you’ll give these easy antipasto skewers a try at your next gathering. They’ve become my go-to recipe when I want to impress without stress, and I know they’ll become yours too. The smiles on your guests’ faces when they see these beautiful skewers will make the simple 15-minute prep time so worth it.
Now it’s your turn! Try this recipe and let me know how it goes in the comments below. Did you add any special ingredients? Serve them at a party? I’d love to hear about your experience! And if you loved this recipe, please pin it to your favorite Pinterest board so you can find it again and share it with your friends who love easy entertaining ideas.
Don’t forget to snap a photo of your beautiful antipasto skewers and tag me on social media – I absolutely love seeing your creations! Happy skewering, friends! 🍢🇮🇹
Pin this recipe for later and follow me for more easy appetizer ideas!