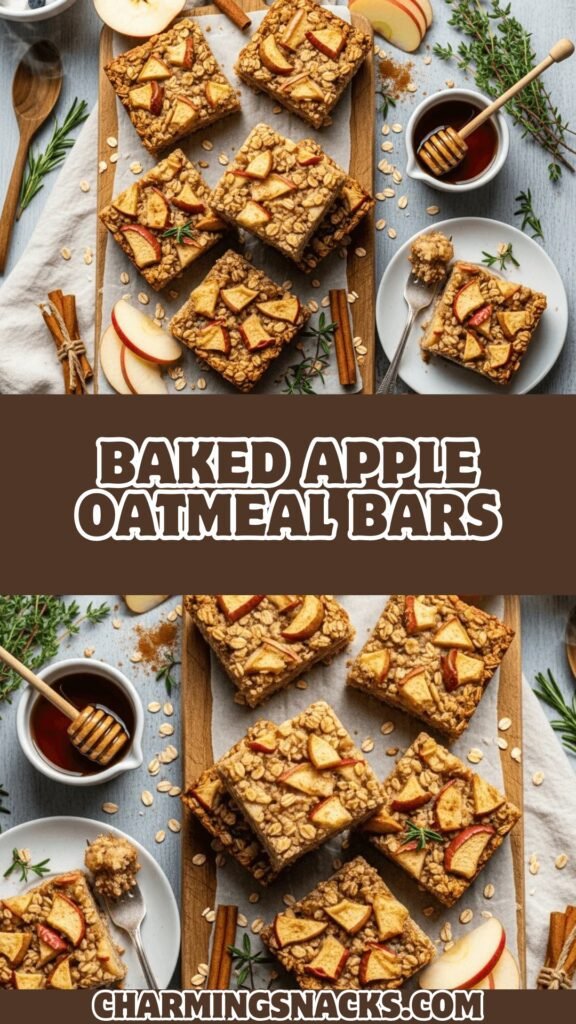
Baked Apple Oatmeal Bars (Healthy Breakfast Meal Prep!)
Get ready to fall in love with the easiest, most delicious breakfast meal prep recipe ever! These baked apple oatmeal bars are everything you want in a morning treat—naturally sweetened, packed with wholesome oats, bursting with cinnamon-spiced apples, and so satisfying you’ll actually look forward to Monday mornings. They taste like apple pie and oatmeal had a baby, and that baby is absolutely irresistible!
Whether you’re rushing out the door on a busy weekday, need a wholesome after-school snack for the kids, or want a guilt-free dessert option, these apple cinnamon oatmeal bars have you covered. They’re perfect for meal prep Sundays, school lunch boxes, grab-and-go breakfasts, or even as a healthier alternative to sugary granola bars.
What makes these baked oatmeal bars truly special is their incredible versatility and wholesome ingredient list. Made with simple pantry staples like rolled oats, fresh apples, maple syrup, and warming spices, they’re naturally gluten-free (when using certified GF oats), dairy-free friendly, refined sugar-free, and absolutely delicious. Plus, they slice beautifully, freeze like a dream, and taste even better the next day! Whether you enjoy them warm from the oven or straight from the fridge, these chewy, tender oatmeal breakfast bars are about to become your new morning ritual.
History / Background
While baked oatmeal bars as we know them today are a relatively modern invention, they’re rooted in centuries of oat-based breakfast traditions. Oatmeal itself has been a breakfast staple in Scotland, Ireland, and Northern Europe since ancient times, prized for its heartiness, affordability, and ability to fuel hard-working farmers through long days.
The concept of baked oatmeal emerged in American kitchens during the mid-20th century as a convenient way to serve oatmeal to large families without standing over a stovetop stirring individual portions. The Amish community, known for their hearty, wholesome cooking, popularized baked oatmeal casseroles in Pennsylvania Dutch country, often serving them warm with milk poured over top.
The evolution from casserole to portable bars happened naturally as our lifestyles became busier. Food bloggers and health-conscious home cooks in the 2000s began experimenting with firmer, sliceable versions that could be eaten on the go. The addition of fruit—particularly apples—harks back to traditional combinations like apple crisp and apple cinnamon oatmeal, comfort foods that have warmed American kitchens for generations.
Today’s baked apple oatmeal bars represent the perfect marriage of traditional comfort food and modern convenience. They’re part of the meal prep movement that’s taken Pinterest and Instagram by storm, proving that healthy eating doesn’t have to be complicated or time-consuming. The apple-cinnamon combination is quintessentially American, evoking memories of fall orchards, homemade pies, and cozy weekend mornings—all packed into a convenient, portable bar that fits our modern, on-the-go lifestyle.
Why You’ll Love This Recipe
These baked apple oatmeal bars are about to revolutionize your breakfast game! Imagine having a week’s worth of delicious, nutritious breakfasts ready in just one hour of Sunday meal prep. These bars deliver incredible flavor and satisfaction while keeping things wholesome and nourishing.
Here’s why these breakfast bars deserve a permanent spot in your meal prep rotation:
- Incredibly easy to make – Just one bowl, one pan, and simple stirring required
- Naturally sweetened – Uses maple syrup and apple sweetness instead of refined sugar
- Perfect for meal prep – Make once, enjoy all week long
- Kid-approved taste – Even picky eaters love these apple cinnamon bars
- Budget-friendly – Uses affordable pantry staples and seasonal apples
- Customizable flavors – Endless variations with different fruits, nuts, and mix-ins
- Freezer-friendly – Stores beautifully for up to 3 months
- Filling and satisfying – Keeps you full for hours thanks to fiber-rich oats
- Healthier than store-bought – No preservatives, artificial flavors, or mystery ingredients
- Great for any meal – Works as breakfast, snack, or healthy dessert
- Allergy-friendly options – Easily adaptable for gluten-free, dairy-free, and vegan diets
- Portable and mess-free – Perfect for lunchboxes, car rides, and busy mornings
- Lower in sugar – About half the sugar of typical granola bars
- Whole grain goodness – Packed with fiber, protein, and sustained energy
- Tastes like apple pie – All the comfort, none of the guilt!
Ingredient Notes
Let’s talk about what makes these oatmeal bars so wonderfully delicious and nutritious! Understanding your ingredients helps you make smart substitutions and create the perfect batch every time.
Rolled Oats (Old-Fashioned Oats): The foundation of your bars! Use old-fashioned rolled oats, not quick oats or steel-cut oats. Rolled oats provide the perfect chewy texture and hold the bars together beautifully. They’re packed with fiber, protein, and complex carbohydrates for sustained energy. For gluten-free bars, use certified gluten-free oats. Substitution: Quick oats will work but create a softer, less chewy texture. Don’t use instant oats—they’ll turn mushy.
Apples: Fresh apples are the star here! I recommend using firm, slightly tart varieties like Granny Smith, Honeycrisp, or Gala—they hold their shape during baking and provide beautiful flavor. You’ll need about 2 medium-large apples, peeled and diced into small pieces (about ½-inch cubes). Substitution: Pears, peaches (in summer), or even blueberries work wonderfully for different seasonal variations.
Maple Syrup: Pure maple syrup provides natural sweetness and moisture while adding a lovely depth of flavor. It’s less processed than refined sugar and contains beneficial minerals. Don’t use pancake syrup—it’s not the same! Substitution: Honey works beautifully (not vegan), or use agave nectar for a lower glycemic option. You can also use a combination of mashed banana and a touch of maple syrup for even less added sugar.
Eggs: Bind everything together and provide structure. Two large eggs create the perfect texture—not too dry, not too wet. Substitution: For vegan bars, use 2 flax eggs (2 tablespoons ground flaxseed mixed with 6 tablespoons water, let sit 5 minutes) or chia eggs. You can also try ½ cup unsweetened applesauce, though the texture will be slightly softer.
Milk: Adds moisture and helps create tender bars. Any milk works—dairy, almond, oat, coconut, or soy. Substitution: Water works in a pinch, but milk adds richness and protein.
Coconut Oil or Butter: Provides moisture, richness, and helps the bars hold together. Melted coconut oil keeps them dairy-free; butter adds incredible flavor. Substitution: Use neutral oil like avocado or vegetable oil, though you’ll lose some flavor depth.
Cinnamon: The warming spice that makes these taste like fall in a bar! Cinnamon pairs perfectly with apples and adds antioxidants. Addition: Nutmeg, cardamom, or apple pie spice elevate the flavor even more.
Baking Powder: Provides a slight lift, creating tender (not dense) bars.
Salt: Essential! It balances sweetness and enhances all the other flavors. Don’t skip it.
Vanilla Extract: Adds warmth and depth. Pure vanilla extract tastes better than imitation.
Optional Add-ins: Chopped walnuts or pecans, raisins, dried cranberries, chocolate chips, or shredded coconut add texture and flavor variety.
Equipment Needed
You don’t need any fancy equipment—just basic kitchen tools you probably already own!
- 9×9-inch square baking pan (or 8×8-inch for thicker bars) – Metal or glass both work
- Parchment paper – Essential for easy removal and cleanup
- Large mixing bowl – For combining all ingredients
- Medium mixing bowl – For preparing the apple mixture
- Measuring cups and spoons – For accurate measurements
- Whisk or fork – For mixing wet ingredients
- Wooden spoon or spatula – For stirring the oat mixture
- Sharp knife and cutting board – For dicing apples
- Vegetable peeler – For peeling apples (optional but recommended)
- Oven mitts – For safe handling of hot pans
- Wire cooling rack – Allows air circulation for even cooling
- Sharp knife – For slicing bars cleanly once cooled

Baked Apple Oatmeal Bars
These healthy baked apple oatmeal bars are the perfect make-ahead breakfast or snack! Packed with wholesome oats, fresh apples, and warming cinnamon, they’re naturally sweetened, freezer-friendly, and absolutely delicious. Enjoy them warm or cold for a nutritious treat that tastes like apple pie!
- Total Time: 60 minutes
- Yield: 12-16 bars (depending on size) 1x
Ingredients
Dry Ingredients:
- 3 cups old-fashioned rolled oats (use certified gluten-free if needed)
- 1 teaspoon baking powder
- 1½ teaspoons ground cinnamon
- ½ teaspoon salt
- ¼ teaspoon ground nutmeg (optional)
Wet Ingredients:
- 2 large eggs (or 2 flax eggs for vegan)
- ⅓ cup pure maple syrup
- 1 cup milk of choice (dairy, almond, oat, etc.)
- ¼ cup melted coconut oil or melted butter
- 2 teaspoons pure vanilla extract
Apple Mixture:
- 2 medium-large apples, peeled and diced (about 2 cups)
- 1 tablespoon maple syrup
- ½ teaspoon ground cinnamon
- 1 tablespoon lemon juice (prevents browning)
Optional Add-ins:
- ½ cup chopped walnuts or pecans
- ⅓ cup raisins or dried cranberries
- 2 tablespoons ground flaxseed (for extra nutrition)
Instructions
- Preheat and prepare: Preheat your oven to 350°F (175°C). Line a 9×9-inch baking pan with parchment paper, leaving some overhang on the sides for easy removal. Lightly grease the parchment paper with cooking spray or a bit of coconut oil.
- Prepare the apples: In a medium bowl, combine the diced apples, 1 tablespoon maple syrup, ½ teaspoon cinnamon, and lemon juice. Toss until the apples are evenly coated. Set aside while you prepare the oat mixture.
- Mix dry ingredients: In a large mixing bowl, combine the rolled oats, baking powder, cinnamon, salt, and nutmeg (if using). Stir with a whisk or fork until everything is evenly distributed.
- Combine wet ingredients: In a separate medium bowl, whisk together the eggs, ⅓ cup maple syrup, milk, melted coconut oil (or butter), and vanilla extract until smooth and well combined.
- Combine everything: Pour the wet ingredients into the bowl with the dry ingredients. Stir with a wooden spoon or spatula until all the oats are moistened and the mixture is well combined. Fold in the prepared apple mixture (including any juices that accumulated in the bowl). If using nuts or dried fruit, fold them in now.
- Transfer to pan: Pour the oatmeal mixture into your prepared baking pan. Use a spatula to spread it evenly and press it down gently to compact it slightly. This helps the bars hold together better after baking.
- Optional topping: For a prettier presentation, you can arrange a few extra apple slices on top and sprinkle with a pinch of cinnamon and a drizzle of maple syrup.
- Bake: Place the pan in the preheated oven and bake for 40-45 minutes, or until the edges are golden brown and the center is set (it should spring back lightly when touched). The bars will firm up as they cool, so don’t overbake or they’ll be dry.
- Cool completely: Remove from the oven and let the bars cool in the pan on a wire rack for at least 30 minutes. For the cleanest slices, let them cool completely—about 1-2 hours. The bars need time to set and firm up.
- Slice and serve: Once completely cooled, use the parchment paper overhang to lift the entire block out of the pan. Place on a cutting board and use a sharp knife to cut into 12 or 16 bars (depending on your preferred size). Wipe the knife clean between cuts for the neatest slices.
- Enjoy: Serve the bars at room temperature, chilled, or warmed up. They’re delicious on their own or with a dollop of yogurt, nut butter, or a drizzle of additional maple syrup!
Notes
Don’t skip the parchment paper: This makes removal SO much easier and prevents sticking.
Apple prep matters: Dice apples into small, uniform pieces (about ½-inch) so they distribute evenly and soften properly during baking.
Let them cool completely: This is crucial! Warm bars will crumble when cut. Patience pays off with clean, beautiful slices.
Storage is key: Store in an airtight container. They’ll last longer in the fridge but can be kept at room temperature for 2-3 days.
Texture preference: For chewier bars, bake for 40 minutes. For firmer, more structured bars, bake the full 45 minutes.
Sweetness level: These bars are mildly sweet. If you prefer sweeter bars, add an extra 2 tablespoons of maple syrup to the wet ingredients.
- Prep Time: 15 minutes
- Cook Time: 45 minutes
- Category: Dessert
- Method: Baking
- Cuisine: American
- Diet: Gluten Free
Nutrition
- Serving Size: 1 bar (recipe cut into 12 bars)
- Calories: 180
- Sugar: 11g
- Sodium: 140mg
- Fat: 7g
- Saturated Fat: 4g
- Unsaturated Fat: 3g
- Trans Fat: 0g
- Carbohydrates: 27g
- Fiber: 4g
- Protein: 4g
- Cholesterol: 30mg
Tips & Variations
The beauty of these baked oatmeal bars is how easily you can customize them to your taste preferences and dietary needs! Here are some delicious ways to make them your own:
Fruit Variations:
- Blueberry Lemon: Replace apples with 1½ cups fresh or frozen blueberries and add 1 tablespoon lemon zest
- Banana Nut: Use 2 mashed ripe bananas instead of apples, add ½ cup chopped walnuts
- Peach Cobbler: Use fresh diced peaches instead of apples (perfect for summer!)
- Cherry Almond: Use 1½ cups pitted cherries and ½ teaspoon almond extract
- Mixed Berry: Combine blueberries, raspberries, and blackberries
- Pumpkin Spice: Replace apples with ¾ cup pumpkin puree and add pumpkin pie spice
Flavor Boosters:
- Add ½ teaspoon apple pie spice for more complex flavor
- Mix in ⅓ cup dark chocolate chips for a dessert-like treat
- Stir in 2 tablespoons chia seeds or ground flaxseed for extra nutrition
- Add ½ cup shredded coconut for tropical vibes
- Include ½ cup chopped dates for natural sweetness and chewy texture
Nut and Seed Options:
- Chopped pecans, walnuts, or almonds (adds healthy fats and crunch)
- Sunflower or pumpkin seeds for nut-free option
- Almond butter or peanut butter swirled on top before baking
Dietary Modifications:
- Lower Sugar: Use only ¼ cup maple syrup and rely more on apple sweetness; add stevia to taste
- Higher Protein: Stir in ¼ cup protein powder (vanilla or unflavored) with the dry ingredients
- Vegan: Use flax eggs and plant-based milk
- Oil-Free: Replace coconut oil with additional mashed banana or applesauce (texture will be softer)
Topping Ideas:
- Drizzle with cream cheese frosting for a special treat
- Spread with almond or peanut butter before eating
- Top with a dollop of Greek yogurt and fresh berries
- Dust with powdered sugar for a pretty presentation
- Add a simple glaze (powdered sugar + milk + vanilla)
Pro Chef Tips
Want bakery-quality baked oatmeal bars? These professional techniques will take your bars from good to absolutely irresistible:
Toast your oats first: For deeper, nuttier flavor, spread oats on a baking sheet and toast at 350°F for 8-10 minutes before using. This extra step adds incredible depth and makes your kitchen smell amazing!
The apple variety matters: Firmer apples like Granny Smith, Honeycrisp, or Pink Lady hold their shape and don’t release too much moisture during baking. Avoid softer varieties like Red Delicious or McIntosh, which can turn mushy and make your bars soggy.
Dice uniformly: Cut your apples into consistent ½-inch pieces. Uniform sizing ensures even cooking—no crunchy chunks alongside mushy bits.
Don’t overmix: Once you combine wet and dry ingredients, mix just until everything is incorporated. Overmixing can make the bars tough instead of tender.
Press firmly before baking: Use the back of a spatula or measuring cup to press the oat mixture firmly into the pan. This compacting helps the bars hold together beautifully when sliced.
The toothpick test isn’t reliable: Unlike cakes, these bars won’t test “clean” with a toothpick. Instead, look for golden edges and a center that springs back lightly when touched. The bars will firm up significantly as they cool.
Cool in the pan: Never try to remove hot bars from the pan—they need to cool and set. Rushing this step leads to crumbly, broken bars. Patience is your friend here!
Use a bench scraper: For the cleanest cuts, use a bench scraper or very sharp knife, wiping it clean between each slice. Dip your knife in hot water, dry it, then slice for ultra-clean edges.
Double wrap for freezing: Individually wrap bars in plastic wrap, then place them all in a freezer bag. This double protection prevents freezer burn and makes grabbing single portions super easy.
Common Mistakes to Avoid
Don’t let these common pitfalls derail your baked oatmeal bar dreams! Here’s what to watch out for:
Using quick oats or instant oats: This is a big one! Quick oats and instant oats have been cut more finely and will absorb too much liquid, resulting in mushy, porridge-like bars instead of sliceable ones. Always use old-fashioned rolled oats for the proper chewy texture and structure.
Cutting the bars while still warm: I know it’s tempting, but warm bars are structurally weak and will fall apart when you try to cut them. The oats need time to set and firm up as they cool. Wait at least 30 minutes, but ideally 1-2 hours for the cleanest slices.
Not lining the pan with parchment: Skipping parchment paper often leads to stuck, broken bars and a messy cleanup situation. The overhang allows you to lift the entire block out effortlessly for perfect slicing.
Overfilling the pan: If you try to stuff too much mixture into a small pan, the center won’t cook properly and you’ll end up with a raw middle and overdone edges. Stick to a 9×9-inch pan for this recipe, or use 8×8 for thicker bars with slightly longer baking time.
Adding too much liquid or wet fruit: Extra milk or very juicy fruit can make your bars soggy and prevent them from setting properly. Stick to the measurements and if your apples seem exceptionally juicy, pat them with a paper towel before mixing in.
Storing them incorrectly: Leaving bars uncovered will dry them out quickly. Always store in an airtight container. Also, if you stack warm bars, condensation will make them soggy. Cool completely and layer with parchment paper between layers if stacking.
Skipping the lemon juice on apples: That little bit of lemon juice isn’t just about preventing browning—it also brightens the flavor and balances the sweetness. Don’t skip it!
Storage & Meal Prep
One of the best things about these baked apple oatmeal bars is how beautifully they store—perfect for weekly meal prep!
Room Temperature Storage: Store completely cooled bars in an airtight container at room temperature for 2-3 days. They’re perfect for breakfast on-the-go or quick snacks. Layer with parchment paper if stacking to prevent sticking.
Refrigerator Storage: For longer freshness, store bars in an airtight container in the refrigerator for up to 1 week. They’ll firm up when cold but soften again when brought to room temperature or warmed slightly. Many people prefer the chewier texture of cold bars!
Individual Wrapping: For grab-and-go convenience, wrap individual bars in plastic wrap or parchment paper, then store all wrapped bars in a large container or gallon-size bag. This makes it easy to grab one for rushed mornings or toss in lunchboxes.
Preventing Sogginess: Make sure bars are completely cool before storing—any trapped heat creates condensation that leads to sogginess. If your bars do soften, you can crisp them up slightly by warming in a 300°F oven for 5 minutes.
Reheating Methods:
- Microwave (quickest): 15-20 seconds on high until just warm
- Oven (best texture): 300°F for 8-10 minutes wrapped in foil
- Toaster oven (convenient): 5-7 minutes at 300°F
- Room temperature (no work required): Just let sit for 10-15 minutes
Signs of Freshness: Fresh bars should be moist and tender but hold their shape when picked up. If they smell off, show mold, or taste overly dry, it’s time to discard them.
Make-Ahead & Freezer Notes
These bars are meal prep superstars! Here’s everything you need to know about making them ahead:
Freezing Baked Bars (Best Method):
- Cool bars completely after baking
- Cut into individual portions
- Wrap each bar tightly in plastic wrap or parchment paper
- Place all wrapped bars in a freezer-safe bag or container
- Label with date (good for up to 3 months)
- Freeze flat for easy storage
Thawing Instructions: Remove desired number of bars from freezer and let thaw at room temperature for 1-2 hours, or overnight in the refrigerator. You can also microwave from frozen for 30-40 seconds until warmed through.
Freezing Unbaked Mixture: You can prepare the entire mixture, press it into a parchment-lined pan, cover tightly with plastic wrap and foil, and freeze for up to 1 month. Bake directly from frozen, adding 10-15 minutes to the baking time.
Make-Ahead Assembly: Prepare all your ingredients the night before—dice apples and store in lemon water in the fridge, measure out dry ingredients, etc. In the morning, drain apples, mix everything together, and bake fresh.
Batch Baking: Double or triple the recipe! Use multiple 9×9-inch pans and bake simultaneously (rotate pans halfway through). Freeze the extras for a constant supply of healthy breakfast options.
Best Reheating from Frozen: For the best texture, thaw in the refrigerator overnight, then warm in a 300°F oven for 8-10 minutes. This maintains the proper moisture and prevents sogginess that can happen with microwave-only reheating.
Quality Timeline: For optimal taste and texture, consume frozen bars within 3 months. They’re safe beyond that but may develop freezer burn or lose moisture.
Serving Suggestions
These versatile oatmeal bars work for so many occasions! Here are delicious ways to enjoy them:
For Breakfast:
- Serve warm with a dollop of Greek yogurt and fresh berries
- Pair with a hard-boiled egg and fruit for a balanced meal
- Enjoy with a cup of hot coffee or chai tea
- Spread with almond butter or peanut butter for extra protein
- Crumble over yogurt parfait with granola
As a Snack:
- Pack in lunchboxes with cheese sticks and veggies
- Enjoy post-workout with a protein shake
- Serve to kids after school with milk or apple slices
- Keep in your car or bag for emergency hunger
For Dessert:
- Warm and top with vanilla ice cream
- Drizzle with salted caramel sauce
- Serve with whipped cream and extra cinnamon
- Pair with hot apple cider or mulled wine
- Top with cream cheese frosting for a special treat
Beverage Pairings:
- Hot coffee (especially with cinnamon)
- Chai tea latte
- Cold milk (dairy or non-dairy)
- Apple cider (hot or cold)
- Green smoothie for a nutritious breakfast
- Herbal tea (chamomile or cinnamon)
Make It a Complete Meal:
- Add scrambled eggs and turkey sausage
- Serve alongside a protein smoothie
- Pair with cottage cheese and berries
- Include bacon or veggie sausage for savory balance
Party and Gathering Ideas:
- Cut into small squares for brunch buffets
- Serve on a platter with fresh fruit for baby showers
- Include in holiday breakfast spreads
- Pack for picnics and hiking trips
FAQs Section
Q: Can I make these bars without eggs?
A: Absolutely! For egg-free/vegan bars, replace each egg with a flax egg (1 tablespoon ground flaxseed mixed with 3 tablespoons water—let sit 5 minutes). Chia eggs work too. You can also use ½ cup mashed banana or ¼ cup applesauce per egg, though this makes the bars sweeter and slightly softer. Many readers report excellent results with Bob’s Red Mill egg replacer as well.
Q: Why are my oatmeal bars falling apart?
A: This usually happens for one of three reasons: (1) you cut them while still warm (they need to cool completely to set), (2) you used quick oats instead of old-fashioned rolled oats (quick oats don’t provide enough structure), or (3) there wasn’t enough binding liquid—make sure you’re measuring accurately. Pressing the mixture firmly into the pan before baking also helps them hold together better.
Q: Can I use steel-cut oats instead of rolled oats?
A: Unfortunately, steel-cut oats won’t work well in this recipe. They’re too hard and require much longer cooking time and more liquid. They won’t soften properly in the baking time required and will result in crunchy, hard bars. Stick with old-fashioned rolled oats for the best texture.
Q: How can I make these bars sweeter without adding more sugar?
A: Try using sweeter apple varieties like Fuji or Gala instead of tart Granny Smith. You can also add ⅓ cup raisins or chopped dates, which provide natural sweetness. A riper banana mashed into the mixture adds sweetness too. Or simply drizzle individual bars with honey or maple syrup when serving rather than adding more to the whole batch.
Q: Are these bars suitable for babies and toddlers?
A: Yes, with some modifications! These bars can be appropriate for babies 9 months and older who are eating finger foods. For babies, omit the added maple syrup (let apple sweetness shine), make sure apples are very finely diced, and consider using ground oats for easier chewing. Always supervise young children when eating and consult your pediatrician about introducing new foods.
Q: Can I use canned or jarred apples instead of fresh?
A: Fresh apples work best for texture and flavor, but in a pinch you can use unsweetened canned or jarred apples. Drain them very well and pat dry with paper towels to remove excess moisture, which can make bars soggy. You may need to reduce other liquids slightly. Apple pie filling is too sweet and goopy—avoid it.
Q: How do I know when the bars are done baking?
A: Look for golden brown edges and a center that springs back lightly when gently pressed with your finger. The bars will still look slightly moist in the center—that’s normal! They firm up considerably as they cool. If the edges are getting too dark before the center sets, tent with foil and continue baking. Avoid overbaking or they’ll be dry and crumbly.
Q: Can I double this recipe?
A: Definitely! You can either use a 9×13-inch pan (double the recipe) for thinner bars, or two 9×9-inch pans for standard thickness. The baking time will be similar. Just make sure your oven can fit two pans at once, and rotate them halfway through baking for even cooking.
Conclusion
And there you have it—everything you need to know to make the most amazing baked apple oatmeal bars! These wholesome, naturally sweetened bars prove that healthy breakfast meal prep doesn’t have to be boring or bland. With their perfect balance of tender oats, sweet-tart apples, and warming spices, they’re like a warm hug on a busy Monday morning.
The best part? You’ve just unlocked a recipe that works for literally any time of day. Rushed weekday breakfast? Check. After-school snack? Absolutely. Healthier dessert option? You bet. Road trip fuel? Perfect. These versatile bars fit seamlessly into your life, saving you time, money, and decision fatigue.
I absolutely love hearing from readers who try my recipes! Did these baked apple oatmeal bars turn out amazing for you? What variations did you try? Drop a comment below and share your experience. And if you loved them, please PIN this recipe to your favorite Pinterest boards—your friends and followers will thank you for sharing this wholesome breakfast solution!
Don’t forget to snap a photo of your beautiful bars and tag me on social media—I genuinely get so excited seeing your creations in my feed! And if you have questions or want to share your own tips, the comment section is all yours.
Ready to transform your breakfast routine? Make a batch this weekend and set yourself up for a week of stress-free, delicious mornings. Your future self (especially Monday morning you) will be so grateful! 🍎