Crispy Baked Mac and Cheese Bites with Golden Breadcrumb Crust
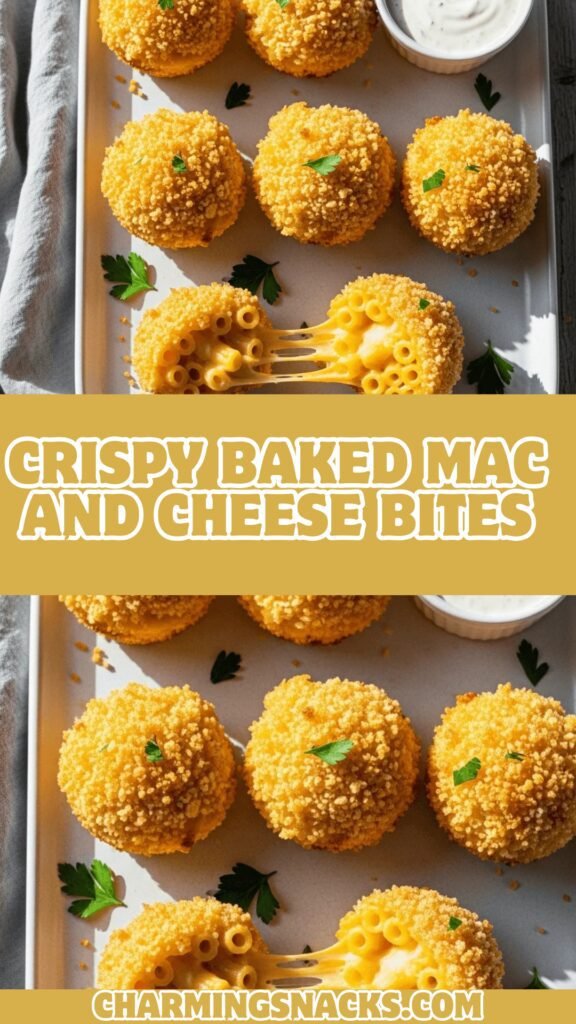
Get ready to fall in love with the ultimate comfort food makeover – baked mac and cheese bites! These adorable, pop-in-your-mouth morsels take everything you love about creamy, cheesy macaroni and cheese and transform it into perfectly portioned, crispy-on-the-outside, gooey-on-the-inside bite-sized treats. Each golden nugget features tender pasta coated in a rich, velvety cheese sauce, formed into cute little rounds, and baked (or fried) until the outside is beautifully crispy while the inside stays luxuriously creamy.
These easy mac and cheese bites have become a Pinterest sensation and party food staple for good reason. They’re perfect for game day gatherings, kids’ birthday parties, holiday appetizer spreads, potlucks, after-school snacks, or anytime you want to serve comfort food in a fun, shareable format. Whether you’re making them for picky eaters who love finger foods or adults who can’t resist anything covered in cheese and breadcrumbs, these crispy mac and cheese balls are guaranteed crowd-pleasers. The best part? They’re incredibly versatile – serve them plain, with dipping sauces, or customize them with add-ins like bacon, jalapeños, or different cheese combinations. Trust me, once you make these, they’ll become your new favorite way to enjoy mac and cheese!
History / Background
Macaroni and cheese itself is an iconic American comfort food with roots dating back centuries. The dish gained popularity in America when Thomas Jefferson encountered it in France and Italy during the late 1700s and subsequently served a version at a state dinner in 1802. However, it was the introduction of Kraft Macaroni & Cheese Dinner in 1937 during the Great Depression that made mac and cheese a true American staple – affordable, filling, and beloved by families across the nation.
The concept of mac and cheese bites is a more modern innovation, emerging from the creative appetizer revolution of the 1990s and 2000s when restaurants and home cooks began transforming classic comfort foods into shareable, bite-sized portions. Deep-fried mac and cheese balls became trendy appetizers at upscale restaurants and food trucks, combining the nostalgia of childhood mac and cheese with the indulgence of crispy fried coating.
The baked version emerged as home cooks sought healthier, easier-to-execute alternatives to deep frying. Food bloggers and Pinterest users embraced baked mac and cheese bites as the perfect party food – they deliver all the crispy, cheesy satisfaction with less mess, less oil, and easier preparation for large batches. The rise of muffin tin recipes and portion-controlled comfort foods in the 2010s further popularized these adorable bites.
Today, mac and cheese bites represent the perfect marriage of nostalgic comfort food and modern appetizer culture. They’re featured at sports bars, appear in frozen food aisles, trend on social media, and have become a go-to recipe for home entertainers who want to serve something familiar yet special. This homemade version gives you complete control over the cheese blend, pasta type, and seasonings while delivering restaurant-quality results that’ll have everyone asking for the recipe.
Why You’ll Love This Recipe
These homemade mac and cheese bites are about to become your new favorite party trick. They take everyone’s beloved comfort food and make it portable, poppable, and even more fun to eat. The contrast between the crispy, golden exterior and the creamy, cheesy interior creates an irresistible texture combination that keeps people coming back for more.
Here’s why this recipe is a winner:
- Make-ahead friendly – Prepare completely in advance and bake right before serving, making party hosting stress-free
- Kid and adult approved – Universally loved by all ages, from toddlers to grandparents
- Healthier than fried – Baked instead of deep-fried means you get all the crispiness with a fraction of the oil
- Perfect portion control – Each bite is a complete serving, making them ideal for parties and portion-conscious eaters
- Customizable – Easily adapt with different cheeses, add-ins like bacon or jalapeños, or dietary modifications
- Budget-friendly – Uses simple, affordable pantry staples to feed a crowd without breaking the bank
- Freezer-friendly – Make huge batches and freeze for quick snacks or last-minute entertaining
- No special equipment needed – Just a muffin tin, which most home cooks already own
- Great for picky eaters – The familiar mac and cheese flavor in a fun format makes vegetables seem less necessary
- Impressive presentation – They look professionally made but are surprisingly simple to execute
Ingredient Notes
Elbow Macaroni (2 cups/8 oz): The classic choice for mac and cheese, elbow macaroni’s small size and hollow center holds cheese sauce perfectly. You can substitute with shells, cavatappi, or any small pasta shape. For gluten-free, use your favorite GF pasta – just be careful not to overcook as it can get mushy.
Sharp Cheddar Cheese (2 cups, shredded): Sharp cheddar provides that classic, tangy mac and cheese flavor with excellent melting properties. Shred it yourself from a block rather than using pre-shredded – the anti-caking agents in pre-shredded cheese prevent smooth melting. For extra flavor, try aged white cheddar or a combination of cheddar and Gruyère.
Mozzarella Cheese (1 cup, shredded): Adds extra stretch and gooeyness to the interior. Low-moisture mozzarella works best for baking. The mozzarella creates that satisfying cheese pull when you bite into these.
Butter (4 tablespoons): Creates the base of your cheese sauce (the roux) and adds richness. Use unsalted butter so you can control the salt level. Don’t substitute with margarine or oil – butter is essential for proper flavor and texture.
All-Purpose Flour (¼ cup): Thickens the cheese sauce and helps it coat the pasta evenly. The flour also helps bind everything together so the bites hold their shape. For gluten-free, use a 1:1 gluten-free flour blend.
Milk (2 cups): Whole milk creates the creamiest sauce, though 2% works in a pinch. Avoid skim milk as it’s too thin and won’t create a rich enough sauce. For extra richness, you can replace ½ cup milk with heavy cream.
Eggs (2 large): Act as the primary binder that holds the mac and cheese bites together. Room temperature eggs incorporate better into the mixture. These are essential – don’t skip them or your bites will fall apart.
Panko Breadcrumbs (2 cups): Japanese-style breadcrumbs create that signature crispy coating that’s crunchier than regular breadcrumbs. If you only have regular breadcrumbs, toast them lightly in a pan first for extra crispiness.
Seasonings (1 tsp each: garlic powder, onion powder; ½ tsp paprika; salt and pepper): These add depth and complexity beyond just cheese flavor. The paprika adds both color and a subtle smokiness. Adjust seasonings to your taste preferences.
Equipment Needed
- Large pot – For boiling pasta
- Medium saucepan – For making the cheese sauce
- Whisk – For creating smooth, lump-free cheese sauce
- Standard 12-cup muffin tin – The perfect size and shape for uniform bites
- Cooking spray or butter – For greasing the muffin tin to prevent sticking
- Large mixing bowl – For combining pasta, cheese sauce, and eggs
- Colander – For draining pasta
- Measuring cups and spoons – For accurate ingredient measurements
- Wooden spoon or spatula – For stirring
- Three shallow bowls – For breading station (optional, if doing coated version)
- Baking sheet – Optional, for extra-crispy coating method
- Wire cooling rack – Optional, for cooling and preventing soggy bottoms
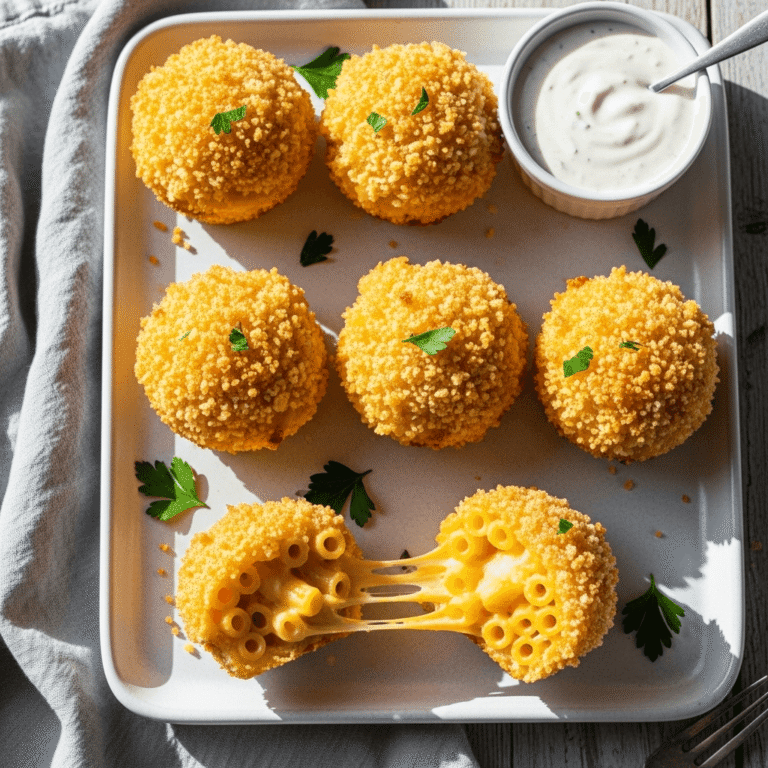
Baked Mac and Cheese Bites
Crispy baked mac and cheese bites with a golden breadcrumb exterior and creamy, cheesy interior. These easy-to-make comfort food bites are perfect for parties, game day, or anytime snacking – no deep frying required!
- Total Time: 55 minutes
- Yield: 24 mac and cheese bites (12 servings) 1x
Ingredients
For the Mac and Cheese:
- 2 cups (8 oz) elbow macaroni, uncooked
- 4 tablespoons unsalted butter
- ¼ cup all-purpose flour
- 2 cups whole milk
- 2 cups sharp cheddar cheese, shredded
- 1 cup mozzarella cheese, shredded
- 1 teaspoon garlic powder
- 1 teaspoon onion powder
- ½ teaspoon paprika
- ½ teaspoon salt
- ¼ teaspoon black pepper
- 2 large eggs, beaten
For the Coating (Optional):
- 1½ cups panko breadcrumbs
- 3 tablespoons melted butter
- ½ teaspoon garlic powder
- ¼ teaspoon paprika
- Cooking spray
Instructions
- Cook the pasta: Bring a large pot of salted water to a boil. Add elbow macaroni and cook according to package directions until al dente (usually 7-8 minutes). Drain well in a colander and set aside. Do not overcook – slightly firm pasta holds together better in the bites.
- Make the cheese sauce: In a medium saucepan over medium heat, melt 4 tablespoons butter. Once melted and bubbling, whisk in flour and cook for 1-2 minutes, stirring constantly, until it forms a paste (roux) and turns light golden. This removes the raw flour taste.
- Add milk and seasonings: Gradually whisk in milk, about ½ cup at a time, whisking constantly to prevent lumps. Add garlic powder, onion powder, paprika, salt, and pepper. Continue cooking and whisking until the sauce thickens and coats the back of a spoon, about 5-7 minutes.
- Add the cheese: Remove from heat and stir in shredded cheddar and mozzarella cheese. Stir until completely melted and smooth. The sauce should be thick and creamy.
- Combine pasta and sauce: In a large mixing bowl, combine the cooked pasta with the cheese sauce. Mix well until all pasta is evenly coated. Let cool for about 10 minutes, stirring occasionally.
- Add eggs: Once the mac and cheese mixture has cooled slightly (so eggs don’t scramble), stir in the beaten eggs until well incorporated. The eggs will help bind everything together.
- Prepare muffin tin: Preheat oven to 400°F (200°C). Generously spray a 12-cup muffin tin with cooking spray or brush with melted butter. This is crucial for easy removal.
- Fill muffin cups: Spoon the mac and cheese mixture evenly into the prepared muffin cups, filling each about ¾ full. Press down gently with the back of the spoon to compact slightly.
- Add breadcrumb topping (optional): In a small bowl, mix panko breadcrumbs with 3 tablespoons melted butter, garlic powder, and paprika. Sprinkle generously over the top of each mac and cheese bite, pressing gently to adhere.
- Bake: Bake for 20-25 minutes until the tops are golden brown and crispy, and the edges are set. The bites should be firm to the touch.
- Cool and remove: Let cool in the muffin tin for 5-10 minutes – this is essential for them to set and hold their shape. Run a butter knife around the edges of each bite and gently twist to release. If they’re sticking, let them cool a few more minutes.
- Serve: Serve warm with your favorite dipping sauces like ranch, marinara, sriracha mayo, or honey mustard.
Notes
- Don’t skip the cooling time before removing from the tin – patience prevents broken bites!
- The mixture should be thick but not dry. If it seems too loose, let it cool longer before filling the muffin tin
- For extra crispy tops, broil for 1-2 minutes at the end, watching carefully
- These can be made in mini muffin tins for smaller, poppable bites – adjust baking time to 15-18 minutes
- Leftover mac and cheese works great for this recipe – just mix with beaten eggs and bake
- Prep Time: 20 minutes
- Cook Time: 35 minutes
- Category: Appetizer
- Method: Baking
- Cuisine: American
- Diet: Vegetarian
Nutrition
- Serving Size: 2 mac and cheese bites
- Calories: 285
- Sugar: 3g
- Sodium: 385mg
- Fat: 16g
- Saturated Fat: 9g
- Unsaturated Fat: 6g
- Trans Fat: 0g
- Carbohydrates: 23g
- Fiber: 1g
- Protein: 12g
- Cholesterol: 75mg
Tips & Variations
Bacon Mac and Cheese Bites: Fold in ½ cup cooked, crumbled bacon to the mac and cheese mixture before filling the muffin tin. The smoky bacon adds amazing flavor and makes these even more indulgent.
Jalapeño Popper Style: Mix in ½ cup diced jalapeños (pickled or fresh) and top with extra pepper jack cheese for a spicy kick that adults will love.
Buffalo Chicken Mac Bites: Add 1 cup diced cooked chicken and 3 tablespoons buffalo sauce to the mixture. Top with blue cheese crumbles for a fun twist.
Truffle Mac and Cheese Bites: Add 1-2 teaspoons truffle oil to the cheese sauce for an upscale, earthy flavor that’s perfect for sophisticated gatherings.
Veggie-Loaded Version: Fold in ½ cup each of finely diced cooked broccoli, bell peppers, or spinach for added nutrition (and to sneak veggies into kids’ diets!).
Three-Cheese Blend: Use a combination of sharp cheddar, Gruyère, and Parmesan for a more complex, gourmet flavor profile.
Air Fryer Method: After initial baking in muffin tin, you can finish these in an air fryer at 375°F for 3-4 minutes for extra crispiness all around.
Gluten-Free Version: Use gluten-free pasta and gluten-free flour (or cornstarch) in the cheese sauce. Use gluten-free breadcrumbs for the topping.
Pro Chef Tips
Slightly undercook your pasta for best results. Cook pasta 1-2 minutes less than package directions suggest. The pasta will continue cooking in the oven, and slightly firm pasta holds together better in the bites without becoming mushy.
Let the mixture cool completely before adding eggs. If your mac and cheese is too hot when you add the eggs, they’ll scramble and create an unpleasant texture. Wait until it’s just warm or room temperature for smooth incorporation.
Pack the mixture firmly into the muffin tin. Use the back of a spoon to really press and compact the mac and cheese into each cup. This helps create bites that hold together beautifully when removed.
Use room temperature ingredients for smoother cheese sauce. Take your eggs out of the fridge 30 minutes before using, and make sure your cheese is at room temperature. Cold ingredients can cause the sauce to seize or become grainy.
The cooling time is non-negotiable. Those 5-10 minutes in the pan after baking allow the eggs to fully set and the structure to firm up. Trying to remove them too early is the #1 cause of broken bites.
Spray your muffin tin liberally. Don’t be shy with the cooking spray or butter. Get into all the corners and sides. You can also line with small strips of parchment paper for absolutely foolproof removal.
Toast your breadcrumb topping for maximum crunch. Mix the breadcrumbs with melted butter and toast them in a pan for 2-3 minutes before topping the bites. This pre-toasting creates an even crispier, more golden crust.
Common Mistakes to Avoid
Overcooking the pasta initially: If your pasta is fully cooked or soft before going into the oven, it will become mushy during baking. Always cook pasta al dente or even slightly firmer than usual for mac and cheese bites.
Making the cheese sauce too thin: Your cheese sauce should be quite thick – thicker than you’d normally make for regular mac and cheese. A thin sauce won’t hold together in bite form and will result in soggy, falling-apart bites.
Skipping the eggs: Some people try to omit the eggs, but they’re essential binders that hold everything together. Without eggs, your bites will crumble and fall apart when you try to remove them from the tin.
Trying to remove the bites too soon: Patience is key! If you try to pop these out while they’re still hot, they’ll break apart. They need that cooling time for the structure to set. Trust the process and wait the full 5-10 minutes.
Not greasing the muffin tin well enough: Even with nonstick pans, you need generous amounts of cooking spray or butter. The cheese will stick if you don’t properly grease every surface of each cup.
Filling the cups too full: If you overfill the muffin cups, the bites will overflow and become difficult to remove cleanly. Fill only ¾ full to leave room for slight expansion and to create neat, uniform bites.
Storage & Meal Prep
Refrigerator Storage: Store leftover mac and cheese bites in an airtight container in the refrigerator for up to 4 days. Place parchment paper between layers to prevent sticking. They’re safe to eat cold (kids often love them this way!), but reheating brings back the best texture.
Best Reheating Method: Reheat in a 350°F oven for 10-12 minutes until heated through and the exterior crisps up again. You can also reheat in an air fryer at 350°F for 5-6 minutes for maximum crispiness. Microwave works in a pinch (1-2 minutes), but the coating will be softer rather than crispy.
Component Prep: You can make the mac and cheese itself 1-2 days ahead and store in the refrigerator. When ready to make bites, let it come to room temperature, mix in the eggs, and proceed with the recipe.
Batch Cooking: This recipe doubles or triples beautifully! Make multiple batches and freeze extras for quick snacks, easy appetizers, or emergency party food. They’re lifesavers when you need something impressive with minimal effort.
Lunchbox Friendly: These make excellent additions to school lunches or work lunches. Pack them with a small container of dipping sauce and some vegetables for a balanced meal that kids will actually eat.
Make-Ahead & Freezer Notes
Make-Ahead Instructions: You can prepare mac and cheese bites completely through step 10 (before baking) up to 24 hours in advance. Cover the filled muffin tin tightly with plastic wrap and refrigerate. When ready to bake, remove from refrigerator, let sit at room temperature for 15 minutes, then bake as directed, adding 5 extra minutes to account for the cold start.
Freezing Unbaked Bites: Fill the muffin tin and freeze until solid (about 2 hours). Pop the frozen bites out and transfer to freezer bags or airtight containers. Freeze for up to 3 months. To bake from frozen, place back in a greased muffin tin and bake at 375°F for 30-35 minutes until heated through and golden.
Freezing Baked Bites: Let baked bites cool completely, then freeze in a single layer on a baking sheet. Once frozen solid, transfer to freezer bags. These keep for up to 3 months. Reheat from frozen in a 350°F oven for 15-20 minutes or air fryer for 8-10 minutes.
Thawing Recommendations: For best results, thaw frozen bites overnight in the refrigerator before reheating. However, you can reheat directly from frozen – just add 5-10 minutes to the reheating time and check that the center is hot.
Party Planning Timeline: Two days before: Make the mac and cheese and refrigerate. One day before: Mix in eggs, fill muffin tin, cover, and refrigerate. Day of: Bake fresh before serving. Or make and freeze weeks ahead, then bake from frozen on party day.
Serving Suggestions
These versatile comfort food bites work for so many occasions! Here are my favorite ways to serve them:
Dipping Sauce Bar: Set out a variety of dipping sauces for guests to choose from: classic ranch dressing, marinara sauce, honey mustard, BBQ sauce, sriracha mayo, buffalo sauce, cheese sauce, garlic aioli, or sweet chili sauce.
Game Day Spread: Arrange on a platter alongside chicken wings, mozzarella sticks, jalapeño poppers, onion rings, and loaded nachos for the ultimate party food buffet that’ll feed a hungry crowd.
Kids’ Party Platters: Serve with other kid-friendly foods like chicken nuggets, fruit skewers, veggie sticks with ranch, and juice boxes for a birthday party spread that children will devour.
Appetizer Course: Serve 2-3 bites per person as an elegant starter before a dinner party. Pair with a simple green salad and crusty bread for a nice balance.
Meal Ideas: Make these the main course! Serve 4-6 bites per person with a side salad, roasted vegetables, or tomato soup for a fun, comfort-food dinner that feels special.
Side Dishes That Complement: Fresh garden salad with vinaigrette, coleslaw, pickles, cherry tomatoes, carrot and celery sticks, fruit salad, or roasted broccoli help balance the richness.
Beverage Pairings: These pair wonderfully with beer (especially IPAs or lagers), sweet tea, lemonade, soda, apple cider, or sparkling water with lemon.
Presentation Ideas: Stack them pyramid-style on a platter, arrange around a bowl of dipping sauce, serve in individual paper cones for a fun street-food vibe, or place in a lined basket for rustic presentation.
FAQs Section
Can I make these in advance and reheat?
Absolutely! These are perfect make-ahead party food. Bake them completely, let cool, then refrigerate for up to 4 days or freeze for up to 3 months. Reheat in the oven at 350°F for 10-15 minutes (from refrigerated) or 20-25 minutes (from frozen) until hot and crispy again.
Why are my mac and cheese bites falling apart?
This usually happens for one of three reasons: the pasta was overcooked initially, the cheese sauce was too thin, or you didn’t let them cool long enough in the pan before removing. Make sure your pasta is al dente, your sauce is thick, and you wait the full 5-10 minutes cooling time.
Can I use a different type of pasta?
Yes! While elbow macaroni is traditional, you can use shells, cavatappi, rotini, penne, or any small pasta shape. Just avoid very large or long pasta like rigatoni or spaghetti, as they won’t hold together well in bite form.
Do I have to use the breadcrumb topping?
No, the breadcrumb topping is optional! Without it, you’ll get mac and cheese bites with a golden, slightly crispy cheese exterior. The breadcrumbs just add extra crunch and visual appeal. Both versions are delicious.
Can I deep fry these instead of baking?
Yes! For ultra-crispy results, you can deep fry these. After cooling in the muffin tin and removing, coat in flour, dip in beaten egg, then roll in breadcrumbs. Deep fry at 350°F for 2-3 minutes until golden. They’re more indulgent this way but absolutely delicious.
What’s the best way to remove them from the muffin tin?
Grease the tin generously, let the bites cool for at least 5-10 minutes, then run a butter knife around the edges and gently twist to release. If they’re still sticking, let them cool a few more minutes. You can also use silicone muffin pans for easier release.
Can I make mini versions?
Definitely! Use a mini muffin tin and reduce the baking time to 15-18 minutes. Mini mac and cheese bites are perfect for parties because they’re true one-bite portions. This recipe will make about 48 mini bites.
How do I know when they’re done baking?
The tops should be golden brown, the edges will look set and slightly crispy, and they should feel firm when gently pressed in the center. If they still look very wet or jiggly, give them a few more minutes.
Conclusion
These crispy baked mac and cheese bites prove that comfort food can be fun, portable, and absolutely irresistible! By transforming classic mac and cheese into these adorable, golden-crusted morsels, you get all the creamy, cheesy goodness in a format that’s perfect for parties, snacking, and sharing. The combination of that crunchy exterior and molten cheese interior creates a texture experience that keeps people reaching for just one more (and then another!).
Whether you’re prepping for game day, planning a birthday party, looking for creative lunch box ideas, or just want to enjoy mac and cheese in a new way, these easy mac and cheese bites deliver every single time. They’re make-ahead friendly, freezer-friendly, kid-approved, and endlessly customizable. Plus, they look so impressive that guests will think you spent hours in the kitchen – our little secret that they only take about an hour!
I’d love to hear how your mac and cheese bites turn out! Did you add any fun mix-ins? What’s your favorite dipping sauce combination? Drop a comment below and share your experience. And if this recipe brings comfort food joy to your kitchen, please share it with your friends and pin it to your favorite Pinterest board so you can make these crispy, cheesy bites again and again. Here’s to taking comfort food to the next level!