Easy Chicken Bacon Ranch Pinwheels: The Perfect Party Appetizer

Get ready to meet your new favorite party appetizer! These chicken bacon ranch pinwheels are flavor-packed, bite-sized spirals that combine tender chicken, crispy bacon, creamy ranch, and melted cheese all wrapped up in a soft tortilla. They’re the kind of appetizer that disappears from the platter within minutes, leaving guests asking for the recipe before they’ve even finished their first bite.
These ranch chicken roll ups are incredibly versatile and work beautifully for virtually any occasion. Serve them at game day parties, baby showers, birthday celebrations, potlucks, holiday gatherings, or even as an easy weeknight dinner paired with a simple salad. What makes these bacon ranch pinwheels truly special is their perfect combination of familiar, crowd-pleasing flavors—the beloved trio of chicken, bacon, and ranch—presented in an elegant, easy-to-eat format that feels special without requiring hours in the kitchen.
The beauty of this chicken bacon ranch appetizer lies in its simplicity and make-ahead friendliness. You can assemble these pinwheels in advance, refrigerate them, and slice just before serving. No heating required unless you prefer them warm! They travel well to potlucks, look impressive on any appetizer spread, and appeal to both kids and adults. Whether you’re an experienced home cook or just starting out, this recipe is straightforward, forgiving, and guaranteed to earn you rave reviews. Trust me, once you add these tortilla pinwheels to your recipe rotation, you’ll be making them again and again for every gathering!
History / Background
Pinwheel appetizers, also known as roll-ups or spirals, have been a staple of American party culture since the mid-20th century. These clever little bites emerged during the 1950s and 60s when entertaining at home became a hallmark of suburban American life. Hostesses competed to create appetizers that were attractive, convenient, and could be made ahead—qualities that pinwheels possessed in abundance.
The concept of rolling fillings in flatbreads isn’t uniquely American, of course. Cultures around the world have long traditions of wraps and rolls—from Middle Eastern lavash rolls to Mexican burritos to Asian spring rolls. What made the American pinwheel distinctive was its evolution as a party food specifically designed for entertaining, typically served cold and sliced into attractive spirals that showcased colorful layers.
Ranch dressing, one of the key components of this recipe, has its own fascinating American origin story. Created in the 1950s by Steve Henson at his Hidden Valley Ranch in California, ranch dressing became America’s favorite salad dressing by the 1990s and has remained a cultural icon ever since. Its tangy, herby, creamy flavor profile has expanded far beyond salads into a seasoning and flavoring for countless dishes.
The specific combination of chicken, bacon, and ranch—now ubiquitous in American cuisine—gained popularity in the 1990s and 2000s as restaurants began featuring this trio in everything from salads to pizzas to sandwiches. The flavor combination resonated deeply with American palates: savory chicken, smoky-salty bacon, and cool, tangy ranch created a perfect balance that felt both indulgent and familiar.
Chicken bacon ranch pinwheels specifically rose to prominence in the 2000s and 2010s, fueled by food blogs, Pinterest, and the rise of home entertaining culture. They represented the perfect marriage of convenience (using store-bought rotisserie chicken and prepared ranch dressing), visual appeal (those beautiful spiral cross-sections), and crowd-pleasing flavors. Today, they’ve become a modern classic—the kind of recipe that appears on appetizer tables across America, from casual game-day gatherings to more formal celebrations. They’re a testament to how traditional entertaining foods can evolve and adapt to contemporary tastes while maintaining their essential appeal: delicious, easy, and perfect for sharing.
Why You’ll Love This Recipe
These easy chicken pinwheels are about to become your most-requested appetizer, and here’s why they’re absolutely perfect for any home cook. The combination of creamy, savory, and smoky flavors creates an addictively delicious bite that appeals to virtually everyone. They look impressively professional but require no advanced cooking skills—if you can spread filling and roll a tortilla, you can make these gorgeous appetizers.
Here’s what makes this recipe absolutely irresistible:
- Ridiculously Easy – No baking, no cooking required; just mix, spread, roll, chill, and slice
- Make-Ahead Perfection – Prepare up to 24 hours in advance, making party day stress-free
- Crowd-Pleasing Guarantee – The magical chicken-bacon-ranch combination that everyone loves
- Budget-Friendly – Uses affordable ingredients, especially if you use rotisserie chicken
- Customizable – Easily adapt with different proteins, cheeses, or add-ins to suit your taste
- No Heating Required – Serve cold or at room temperature; no need to keep warm
- Kid-Approved – Children love these bite-sized spirals; great for lunchboxes too
- Travel-Friendly – Perfect for potlucks; they transport easily without getting messy
- Impressive Presentation – Beautiful spiral cross-sections look professional and Instagram-worthy
- Versatile Serving – Works as appetizer, snack, light lunch, or party food
- Quick Assembly – From start to finish, active prep is only about 15 minutes
- Minimal Cleanup – Just a cutting board, knife, and mixing bowl; no pots or pans
Ingredient Notes
Understanding your ingredients helps you make the best chicken bacon ranch roll ups every single time.
Flour Tortillas – Large burrito-size tortillas (10-12 inches) work best for these pinwheels. Choose soft, fresh tortillas that are pliable and won’t crack when rolled. Regular flour tortillas are traditional, but you can use whole wheat for added nutrition, or even spinach or tomato-flavored tortillas for color variation. Avoid corn tortillas as they crack easily and don’t roll well. Check the expiration date—fresh tortillas roll more easily without breaking.
Cream Cheese – The creamy base that holds everything together! Use full-fat brick-style cream cheese (not spreadable or whipped) for the best texture and stability. It must be softened to room temperature—about 30 minutes on the counter—so it spreads smoothly without tearing the tortilla. For a lighter option, you can use ⅓-less-fat cream cheese, though the filling will be slightly less rich. Greek yogurt mixed with a little cream cheese can work for a tangier, lighter version.
Ranch Dressing – Adds that signature tangy, herby flavor everyone loves. You can use bottled ranch dressing (any brand you prefer) or ranch seasoning mix. If using dry ranch seasoning, mix 2-3 tablespoons of the powder directly into the cream cheese for concentrated flavor without extra moisture. Homemade ranch dressing works beautifully too if you have it on hand. For variety, try ranch with bacon bits already mixed in, or jalapeño ranch for heat.
Cooked Chicken – The protein base of your pinwheels. Rotisserie chicken from the grocery store is the easiest, quickest option and adds great flavor—just shred or dice the breast meat. Alternatively, use leftover cooked chicken, grilled chicken breast, or even canned chicken in a pinch (drain it well first). For the best texture, dice or shred the chicken into small, uniform pieces so the pinwheels roll smoothly. Season plain cooked chicken with a little salt and pepper if it’s bland.
Bacon – Provides essential smoky, salty crunch. Cook bacon until crispy, drain on paper towels, and crumble into small pieces. You’ll need about 8-10 strips of regular bacon, or use pre-cooked bacon crumbles to save time (though fresh tastes better). Turkey bacon works as a lighter alternative. For an even easier option, bacon bits from a jar can substitute, though they won’t have quite the same flavor and texture as real bacon.
Shredded Cheese – Adds creaminess and helps bind the filling. Sharp cheddar is classic and provides great flavor, but you can use Monterey Jack, Colby Jack, mozzarella, or a Mexican blend. Pre-shredded cheese works perfectly and saves time. For best results, use a good-quality cheese that melts well and has real flavor. About 1 to 1½ cups is ideal—enough to bind everything without overwhelming the other flavors.
Green Onions – Add freshness, mild onion flavor, and beautiful green color. Both white and green parts can be used, finely chopped. Regular yellow or white onion can substitute if needed (use less as it’s stronger), or try chives for a milder option. Red onion adds a pop of color and slight sharpness.
Optional Add-Ins – Fresh spinach, diced tomatoes, diced bell peppers, jalapeños, or fresh herbs like dill or parsley can all enhance these pinwheels with extra flavor, nutrition, and color.
Equipment Needed
You’ll need minimal equipment to make these ranch chicken pinwheels—just basic kitchen tools:
- Medium mixing bowl – For combining cream cheese, ranch, and other filling ingredients
- Electric mixer or sturdy spoon – For beating cream cheese until smooth and fluffy
- Rubber spatula or offset spatula – For spreading filling evenly across tortillas
- Sharp chef’s knife – For slicing pinwheels into clean, neat rounds
- Cutting board – A stable surface for rolling and slicing
- Measuring cups and spoons – For accurate ingredient portions
- Large plate or baking sheet – For arranging rolled tortillas before slicing
- Plastic wrap – For wrapping rolled tortillas to hold their shape while chilling
- Serving platter – For beautiful presentation of your finished pinwheels
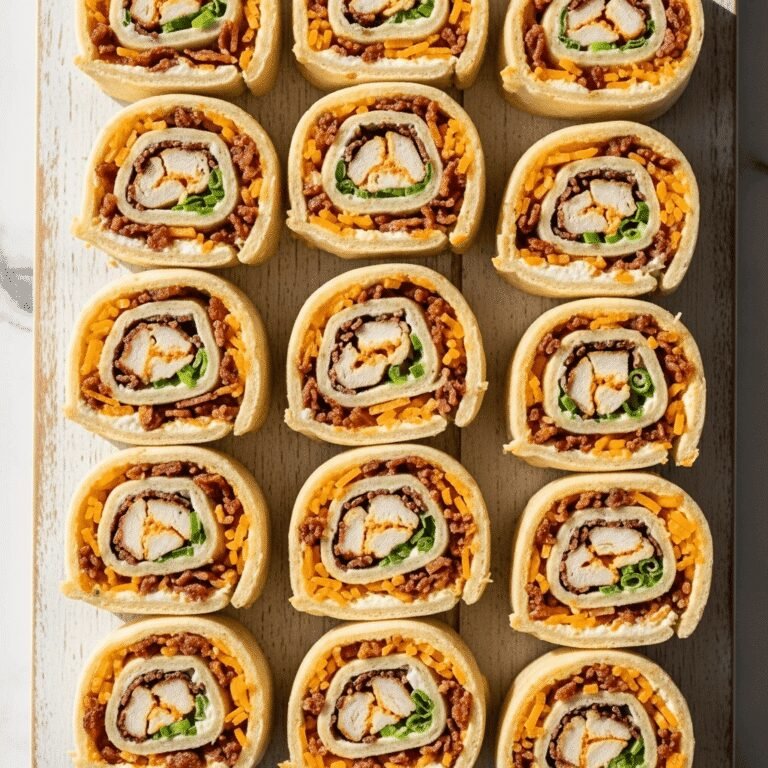
Chicken Bacon Ranch Pinwheels
These irresistible chicken bacon ranch pinwheels feature creamy ranch-seasoned filling, tender chicken, crispy bacon, and melted cheese rolled in soft flour tortillas and sliced into beautiful spirals. They’re the perfect make-ahead appetizer for any party or gathering!
- Total Time: 15 minutes
- Yield: 40-48 pinwheels (about 10-12 servings) 1x
Ingredients
- 8 oz cream cheese, softened to room temperature
- ½ cup ranch dressing (or ¼ cup ranch seasoning mix)
- 2 cups cooked chicken, finely diced or shredded
- 8-10 strips bacon, cooked crispy and crumbled (about ¾ cup)
- 1½ cups shredded sharp cheddar cheese
- ¼ cup green onions, finely chopped
- ¼ cup red bell pepper, finely diced (optional)
- 4 large flour tortillas (10-12 inch burrito size)
- ¼ teaspoon garlic powder
- ¼ teaspoon black pepper
- Pinch of salt (if needed, taste first)
Instructions
- Prepare the creamy base: In a medium mixing bowl, beat the softened cream cheese with an electric mixer or sturdy spoon until smooth and fluffy, about 1-2 minutes. Add ranch dressing (or ranch seasoning mix), garlic powder, and black pepper. Beat until completely combined and creamy.
- Mix in the fillings: Add the diced chicken, crumbled bacon, shredded cheese, chopped green onions, and bell pepper (if using) to the cream cheese mixture. Fold everything together with a spatula until evenly distributed throughout. Taste and adjust seasoning if needed—the bacon and cheese add salt, so you may not need additional.
- Prepare tortillas: Lay one flour tortilla flat on a clean cutting board or work surface. Make sure your work area is dry—any moisture will make the tortillas soggy.
- Spread the filling: Using a rubber spatula or offset spatula, spread about ¾ to 1 cup of the filling mixture evenly across the entire tortilla, going all the way to the edges. Spread it thin enough that you can still roll it without filling squeezing out, but thick enough to get good flavor in every bite—about ⅛ to ¼ inch thick.
- Roll tightly: Starting from one edge, roll the tortilla as tightly as possible without squeezing out the filling. The tighter you roll, the prettier your pinwheel slices will be and the better they’ll hold together. Think of it like rolling a sleeping bag or yoga mat—firm and consistent pressure.
- Wrap and secure: Once rolled, wrap the log tightly in plastic wrap, twisting the ends to seal. This holds the shape and prevents the tortilla from unrolling. Place seam-side down on a plate or baking sheet.
- Repeat: Continue with remaining tortillas and filling until all four tortillas are rolled, wrapped, and arranged on your plate or sheet.
- Refrigerate: Chill the wrapped rolls in the refrigerator for at least 1 hour, or up to 24 hours. This crucial step firms up the cream cheese, helping the pinwheels hold their shape when sliced and making cutting much cleaner and easier.
- Slice and serve: Remove plastic wrap from the chilled rolls. Using a sharp chef’s knife, trim off the uneven ends (snack on these!), then slice each roll into ¾ to 1-inch thick rounds. Wipe your knife clean between cuts for the neatest slices. You should get 10-12 pinwheels per tortilla.
- Arrange and enjoy: Arrange the pinwheels on a serving platter in a single layer or slightly overlapping. Serve immediately, or cover and refrigerate for up to 2 hours before your event. Garnish with extra chopped green onions or fresh herbs if desired.
Notes
- Tortilla freshness matters: Use fresh, pliable tortillas. Stale or cold tortillas crack when rolled. If yours are cold from the fridge, let them come to room temperature or warm them slightly (10 seconds in the microwave) to make them more flexible.
- Chill time is essential: Don’t skip the refrigeration step. The filling needs time to firm up for clean slicing and better presentation.
- Customize the filling: This recipe is incredibly flexible. Swap ingredients based on what you have or prefer—different proteins, cheeses, or vegetables all work beautifully.
- Slicing tip: A very sharp knife is key to clean cuts. Serrated knives can shred the tortilla edges, so a sharp chef’s knife works best.
- Serving temperature: These are best served cold or at cool room temperature. Don’t leave them out more than 2 hours for food safety.
- Prep Time: 15 minutes
- Cook Time: 0 minutes
- Category: Appetizer
- Method: No-Bake
- Cuisine: American
- Diet: Gluten Free
Nutrition
- Serving Size: 4 pinwheels (about 3 oz)
- Calories: 285
- Sugar: 2g
- Sodium: 625mg
- Fat: 18g
- Saturated Fat: 9g
- Unsaturated Fat: 8g
- Trans Fat: 0g
- Carbohydrates: 16g
- Fiber: 1g
- Protein: 15g
- Cholesterol: 58mg
Tips & Variations
These bacon ranch chicken pinwheels are wonderfully adaptable to different tastes and dietary needs.
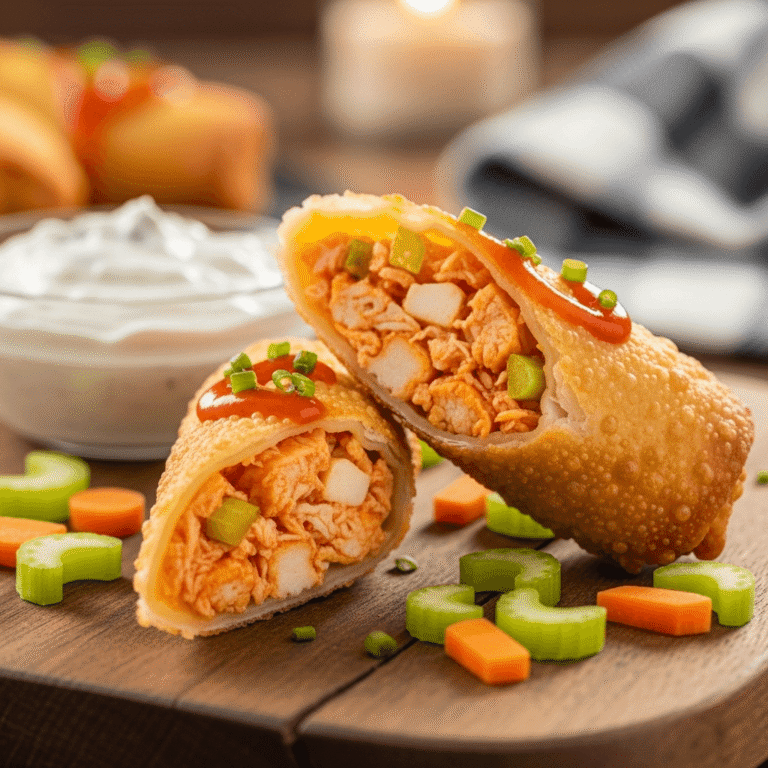
Buffalo Chicken Ranch Pinwheels: Replace regular chicken with chicken tossed in buffalo sauce, and add crumbled blue cheese to the filling. Add diced celery for authentic buffalo wing experience. Serve with extra ranch for dipping!
Lighter Version: Use reduced-fat cream cheese, light ranch dressing or Greek yogurt, turkey bacon, and part-skim mozzarella. Choose whole wheat tortillas for added fiber. These swaps significantly reduce calories while maintaining great flavor.
Pizza Pinwheels: Replace ranch with pizza sauce or marinara, add pepperoni and mozzarella, plus Italian seasoning. Roll and slice the same way for a pizza-inspired twist.
Vegetarian Option: Omit chicken and bacon. Load up with roasted vegetables like bell peppers, zucchini, and spinach. Add black beans for protein. Use vegetarian bacon bits or smoked paprika for smoky flavor.
Tex-Mex Style: Add taco seasoning to the cream cheese base, use a Mexican cheese blend, and include black beans, corn, diced jalapeños, and cilantro. Serve with salsa and guacamole for dipping.
Ham and Swiss Variation: Replace chicken with diced ham, use Swiss cheese instead of cheddar, and add Dijon mustard to the cream cheese mixture. Add finely chopped dill pickles for a deli-style pinwheel.
Spicy Jalapeño Version: Add diced jalapeños, use pepper jack cheese, and include a dash of cayenne pepper in the filling. Top finished pinwheels with a dot of hot sauce for extra heat.
Garden Veggie: Add finely diced tomatoes (seeds removed), cucumbers, shredded carrots, and fresh spinach or lettuce for a refreshing, vegetable-forward option.
Pro Chef Tips
These professional techniques will elevate your tortilla roll ups from good to absolutely exceptional:
Room Temperature is Everything: This cannot be overstated—softened cream cheese is crucial for smooth spreading. Cold cream cheese will tear your tortillas and create an uneven, lumpy filling. Plan ahead and leave cream cheese on the counter for 30-60 minutes, or microwave it in 10-second bursts (carefully!) until just softened but not melted.
The Spread Technique: Use an offset spatula (like a small frosting spatula) for the most even spreading. Work from the center outward, using gentle pressure. Go all the way to the edges—any bare spots will make rolling harder and create empty pockets in your slices. Aim for consistent thickness across the entire tortilla.
Moisture Management: This is key to preventing soggy pinwheels. If using fresh tomatoes or vegetables with high water content, remove seeds and pat them completely dry with paper towels before adding to the filling. Drain canned chicken very well. The drier your ingredients, the better your pinwheels will hold together.
Rolling Mastery: When rolling, use both hands to maintain even tension across the entire width of the tortilla. Roll slowly and deliberately, tucking the edge under as you go to start a tight spiral. If filling starts squeezing out the sides, you’ve overfilled—next time use less. The tighter your roll, the more beautiful and stable your pinwheels will be.
Strategic Chilling: The minimum chill time is 1 hour, but 2-4 hours (or overnight) is even better. The longer chill time allows the cream cheese to firm significantly, making slicing dramatically easier and cleaner. The flavors also meld together beautifully during this rest period.
Knife Technique: Use a very sharp, non-serrated chef’s knife. Wipe the blade clean with a damp paper towel after every 2-3 cuts to prevent drag and ensure clean, pretty slices. Use a gentle sawing motion rather than pressing straight down, which can compress and distort the spiral. Let the sharp knife do the work.
Presentation Perfection: Arrange pinwheels standing on their sides (showing the spiral) rather than flat. This showcases the beautiful layers and looks more professional. Place them tightly together on the platter so they support each other and don’t tip over.
Common Mistakes to Avoid
Even simple recipes can go wrong. Here’s how to sidestep the most common pitfalls:
Mistake #1: Using cold cream cheese. This is the number one error that leads to frustrated cooks and torn tortillas. Cold, hard cream cheese is nearly impossible to spread smoothly—it chunks up, tears the tortilla, and creates an uneven filling that makes rolling difficult. Always, always soften your cream cheese completely to room temperature first. It should be easily spreadable with no resistance.
Mistake #2: Overfilling the tortillas. More filling doesn’t equal better pinwheels! Too much filling causes several problems: it squeezes out the sides when rolling, makes the roll too thick to slice cleanly, causes the tortilla to tear, and makes the pinwheels fall apart. Use about ¾ to 1 cup filling per large tortilla, spread thin. You should be able to see the tortilla through the filling slightly—that’s perfect.
Mistake #3: Skipping or shortening the chill time. I know it’s tempting to slice immediately, but warm or room-temperature pinwheels are nearly impossible to cut cleanly. The filling is too soft, squishing out when you try to slice. The rolls need at least 1 hour (preferably 2+) in the refrigerator to firm up the cream cheese. This patience pays off with beautiful, clean slices that hold their shape perfectly.
Mistake #4: Using a dull or serrated knife. A dull knife compresses the pinwheel rather than cutting it, squishing the filling and distorting that pretty spiral. A serrated knife can shred the tortilla edges and create messy, ragged cuts. Always use a very sharp chef’s knife, wipe it clean between cuts, and use gentle pressure with a slight sawing motion for the cleanest slices.
Mistake #5: Not managing moisture from ingredients. Wet ingredients like fresh tomatoes, lettuce, or improperly drained chicken release moisture that makes the tortillas soggy and causes the pinwheels to fall apart. Always remove tomato seeds, pat vegetables dry with paper towels, drain canned chicken thoroughly, and use firmer vegetables rather than watery ones. Prevention is key here—once soggy, there’s no fix.
Storage & Meal Prep
Proper storage keeps your chicken bacon ranch appetizer fresh and safe, while strategic prep makes entertaining effortless.
Refrigerator Storage (Unsliced): The best storage method is to keep the rolls whole and wrapped in plastic wrap. They’ll stay fresh in the refrigerator for up to 24 hours before slicing. This is ideal for make-ahead prep—assemble the night before, refrigerate wrapped, then slice fresh right before your event.
Refrigerator Storage (Sliced): Once sliced, arrange pinwheels in a single layer in an airtight container, separating layers with parchment paper if stacking. Cover tightly and refrigerate for up to 2 days. The edges may dry slightly, but they’ll still taste great. For best presentation, slice no more than 4-6 hours before serving.
Room Temperature Serving: During your party, pinwheels can sit at room temperature for up to 2 hours safely (1 hour if it’s hot weather over 90°F). After that, dairy-based foods should be refrigerated for food safety. For longer parties, keep backup portions in the fridge and refresh your platter.
Preventing Drying: The cut edges can dry out if exposed to air. Press plastic wrap directly against the cut ends of whole rolls before refrigerating. For sliced pinwheels, covering the container tightly prevents air exposure and keeps them moist.
Quality Timeline: While these keep for 2 days refrigerated, they’re absolutely best within the first 24 hours. The tortillas can absorb moisture from the filling over time, becoming slightly softer (though still tasty). For the prettiest, freshest pinwheels, slice and serve the same day you assemble them.
Make-Ahead & Freezer Notes
These easy pinwheels are one of the ultimate make-ahead appetizers, perfect for stress-free entertaining.
24 Hours Ahead (Best Timeline): This is the ideal make-ahead scenario. Assemble your pinwheel rolls completely, wrap them tightly in plastic wrap, and refrigerate for up to 24 hours. The overnight rest actually improves them—flavors meld together beautifully, and the chilling firms everything perfectly. Slice them 2-4 hours before your event for the freshest presentation.
Morning-Of Prep: If you can’t prepare the day before, morning-of works wonderfully. Assemble the rolls in the morning, refrigerate for several hours, then slice an hour or two before guests arrive. You’ll have plenty of chill time for easy slicing, and everything will still be perfectly fresh.
Component Prep (2-3 Days Ahead): For ultimate flexibility, prep components separately. Cook and crumble bacon (store in fridge), cook and dice chicken (refrigerate), and even mix the cream cheese base (refrigerate in an airtight container). When ready to assemble, bring cream cheese mixture to room temperature, then spread, roll, and chill. This spreads the work across multiple days.
Freezing Instructions: Good news—these pinwheels freeze surprisingly well! Assemble the rolls completely, wrap each one tightly in plastic wrap, then place in a freezer bag and freeze for up to 2 months. To thaw, move to the refrigerator 4-6 hours before slicing (or overnight), then slice while still quite cold for cleanest cuts.
Freezing Sliced Pinwheels: You can also freeze them pre-sliced. Arrange sliced pinwheels in a single layer on a parchment-lined baking sheet and freeze until solid (about 1 hour), then transfer to a freezer bag. This prevents them from sticking together. Thaw in the refrigerator for 2-3 hours before serving.
Quality Note: While freezing works well, the tortillas can become very slightly softer after freezing and thawing. They’re still delicious, but for the absolute best texture, fresh or refrigerated is preferred. That said, frozen ones are still miles better than no pinwheels at all!
Quick Thaw Method: If you’re in a rush, you can let frozen pinwheels sit at room temperature for about 30-45 minutes, but refrigerator thawing is safer and maintains better texture.
Serving Suggestions
The right accompaniments and presentation make your chicken ranch pinwheels shine at any gathering.
As Part of an Appetizer Spread: These pinwheels pair beautifully with complementary appetizers. Serve alongside vegetable crudité with dip, a cheese and cracker board, buffalo chicken dip, spinach artichoke dip, fresh fruit, and mixed nuts. This variety ensures there’s something for everyone.
Dipping Sauces: While delicious on their own, offering dipping options adds fun variety. Serve with extra ranch dressing, buffalo sauce, honey mustard, barbecue sauce, or a garlic aioli. Small bowls of sauce scattered around the platter invite guests to customize their experience.
Light Lunch or Dinner: These pinwheels can absolutely be a main course. Serve 6-8 pinwheels per person alongside a fresh garden salad, tomato soup, fruit salad, or pasta salad for a complete, satisfying meal. They’re perfect for casual lunches, brunches, or light dinners.
Kids’ Lunch Boxes: Children love these! Pack 3-4 pinwheels in a lunchbox with carrot sticks, grapes, and a small treat. They travel well and don’t need reheating, making them ideal for school lunches or picnics.
Game Day Presentation: For sports viewing parties, arrange pinwheels on a large platter or wooden cutting board in rows or circular patterns. Add decorative toothpicks or party picks for easy grabbing. Surround with chips, pretzels, and dipping sauces for a complete snack station.
Beverage Pairings: These savory, creamy pinwheels pair well with crisp white wines (Sauvignon Blanc, Pinot Grigio), light beers, hard seltzers, iced tea, lemonade, or sparkling water with citrus. For a family-friendly punch, try a fruity lemonade or cranberry-orange spritzer.
Holiday Variations: Make them festive by using colored tortillas (spinach for green, tomato for red) during Christmas. Use cookie cutters to punch shapes from flat pinwheels for special occasions—hearts for Valentine’s Day, stars for Independence Day.
Elegant Presentation: For more formal events, arrange pinwheels in concentric circles on a white platter, garnish with fresh herbs (parsley, dill, or chives), and add edible flowers for an upscale look. Small appetizer plates and cocktail napkins nearby encourage elegant service.
FAQs Section
Can I make these pinwheels without bacon?
Absolutely! Simply omit the bacon for a chicken ranch version. You might want to add a little extra seasoning or a drop of liquid smoke to compensate for the missing smoky flavor. Alternatively, use bacon bits, turkey bacon, or even coconut bacon for a vegetarian option. The pinwheels will still be delicious—the bacon adds great flavor but isn’t essential to the recipe’s success.
How do I prevent the tortillas from cracking when I roll them?
Tortilla cracking usually happens because they’re too cold or too dry. Always bring refrigerated tortillas to room temperature before using (about 15-20 minutes on the counter). If they’re still stiff, warm each tortilla in the microwave for just 5-10 seconds to make it more pliable. Fresh tortillas work much better than older ones—check expiration dates. Also, don’t spread the filling too thick, which makes rolling harder and can cause cracking.
Can I use Greek yogurt instead of cream cheese?
You can substitute some of the cream cheese with Greek yogurt for a lighter, tangier version, but I wouldn’t recommend replacing it entirely. A good ratio is half cream cheese and half thick Greek yogurt. The cream cheese is crucial for the right consistency and binding—all Greek yogurt will make the filling too thin and won’t hold the pinwheels together as well. If you do use more yogurt, you may need to increase the chill time.
What’s the best way to slice pinwheels cleanly?
Use a very sharp, non-serrated chef’s knife and make sure your rolls are well-chilled (at least 1 hour, preferably longer). Wipe the knife blade clean with a damp paper towel after every 2-3 cuts to prevent buildup. Use a gentle sawing motion rather than pressing straight down. Don’t rush—take your time with each slice for the cleanest results. Trim the uneven ends off first and save them as a cook’s treat!
Can these pinwheels be served warm?
While they’re traditionally served cold, you can serve them warm if you prefer. After slicing, arrange on a baking sheet and bake at 350°F for about 5-8 minutes until the cheese melts and they’re heated through. Keep in mind that warming them slightly changes the texture—the tortilla becomes softer and the filling gets creamier. Most people prefer them cold or at room temperature, but both ways are delicious!
How long do chicken bacon ranch pinwheels last in the refrigerator?
Properly stored in an airtight container, these pinwheels will keep for 2-3 days in the refrigerator. However, they’re best within the first 24 hours for optimal texture and freshness. After that, the tortillas can absorb moisture from the filling and become slightly softer (though they’re still safe to eat and taste good). Always store them covered tightly to prevent drying out.
Can I make mini pinwheels for a party?
Yes! For bite-sized appetizers, simply slice your regular pinwheels thinner—about ½ inch thick instead of ¾ to 1 inch. You’ll get twice as many pieces, which is great for large parties where people want to sample many different appetizers. They also look adorable and are perfect for elegant events. Just be aware that thinner slices are more delicate to handle.
Conclusion
And there you have it—the ultimate recipe for chicken bacon ranch pinwheels that will make you the MVP of every gathering! These beautiful, flavorful spiral appetizers prove that impressive party food doesn’t have to be complicated or time-consuming. With just a handful of simple ingredients and about 15 minutes of hands-on work, you can create an appetizer that looks professional and tastes absolutely incredible.
The magic of these ranch chicken roll ups lies in their perfect balance of flavors and textures—creamy, crunchy, savory, and satisfying all in one bite. The make-ahead nature means you can prep stress-free, the no-bake method means your kitchen stays cool, and the universal appeal means even picky eaters will be reaching for seconds. Whether you’re hosting a game day party, bringing something to a potluck, or just want a fun dinner option, these pinwheels deliver every single time.
I can’t wait to hear how these bacon ranch pinwheels turn out in your kitchen! Did you try any of the variations? What occasion did you serve them for? How quickly did they disappear from the platter? Drop a comment below and share your experience—I love connecting with fellow home cooks and hearing about your successes! And if this recipe becomes a hit at your table like it has at mine, please pin it to your favorite appetizer board on Pinterest so other food lovers can discover it too.
Now grab those tortillas, mix up that creamy filling, and get ready to roll your way to party perfection. Your guests are going to be so impressed, and you’ll be smiling knowing just how easy these actually were to make. Happy rolling, friends, and enjoy every delicious, spiral-sliced bite!