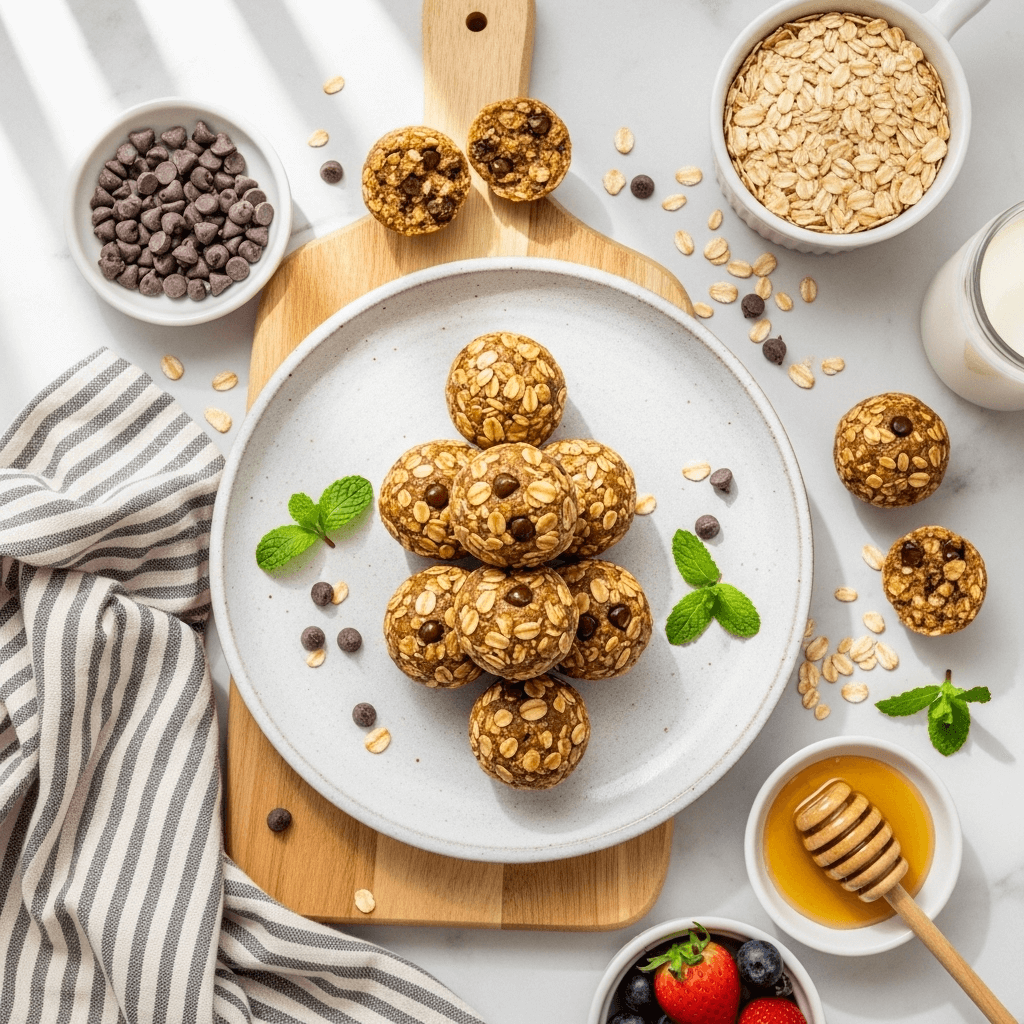
No-Bake Chocolate Chip Granola Balls – Easy, Healthy & Delicious!
Get ready to fall in love with these Chocolate Chip Granola Balls – the ultimate no-bake treat that’s perfect for satisfying your sweet tooth while keeping things relatively healthy! These bite-sized energy balls are packed with wholesome oats, natural sweetness from honey or maple syrup, creamy nut butter, and those irresistible chocolate chips that make everything better. They’re chewy, slightly sweet, and incredibly satisfying.
What makes these no-bake granola balls so incredibly popular? They require absolutely zero baking, come together in just 10 minutes, and are endlessly customizable to suit your taste preferences and dietary needs. Whether you need a quick breakfast on busy mornings, a post-workout snack, an afternoon pick-me-up, or a healthier dessert option, these little powerhouses have you covered.
These easy chocolate chip energy balls work beautifully for so many situations: pack them in school lunchboxes for a wholesome treat kids actually love, toss a few in your gym bag for post-workout fuel, keep a batch in your fridge for late-night snack cravings, bring them to potlucks and parties, or enjoy them with your morning coffee as a grab-and-go breakfast. They’re naturally gluten-free (when using certified gluten-free oats), can easily be made vegan, and are packed with fiber, protein, and healthy fats that keep you energized for hours.
The best part? These healthy granola balls with chocolate chips taste like a treat but fuel you like real food. No artificial ingredients, no processed sugars (if you choose natural sweeteners), and no guilt – just pure, delicious satisfaction in every bite. Once you see how easy they are to make, you’ll wonder why you ever bought expensive store-bought energy balls!
History / Background
While granola balls and energy bites might seem like a modern health food trend, the concept of portable, nutrient-dense food balls has ancient roots. Throughout history, travelers, warriors, and nomadic peoples created compact, shelf-stable foods that combined nuts, seeds, dried fruits, and natural sweeteners to sustain them on long journeys. Middle Eastern cultures made “energy balls” from dates and nuts centuries ago, while Native American tribes created pemmican – a mixture of dried meat, fat, and berries pressed into cakes.
The modern incarnation of granola balls emerged during the health food movement of the 1960s and 70s in the United States, when granola itself became synonymous with natural, wholesome eating. Granola was invented in the late 1800s by Dr. James Caleb Jackson, but it gained mainstream popularity in the counterculture movement when it became associated with a back-to-nature, health-conscious lifestyle.
Energy balls and protein balls specifically gained tremendous popularity in the 2000s and 2010s, coinciding with several cultural shifts: the rise of food blogs and Pinterest (where no-bake recipes proliferated), increased awareness of the importance of whole foods and clean eating, the explosion of fitness culture and the need for convenient protein-rich snacks, and busy families seeking healthier alternatives to processed snacks.
The addition of chocolate chips to these wholesome balls represents the perfect marriage of nutrition and indulgence – acknowledging that healthy eating doesn’t have to mean deprivation. It’s this balance that made chocolate chip granola energy balls a Pinterest sensation and a staple recipe in health-conscious households across America.
Today, these granola balls have secured their place as a go-to recipe for home cooks who want something quick, nutritious, and delicious. They’ve become especially popular among busy parents, fitness enthusiasts, meal preppers, and anyone seeking a better alternative to candy bars and processed snacks. The beauty of this recipe is its simplicity and adaptability – the base recipe is a blank canvas for creativity, allowing cooks to add their favorite mix-ins, adjust sweetness levels, and cater to dietary restrictions without sacrificing flavor.
Why You’ll Love This Recipe
These chocolate chip granola balls aren’t just another healthy snack recipe – they’re genuinely delicious, satisfying treats that happen to be good for you! The combination of chewy oats, creamy nut butter, natural sweetness, and those little bursts of chocolate creates a flavor and texture experience that rivals any candy or cookie.
Here’s why this recipe will become your new favorite:
- No Baking Required – Zero oven time means they’re ready in minutes and perfect for hot summer days when you don’t want to heat up the kitchen
- Ready in 10 Minutes – Literally one of the fastest recipes ever! Mix, roll, chill, and eat
- Only 7 Basic Ingredients – Simple pantry staples you probably already have on hand
- Naturally Wholesome – Packed with whole grains, healthy fats, fiber, and protein that actually fuel your body
- Kid-Approved – Children absolutely love these! They taste like a treat but parents can feel good about serving them
- Perfect for Meal Prep – Make a big batch on Sunday and have grab-and-go snacks all week long
- Highly Customizable – Easily adapt to dietary needs and personal preferences with endless variation possibilities
- Budget-Friendly – Costs a fraction of store-bought energy balls with better ingredients
- No Special Equipment – Just a bowl and spoon! Anyone can make these successfully
- Naturally Gluten-Free – When made with certified gluten-free oats, perfect for those with gluten sensitivities
- Vegan-Friendly Option – Easily made completely plant-based with simple swaps
- Portable & Mess-Free – Travel well in lunchboxes, gym bags, purses, and backpacks
- Satisfying & Energizing – The perfect balance of carbs, protein, and fat keeps hunger at bay for hours
- Healthier Than Store-Bought – You control the ingredients, avoiding unnecessary additives and excessive sugar
- Crowd-Pleasing – Everyone from toddlers to grandparents loves these little bites!
Ingredient Notes
The magic of these granola balls lies in the simple yet perfectly balanced ingredients. Each component plays a crucial role in creating the ideal texture, flavor, and nutrition:
Old-Fashioned Rolled Oats – The foundation of your granola balls! These provide fiber, complex carbohydrates, and that classic granola texture. Old-fashioned rolled oats work best because they’re thick enough to hold their shape and create the right chewy texture. Quick oats can work in a pinch but may result in a slightly mushier texture. Steel-cut oats won’t work as they’re too hard and won’t bind properly. For gluten-free needs, use certified gluten-free oats.
Nut Butter – This is the binding agent and protein powerhouse! Natural peanut butter is classic and affordable, but almond butter, cashew butter, or sunflower seed butter all work beautifully. Use creamy, not crunchy, for the smoothest texture and best binding. Natural nut butters (where the oil separates on top) work better than no-stir varieties as they’re easier to mix. Make sure to stir the nut butter well before measuring. For nut-free versions, sunflower seed butter or tahini are excellent substitutes.
Honey or Maple Syrup – Provides natural sweetness and acts as another binding agent. Honey creates a slightly chewier texture, while maple syrup results in a softer ball and adds a subtle maple flavor. Both work equally well, so choose based on preference or dietary needs (vegans should use maple syrup or agave nectar). Don’t substitute with granulated sugar as the liquid sweetener is crucial for binding.
Mini Chocolate Chips – The star that makes these balls irresistible! Mini chips distribute more evenly throughout the balls than regular-sized chips. Use semi-sweet, dark chocolate, or even vegan chocolate chips depending on preference. You can reduce the amount for a less sweet version or increase if you’re team chocolate-all-the-way!
Vanilla Extract – A small amount enhances all the other flavors and adds depth. Pure vanilla extract tastes better than imitation, but either works.
Salt – Essential for bringing out the sweetness and balancing flavors. Don’t skip this! Even just a pinch makes a huge difference.
Ground Cinnamon (optional) – Adds warmth and complexity. Cinnamon pairs beautifully with chocolate and oats, creating that cozy, comforting flavor profile.
Optional Add-Ins: Shredded coconut, ground flaxseed or chia seeds (for extra nutrition), chopped nuts, dried fruit, cocoa powder, protein powder, or hemp hearts can all be incorporated for variety and additional nutrition.
Equipment Needed
One of the best things about this recipe is how minimal the equipment requirements are! You likely have everything you need already:
- Large Mixing Bowl – For combining all your ingredients. A medium bowl works too if that’s what you have.
- Measuring Cups and Spoons – For accurate measurements to ensure the perfect texture every time.
- Sturdy Spoon or Rubber Spatula – For mixing everything together. The mixture can be thick, so a sturdy utensil helps.
- Small Cookie Scoop or Tablespoon – Makes portioning the balls uniform and easier. A 1-tablespoon cookie scoop is perfect!
- Baking Sheet or Plate – For placing the rolled balls while they chill.
- Parchment Paper or Wax Paper (optional) – Lining your baking sheet prevents sticking and makes cleanup easier.
- Airtight Container – For storing your finished granola balls in the refrigerator.
- Your Hands! – The best tool for rolling the mixture into balls. Slightly damp hands prevent sticking.
That’s it! No food processor, no mixer, no special gadgets required. This is truly a recipe anyone can make with basic kitchen tools.
Print
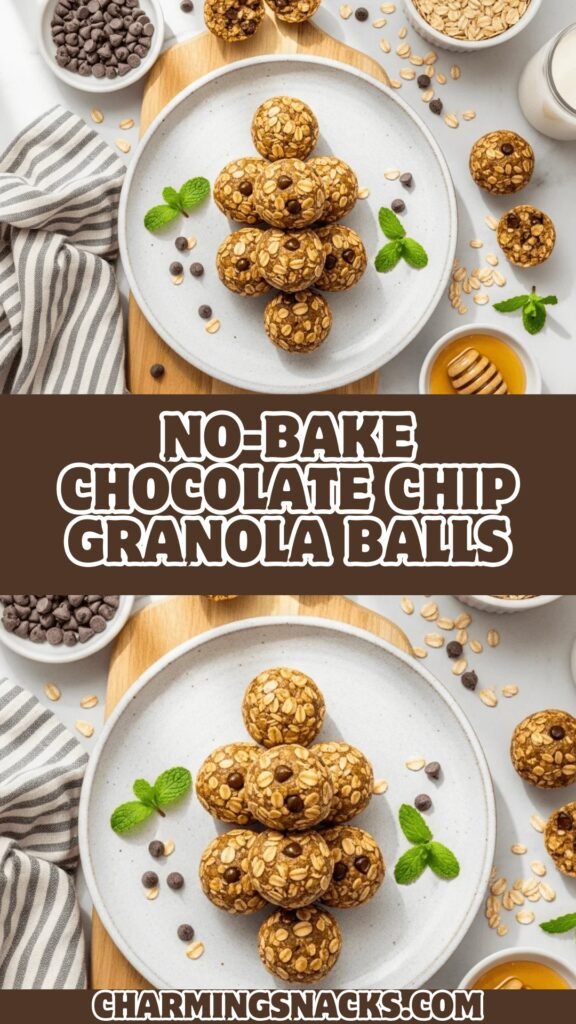
No-Bake Chocolate Chip Granola Balls
These No-Bake Chocolate Chip Granola Balls are the perfect healthy snack! Made with wholesome oats, creamy nut butter, natural sweetener, and chocolate chips, they come together in just 10 minutes with no baking required. Perfect for meal prep, lunchboxes, or anytime you need a quick energy boost!
- Total Time: 10 minutes
- Yield: 20-24 balls (about 10-12 servings) 1x
Ingredients
- 1½ cups old-fashioned rolled oats (use certified gluten-free if needed)
- ½ cup natural peanut butter (or almond butter, cashew butter, or sunflower seed butter)
- ⅓ cup honey (or pure maple syrup for vegan option)
- ½ cup mini chocolate chips (semi-sweet or dark chocolate)
- 1 teaspoon vanilla extract
- ¼ teaspoon salt
- ½ teaspoon ground cinnamon (optional but recommended)
- 2 tablespoons ground flaxseed (optional, for extra nutrition)
- 2 tablespoons shredded coconut (optional)
Instructions
- Prepare Your Workspace: Line a baking sheet or large plate with parchment paper and set aside. This is where you’ll place your rolled balls to chill.
- Combine Wet Ingredients: In a large mixing bowl, add the peanut butter, honey (or maple syrup), and vanilla extract. If your peanut butter is very thick or has been refrigerated, you can microwave it for 15-20 seconds to make it easier to stir. Mix these ingredients together until smooth and well combined.
- Add Dry Ingredients: Add the oats, salt, and cinnamon (if using) to the bowl with the wet ingredients. If you’re using optional add-ins like flaxseed or coconut, add them now as well. Stir everything together with a sturdy spoon or spatula until all the oats are completely coated with the peanut butter mixture. The mixture should be thick but sticky.
- Fold in Chocolate Chips: Add the mini chocolate chips to the mixture and fold them in gently until evenly distributed throughout. Try not to overmix at this point or the chocolate may start melting from the warmth of your hands.
- Chill the Mixture (Optional but Helpful): If the mixture feels too sticky to work with, cover the bowl and refrigerate for 10-15 minutes. This makes rolling much easier, though it’s not absolutely necessary if you’re in a hurry.
- Roll Into Balls: Using a small cookie scoop (about 1 tablespoon) or a regular tablespoon, portion out the mixture. With slightly damp or lightly oiled hands, roll each portion between your palms to form compact balls. Apply gentle but firm pressure to ensure they hold together well. Place each ball on your prepared baking sheet.
- Chill to Set: Once all balls are formed, place the baking sheet in the refrigerator for at least 30 minutes to allow them to firm up. This chilling time helps them hold their shape better and makes them less sticky to handle.
- Store and Enjoy: Transfer the chilled granola balls to an airtight container and store in the refrigerator. They’re ready to grab and enjoy whenever you need a quick, healthy snack!
Notes
- Texture Matters: The mixture should be thick and sticky but moldable. If too dry, add 1 tablespoon more nut butter or honey. If too wet, add 2 tablespoons more oats.
- Binding Issues: If balls won’t hold together, the mixture needs more liquid binder (add more nut butter or honey, 1 tablespoon at a time).
- Nut-Free Option: Use sunflower seed butter instead of peanut or almond butter for a nut-free version.
- Sweetness Level: Adjust honey/maple syrup amount to taste. Start with ¼ cup for less sweet, or increase to ½ cup for sweeter balls.
- Chocolate Distribution: Mini chips work best, but regular chocolate chips can be roughly chopped and used instead.
- Make Them Stick: Really press and compact the mixture when rolling for balls that hold together perfectly.
- Prep Time: 10 minutes
- Cook Time: 0 minutes
- Category: Dessert
- Method: No-Bake
- Cuisine: American
- Diet: Gluten Free
Nutrition
- Serving Size: 2 balls
- Calories: 185
- Sugar: 12g
- Sodium: 85mg
- Fat: 9g
- Saturated Fat: 2g
- Unsaturated Fat: 6g
- Trans Fat: 0g
- Carbohydrates: 23g
- Fiber: 3g
- Protein: 5g
- Cholesterol: 0mg
Tips & Variations
These granola balls are incredibly versatile! Here are some delicious ways to customize them:
Flavor Variations:
Peanut Butter Cup: Use peanut butter and add 2 tablespoons cocoa powder to the mixture, plus chocolate chips. Tastes like a Reese’s!
Almond Joy: Use almond butter, add ½ cup shredded coconut and use dark chocolate chips. Drizzle with melted chocolate if feeling fancy.
Cookie Dough: Add 1-2 tablespoons brown sugar, extra vanilla, and use both mini chocolate chips and white chocolate chips.
Lemon Blueberry: Omit chocolate chips and cinnamon. Add 2 tablespoons lemon zest and ⅓ cup dried blueberries.
Apple Pie: Add ½ teaspoon cinnamon, ¼ teaspoon nutmeg, and ⅓ cup finely diced dried apples. Omit chocolate chips or keep them – both work!
Tropical: Use cashew butter, add ⅓ cup shredded coconut, ¼ cup chopped dried pineapple, and ¼ cup chopped macadamia nuts. Replace chocolate chips with white chocolate chips.
Protein Boost:
Add 2-4 tablespoons of your favorite protein powder (vanilla or chocolate work best). You may need to add 1-2 tablespoons more honey to compensate for the extra dry ingredient.
Nut-Free Options:
Replace peanut butter with sunflower seed butter or tahini. The flavor will be different but equally delicious!
Add More Nutrition:
Mix in ground flaxseed, chia seeds, hemp hearts, or wheat germ for extra fiber, omega-3s, and nutrients.
Different Textures:
Add chopped nuts (walnuts, almonds, pecans) for extra crunch, or dried fruit (cranberries, raisins, chopped dates) for chewy sweetness.
Lower Sugar:
Reduce honey to ¼ cup and add 2 tablespoons of sugar-free nut butter or use a sugar-free chocolate chip alternative.
Pro Chef Tips
Want to take your granola balls from good to absolutely perfect? Here are professional secrets:
Toast Your Oats First: For extra depth of flavor, spread oats on a baking sheet and toast at 350°F for 8-10 minutes until lightly golden and fragrant. Let cool completely before using. This creates a nuttier, more complex flavor.
Room Temperature Matters: Make sure your nut butter and honey are at room temperature or slightly warm. Cold ingredients are harder to mix and won’t bind as well. If needed, microwave for 15-20 seconds to soften.
The Damp Hands Trick: Slightly damp or lightly oiled hands are the secret to rolling smooth balls without the mixture sticking everywhere. Keep a small bowl of water nearby and re-dampen hands between balls.
Compact Firmly: When rolling, apply steady, firm pressure to really compact the mixture. Loosely formed balls will fall apart. The tighter you roll, the better they’ll hold together.
Chill Before Rolling: If you have the time, refrigerating the mixture for 10-15 minutes before rolling makes the process much easier and results in neater balls.
Uniform Size: Use a cookie scoop or measuring spoon to portion out the mixture. This ensures all balls are the same size, which looks more professional and helps with consistent nutrition tracking.
Press-and-Roll Method: For balls that really hold together, first press the mixture firmly in your palm to flatten and compact it, then roll into a ball. This extra compression step makes a big difference.
Double-Batch It: This recipe doubles beautifully! The mixture keeps well, so making a larger batch means you’ll have snacks for weeks.
Flavor Development: These actually taste even better the next day after flavors have had time to meld. Make them ahead when possible!
Common Mistakes to Avoid
Even though this recipe is super simple, there are a few common pitfalls to watch out for:
Not Measuring Nut Butter Correctly: Nut butter should be measured packed into the measuring cup, not loosely scooped. Use a spoon to pack it down and level it off. Too little nut butter means dry, crumbly balls that won’t hold together.
Using the Wrong Type of Oats: Quick oats or instant oats will make the texture mushy and paste-like. Steel-cut oats are too hard and won’t bind. Always use old-fashioned rolled oats for the perfect chewy texture.
Mixture Too Dry: If your balls are crumbly and won’t hold together, add more liquid binder (nut butter or honey) one tablespoon at a time until the mixture is sticky enough to hold its shape. Different brands of ingredients have varying moisture levels, so you may need to adjust.
Not Chilling Long Enough: While you can technically eat these immediately, they’re quite sticky and soft when warm. Chilling for at least 30 minutes (or up to an hour) firms them up considerably and makes them much easier to handle and less messy to eat.
Rolling Too Loosely: Gently rolling results in balls that fall apart easily. You need to apply firm, steady pressure when rolling to really compact the ingredients together. Don’t be afraid to squeeze!
Skipping the Salt: Salt enhances sweetness and brings out all the flavors. Without it, the balls taste flat and one-dimensional. Even if you’re watching sodium, a little salt makes a huge difference.
Storage & Meal Prep
These granola balls are meal prep champions! Here’s how to store them properly:
Refrigerator Storage:
Store granola balls in an airtight container in the refrigerator for up to 2 weeks (though they rarely last that long!). Layer them between pieces of parchment paper if stacking to prevent them from sticking together. The cold temperature keeps them firm and fresh.
Room Temperature Storage:
While refrigeration is recommended, these can be kept at room temperature for 3-4 days if your house isn’t too warm. However, they’ll be softer and stickier at room temperature, especially in hot weather. The chocolate chips may also start to melt.
Meal Prep Strategy:
Make a batch every Sunday and portion them into grab-and-go containers or bags. Place 2-3 balls in small containers or snack bags for easy portion control throughout the week. They’re perfect for:
- Lunchbox snacks for kids and adults
- Pre-workout or post-workout fuel
- Afternoon energy boost at the office
- On-the-go breakfast with a piece of fruit
- Healthier dessert option
Portability:
These travel exceptionally well! They’re not messy, won’t crumble, and maintain their shape. Pack them in:
- Lunchboxes with an ice pack
- Gym bags for post-workout snacks
- Purses or backpacks for on-the-go energy
- Travel containers for road trips or flights
Freshness Tips:
The longer these sit, the more the flavors meld together and the better they taste! Don’t worry if they seem a bit soft when first made – they firm up beautifully after chilling overnight.
Make-Ahead & Freezer Notes
These granola balls are fantastic for advance preparation and freeze beautifully!
Make-Ahead Options:
Same Day: Mix the ingredients and refrigerate the mixture (unrolled) for up to 24 hours. Roll into balls when ready. This actually makes rolling easier as the mixture firms up!
Fully Prepared: Roll balls completely and refrigerate for up to 2 weeks. This is the ultimate meal prep solution – make once, enjoy for weeks.
Freezing Instructions:
Can You Freeze Granola Balls?
Absolutely! These freeze exceptionally well for up to 3 months.
How to Freeze:
- Roll and chill the balls as directed.
- Place balls on a parchment-lined baking sheet in a single layer.
- Freeze until solid (about 1-2 hours).
- Transfer frozen balls to a freezer-safe container or bag, separating layers with parchment paper.
- Label with the date and contents.
Thawing Methods:
Refrigerator (Best Method): Transfer desired amount of balls to the refrigerator the night before. They’ll be perfectly thawed and ready to eat by morning.
Room Temperature (Quick Method): Leave at room temperature for 15-20 minutes. They’ll soften slightly but remain firm enough to eat.
Eat Frozen: Some people actually prefer eating these slightly frozen! They’re firmer and less sweet-tasting when frozen, almost like a frozen truffle. Try it – you might love it!
Freezer Meal Prep:
Make a triple or quadruple batch and freeze most of them. Keep just one week’s worth in the fridge and replenish from the freezer as needed. This way you always have healthy snacks ready without constant prep work.
Serving Suggestions
While these granola balls are perfect on their own, here are some delicious ways to enjoy them:
As a Snack:
- Pair with fresh apple slices and a handful of almonds
- Serve alongside Greek yogurt and berries
- Enjoy with a glass of cold milk or plant-based milk alternative
- Pack with cheese cubes and grapes for a balanced snack plate
For Breakfast:
- Crumble 2-3 balls over yogurt parfaits for added texture
- Serve alongside oatmeal or overnight oats
- Pair with a smoothie for a complete breakfast
- Enjoy with scrambled eggs and fresh fruit for a balanced morning meal
As Dessert:
- Serve with vanilla ice cream as a healthier sundae topping
- Dip in melted dark chocolate for an extra-special treat
- Pair with fresh berries and whipped cream
- Create a dessert platter with other healthy treats
For Kids:
- Pack in lunchboxes with string cheese and fruit
- Serve as an after-school snack with celery sticks and peanut butter
- Include in bento boxes with various healthy foods
- Make a fun “build your own trail mix” station with granola balls, dried fruit, and nuts
Beverage Pairings:
- Hot coffee or tea (especially chai or cinnamon tea)
- Cold brew or iced coffee
- Chocolate milk or regular milk
- Green smoothies
- Herbal tea
- Almond milk or oat milk
Party & Entertaining:
- Add to a dessert board with cookies, brownies, and fruit
- Serve at brunch alongside muffins and pastries
- Include in a healthy snack spread for book club or game night
- Pack in party favor bags for children’s birthday parties
FAQs Section
Can I make these without chocolate chips?
Absolutely! While the chocolate chips are delicious, you can omit them entirely or substitute with other mix-ins like dried fruit (cranberries, raisins, chopped dates), chopped nuts, or even white chocolate chips. The balls will still hold together perfectly without them.
Why won’t my granola balls stick together?
This usually means the mixture is too dry and needs more binding agent. Add more nut butter or honey, one tablespoon at a time, mixing well after each addition until the mixture is sticky enough to hold its shape when pressed. Also make sure you’re pressing firmly when rolling – loose rolling won’t create enough compression.
Can I use quick oats instead of old-fashioned oats?
While old-fashioned rolled oats are strongly recommended for the best texture, quick oats can work in a pinch. The texture will be slightly softer and less chewy, and you may need to reduce the amount of liquid slightly as quick oats absorb more moisture. Avoid instant oats as they’re too fine and will make the mixture mushy.
Are these granola balls healthy?
Yes! They’re made with whole food ingredients – whole grain oats, natural nut butter, and natural sweeteners. They provide fiber, protein, and healthy fats that give you sustained energy. While they do contain sugar (from honey and chocolate), they’re much healthier than most processed snacks and provide actual nutritional value along with the sweetness.
How do I make these vegan?
Simple! Use maple syrup or agave nectar instead of honey, and choose vegan chocolate chips (many dark chocolate chips are naturally vegan, but check the label). The rest of the ingredients are already plant-based!
Can I add protein powder?
Yes! Add 2-4 tablespoons of protein powder to boost the protein content. Vanilla or chocolate protein powder work best. You may need to add an extra tablespoon or two of honey or nut butter to compensate for the extra dry ingredient and help the balls bind properly.
How long do these last, and how should I store them?
Stored in an airtight container in the refrigerator, these will stay fresh for up to 2 weeks. They can also be frozen for up to 3 months. For best results, keep them refrigerated as the cold temperature maintains their firm texture and prevents the chocolate from melting.
Can kids help make these?
Absolutely! This is a perfect recipe for kids to help with. They can measure ingredients, mix everything together, and roll the balls (the fun part!). It’s a great way to get children involved in the kitchen and teach them about healthy snacking. Just supervise younger children to ensure they’re rolling the balls properly so they hold together.
Conclusion
There you have it – everything you need to know to make the most delicious, nutritious Chocolate Chip Granola Balls that will quickly become your go-to healthy snack! These no-bake energy balls prove that eating well doesn’t have to be boring or complicated. With just a handful of wholesome ingredients, 10 minutes of your time, and zero baking required, you can create snacks that taste like a treat but fuel you like real food.
Whether you’re meal prepping for the week ahead, looking for healthier lunchbox options for your kids, needing convenient gym snacks, or simply wanting something sweet that doesn’t derail your healthy eating goals, these easy granola balls with chocolate chips deliver on every level. The fact that they’re endlessly customizable means you’ll never get bored – try a new flavor combination each time you make them!
I’d absolutely love to hear how your granola balls turn out! What flavor variation did you try? Did you make any substitutions? How quickly did your family devour them? Drop a comment below and share your experience! And if you loved this recipe as much as my readers do, please pin it to your favorite Pinterest boards so other home cooks and healthy snack lovers can discover it too. Your support helps me continue creating delicious, nutritious recipes that make healthy living easier and more enjoyable!
Now grab those oats and get mixing – your healthiest, most delicious snack adventure awaits! Trust me, once you taste how amazing homemade granola balls are, you’ll never go back to store-bought energy balls again. Happy snacking! 🍫✨