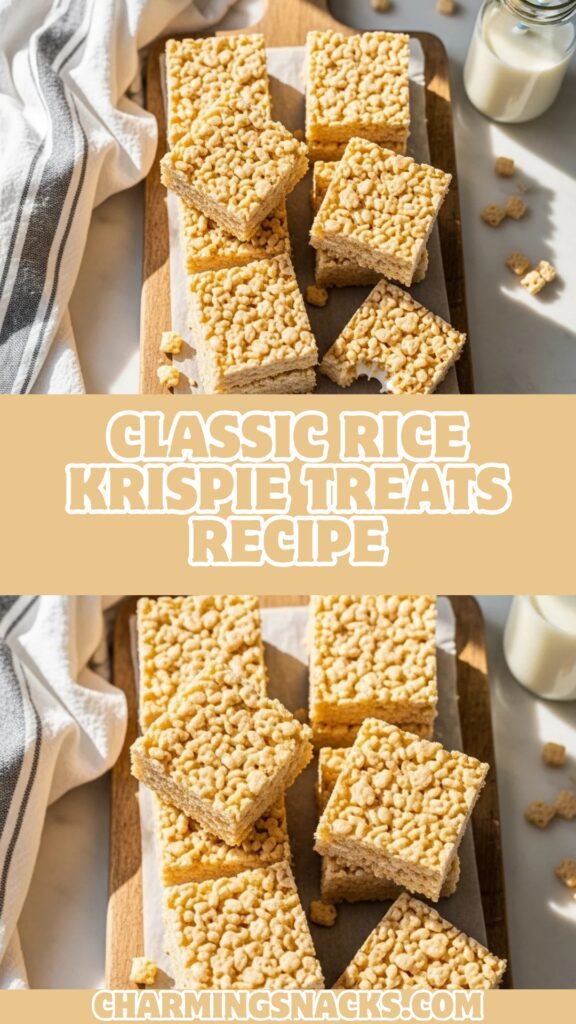
The Ultimate Classic Rice Krispie Treats Recipe (Easy 3-Ingredient Dessert!)
There’s something utterly magical about Rice Krispie Treats – those perfectly chewy, marshmallow-y squares that transport us straight back to childhood with just one bite. This classic no-bake dessert is beloved across American kitchens for good reason: it requires just three simple ingredients, takes less than 15 minutes from start to finish, and delivers that irresistible combination of crispy cereal and gooey sweetness that keeps everyone coming back for more.
Whether you’re whipping up a batch for your kids’ bake sale, need a last-minute dessert for a potluck, or simply want to relive those nostalgic childhood memories, homemade Rice Krispie Treats are the answer. They’re perfect for birthday parties, holiday gatherings, office celebrations, or even just a Tuesday afternoon when you need something sweet. Unlike their store-bought counterparts, homemade Rice Krispie Treats are fresher, more flavorful, and can be customized to your heart’s content. Today, I’m sharing the foolproof method for making the best Rice Krispie Treats you’ve ever tasted – crispy on the outside, gooey in the middle, and absolutely irresistible.
History / Background
The story of Rice Krispie Treats is a delightful slice of American culinary history that dates back to 1939. Created by Mildred Day and Malitta Jensen, who worked in the Kellogg Company’s Home Economics Department in Battle Creek, Michigan, this simple dessert was originally developed as a fundraiser for the Camp Fire Girls. The recipe was so popular that Kellogg’s began printing it on their Rice Krispies cereal boxes, and it quickly became a household staple across America.
The timing of this invention was particularly significant – during the Great Depression and heading into World War II, families needed recipes that were economical, used shelf-stable ingredients, and didn’t require an oven (saving precious fuel). Rice Krispie Treats checked all these boxes perfectly. The original recipe called for just butter, marshmallows, and Rice Krispies cereal, making it accessible to virtually every American household.
What makes this treat so culturally significant is its democratizing nature. Unlike fancy desserts that required expensive ingredients or complicated techniques, anyone could make Rice Krispie Treats successfully. This recipe has been passed down through generations, appearing at school fundraisers, church bake sales, birthday parties, and family gatherings for over 80 years. It represents a particular era of American home cooking where convenience foods were celebrated, and simple, reliable recipes became cherished family traditions.
The iconic “Snap! Crackle! Pop!” slogan of Rice Krispies cereal became forever associated with these treats, and they’ve remained one of the most popular no-bake desserts in American cuisine. Today, while the basic recipe remains unchanged, creative bakers have developed countless variations, but the original version continues to be a beloved classic.
Why You’ll Love This Recipe
This classic Rice Krispie Treats recipe is everything you want in a dessert – simple, satisfying, and guaranteed to please crowds of all ages. I’ve tested this recipe countless times, and it delivers perfect results every single time. Here’s what makes this recipe absolutely irresistible:
Key Benefits:
- Incredibly Quick – From start to finish, you’ll have these treats ready in just 15 minutes, making them perfect for last-minute dessert emergencies
- Only 3 Ingredients – You probably have everything you need in your pantry right now: butter, marshmallows, and Rice Krispies cereal
- No Baking Required – Perfect for hot summer days when you don’t want to turn on the oven, or when your oven is already occupied with dinner
- Budget-Friendly – This entire batch costs just a few dollars to make, yet yields 12-16 generous servings
- Kid-Approved – Children absolutely love these treats, and they’re safe enough for older kids to help make (with supervision)
- Endlessly Customizable – Once you master the basic recipe, you can add chocolate chips, sprinkles, peanut butter, or any mix-ins you love
- Portable & Travel-Friendly – These treats hold up beautifully for bake sales, potlucks, and picnics without refrigeration
- Always Successful – Unlike temperamental baked goods, this recipe is nearly foolproof and works perfectly every time
Whether you’re a complete beginner in the kitchen or an experienced baker looking for something easy, this recipe will become your go-to for quick, delicious treats that everyone loves.
Ingredient Notes
The beauty of Rice Krispie Treats lies in their simplicity, but understanding each ingredient helps you achieve the perfect texture and flavor every time.
Butter (3 tablespoons): Unsalted butter is my preference because it allows you to control the salt level in your treats. The butter adds richness and helps prevent the marshmallows from sticking to your pot. It also contributes to that beautiful golden color and subtle savory note that balances the sweetness. You can substitute with salted butter (just reduce any additional salt), or use vegan butter for a dairy-free version. Some bakers use margarine, though I find real butter gives the best flavor.
Marshmallows (10 ounces or about 40 regular-sized): Fresh marshmallows are crucial here – they’re the binding agent that holds everything together. I strongly recommend using one 10-ounce bag of regular marshmallows rather than mini marshmallows, as they melt more evenly and create a smoother texture. Avoid using stale marshmallows, which won’t melt properly and will result in hard, crumbly treats. In a pinch, you can use marshmallow fluff (about 2 cups), though the texture will be slightly different. For flavor variations, try strawberry, vanilla, or chocolate marshmallows.
Rice Krispies Cereal (6 cups): The star ingredient! Use genuine Kellogg’s Rice Krispies for the most authentic flavor and best texture. Generic crispy rice cereals work in a pinch but may have slightly different results. Make sure your cereal is fresh and crispy – stale cereal will make your treats taste flat. The cereal should be measured after gently settling in the measuring cup, not packed down. For gluten-free treats, verify your cereal brand is certified gluten-free, as some contain malt flavoring from barley.
Optional: Vanilla Extract (1 teaspoon): While not in the original recipe, a splash of vanilla enhances the overall flavor and adds depth. This is my secret ingredient for extra-delicious treats.
Optional: Salt (pinch): A tiny pinch of salt balances the sweetness and makes the flavors pop. If using salted butter, you can skip this.
Equipment Needed
Having the right tools makes this recipe even easier. Here’s everything you’ll need:
- Large Saucepan or Pot (3-4 quart capacity) – For melting butter and marshmallows. Non-stick is helpful but not required.
- Wooden Spoon or Heat-Resistant Silicone Spatula – For stirring the marshmallow mixture and folding in the cereal.
- 13×9-inch Baking Pan – The standard size for traditional Rice Krispie Treats. You can also use an 8×8-inch pan for thicker treats.
- Cooking Spray or Parchment Paper – To prevent sticking. I prefer parchment paper for easiest removal.
- Measuring Cups and Spoons – For accurate ingredient measurements.
- Wax Paper or Additional Parchment Paper – For pressing the mixture into the pan without it sticking to your hands.
- Sharp Knife – For cutting clean squares once the treats have set.
- Optional: Candy Thermometer – If you want to be precise about marshmallow melting temperature (not necessary for beginners).
Classic Rice Krispie Treats Recipe
Classic homemade Rice Krispie Treats are the perfect combination of crispy cereal and gooey marshmallow in every bite. This foolproof recipe takes just 15 minutes of active time and uses only 3 simple ingredients for the ultimate nostalgic dessert that kids and adults alike absolutely love.
- Total Time: 35 minutes
- Yield: 12-16 treats 1x
Ingredients
- 3 tablespoons unsalted butter
- 10 ounces (about 40) regular marshmallows or one 10-oz bag
- 6 cups Rice Krispies cereal
- 1 teaspoon vanilla extract (optional but recommended)
- Pinch of salt (optional)
- Cooking spray or butter for greasing
Instructions
- Prepare Your Pan: Line a 13×9-inch baking pan with parchment paper, leaving some overhang on the sides for easy removal, or grease it generously with butter or cooking spray. Set aside.
- Melt the Butter: In a large saucepan or pot, melt the butter over low to medium-low heat. Watch carefully to prevent burning – the butter should melt gently and completely.
- Add Marshmallows: Once butter is melted, add all the marshmallows to the pot. Stir constantly with a wooden spoon or silicone spatula. The marshmallows will begin to puff up and gradually melt into a smooth, creamy mixture. This takes about 3-5 minutes. Keep the heat low to prevent scorching.
- Check for Complete Melting: Continue stirring until no marshmallow lumps remain and the mixture is completely smooth and uniform. Remove from heat immediately to prevent overcooking.
- Add Vanilla and Salt (Optional): If using, quickly stir in the vanilla extract and pinch of salt until combined.
- Add Cereal: Working quickly, pour the Rice Krispies cereal into the marshmallow mixture. Using your spatula or wooden spoon, fold the cereal into the marshmallow mixture, making sure every piece gets coated. Work efficiently but gently – you don’t want to crush the cereal. The mixture should look evenly combined with no dry cereal remaining.
- Transfer to Pan: Immediately pour the mixture into your prepared pan. Using a piece of wax paper or buttered hands, gently but firmly press the mixture into an even layer. Don’t press too hard or your treats will be dense and hard – just firm enough to hold together.
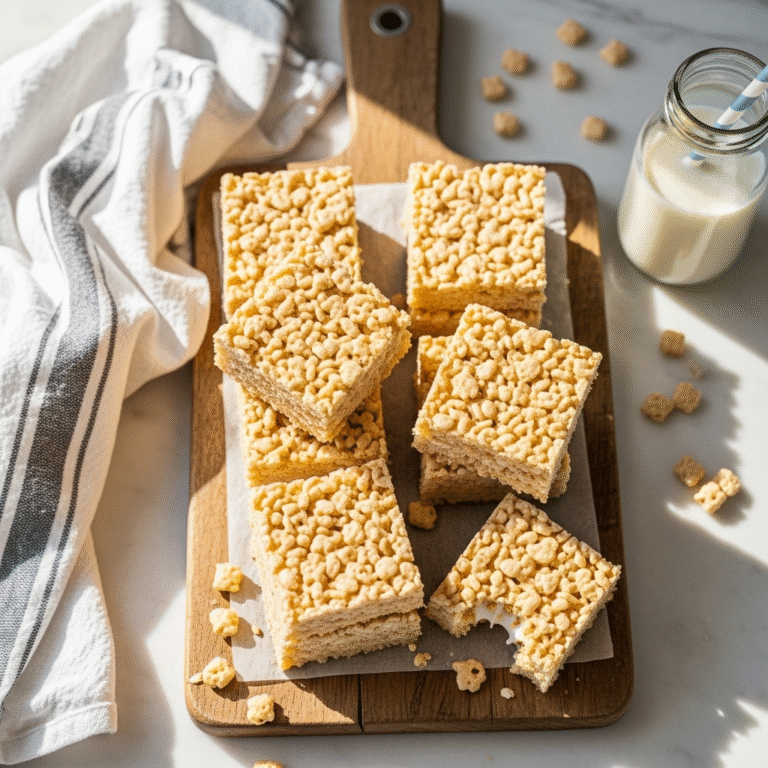
- Cool and Cut: Let the treats cool at room temperature for about 30 minutes until completely set. If you’re in a hurry, you can refrigerate for 15 minutes. Once cooled, lift the treats out using the parchment paper overhang (if used) and place on a cutting board. Using a sharp knife (sprayed with cooking spray or wiped with butter to prevent sticking), cut into 12-16 squares.
- Serve and Enjoy: Your homemade Rice Krispie Treats are ready to serve! Store any leftovers in an airtight container.
Notes
- Work Quickly: Once you add the cereal to the marshmallow mixture, work fast. The mixture sets up quickly, and if you wait too long, it becomes difficult to press into the pan.
- Don’t Overcook the Marshmallows: If marshmallows get too hot, they’ll become tough and sticky, resulting in hard treats. Low heat and constant stirring are key.
- Pressing Technique: The biggest mistake people make is pressing too hard. Gentle but firm pressure creates treats that are chewy and tender, not rock-hard.
- Fresh Ingredients: Use fresh marshmallows and crispy cereal for best results. Stale ingredients will affect the texture and taste.
- Pan Size Matters: A 13×9-inch pan creates traditional-thickness treats. Use an 8×8-inch pan for thicker treats (but they may be harder to bite through), or a 9×13-inch pan for thinner, crispier bars.
- Prep Time: 5 minutes
- Cook Time: 30 minutes
- Category: Dessert
- Method: Stovetop
- Diet: Vegetarian
Nutrition
- Serving Size: 1 treat (based on 16 servings)
- Calories: 140
- Sugar: 12g
- Sodium: 95mg
- Fat: 2.5g
- Saturated Fat: 1g
- Unsaturated Fat: 1g
- Trans Fat: 0g
- Carbohydrates: 29g
- Fiber: 0g
- Protein: 1g
- Cholesterol: 6mg
Tips & Variations
Once you’ve mastered the classic recipe, the possibilities for customization are endless! Here are some delicious ways to make this recipe your own:
Chocolate Lovers: Stir in 1 cup of chocolate chips, M&Ms, or chopped chocolate bars immediately after adding the cereal. The residual heat will slightly melt them for pockets of chocolate throughout. You can also drizzle melted chocolate over the top once cooled.
Peanut Butter Dream: Add 1/2 cup of creamy peanut butter to the melted marshmallow mixture before adding the cereal. This creates an irresistibly rich, nutty flavor. Top with a chocolate drizzle for homemade peanut butter cup treats.
Birthday Cake Style: Add 1-2 tablespoons of rainbow sprinkles to the mixture before pressing into the pan. You can also use funfetti or birthday cake flavored marshmallows for extra festivity.
S’mores Variation: Use Golden Grahams cereal instead of Rice Krispies (or half and half), add mini chocolate chips, and top with toasted mini marshmallows for a campfire-inspired treat.
Brown Butter Elevation: Instead of regular melted butter, brown the butter first for a nutty, caramelized flavor that adds sophisticated depth.
Seasonal Themes: Add food coloring to match holidays (green for St. Patrick’s Day, orange for Halloween, red and green for Christmas). Mix in holiday-themed candies like candy corn, conversation hearts, or mini peanut butter cups.
Cereal Swaps: Try using Fruity Pebbles, Cocoa Pebbles, Cinnamon Toast Crunch, or Lucky Charms for completely different flavor profiles.
Add Crunch: Mix in 1/2 cup of chopped nuts (pecans, almonds, or peanuts), pretzels, or toffee bits for added texture.
Pro Chef Tips
Want to take your Rice Krispie Treats from good to absolutely phenomenal? Here are my professional secrets:
The Low-and-Slow Method: Patience is everything. Melt your marshmallows over the lowest heat setting possible. This prevents the sugars from caramelizing too much, which causes tough, hard treats. It takes a few extra minutes, but the result is noticeably more tender and chewy.
The Fresh Marshmallow Test: Press a marshmallow gently between your fingers. It should feel soft, pillowy, and spring back. If it feels hard or stale, your treats won’t have that perfect gooey texture. Always use the freshest marshmallows possible.
Temperature Matters: Don’t let your marshmallow mixture get above 240°F if you’re using a thermometer. Beyond this temperature, the sugars begin to change structure and you’ll end up with harder treats.
The Gentle Fold: When adding cereal, use a folding motion rather than vigorous stirring. This ensures even coating without crushing the delicate rice cereal, maintaining that signature crispy texture.
Grease Your Hands, Not Just the Pan: When pressing the mixture into the pan, butter your hands or use a piece of wax paper lightly sprayed with cooking spray. This prevents sticking and allows you to create an even layer without the mixture pulling apart.
The 24-Hour Secret: While these are delicious immediately, the flavor and texture actually improve after 24 hours. The marshmallow sets up perfectly and the flavors meld together beautifully. If you can resist, make them a day ahead for the best results.
Add Extras at the Right Time: For mix-ins like chocolate chips, add them to the cereal BEFORE mixing with marshmallows, or immediately after combining cereal and marshmallows. This ensures even distribution and prevents the mixture from cooling too much.
Cut with Confidence: For the cleanest cuts, use a sharp chef’s knife sprayed with cooking spray or wiped with butter. Use a straight downward motion rather than sawing back and forth.
Common Mistakes to Avoid
Even with such a simple recipe, there are a few pitfalls that can turn your treats from perfect to disappointing. Here’s what to watch out for:
Overheating the Marshmallows: This is the #1 mistake! High heat causes the sugars in marshmallows to harden as they cool, resulting in rock-hard treats that are impossible to bite through. Always use low to medium-low heat and stir constantly. If you notice your marshmallows starting to brown or caramelize, your heat is too high.
Pressing Too Hard: Many people think they need to really pack the mixture down firmly, but this compresses the air pockets and creates dense, hard squares. Use gentle, even pressure – just enough to make the mixture hold together in an even layer.
Using Stale Ingredients: Old marshmallows lose moisture and won’t melt smoothly. Stale cereal lacks that satisfying snap. Always check your ingredients are fresh before starting. Marshmallows should be soft and springy, cereal should be crispy and aromatic.
Waiting Too Long to Press: Once you combine the cereal with the marshmallow mixture, you need to work quickly. If you wait even 2-3 minutes, the mixture begins to set up and becomes difficult to spread evenly. Have your pan ready and press immediately.
Wrong Pan Size: Using a different sized pan dramatically affects your treats. Too large and they’ll be thin and crispy (though some people prefer this). Too small and they’ll be thick, dense, and hard to bite through. Stick with 13×9 inches for the traditional texture.
Measuring Cereal Incorrectly: Don’t pack the cereal into your measuring cup – you want it lightly settled. Too much cereal and your treats will be dry and fall apart; too little and they’ll be overly sticky and dense.
Cutting Too Soon: If you cut before the treats have fully cooled and set, they’ll be gooey and fall apart. Wait at least 30 minutes at room temperature, or 15 minutes in the refrigerator.
Storage & Meal Prep
Proper storage keeps your Rice Krispie Treats fresh, chewy, and delicious for days. Here’s everything you need to know:
Room Temperature Storage: Rice Krispie Treats are best stored at room temperature in an airtight container. They’ll stay fresh and maintain their perfect texture for up to 3 days. Layer them between sheets of parchment or wax paper if stacking to prevent sticking. Keep them away from heat and direct sunlight, which can cause them to become sticky.
Refrigerator Storage: While not necessary, you can refrigerate Rice Krispie Treats if your kitchen is particularly warm or humid. They’ll keep for up to 1 week in an airtight container. Note that refrigeration can make them slightly firmer, but they’ll soften back up if left at room temperature for 15-20 minutes before serving.
Preventing Staleness: The biggest enemy of Rice Krispie Treats is air exposure, which makes them hard. Always store in a truly airtight container – ziplock bags or containers with tight-fitting lids work perfectly. If your treats do become a bit hard, you can sometimes revive them by microwaving briefly (5-10 seconds) to soften the marshmallow again.
Keeping Them Soft: Place a slice of bread in the container with your treats. The treats will absorb moisture from the bread, staying softer longer. Replace the bread slice every day or two.
Travel Tips: Rice Krispie Treats travel exceptionally well! Wrap individual bars in plastic wrap for lunch boxes, road trips, or gifts. They don’t need refrigeration and won’t melt like chocolate-based treats, making them perfect for bake sales and outdoor events.
Reheating (If Needed): If your treats become too firm, place one on a microwave-safe plate and heat for 5-10 seconds. This softens the marshmallow slightly. Be careful not to overheat or they’ll become too sticky.
Make-Ahead & Freezer Notes
Rice Krispie Treats are one of the best make-ahead desserts, perfect for meal prep and batch cooking!
Make-Ahead Timeline: You can make these treats up to 3 days in advance. In fact, many people find they taste even better after sitting for 24 hours, as the flavors meld together and the texture reaches peak perfection. Simply store in an airtight container at room temperature until ready to serve.
Freezer-Friendly: Yes! Rice Krispie Treats freeze beautifully for up to 6 weeks. To freeze, let the treats cool completely, then cut into squares. Wrap each square individually in plastic wrap, then place all wrapped treats in a freezer-safe ziplock bag or container. This double-wrapping prevents freezer burn and makes it easy to grab individual portions.
Thawing Instructions: Remove treats from the freezer and let them thaw at room temperature for about 30 minutes to 1 hour. For faster thawing, you can microwave frozen treats for 10-15 seconds, but watch carefully to avoid overheating. They’re also delicious eaten semi-frozen on a hot day – they have a nice, chewy texture!
Batch Cooking: This recipe doubles and triples perfectly, making it ideal for parties or stocking your freezer. You can make several batches in different flavors, freeze them all, and have a variety ready for last-minute needs.
Best Practices for Freezing: Cut treats into individual portions before freezing rather than freezing the whole pan. This makes it much easier to remove just what you need. Label your container with the date so you remember when they were made.
Not Recommended for Freezing: If you’ve added fresh fruit or cream cheese frosting to your treats, they won’t freeze as well. Stick to freezing basic treats or those with shelf-stable mix-ins like chocolate chips or nuts.
Serving Suggestions
Rice Krispie Treats are delicious on their own, but here are some creative ways to serve them:
Classic Presentation: Arrange squares on a decorative plate or cake stand lined with colorful napkins. Dust lightly with powdered sugar for an elegant touch at parties.
Dessert Pairings: Serve alongside vanilla ice cream for a nostalgic sundae. Add chocolate sauce and whipped cream for an indulgent treat bar. Pair with fresh berries and a drizzle of caramel sauce for a semi-homemade dessert.
Party Platter Ideas: Cut into smaller bite-sized pieces for party platters. Alternate with brownies, cookies, and fudge for a diverse dessert spread. Use cookie cutters to create fun shapes for themed parties or holidays.
Beverage Pairings: These treats pair beautifully with cold milk (the classic choice!), hot chocolate, coffee, or even champagne for an elevated dessert experience. For kids’ parties, serve with fruit punch or chocolate milk.
Ice Cream Sandwiches: Cut treats in half horizontally to create thinner layers, then sandwich vanilla ice cream between them for homemade Rice Krispie ice cream sandwiches.
Gift Giving: Wrap individual treats in cellophane bags tied with ribbons for party favors, teacher gifts, or care packages. Stack them in a decorative tin for holiday gifting.
Breakfast or Snack: While technically a dessert, these make a fun breakfast treat or after-school snack. Serve with fresh fruit to balance the sweetness.
FAQs Section
Q: Why are my Rice Krispie Treats hard and not chewy?
A: This usually happens when the marshmallows are overheated or cooked too long. High heat causes the sugars to harden as they cool. Always use low heat and remove from heat as soon as the marshmallows are melted. Another cause is pressing too firmly when spreading in the pan. Use gentle pressure to maintain the chewy texture.
Q: Can I make Rice Krispie Treats without butter?
A: While butter adds flavor and prevents sticking, you can substitute with coconut oil, vegan butter, or even cooking spray in a pinch. The texture will be slightly different, but they’ll still work. Some people use a bit of marshmallow fluff as a substitute, though this changes the proportions slightly.
Q: My treats fell apart when I tried to cut them. What went wrong?
A: This typically means either you didn’t use enough marshmallow to bind the cereal, you cut them before they fully cooled and set, or your marshmallows were stale. Make sure to use the full amount of marshmallows and let the treats cool completely (30 minutes) before cutting. Fresh marshmallows are essential for proper binding.
Q: Can I make these dairy-free or vegan?
A: Absolutely! Use vegan butter and check that your marshmallows are vegan (some brands like Dandies make vegan marshmallows). Many Rice Krispies cereals are accidentally vegan, but check the label to be sure about vitamin D3 sources. The recipe works exactly the same way with these substitutions.
Q: How do I prevent the mixture from sticking to my hands when pressing into the pan?
A: Butter your hands liberally, use a piece of wax paper sprayed with cooking spray, or wear food-safe gloves sprayed with oil. You can also use the bottom of a measuring cup sprayed with cooking spray to press the mixture evenly. Work quickly before the mixture cools and becomes harder to spread.
Q: Can I add protein powder to make these healthier?
A: Yes, you can add 2-3 tablespoons of vanilla protein powder to the marshmallow mixture before adding the cereal. More than this can make them dry and chalky. Keep in mind this is still a sweet treat even with added protein. Some people also use brown rice cereal or add chia seeds for extra nutrition.
Q: My treats are too sticky. How do I fix this?
A: Overly sticky treats usually result from not using enough cereal or from the mixture being too hot when mixed. Next time, measure your cereal carefully (6 cups lightly settled, not packed) and let the marshmallow mixture cool for 30 seconds after removing from heat before adding cereal. If your current batch is too sticky, you can try adding another cup of cereal and gently mixing it through.
Q: What’s the best way to cut clean, even squares?
A: Use a large, sharp knife sprayed with cooking spray or wiped with butter. Wipe the knife clean between each cut and re-spray as needed. For the cleanest cuts, use a straight downward motion rather than sawing. A pizza cutter also works wonderfully and creates perfectly straight edges!
Conclusion
There you have it – the ultimate guide to making perfect, chewy, absolutely irresistible homemade Rice Krispie Treats! This classic American dessert has stood the test of time for good reason: it’s incredibly simple, requires just three basic ingredients, and delivers that nostalgic, comforting sweetness that everyone loves.
Whether you’re making these for a bake sale, a family gathering, or just because you’re craving something sweet, this foolproof recipe ensures success every single time. The key is remembering those critical points: low heat for the marshmallows, gentle folding of the cereal, and light pressing into the pan. Master these basics and you’ll have perfectly chewy treats that rival any bakery version.
I hope this recipe brings as much joy to your kitchen as it has to mine! Rice Krispie Treats are more than just a dessert – they’re an edible memory, a connection to simpler times, and proof that the best recipes don’t need to be complicated to be absolutely delicious.
Now it’s your turn! Head to your kitchen and whip up a batch of these delightful treats. I’d love to hear how they turned out for you. Did you stick with the classic recipe or try one of the variations? What’s your favorite way to customize them? Drop a comment below and let me know! And if you loved this recipe, please share it on Pinterest to help other home cooks discover the magic of homemade Rice Krispie Treats. Don’t forget to pin your favorite photos for easy reference next time you need a quick, crowd-pleasing dessert!
Happy cooking, and here’s to many batches of perfectly gooey, crispy, delicious Rice Krispie Treats in your future! 🎉