Crispy Baked Ravioli Appetizer – Easy, Cheesy & Party-Perfect!
Get ready to discover your new favorite party appetizer that disappears faster than you can make it! This Baked Ravioli Appetizer takes ordinary frozen ravioli and transforms them into crispy, golden, bite-sized pieces of heaven that are perfect for dipping. If you’re looking for an easy crowd-pleaser that looks impressive but requires minimal effort, this crispy baked ravioli recipe is about to become your secret weapon for entertaining!
What makes this easy ravioli appetizer so irresistible? Imagine tender cheese-filled ravioli coated in seasoned breadcrumbs and Parmesan, baked until golden and crispy on the outside while staying soft and cheesy inside. Served with warm marinara sauce for dipping, they’re like eating the best parts of lasagna and mozzarella sticks combined! Whether you’re hosting game day, planning a party, need something for potlucks, looking for an after-school snack the kids will actually eat, or want an impressive appetizer for dinner guests, these baked ravioli bites deliver every single time.
The best part? This recipe uses store-bought frozen ravioli, so there’s no complicated pasta-making involved. Just coat, bake, and serve! They’re naturally kid-friendly (what child doesn’t love anything you can dunk in marinara?), budget-conscious, and can be prepped ahead for stress-free entertaining. Serve them at your next gathering and watch them vanish within minutes – I guarantee you’ll be making these on repeat!
History / Background
The Baked Ravioli Appetizer is a beautiful example of Italian-American fusion cuisine – taking a traditional Italian pasta and reimagining it in a completely new way. While ravioli itself has ancient roots dating back to 14th century Italy, this crispy, breaded version is a thoroughly modern American invention.
Traditional ravioli originated in Italy as filled pasta parcels, with different regions claiming various versions as their own. The word “ravioli” comes from the Italian verb “riavvolgere,” meaning “to wrap.” These delicate pasta pillows were traditionally stuffed with ricotta, meat, or vegetables, boiled, and served with butter, sage, or tomato sauce. They represented Italian cooking at its finest – simple ingredients transformed into something special through careful technique and tradition.
The transformation of ravioli from a main course pasta dish to a crispy, finger-food appetizer happened in American home kitchens and restaurants, likely during the 1990s and early 2000s when fusion cuisine and creative appetizers became increasingly popular. American cooks began experimenting with taking familiar Italian ingredients and presenting them in new, party-friendly ways.
This breaded, baked version likely drew inspiration from several sources: the popularity of mozzarella sticks (breaded, fried cheese that became an American restaurant staple), the Italian tradition of arancini (breaded and fried rice balls), and the American love of finger foods and dippable appetizers. The genius was recognizing that ravioli – already filled with delicious cheese – could be transformed into a hand-held appetizer by coating them in breadcrumbs and either frying or baking them until crispy.
The baked version became especially popular as home cooks sought healthier alternatives to deep-fried foods. Baking the breaded ravioli in the oven produces similar crispy results with significantly less oil, making them feel less indulgent while still being absolutely delicious. The accessibility of quality frozen ravioli made this recipe even more approachable – no pasta-making skills required!
Today, this crispy ravioli appetizer has become a staple at parties, game day gatherings, and family dinners across America. It represents the best of Italian-American cooking: honoring traditional flavors while embracing innovation and convenience.
Why You’ll Love This Recipe
This easy baked ravioli appetizer is honestly one of those recipes I make constantly because it checks every single box for what makes a perfect party food. It’s become my most-requested appetizer for good reason!
Here’s why you’ll be obsessed:
- Ridiculously easy to make – If you can dip and bake, you can make this!
- Uses frozen ravioli – No pasta-making skills or hours of prep required
- Healthier than fried – All the crispy goodness with way less oil
- Kid-approved guaranteed – Even picky eaters love these
- Perfect for entertaining – Can feed a crowd without breaking a sweat
- Budget-friendly – Uses affordable ingredients you can find anywhere
- Make-ahead friendly – Prep in advance for stress-free hosting
- Versatile serving options – Works as appetizer, snack, or light dinner
- Customizable – Easy to adapt with different fillings and seasonings
- Restaurant-quality results – Looks and tastes like you ordered takeout
- No deep fryer needed – Oven-baked means less mess and fewer calories
- Always disappears first – I’ve never had leftovers at a party!
Ingredient Notes
Every ingredient in this crispy baked ravioli works together to create that perfect golden exterior and cheesy interior. Here’s what you need to know:
Frozen Ravioli: The star of the show! You can use any variety – cheese ravioli is classic and universally loved, but meat-filled, spinach and cheese, mushroom, or lobster ravioli all work beautifully. Don’t thaw the ravioli before using – frozen works best for this recipe. A 25-ounce package typically contains about 30-35 ravioli, perfect for appetizer portions.
All-Purpose Flour: Creates the first layer in the breading station. The flour helps the egg wash stick to the ravioli and creates a base for the breadcrumb coating. You can substitute with gluten-free flour if needed.
Eggs: Act as the “glue” that holds the breadcrumb coating to the ravioli. Beat them well with a splash of water or milk to create an even coating that adheres properly.
Italian Breadcrumbs: Provide the crispy coating and are already seasoned with Italian herbs, garlic, and spices. If you only have plain breadcrumbs, you can add your own Italian seasoning, garlic powder, and salt. Panko breadcrumbs create an even crispier coating if you prefer extra crunch.
Parmesan Cheese: Freshly grated Parmesan adds nutty, salty flavor and helps create that golden-brown crust. Use the real stuff (Parmigiano-Reggiano) for best flavor – the pre-grated kind in the green can won’t give you the same results.
Italian Seasoning: A blend of dried herbs like basil, oregano, thyme, and rosemary that adds authentic Italian flavor. You can make your own blend or use store-bought.
Garlic Powder: Adds savory depth to the breading. Fresh minced garlic doesn’t work well here as it can burn during baking.
Olive Oil or Cooking Spray: A light coating of oil helps the ravioli crisp up and turn golden brown in the oven. You can use spray olive oil, regular olive oil in a spray bottle, or brush with oil.
Marinara Sauce: Essential for serving! Use your favorite jarred marinara, or make homemade if you have time. Warm the sauce before serving for the best dipping experience.
Optional Garnish: Fresh basil and extra Parmesan make a beautiful finishing touch.
Equipment Needed
This recipe requires minimal equipment, making it perfect for any kitchen:
- Large baking sheet – For baking the ravioli (you may need 2 sheets depending on quantity)
- Parchment paper or silicone baking mat – Prevents sticking and makes cleanup easy
- Three shallow bowls or pie plates – For the breading station (flour, eggs, breadcrumbs)
- Fork or small whisk – For beating the eggs
- Tongs or two forks – For coating ravioli without making a mess
- Wire cooling rack (optional) – Elevates ravioli for crispier bottoms
- Pastry brush or oil mister – For applying oil to ravioli
- Small saucepan – For warming marinara sauce
- Serving platter – For presenting your beautiful appetizer
- Small bowls – For serving marinara dipping sauce
That’s all you need! No deep fryer, no specialty equipment, just basic kitchen tools.
Print
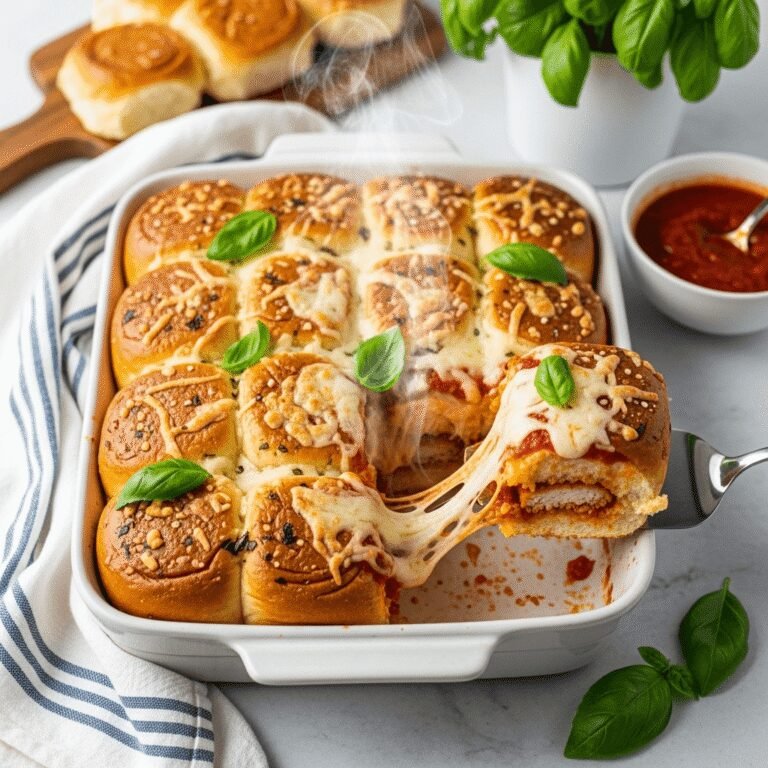
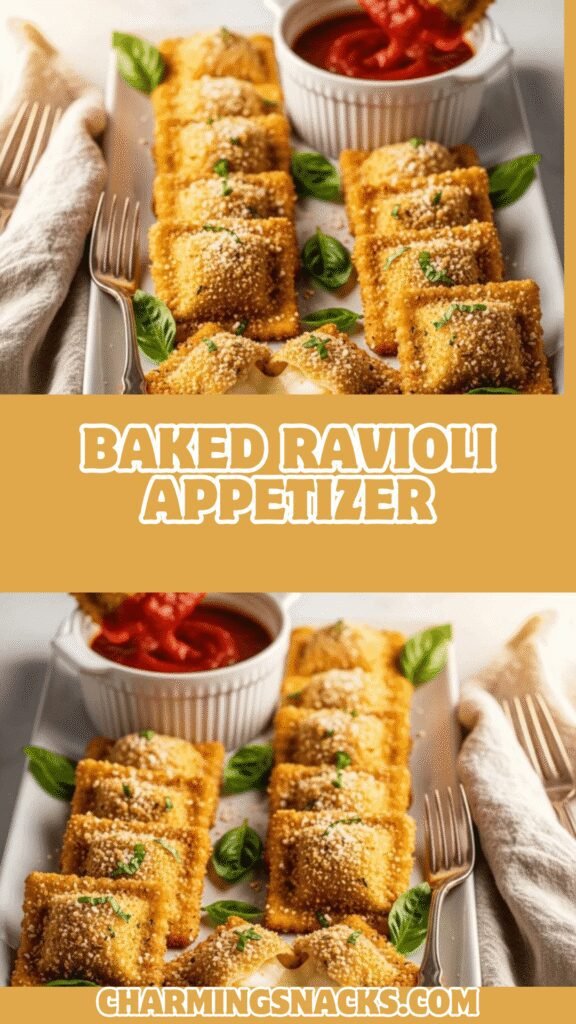
Crispy Baked Ravioli Appetizer
These Crispy Baked Ravioli are golden, crunchy on the outside and filled with melty cheese on the inside! Coated in Italian breadcrumbs and Parmesan, then baked to perfection, they’re the ultimate crowd-pleasing appetizer served with warm marinara sauce.
- Total Time: 35 minutes
- Yield: 6-8 servings (about 30-35 pieces) 1x
Ingredients
- 1 (25-ounce) package frozen ravioli (cheese, meat, or your choice)
- ½ cup all-purpose flour
- 3 large eggs
- 2 tablespoons water or milk
- 2 cups Italian-style breadcrumbs
- 1 cup freshly grated Parmesan cheese
- 2 teaspoons Italian seasoning
- 1 teaspoon garlic powder
- ½ teaspoon salt
- ¼ teaspoon black pepper
- Olive oil cooking spray or 2-3 tablespoons olive oil
- 2 cups marinara sauce, for serving (warmed)
- Fresh basil leaves, for garnish (optional)
- Extra Parmesan cheese, for garnish (optional)
Instructions
Step 1: Prepare Your Baking Sheet
Preheat your oven to 425°F (220°C). Line a large baking sheet with parchment paper or a silicone baking mat. If you have a wire cooling rack that fits your baking sheet, place it on top of the parchment – this allows hot air to circulate around the ravioli for even crispier results. Set aside.
Step 2: Set Up Your Breading Station
This is the key to success! Set up three shallow bowls or pie plates in assembly-line fashion. In the first bowl, add the flour. In the second bowl, beat together the eggs and water (or milk) with a fork until well combined and slightly frothy. In the third bowl, combine the Italian breadcrumbs, Parmesan cheese, Italian seasoning, garlic powder, salt, and black pepper. Mix thoroughly to ensure the seasonings are evenly distributed throughout the breadcrumbs.
Step 3: Bread the Ravioli
Keep the ravioli frozen – don’t thaw them! Working with one ravioli at a time (or a few if you get the hang of it), first coat it completely in flour, shaking off any excess. Next, dip it into the egg mixture, making sure it’s completely coated. Let excess egg drip off. Finally, press the ravioli into the breadcrumb mixture, coating both sides generously. Press gently so the breadcrumbs adhere well. Place the breaded ravioli on your prepared baking sheet. Repeat with remaining ravioli, arranging them in a single layer with a little space between each one.
Step 4: Apply Oil for Crispiness
Once all ravioli are breaded and arranged on the baking sheet, spray them generously with olive oil cooking spray, or use a pastry brush to lightly brush them with olive oil. Make sure you get the tops well-coated – this is what creates that golden, crispy exterior. Don’t skip this step!
Step 5: Bake to Golden Perfection
Place the baking sheet in your preheated oven and bake for 12-15 minutes. Carefully flip each ravioli using tongs or a spatula, spray or brush the other side with oil, and bake for an additional 8-10 minutes until both sides are golden brown and crispy. The ravioli should be crispy on the outside and heated through inside. Keep an eye on them during the last few minutes – oven temperatures vary, and you want golden brown, not dark brown.
Step 6: Warm the Marinara Sauce
While the ravioli are baking, warm your marinara sauce in a small saucepan over medium-low heat, stirring occasionally. You can also heat it in the microwave in 30-second intervals. Warm sauce is much better for dipping than cold!
Step 7: Serve Immediately
Remove the ravioli from the oven and let them cool for just 2-3 minutes – they’ll be extremely hot inside! Transfer to a serving platter and garnish with fresh basil leaves and extra Parmesan cheese if desired. Serve immediately with the warm marinara sauce in small bowls for dipping. Watch them disappear!
Notes
- Don’t thaw the ravioli: Frozen ravioli work best and hold their shape during breading
- Work in batches: If your baking sheet is too crowded, use two sheets or bake in batches
- Spray generously: The oil spray is crucial for achieving that golden, crispy exterior
- Flip carefully: Use tongs or a thin spatula to avoid breaking the crispy coating
- Serve hot: These are best enjoyed fresh from the oven while crispy
- Double batch: This recipe is so popular, you might want to double it!
- Air fryer option: Can be made in an air fryer at 380°F for 10-12 minutes, flipping halfway
- Prep Time: 15 minutes
- Cook Time: 20 minutes
- Category: Appetizer
- Method: Baking
- Cuisine: Italian-American
- Diet: Vegetarian
Nutrition
- Serving Size: 4-5 ravioli pieces with marinara
- Calories: 285
- Sugar: 4g
- Sodium: 680mg
- Fat: 11g
- Saturated Fat: 4g
- Unsaturated Fat: 6g
- Trans Fat: 0g
- Carbohydrates: 34g
- Fiber: 3g
- Protein: 14g
- Cholesterol: 95mg
Tips & Variations
Make This Recipe Your Own:
Different Ravioli Fillings: Experiment with various frozen ravioli! Try butternut squash ravioli with sage butter for dipping, lobster ravioli for an upscale appetizer, mushroom ravioli with truffle oil, or spinach and ricotta for a vegetarian favorite.
Extra Crispy Version: Use panko breadcrumbs instead of Italian breadcrumbs for maximum crunch. Mix half panko and half Italian breadcrumbs for the best of both worlds.
Spicy Kick: Add ½ teaspoon red pepper flakes to the breadcrumb mixture, serve with spicy arrabbiata sauce instead of marinara, or sprinkle with crushed red pepper before serving.
Garlic Lover’s Dream: Add an extra teaspoon of garlic powder to the breadcrumbs, serve with garlic aioli for dipping, or toss the baked ravioli in melted garlic butter.
Ranch Style: Add ranch seasoning mix to the breadcrumbs and serve with ranch dressing for dipping – kids go crazy for this version!
Pesto Variation: Serve with pesto sauce instead of marinara for a fresh, herby twist. You can also add some pesto to the marinara for a combination sauce.
Cheesy Overload: After baking, sprinkle with additional mozzarella cheese and return to the oven for 2 minutes to melt, creating a super cheesy version.
Air Fryer Method: Arrange breaded ravioli in a single layer in the air fryer basket, spray with oil, and cook at 380°F for 10-12 minutes, flipping halfway through.
Gluten-Free Option: Use gluten-free ravioli and gluten-free breadcrumbs to make this dish celiac-friendly.
Herb Garden Version: Add fresh chopped herbs like parsley, oregano, or basil to the breadcrumb mixture for extra flavor.
Pro Chef Tips
Keep Your Breading Station Organized: Use one hand for wet ingredients (egg) and one hand for dry ingredients (flour and breadcrumbs) to prevent your fingers from becoming completely coated in breading. This “wet hand, dry hand” technique keeps the process cleaner and more efficient.
Double Bread for Extra Crunch: For an ultra-crispy coating, do a second dip! After the initial breading, dip the ravioli back into the egg wash, then into the breadcrumbs again. This creates a thicker, crunchier crust that holds up even better to dipping.
Press Breadcrumbs Firmly: Don’t just sprinkle breadcrumbs on – really press them into the ravioli to ensure they adhere properly. Gently pat and press the breadcrumbs so they stick well and won’t fall off during baking.
Space Matters: Don’t overcrowd your baking sheet! Ravioli need space between them for hot air to circulate. Crowded ravioli steam rather than crisp up. If necessary, use two baking sheets or bake in batches.
Oil Application is Critical: Professional kitchens know that the key to crispy baked (not fried) food is proper oil application. You need enough oil to promote browning and crispiness, but not so much that it’s greasy. A light, even spray on both sides is perfect.
Use the Right Oven Temperature: 425°F is the sweet spot – hot enough to crisp the breadcrumbs quickly without burning, but not so hot that the outside burns before the inside heats through. Don’t be tempted to increase the temperature thinking it will be faster.
Let Them Rest Briefly: While you want to serve these relatively quickly, letting them rest for 2-3 minutes after baking allows the cheese inside to set slightly so it won’t burn your mouth, and the exterior to set up and become even crispier.
Common Mistakes to Avoid
Mistake #1: Thawing the Ravioli First
Many people think they need to thaw frozen ravioli before breading them, but this actually makes them soggy and difficult to coat! The ravioli can fall apart or become mushy. Always bread frozen ravioli straight from the package – they’ll cook perfectly in the oven while the coating crisps up.
Mistake #2: Skipping the Oil Spray
This is the biggest mistake! Without oil, your ravioli will be dry and pale instead of golden and crispy. The oil is essential for browning and creating that restaurant-quality crunch. Don’t skip it or use too little – be generous with the spray.
Mistake #3: Not Heating the Marinara Sauce
Cold marinara sauce is a disappointment with hot, crispy ravioli. The temperature contrast is jarring, and cold sauce doesn’t coat the ravioli as nicely. Always warm your marinara – it makes a significant difference in the eating experience.
Mistake #4: Overcrowding the Baking Sheet
When ravioli are touching or too close together, they steam instead of crisping. The moisture they release during cooking creates humidity, preventing that golden, crunchy exterior. Give each piece space to breathe, even if it means baking in two batches.
Mistake #5: Not Flipping Halfway Through
Only cooking one side results in unevenly browned ravioli with one crispy side and one pale, soft side. Flipping ensures both sides get equally golden and crispy. Yes, it’s an extra step, but it’s essential for the best texture.
Storage & Meal Prep
Storing Baked Ravioli:
Store any leftover baked ravioli in an airtight container in the refrigerator for up to 3 days. Be aware that they will lose some of their crispiness as they sit – this is inevitable with breaded, baked foods. However, they’re still delicious and can be re-crisped!
Reheating for Best Results:
The oven or air fryer are your best options for reheating. Preheat your oven to 375°F (190°C) and bake the ravioli on a baking sheet for 8-10 minutes until heated through and crispy again. In an air fryer, reheat at 350°F for 5-6 minutes. Avoid the microwave – it will make them soggy.
Storing Marinara Sauce:
Store leftover marinara sauce separately in an airtight container in the refrigerator for up to 5 days, or freeze for up to 3 months. Reheat on the stovetop or in the microwave.
Meal Prep Tips:
You can prep the breading station ingredients ahead of time. Mix the breadcrumb mixture and store in an airtight container for up to a week. Measure out flour into a container. This makes it quick to set up when you’re ready to bread the ravioli.
Packed Lunches:
These make great additions to lunch boxes! Pack them cold with a small container of marinara sauce. They’re still tasty at room temperature, though not as crispy.
Make-Ahead & Freezer Notes
Make-Ahead Instructions:
These baked ravioli appetizers are excellent for make-ahead entertaining! Here’s your strategy:
- Up to 2 hours before baking: Bread all the ravioli and arrange them on the baking sheet. Cover loosely with plastic wrap and refrigerate. Spray with oil and bake just before serving.
- Up to 1 day ahead: Prepare the breadcrumb mixture and store in an airtight container. Set up your breading station right before you’re ready to cook.
- Same day: Bread the ravioli in the morning, cover and refrigerate, then bake fresh when guests arrive.
Freezing Breaded (Unbaked) Ravioli:
This is the best make-ahead option! Bread the ravioli completely, arrange them on a baking sheet in a single layer (not touching), and freeze until solid (about 2 hours). Transfer the frozen breaded ravioli to a freezer bag or airtight container and freeze for up to 2 months. To bake: No need to thaw! Arrange frozen breaded ravioli on a baking sheet, spray with oil, and bake at 425°F for 18-22 minutes, flipping halfway through.
Freezing Baked Ravioli:
You can freeze already-baked ravioli, though they won’t be quite as crispy when reheated. Cool completely, freeze in a single layer, then transfer to a freezer bag. Freeze for up to 1 month. Reheat from frozen at 375°F for 12-15 minutes.
Best Practice for Parties:
For stress-free entertaining, bread the ravioli up to 2 hours ahead, keep them refrigerated, then bake in batches throughout your party. This ensures guests always get hot, fresh, crispy ravioli!
Serving Suggestions
These crispy ravioli bites are incredibly versatile and work beautifully in many serving scenarios:
As a Party Appetizer:
- Arrange on a large platter surrounding bowls of warm marinara
- Perfect for game day spreads alongside wings, nachos, and dips
- Ideal for cocktail parties – easy to eat standing up
- Great for potlucks – always a hit and easy to transport
As Part of an Italian Feast:
- Serve before a pasta dinner like lasagna or spaghetti
- Include on an antipasto platter with meats, cheeses, and olives
- Pair with other Italian appetizers like bruschetta and caprese skewers
- Great starter before serving osso buco or chicken piccata
For Family Meals:
- Serve with a simple green salad for an easy dinner
- Perfect after-school snack kids actually get excited about
- Light lunch option with tomato soup
- Fun Friday night finger food meal
Dipping Sauce Options:
- Classic: Warm marinara or tomato sauce
- Creamy: Alfredo sauce or garlic cream sauce
- Pesto: Basil pesto or sun-dried tomato pesto
- Ranch: Ranch dressing (especially kid-friendly)
- Garlic: Garlic aioli or roasted garlic butter
- Spicy: Arrabbiata sauce or spicy vodka sauce
Complete Party Menu:
- Appetizers: These baked ravioli, caprese skewers, antipasto platter
- Main: Italian sausage sliders or baked ziti
- Side: Caesar salad and garlic bread
- Dessert: Tiramisu or cannoli
- Drinks: Italian wines, Aperol spritz, or Italian sodas
Beverage Pairings:
These ravioli pair wonderfully with Italian red wines (Chianti, Sangiovese), crisp white wines (Pinot Grigio, Soave), Italian beer (Peroni, Moretti), sparkling water, or for non-alcoholic options, Italian sodas or lemonade.
FAQs Section
Can I use fresh ravioli instead of frozen?
Yes, but fresh ravioli are more delicate and can fall apart more easily during the breading process. If using fresh, work gently and consider refrigerating them for 30 minutes before breading to firm them up. Fresh ravioli will also cook faster, so reduce baking time by 3-5 minutes and watch carefully.
Do I have to flip the ravioli halfway through baking?
While you technically don’t have to, flipping ensures both sides get evenly golden and crispy. If you skip this step, the bottom will be paler and less crispy than the top. For the best texture and appearance, I strongly recommend flipping.
Can I make these in an air fryer?
Absolutely! Air fryers work great for this recipe. Arrange breaded ravioli in a single layer in the air fryer basket (don’t overcrowd), spray with oil, and cook at 380°F for 10-12 minutes, flipping halfway through and spraying the other side. Work in batches if necessary.
What’s the best type of ravioli to use?
Cheese ravioli (typically ricotta or a blend of Italian cheeses) is the most popular and kid-friendly option. However, any frozen ravioli works! Try meat-filled for heartier appetizers, lobster for elegant entertaining, or butternut squash for fall gatherings.
Can I make these gluten-free?
Yes! Use gluten-free ravioli (several brands make them) and substitute gluten-free breadcrumbs for the Italian breadcrumbs. Use gluten-free flour or skip the flour step entirely and go straight from ravioli to egg to breadcrumbs. The texture will be slightly different but still delicious.
Why are my ravioli not getting crispy?
The most common reasons are: not using enough oil spray, overcrowding the baking sheet (which creates steam), or oven temperature being too low. Make sure you’re baking at 425°F, giving ravioli space, and spraying generously with oil on both sides.
Can I prep these ahead for a party?
Yes! The best method is to bread all the ravioli up to 2 hours before baking, arrange them on the baking sheet, cover loosely, and refrigerate. About 25 minutes before serving, pop them in the oven. For longer advance prep, freeze the breaded ravioli and bake from frozen when needed.
Conclusion
These Crispy Baked Ravioli Appetizers are hands-down one of my favorite party foods to make because they never fail to impress! There’s something so satisfying about taking humble frozen ravioli and transforming them into restaurant-quality appetizers that look like you spent hours in the kitchen. The combination of that golden, crunchy exterior with the soft, melty cheese interior is absolutely addictive – and serving them with warm marinara for dunking? Pure genius!
What I love most about this easy baked ravioli recipe is how it manages to be simultaneously impressive and effortless. Your guests will think you’re a culinary wizard, but you’ll know the secret: it’s just frozen ravioli, a simple breading process, and your oven doing all the work. No deep frying, no complicated techniques, no stress – just delicious, crowd-pleasing results every time.
Whether you’re hosting game day, planning a party, looking for an after-school snack, or need a quick appetizer for unexpected guests, these crispy ravioli bites have you covered. They’re the kind of recipe that becomes your signature dish – the one everyone asks you to bring, the one that always disappears first, the one you make on repeat because it’s just that good.
Ready to make the easiest, most impressive appetizer ever? Grab a bag of frozen ravioli and get ready for crispy, cheesy perfection! I’d absolutely love to hear how yours turn out – leave a comment below sharing your experience, what type of ravioli you used, or any creative variations you tried. And please save this recipe to your Pinterest boards so you can make it for your next gathering! Share it with friends who love easy entertaining and crowd-pleasing appetizers.
Happy baking, and here’s to many platters of these irresistible crispy ravioli!