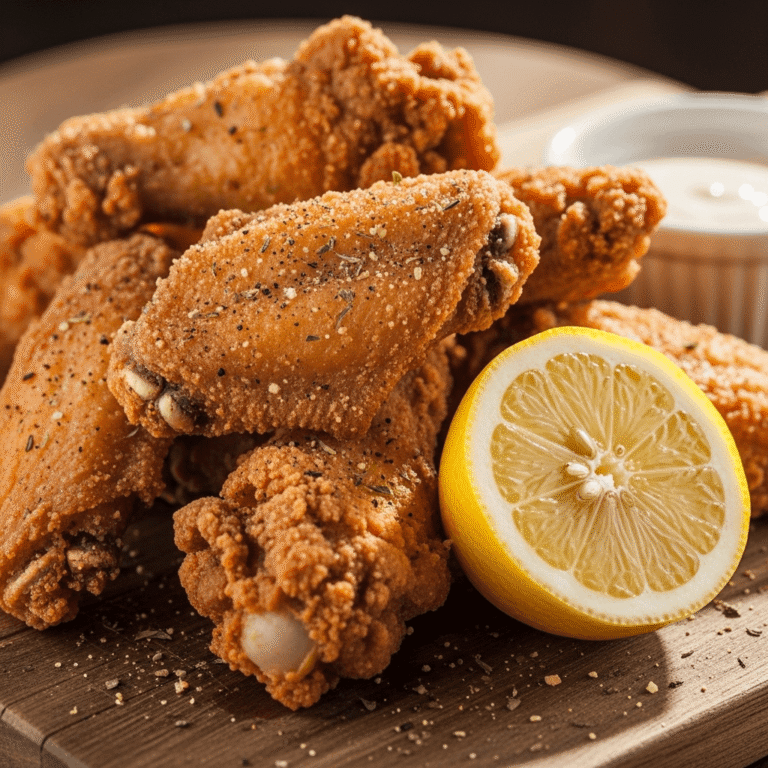
Crispy Fried Goat Cheese Balls with Honey Drizzle

These crispy goat cheese appetizers are perfect for holiday gatherings, game day parties, wine nights with friends, or any time you want to elevate your entertaining game. They’re fancy enough for special occasions but surprisingly easy to make at home. The combination of tangy goat cheese, crispy panko coating, and a drizzle of sweet honey creates a flavor profile that’s absolutely irresistible. Whether you’re hosting a sophisticated cocktail party or a casual get-together, these golden beauties will be the star of your appetizer spread.
What makes these fried goat cheese bites even better is their versatility—serve them over mixed greens for an elegant salad, arrange them on a charcuterie board, or simply present them with your favorite dipping sauces. They’re also incredibly customizable, allowing you to add herbs, spices, or different coatings to match your personal taste preferences.
History / Background
Goat cheese, also known as chèvre in French culinary terminology, has been enjoyed by humans for thousands of years—making it one of the oldest cheeses in existence. Archaeological evidence suggests that goat cheese production dates back over 8,000 years to ancient Mesopotamia and the Mediterranean regions. Goats were among the first animals to be domesticated, and their milk was naturally processed into cheese as a way to preserve this nutritious food source.
The concept of frying cheese isn’t new either. Many cultures around the world have traditional fried cheese dishes—from Greek saganaki to Mexican queso frito to Italian mozzarella fritta. However, the modern American version of fried goat cheese balls gained popularity in upscale restaurants during the farm-to-table movement of the late 1990s and early 2000s. Chefs began featuring these crispy goat cheese rounds on salads and as standalone appetizers, showcasing locally-sourced artisanal cheeses.
The trend quickly moved from restaurant menus to home kitchens as food bloggers and cooking shows demonstrated how achievable these restaurant-quality appetizers were to make at home. The Pinterest era further propelled their popularity, with home cooks sharing beautiful photos of golden, crispy goat cheese balls drizzled with honey or balsamic glaze. Today, they’ve become a staple at dinner parties, holiday gatherings, and wine tastings across America, representing the perfect marriage of rustic Mediterranean ingredients and modern American entertaining style.
Why You’ll Love This Recipe
These crispy fried goat cheese balls check every box for the perfect appetizer, combining restaurant-quality results with home-cook-friendly simplicity. The contrast between the warm, creamy interior and the golden, crunchy coating creates an addictive texture that keeps people coming back for more.
Here’s why this recipe deserves a permanent spot in your entertaining repertoire:
- Incredibly Easy: Despite their impressive appearance, these require just a simple three-step breading process that anyone can master
- Make-Ahead Friendly: Prepare them hours or even days in advance, then fry just before serving for fresh, hot appetizers
- Budget-Conscious: A log of goat cheese goes a long way, making these more affordable than you’d think for such an elegant appetizer
- Quick Cooking Time: They fry in just 2-3 minutes, meaning you can serve hot appetizers to guests without being stuck in the kitchen
- Customizable: Easily adapt the coating with different herbs, nuts, or spices to match your menu or preferences
- Crowd-Pleaser: The combination of tangy, creamy, crispy, and sweet appeals to virtually everyone’s palate
- Versatile Presentation: Serve them as a standalone appetizer, over salads, or as part of a larger cheese board
- Perfect Party Food: They’re finger-food friendly and look stunning on any serving platter
- Impressive Yet Approachable: Your guests will think you’re a culinary genius, but you’ll know how simple they actually were to make
Ingredient Notes
Understanding your ingredients ensures the best possible results with these crispy goat cheese appetizers. Here’s what you need to know about each component:
Goat Cheese: The star of the show! Look for a firm, fresh goat cheese log (chèvre) rather than the crumbly variety. The cheese should be cold when you work with it, making it easier to shape and coat. Fresh goat cheese has that perfect tangy flavor that contrasts beautifully with the sweet honey. If you’re sensitive to goat cheese’s tanginess, you can substitute cream cheese or a combination of half goat cheese and half cream cheese for a milder flavor.
All-Purpose Flour: Creates the first layer that helps the egg wash adhere to the cheese. The flour coating also prevents the cheese from leaking out during frying. You can substitute with gluten-free all-purpose flour if needed.
Eggs: Acts as the “glue” that binds the panko coating to the cheese balls. Make sure your eggs are at room temperature for the best consistency. Beating them well ensures even coating.
Panko Breadcrumbs: Japanese-style breadcrumbs are essential here—they’re larger and flakier than regular breadcrumbs, creating that irresistibly crispy, crunchy exterior. Don’t substitute regular breadcrumbs or you’ll lose that signature crunch. You can find panko in the international aisle or with other breadcrumbs at any grocery store.
Fresh Herbs (Optional): Chopped fresh thyme, rosemary, or basil mixed into the panko adds an aromatic dimension. Fresh herbs work better than dried here, as they distribute more evenly in the coating.
Vegetable Oil: Use a neutral oil with a high smoke point for frying—vegetable, canola, or peanut oil all work wonderfully. You need enough oil to come halfway up the cheese balls for proper frying.
Honey: The finishing touch that adds sweetness to balance the tangy cheese and savory coating. Use good-quality honey for the best flavor—local honey adds a special touch. Hot honey (honey infused with chili peppers) is an exciting alternative for those who like a little heat.
Salt and Pepper: Simple seasonings that enhance all the other flavors. Season both the flour and panko for maximum flavor impact.
Equipment Needed
Having the right tools makes this recipe even easier. Here’s everything you’ll need:
- Medium mixing bowls (3): One each for flour, beaten eggs, and panko coating
- Large heavy-bottomed skillet or Dutch oven: For frying—cast iron works beautifully and maintains steady temperature
- Cooking thermometer: Ensures your oil stays at the perfect temperature (350°F) for golden, crispy results
- Slotted spoon or spider strainer: For safely removing the fried cheese balls from hot oil
- Paper towels: Placed on a plate or baking sheet to drain excess oil
- Sharp knife: For slicing the goat cheese log into rounds
- Baking sheet: For staging your breaded cheese balls before frying
- Measuring cups and spoons: For accurate ingredient quantities
- Small bowl or squeeze bottle: For drizzling honey
- Serving platter: For presenting your finished masterpiece

Crispy Fried Goat Cheese Balls
Golden, crispy fried goat cheese balls with a creamy tangy center, finished with a drizzle of sweet honey. These elegant appetizers are perfect for entertaining and surprisingly easy to make at home!
- Total Time: 35 minutes
- Yield: 16-18 cheese balls (serves 6-8) 1x
Ingredients
- 8 oz log fresh goat cheese (chèvre), cold
- ½ cup all-purpose flour
- 2 large eggs, beaten
- 1½ cups panko breadcrumbs
- 2 tablespoons fresh thyme leaves, finely chopped (optional)
- ½ teaspoon salt
- ¼ teaspoon black pepper
- ¼ teaspoon garlic powder (optional)
- Vegetable oil for frying (about 2-3 cups)
- ¼ cup honey, for drizzling
- Fresh herbs for garnish (thyme, basil, or microgreens)
- Flaky sea salt for finishing (optional)
Instructions
- Prepare the goat cheese: Remove the goat cheese from the refrigerator. Using a sharp knife, slice the log into ½-inch thick rounds (you should get about 16-18 pieces). Gently roll each round between your palms to form smooth balls. Place them on a parchment-lined baking sheet and refrigerate for 15 minutes to firm up—this prevents them from falling apart during breading.
- Set up your breading station: Arrange three shallow bowls in a row. In the first bowl, place the flour seasoned with a pinch of salt and pepper. In the second bowl, add the beaten eggs. In the third bowl, combine the panko breadcrumbs with chopped fresh thyme (if using), remaining salt, pepper, and garlic powder. Mix well to distribute seasonings evenly.
- Bread the cheese balls: Working with one cheese ball at a time, roll it in the flour to coat completely, shaking off excess. Next, dip it into the beaten egg, allowing excess to drip off. Finally, roll it in the panko mixture, pressing gently to ensure the crumbs adhere well. Place the coated ball back on the baking sheet. Repeat with all cheese balls. For extra crispiness, you can double-coat by dipping the breaded balls back into egg and panko one more time.
- Chill the coated cheese balls: Once all balls are breaded, place the baking sheet in the refrigerator for at least 30 minutes (or up to 4 hours). This crucial step helps the coating set and prevents the cheese from leaking during frying.
- Heat the oil: Pour vegetable oil into a large, heavy-bottomed skillet or Dutch oven to a depth of about 1-1½ inches. Heat over medium-high heat until the oil reaches 350°F on a cooking thermometer. To test without a thermometer, drop a small piece of bread into the oil—it should sizzle immediately and turn golden in about 30 seconds.
- Fry the cheese balls: Working in batches of 4-5 balls at a time (don’t overcrowd), carefully place the cheese balls into the hot oil using a slotted spoon. Fry for 1-2 minutes, turning once, until golden brown on all sides. The coating should be deeply golden and crispy. Watch them carefully—they cook quickly!
- Drain and serve: Using a slotted spoon, transfer the fried cheese balls to a paper towel-lined plate to drain excess oil. Allow the oil to return to 350°F between batches. While still hot, transfer to your serving platter.
- Finish and garnish: Drizzle the warm goat cheese balls generously with honey. Sprinkle with fresh herb leaves and a pinch of flaky sea salt if desired. Serve immediately while hot and crispy!
Notes
- Make-Ahead Tip: Bread the cheese balls up to 2 days in advance and store them covered in the refrigerator. Fry just before serving.
- Oil Temperature: Maintaining 350°F is crucial. Too hot and the coating burns before the cheese warms; too cool and they’ll be greasy.
- Serving Temperature: These are best served hot, when the cheese is warm and creamy inside. They lose appeal as they cool and the cheese firms up.
- Reheating: If needed, reheat in a 375°F oven for 5-7 minutes to re-crisp, though they’re always best fresh.
- Honey Alternative: Balsamic glaze, fig jam, or hot pepper jelly all make excellent alternatives to honey.
- Prep Time: 20 minutes
- Cook Time: 15 minutes
- Category: Appetizer
- Method: Pan-Frying
- Cuisine: American
- Diet: Vegetarian
Nutrition
- Serving Size: 2-3 cheese balls
- Calories: 245
- Sugar: 9g
- Sodium: 285mg
- Fat: 16g
- Saturated Fat: 6g
- Unsaturated Fat: 9g
- Trans Fat: 0g
- Carbohydrates: 18g
- Fiber: 1g
- Protein: 8g
- Cholesterol: 68mg
Tips & Variations
Flavor Variations:
- Herbed Version: Mix fresh basil, oregano, or dill into the panko for an Italian-inspired twist
- Spicy Kick: Add cayenne pepper or red pepper flakes to the breading, and drizzle with hot honey
- Nutty Crunch: Replace half the panko with finely chopped pecans, walnuts, or pistachios for added texture and flavor
- Everything Bagel Style: Mix everything bagel seasoning into the panko coating for a savory-forward version
- Sweet and Savory: Add a teaspoon of lemon zest to the panko and serve with lavender honey
Cheese Alternatives:
- Cream Cheese: Use for a milder, less tangy flavor
- Boursin: Garlic and herb flavored cheese adds extra depth
- Feta: Creates a saltier, more Mediterranean-style appetizer (use less salt in coating)
- Brie: Remove rind, cut into cubes, freeze solid before breading for a luxurious twist
Cooking Method Variations:
- Air Fryer: Spray breaded balls with cooking spray and air fry at 375°F for 6-8 minutes, turning halfway
- Baked: Place on a parchment-lined baking sheet, spray with oil, and bake at 425°F for 12-15 minutes until golden
Serving Style Options:
- Serve over arugula salad with balsamic vinaigrette for an elegant first course
- Thread onto skewers with cherry tomatoes and fresh basil for easy serving
- Arrange on a holiday cheese board alongside crackers, fruits, and cured meats
- Present in individual serving cups with microgreens for cocktail parties
Pro Chef Tips
Temperature Control is Everything: Professional kitchens use thermometers religiously, and you should too. Oil that’s too hot will burn the coating before warming the cheese center, while oil that’s too cool creates greasy, soggy appetizers. Maintain that steady 350°F for perfect results every time.
The Double-Coating Technique: For extra-crispy cheese balls that hold together beautifully, do a double coat. After the first complete breading (flour, egg, panko), dip back into the egg wash and roll in fresh panko one more time. This creates an exceptionally thick, crunchy shell that’s virtually leak-proof.
Freeze Before Frying: Here’s a restaurant secret—after breading your cheese balls, freeze them solid (at least 2 hours or overnight). Fry them straight from frozen. This allows the coating to crisp up before the cheese inside has a chance to melt and leak out. You’ll need to add 30-60 seconds to the frying time, but the results are worth it.
Use Fresh Oil: Old or reused frying oil can impart off-flavors and doesn’t maintain temperature as well. For the cleanest-tasting, crispiest results, use fresh oil. If you must reuse oil, strain it well and use it within a few days.
Season Every Layer: Don’t just season the panko—add salt and pepper to the flour coating too. This ensures flavor in every bite. Professional chefs know that proper seasoning at each stage creates depth of flavor.
Work Quickly and Confidently: When frying, don’t hesitate or fidget with the cheese balls constantly. Add them to the oil confidently, let them cook undisturbed for 45-60 seconds, turn once, and remove promptly. Overhandling leads to coating damage and potential cheese leakage.
Quality Ingredients Matter: Since there are so few ingredients in this recipe, each one shines through. Splurge on good goat cheese from a reputable brand or local creamery, use real honey (not corn syrup), and fresh herbs when possible. Your taste buds will thank you.
Common Mistakes to Avoid
Starting with Warm Cheese: This is the number one mistake! If your goat cheese is too soft or at room temperature, it will leak during frying. Always work with cold cheese, and chill the formed balls before breading. After breading, chill again before frying.
Skipping the Resting Time: Rushing to fry immediately after breading leads to coating that doesn’t adhere properly. The refrigeration time allows the coating to set and bond to the cheese, preventing it from sliding off in the hot oil.
Overcrowding the Pan: When you add too many cheese balls at once, the oil temperature drops dramatically, resulting in greasy, pale appetizers instead of crispy golden ones. Fry in small batches, allowing the oil to return to temperature between batches.
Using Regular Breadcrumbs Instead of Panko: Regular breadcrumbs create a dense, less crispy coating. Panko’s larger, flakier structure creates that signature light, crunchy texture that makes these irresistible. Don’t substitute!
Frying at the Wrong Temperature: Without a thermometer, it’s just guesswork. Too hot and the outside burns while the inside stays cold; too cool and they absorb excess oil and turn soggy. Invest in a simple cooking thermometer—it’s a game-changer for all your frying needs.
Not Draining Properly: Placing fried cheese balls directly on a serving platter without draining makes them greasy. Always use paper towels to absorb excess oil, then transfer to your final serving dish.
Letting Them Sit Too Long: These are at their absolute best served immediately. The cheese is creamy, the coating is crispy, and the contrast is perfect. As they sit, the coating softens and the cheese firms up. Plan your timing so they come out of the oil right before serving.
Storage & Meal Prep
Refrigerator Storage: Store any leftover fried goat cheese balls in an airtight container in the refrigerator for up to 2 days. However, be aware that the coating will soften significantly. They’re still delicious but won’t have that fresh-fried crispiness.
Pre-Breading Storage: The absolute best way to prep these ahead is to bread them completely, arrange them on a parchment-lined baking sheet without touching, and refrigerate covered for up to 2 days before frying. This is perfect for party planning—do all the messy breading work a day or two ahead, then just fry them fresh when guests arrive.
Reheating Instructions: To revive leftover fried cheese balls and restore some crispiness, place them on a wire rack set over a baking sheet and reheat in a 375°F oven for 5-7 minutes. The wire rack allows air circulation, helping the coating crisp up again. Avoid microwaving, as this makes them soggy and rubbery.
Draining and Serving: If making these for a party, keep a warming tray set to low (around 200°F) nearby. As you fry batches, you can keep finished cheese balls warm without them getting soggy. Just don’t hold them longer than 15-20 minutes or the cheese may begin to leak.
Honey Drizzling Tip: Wait to drizzle honey until right before serving. If you drizzle too early, it will make the coating soggy. Keep the honey in a squeeze bottle or small pitcher so guests can add more to their liking.
Make-Ahead & Freezer Notes
Breaded and Frozen (Best Method): This is the ultimate make-ahead technique! Bread the cheese balls completely, arrange them on a parchment-lined baking sheet, and freeze until solid (about 2 hours). Once frozen solid, transfer them to a freezer bag or airtight container, separating layers with parchment paper. They’ll keep beautifully for up to 3 months. When ready to serve, fry them directly from frozen—no thawing needed! Just add an extra minute to the frying time. This method actually produces superior results because the frozen cheese stays intact while the coating crisps perfectly.
Unbreaded Cheese Ball Prep: You can form the unbreaded goat cheese balls and freeze them on a tray, then store in a freezer bag for up to 3 months. Thaw them in the refrigerator before breading and frying. This option takes a bit more last-minute work but gives you flexibility.
Already-Fried Freezing: While not ideal, you can freeze already-fried cheese balls for up to 1 month. Let them cool completely, freeze on a tray, then transfer to a freezer container. Reheat from frozen in a 375°F oven for 10-12 minutes. The texture won’t be quite as crispy as fresh, but it’s acceptable for casual meals.
Thawing Guidelines: If you’ve frozen unbreaded or already-fried cheese balls, always thaw them in the refrigerator, never at room temperature. This prevents food safety issues and maintains the best texture.
Party Planning Timeline: For stress-free entertaining, here’s the perfect schedule:
- 2-3 days before: Bread all cheese balls, cover, and refrigerate
- Day of party, 2 hours before: Heat oil and fry all batches; keep warm in low oven on wire rack
- Just before serving: Arrange on platter, drizzle with honey, garnish with herbs
Serving Suggestions
These crispy fried goat cheese balls are incredibly versatile and pair beautifully with a variety of accompaniments:
Salad Presentations:
- Serve warm cheese balls over a bed of mixed greens, arugula, or baby spinach with balsamic vinaigrette for an elegant starter salad
- Create a roasted beet and goat cheese salad with candied walnuts and orange vinaigrette
- Arrange over butter lettuce with sliced pears, dried cranberries, and champagne vinaigrette
Dipping Sauces:
- Hot honey (honey infused with chili peppers) for sweet heat
- Balsamic reduction or balsamic glaze for tangy sweetness
- Fig jam or preserves for sophisticated sweetness
- Marinara sauce for an Italian twist
- Cranberry sauce during the holidays
- Pepper jelly for Southern flair
Beverage Pairings:
- Crisp white wines: Sauvignon Blanc, Pinot Grigio, or Chardonnay
- Light reds: Pinot Noir or Beaujolais
- Sparkling wines: Prosecco or Champagne
- Craft beers: Wheat beers or light IPAs
- Non-alcoholic: Sparkling apple cider or lemonade
Complete Appetizer Spread: Build an impressive appetizer board by surrounding your fried goat cheese balls with:
- Fresh and dried fruits (grapes, figs, apricots)
- Assorted crackers and crostini
- Cured meats (prosciutto, salami)
- Olives and pickled vegetables
- Honey, jams, and mustards
- Candied or spiced nuts
Meal Integration: While these shine as appetizers, they also work beautifully as:
- A protein element in grain bowls with quinoa and roasted vegetables
- A topping for creamy tomato soup
- A garnish for pasta dishes with light cream or tomato sauces
- Part of a Mediterranean mezze platter with hummus, pita, and fresh vegetables
FAQs Section
Q: Can I use regular breadcrumbs instead of panko? A: While you technically can, I strongly recommend against it. Panko breadcrumbs are what create that signature light, crispy, crunchy texture that makes these goat cheese balls so irresistible. Regular breadcrumbs produce a denser, less crispy coating that doesn’t have the same wow factor. Panko is readily available in any grocery store and truly makes a difference in the final result.
Q: Why did my cheese leak out during frying? A: Cheese leakage happens for a few reasons: the cheese was too warm when you fried it, the oil temperature was too low (allowing the cheese to melt before the coating set), or there were gaps in your coating. Always start with cold cheese, chill the breaded balls for at least 30 minutes before frying, maintain oil temperature at 350°F, and ensure the coating is even with no bare spots. For foolproof results, freeze the breaded balls solid before frying.
Q: Can I make these in an air fryer? A: Absolutely! Air frying is a great lower-fat alternative. Spray the breaded cheese balls generously with cooking spray (this is crucial for crispiness), arrange them in a single layer in your air fryer basket without touching, and cook at 375°F for 6-8 minutes, turning halfway through. They won’t be quite as golden or crispy as deep-fried versions, but they’re still delicious and much lighter.
Q: How far in advance can I prepare these? A: For the best results, bread your cheese balls up to 2 days in advance and store them covered in the refrigerator, then fry just before serving. For even longer advance prep, bread them completely and freeze for up to 3 months—they can be fried straight from frozen with just an extra minute of cooking time. This makes them perfect for party planning!
Q: What can I substitute for goat cheese? A: If you’re not a fan of goat cheese’s tangy flavor, try cream cheese for a milder option, or use Boursin (garlic and herb cheese spread) for extra flavor. Feta cheese works for a Mediterranean twist, though it’s saltier so reduce the salt in your coating. For a luxurious variation, try brie—just remove the rind, cut into cubes, and freeze solid before breading.
Q: Can these be made ahead and reheated? A: While they’re always best fresh from the fryer, you can make them a few hours ahead and reheat in a 375°F oven on a wire rack for 5-7 minutes before serving. The coating won’t be quite as crispy as when freshly fried, but this method works reasonably well for parties. Never microwave them, as this makes them soggy and rubbery.
Q: Are these gluten-free friendly? A: They can be! Simply substitute gluten-free all-purpose flour for regular flour and use gluten-free panko breadcrumbs (several brands make them, and they’re increasingly available in regular grocery stores). The process and results are virtually identical. Make sure to check that all your other ingredients (including any seasonings) are certified gluten-free if this is for someone with celiac disease.
Conclusion
There you have it—everything you need to create these absolutely irresistible Crispy Fried Goat Cheese Balls that’ll make you the star of every gathering! From their ancient Mediterranean roots to your modern dinner table, these golden beauties represent the perfect marriage of simple ingredients and impressive results. The combination of warm, creamy, tangy goat cheese encased in a perfectly crispy panko shell, finished with a drizzle of sweet honey, creates a flavor and texture experience that your guests simply won’t be able to resist.
Whether you’re planning an elegant holiday dinner party, a casual game day gathering, or simply want to treat yourself to restaurant-quality appetizers at home, this recipe delivers every single time. The best part? Despite looking and tasting like something from an upscale bistro, they’re surprisingly simple to make with just a handful of ingredients and basic cooking techniques that anyone can master.
Now it’s your turn to experience the magic! Give these fried goat cheese balls a try and watch them disappear from your serving platter within minutes. I’d absolutely love to hear how they turned out for you—did you try any of the flavor variations? What did your family think? Drop a comment below sharing your experience, and don’t forget to rate this recipe!
Before you go, PIN THIS RECIPE to your appetizer board on Pinterest so you’ll have it ready the next time you’re planning a party or need a show-stopping starter. Your future entertaining self will thank you! And if you love these as much as I do, please share this recipe with your friends who love to entertain—everyone deserves to have this crowd-pleaser in their recipe collection.
Happy cooking, and here’s to crispy, creamy, absolutely delicious appetizers that make every gathering a little more special! 🧀✨