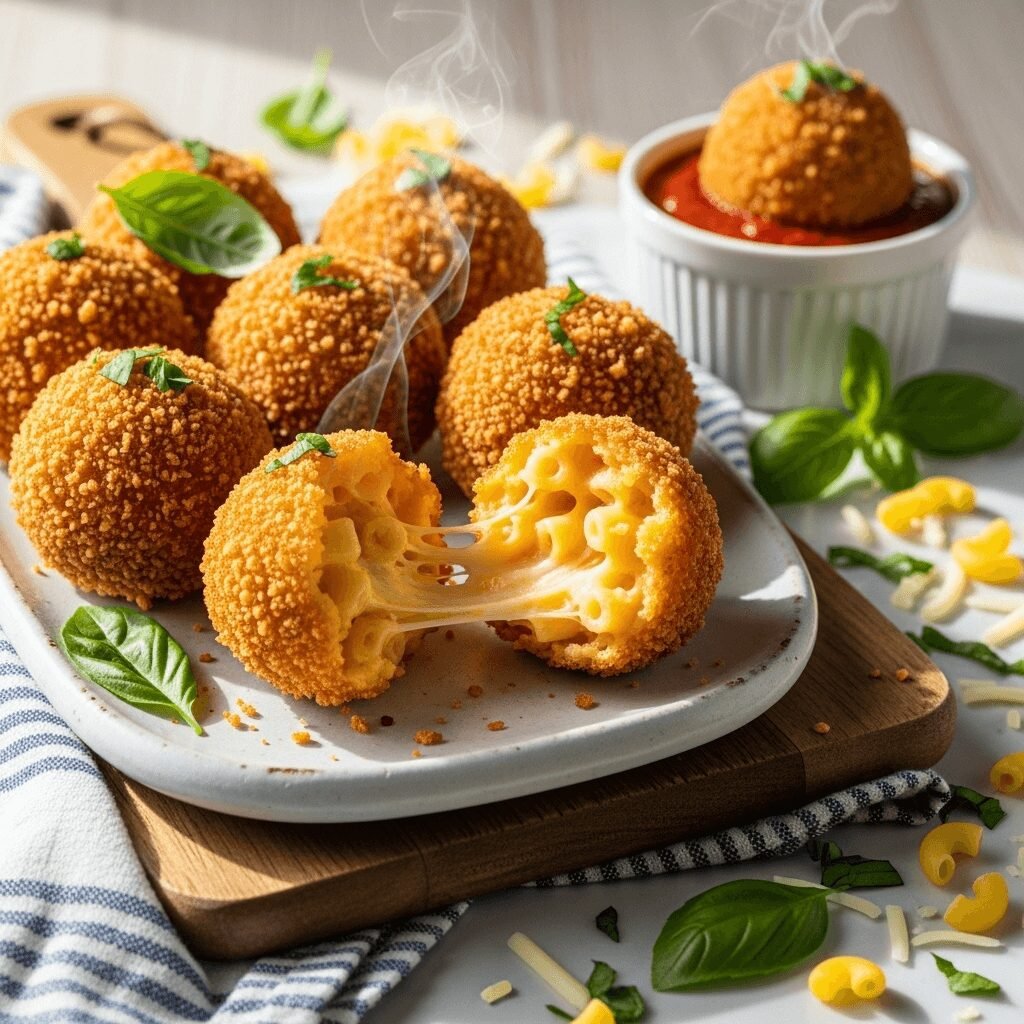
Fried Mac and Cheese Balls: Crispy, Cheesy Perfection

Fried mac and cheese balls are the ultimate comfort food appetizer—crispy golden-brown exteriors giving way to creamy, gooey mac and cheese centers that stretch with every bite. These homemade mac and cheese balls transform everyone’s favorite comfort food into portable, poppable perfection that’s ideal for parties, game day gatherings, holiday appetizers, or anytime you’re craving indulgent, shareable food that disappears in minutes.
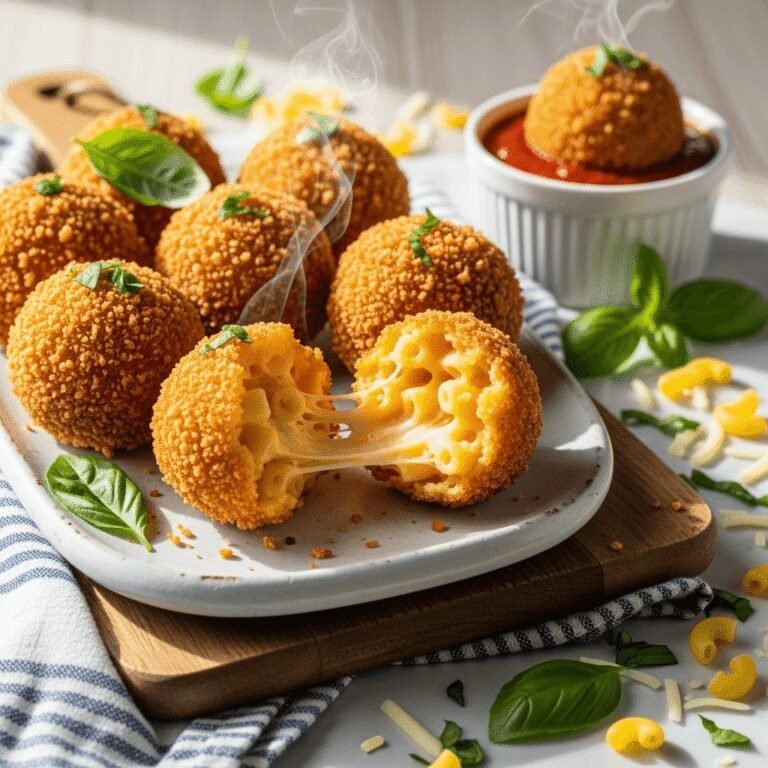
What makes these crispy mac and cheese bites so irresistible is the incredible textural contrast. The crunchy, seasoned breadcrumb coating shatters to reveal hot, melty cheese sauce clinging to tender pasta. It’s everything you love about classic mac and cheese, reimagined as a handheld appetizer that’s both fun to make and even more fun to eat. The cheese pull alone is Instagram-worthy, making these perfect for social media sharing and Pinterest boards.
These easy fried mac and cheese balls work beautifully for countless occasions—Super Bowl parties, New Year’s Eve celebrations, potluck contributions, kids’ birthday parties, cocktail hours, game night snacks, or simply as an elevated side dish for casual dinners. They’re endlessly customizable with different cheeses, add-ins like bacon or jalapeños, and various dipping sauces. Best of all, you can prepare them in advance and fry just before serving, making party hosting stress-free while delivering restaurant-quality results that will have everyone asking for your recipe.
History / Background
While mac and cheese itself dates back centuries with roots in European cuisine (particularly Italian and French cooking), the concept of fried mac and cheese balls is a distinctly modern American innovation that emerged from the creative food scene of the late 1990s and early 2000s. This period saw chefs and home cooks alike experimenting with transforming beloved comfort foods into appetizer-sized, fried iterations—think fried pickles, mozzarella sticks, and deep-fried everything at state fairs.
The trend of breading and frying leftover mac and cheese likely began as a clever way to repurpose refrigerated leftovers. Cold mac and cheese firms up significantly, making it perfect for shaping into balls or patties, coating, and frying. What started as a thrifty home cook’s solution quickly became a restaurant sensation as upscale gastropubs and casual dining establishments recognized the appeal of this nostalgic-yet-novel dish.
Mac and cheese balls gained massive popularity through food blogs, Pinterest, and social media in the 2010s, with the hashtag #macandcheeseballs generating millions of views and endless creative variations. The visual appeal of that cheese pull—the stretchy, melted cheese extending from a golden-fried ball—proved perfect for viral food content, cementing these bites as a modern comfort food classic.
Culturally, fried mac and cheese balls represent the American love for both mac and cheese and fried foods, two pillars of comfort cuisine. They embody the playful innovation that characterizes modern American cooking—taking something traditional and beloved, then reimagining it in a fun, shareable format. While they don’t have centuries of history like some classic recipes, fried mac and cheese balls have quickly become a staple at parties, restaurants, and home kitchens across the United States, earning their place in the contemporary comfort food canon.
Why You’ll Love This Recipe
These crispy fried mac and cheese balls are about to become your most-requested appetizer, and here’s why. This recipe delivers restaurant-quality results that taste even better than takeout, with a perfect crispy-creamy contrast in every bite. Whether you’re an experienced cook or just starting out, you’ll appreciate how achievable and impressive these cheese balls are.
Here’s why this recipe deserves a permanent spot in your entertaining rotation:
- Show-Stopping Presentation – Golden, perfectly round, and irresistibly photogenic with that famous cheese pull
- Make-Ahead Friendly – Prepare completely in advance and fry just before serving, perfect for stress-free hosting
- Crowd-Pleasing Appeal – Universally loved by kids and adults alike—nobody can resist fried cheese
- Budget-Friendly – Uses affordable pantry staples and common ingredients you likely already have
- Customizable – Easily adapt with different cheeses, add-ins, or seasonings to match your preferences
- Versatile Serving Options – Works as appetizers, party snacks, side dishes, or even fun main courses
- Texture Perfection – Crispy exterior with creamy, gooey interior creates addictive contrast
- Freezer-Friendly – Freeze uncooked balls for up to 3 months and fry straight from frozen
- Kid-Approved – Even picky eaters love these fun, handheld treats
- Party Star – Always the first appetizer to disappear at gatherings
- Leftover Solution – Perfect way to transform leftover mac and cheese into something new and exciting
- Impressive Yet Achievable – Looks and tastes gourmet without requiring professional skills
Ingredient Notes
Understanding your ingredients helps you make the best fried mac and cheese balls possible. Let’s break down each component:
Mac and Cheese (Homemade or Leftover) – The foundation of your balls. Thick, creamy mac and cheese works best—think stovetop mac and cheese with a roux-based sauce rather than baked casserole-style. The mac needs to be cold and firm enough to shape into balls, so refrigerate it for at least 4 hours or overnight. Using leftover mac and cheese is perfectly acceptable and actually ideal since it’s already cold and set.
Elbow Macaroni – Classic shape that’s easy to eat in ball form. Small shells, cavatappi, or ditalini work equally well. Cook pasta just until al dente since it will cook slightly more when fried. Overcooked pasta creates mushy balls that fall apart.
Sharp Cheddar Cheese – Provides robust flavor that shines through the breading. Sharp or extra-sharp cheddar delivers the most pronounced cheese taste. For best melting and flavor, shred from a block rather than using pre-shredded cheese, which contains anti-caking agents.
Additional Cheese Options – Combining cheeses creates complexity. Try Gruyère for nuttiness, Monterey Jack for creaminess, mozzarella for extra stretchiness, or pepper jack for spicy kick. A blend of 2-3 cheeses produces the most interesting flavor profile.
All-Purpose Flour – First coating layer that helps the egg wash adhere to the wet mac and cheese balls. This creates the foundation for breading to stick properly.
Eggs – Beaten eggs create the sticky middle layer that binds breadcrumbs to the floured surface. Room temperature eggs work more smoothly than cold eggs straight from the refrigerator.
Breadcrumbs – Panko breadcrumbs create the crispiest, crunchiest coating with maximum texture. Italian-seasoned breadcrumbs add extra flavor. Regular breadcrumbs work but produce less dramatic crunch. For gluten-free option, use gluten-free panko or crushed cornflakes.
Seasonings – Garlic powder, onion powder, paprika, and black pepper enhance the breading’s flavor. Don’t skip seasoning the breadcrumbs—this is crucial for flavorful coating rather than bland breading.
Vegetable Oil for Frying – High smoke point oil is essential for deep frying. Vegetable oil, canola oil, or peanut oil all work well. Avoid olive oil, which smokes at lower temperatures.
Equipment Needed
Having the right tools makes preparing crispy mac and cheese balls much easier:
- Large Pot – For cooking pasta initially
- Medium Saucepan – To make cheese sauce if preparing fresh mac and cheese
- Whisk – For creating smooth cheese sauce
- Colander – To drain cooked pasta
- Large Mixing Bowl – For combining pasta with cheese sauce
- Baking Sheet – To hold formed balls during chilling and breading process
- Parchment Paper or Plastic Wrap – To line baking sheets and prevent sticking
- Cookie Scoop or Ice Cream Scoop – For portioning consistent, evenly-sized balls (2-tablespoon size works perfectly)
- Three Shallow Bowls or Plates – For flour, egg wash, and breadcrumbs in your breading station
- Large Heavy-Bottomed Pot or Dutch Oven – For deep frying (at least 3 inches deep)
- Candy/Deep Fry Thermometer – Essential for monitoring oil temperature (350°F is ideal)
- Spider Strainer or Slotted Spoon – For safely removing fried balls from hot oil
- Paper Towels – For draining excess oil after frying
- Wire Cooling Rack – Keeps fried balls crispy by allowing air circulation (prevents sogginess)
Fried Mac and Cheese Balls
Crispy fried mac and cheese balls feature golden, crunchy breadcrumb coating surrounding creamy, cheesy macaroni centers. These irresistible bites make perfect party appetizers, game day snacks, or comfort food treats that disappear in minutes!
- Total Time: 4 hours 50 minutes
- Yield: 24-30 mac and cheese balls (8-10 servings) 1x
Ingredients
For the Mac and Cheese:
- 8 oz elbow macaroni (2 cups dry)
- 3 tablespoons butter
- 3 tablespoons all-purpose flour
- 2 cups whole milk
- 3 cups sharp cheddar cheese, shredded (about 12 oz)
- ½ teaspoon garlic powder
- ½ teaspoon salt
- ¼ teaspoon black pepper
- ¼ teaspoon paprika
For Breading:
- 1 cup all-purpose flour
- 3 large eggs, beaten
- 2½ cups panko breadcrumbs
- 1 teaspoon garlic powder
- 1 teaspoon onion powder
- ½ teaspoon paprika
- ½ teaspoon salt
- ¼ teaspoon black pepper
For Frying:
- Vegetable oil for deep frying (about 6 cups)
Optional for Serving:
- Marinara sauce
- Ranch dressing
- Sriracha mayo
- Honey mustard
Instructions
- Make Mac and Cheese: Cook macaroni according to package directions until al dente. Drain and set aside. In a medium saucepan over medium heat, melt butter. Whisk in flour and cook for 1-2 minutes until golden, creating a roux. Gradually whisk in milk, stirring constantly until smooth and thickened, about 5 minutes.
- Add Cheese: Remove saucepan from heat. Add shredded cheddar cheese, garlic powder, salt, pepper, and paprika. Stir until cheese melts completely and sauce is smooth. Add cooked macaroni and stir until pasta is evenly coated.
- Chill the Mac and Cheese: Transfer mac and cheese to a baking dish or large bowl. Spread evenly, cover with plastic wrap, and refrigerate for at least 4 hours or overnight until very cold and firm. This step is crucial—mac and cheese must be completely chilled to hold its shape.
- Form Balls: Line a baking sheet with parchment paper. Using a 2-tablespoon cookie scoop or your hands, portion cold mac and cheese and roll into balls about 1½ inches in diameter. Place formed balls on the prepared baking sheet. Refrigerate for 30 minutes.
- Set Up Breading Station: Place flour in one shallow bowl. Beat eggs in a second shallow bowl. In a third bowl, combine panko breadcrumbs with garlic powder, onion powder, paprika, salt, and pepper.
- Bread the Balls: Working one at a time, roll each mac and cheese ball in flour to coat completely, shaking off excess. Dip in beaten egg, letting excess drip off. Roll in seasoned breadcrumbs, pressing gently to adhere. Place breaded balls back on baking sheet. For extra crispy coating, repeat the egg and breadcrumb steps (double breading).
- Chill Breaded Balls: Once all balls are breaded, refrigerate for at least 30 minutes or up to overnight. This helps the breading stick during frying.
- Heat Oil: In a large, heavy-bottomed pot or Dutch oven, heat 3 inches of vegetable oil to 350°F, monitoring with a thermometer. Don’t skip this—proper temperature is essential for crispy results.
- Fry the Balls: Working in batches of 4-5 balls at a time (don’t overcrowd), carefully lower mac and cheese balls into hot oil using a slotted spoon. Fry for 2-3 minutes, turning occasionally, until deep golden brown and crispy all over.
- Drain and Serve: Remove fried balls with a spider strainer or slotted spoon and transfer to a wire rack set over paper towels to drain excess oil. Let cool for 2-3 minutes before serving (the centers will be very hot!). Serve immediately with your favorite dipping sauces.
Notes
- Cold mac and cheese is essential—warm or room temperature mac won’t hold its shape when forming balls.
- Don’t skip the chilling steps. Refrigerating formed balls before breading and after breading helps everything hold together during frying.
- Maintain oil temperature at 350°F throughout frying. If oil gets too hot, balls will brown too quickly outside while staying cold inside. If too cool, they’ll absorb excess oil and become greasy.
- For best results, use a thermometer rather than guessing oil temperature.
- Leftover mac and cheese works perfectly for this recipe—just make sure it’s thick and creamy.
- These can be frozen after breading (before frying) for up to 3 months. Fry straight from frozen, adding 1-2 minutes to cooking time.
- If balls start to fall apart during frying, your mac and cheese may be too loose. Next time, use less milk in the sauce or add extra cheese.
- Prep Time: 30 minutes (plus 4 hours chilling)
- Cook Time: 20 minutes
- Category: Appetizer
- Method: Deep Frying
- Cuisine: American
- Diet: Vegetarian
Nutrition
- Serving Size: 3 mac and cheese balls
- Calories: 385
- Sugar: 4g
- Sodium: 542mg
- Fat: 24g
- Saturated Fat: 10g
- Unsaturated Fat: 12g
- Trans Fat: 0g
- Carbohydrates: 29g
- Fiber: 1g
- Protein: 14g
- Cholesterol: 95mg
Tips & Variations
Transform your fried mac and cheese balls to match any preference with these creative variations:
Bacon Mac and Cheese Balls: Fold ½ cup cooked, crumbled bacon into the mac and cheese before forming balls. The smoky, salty bacon adds incredible depth and makes these even more irresistible.
Jalapeño Popper Mac and Cheese Balls: Add ¼ cup diced pickled jalapeños to the mac and cheese mixture and use pepper jack cheese instead of cheddar. These deliver a spicy kick that heat lovers will adore.
Buffalo Mac and Cheese Balls: Mix 2-3 tablespoons buffalo sauce into the mac and cheese before chilling. Serve with ranch or blue cheese dressing for dunking. Perfect for game day!
Truffle Mac and Cheese Balls: Add 1 teaspoon truffle oil to the cheese sauce and mix in 2 tablespoons grated Parmesan. These upscale balls are perfect for elegant gatherings.
Pizza Mac and Cheese Balls: Mix in ¼ cup mini pepperoni pieces and use mozzarella cheese. Serve with warm marinara for dipping for pizza-flavored perfection.
Baked Version (Healthier): Instead of deep frying, arrange breaded balls on a baking sheet, spray generously with cooking spray, and bake at 400°F for 20-25 minutes, turning halfway through, until golden brown. They won’t be quite as crispy but are significantly lighter.
Air Fryer Mac and Cheese Balls: Arrange breaded balls in a single layer in the air fryer basket, spray with cooking spray, and air fry at 400°F for 10-12 minutes, shaking the basket halfway through, until golden and crispy.
Four-Cheese Blend: Use a combination of cheddar, Gruyère, mozzarella, and Parmesan for complex, sophisticated cheese flavor that elevates these from simple to spectacular.
Pro Chef Tips
Elevate your fried mac and cheese balls from good to restaurant-quality with these professional techniques:
The Colder, The Better: The single most important factor for success is working with very cold mac and cheese. Refrigerate overnight if possible. When the mac is ice-cold and firm, it’s much easier to shape, holds together better during breading, and maintains structure during frying. If your mac and cheese feels at all soft or warm, put it back in the refrigerator.
Double Bread for Extra Crunch: Professional kitchens often double-bread items for maximum coating adhesion and crunch. After the first round of flour-egg-breadcrumbs, dip balls back in egg and breadcrumbs one more time. This creates an incredibly crispy, thick coating that’s impressive and delicious.
Season Every Layer: Don’t just season the breadcrumbs—season the mac and cheese generously, season the flour with salt and pepper, and add hot sauce to the egg wash. Layering seasoning throughout creates depth rather than one-dimensional flavor.
Perfect Oil Temperature is Non-Negotiable: Invest in a good thermometer and maintain oil at exactly 350°F. Too hot and exteriors burn before interiors warm through. Too cool and balls absorb excess oil, becoming greasy rather than crispy. Monitor constantly and adjust heat as needed between batches.
Don’t Overcrowd the Pot: Fry in small batches of 4-5 balls maximum. Adding too many at once dramatically drops oil temperature, resulting in soggy, oil-logged balls instead of crispy ones. Be patient—proper frying takes time but delivers superior results.
Use Fresh Oil: Old, previously-used frying oil contains particles and flavors that affect both taste and browning. Use fresh oil for the cleanest flavor and most attractive golden color.
Let Them Rest Before Serving: Freshly fried balls are volcano-hot inside. Let them rest for 2-3 minutes after frying. This prevents mouth-burning while allowing the coating to set properly, ensuring maximum crispiness. Rushing this step leads to soggy exterior and burnt tongues.
Common Mistakes to Avoid
Sidestep these frequent pitfalls for perfect fried mac and cheese balls every time:
Using Mac and Cheese That’s Too Loose: If your mac and cheese is soupy or very saucy, it won’t hold together when shaped into balls. The sauce should be thick and the pasta should be well-coated but not swimming in liquid. If using leftover mac that seems too loose, strain excess liquid before refrigerating, or mix in ¼ cup additional shredded cheese to thicken.
Skipping the Chilling Steps: This is the most common reason for failure. You must chill the mac and cheese until firm (minimum 4 hours), chill formed balls before breading, and chill again after breading. Each chilling step is crucial for structural integrity. Rushing this process results in balls that fall apart in the oil, creating a messy, disappointing disaster.
Attempting to Fry Warm or Room Temperature Balls: Even if balls are shaped and breaded, they must go into the oil cold from the refrigerator. Warm balls will fall apart immediately upon contact with hot oil as the cheese melts and the structure collapses before the breading sets.
Not Monitoring Oil Temperature: Eyeballing oil temperature is unreliable and leads to inconsistent results. Without a thermometer, you’re guessing—and guessing wrong means greasy or burnt balls. Always use a thermometer and adjust heat to maintain steady 350°F throughout frying.
Overcrowding the Pot: Adding too many balls at once causes oil temperature to plummet, resulting in greasy balls with soggy breading. It also makes balls stick together and increases the risk of oil splatter. Always fry in small batches with plenty of space between each ball.
Using Pre-Shredded Cheese: Pre-shredded cheese contains cellulose anti-caking coating that inhibits smooth melting and creates grainy texture. For the creamiest, smoothest mac and cheese that holds together properly, always shred cheese yourself from a block.
Storage & Meal Prep
Proper storage keeps your mac and cheese balls delicious and ready when you need them:
Refrigerator Storage (Uncooked): Store breaded, uncooked mac and cheese balls in an airtight container in the refrigerator for up to 24 hours before frying. Separate layers with parchment paper to prevent sticking. This is ideal for party prep—bread them the day before, refrigerate, and fry just before serving for hot, fresh results.
Refrigerator Storage (Cooked): Fried mac and cheese balls don’t store particularly well once cooked. If you must refrigerate leftovers, place them in an airtight container for up to 2 days. Reheat in a 350°F oven for 10-12 minutes or in an air fryer at 350°F for 5-6 minutes. They won’t be as crispy as freshly fried, but gentle reheating helps restore some texture.
Freezing Uncooked Balls (Best Method): This is the ultimate make-ahead strategy. After breading balls completely, freeze them in a single layer on a baking sheet until solid (about 2 hours). Transfer frozen balls to freezer bags or airtight containers, separating layers with parchment paper. Store for up to 3 months. Fry directly from frozen, adding 1-2 extra minutes to cooking time. Don’t thaw before frying—this causes them to fall apart.
Freezing Cooked Balls: While possible, fried balls lose significant crispiness when frozen and reheated. If you do freeze cooked balls, place them in freezer bags for up to 1 month. Reheat from frozen in a 375°F oven for 15-20 minutes. The texture won’t match freshly fried, but they’re still tasty.
Reheating for Best Crispiness: Never microwave fried mac and cheese balls—this makes breading soggy and rubbery. Always reheat in the oven (350°F for 10-12 minutes) or air fryer (350°F for 5-7 minutes) to restore crispiness. Place on a wire rack over a baking sheet so air circulates around all sides.
Room Temperature Note: Don’t leave fried balls at room temperature for more than 2 hours (1 hour if room temperature exceeds 90°F). The dairy in the mac and cheese makes these potentially hazardous if left out too long.
Make-Ahead & Freezer Notes
Plan ahead with these time-saving strategies for stress-free entertaining:
Complete Make-Ahead Timeline (Best Method): Day 1—Make mac and cheese, refrigerate overnight. Day 2 morning—Form balls, bread them completely, freeze until solid on a baking sheet. Day 2 afternoon—Transfer frozen breaded balls to freezer bags. Party day—Fry balls directly from frozen 10-15 minutes before serving. This method gives you hot, fresh, crispy balls with minimal day-of work.
Two-Day Advance Prep: Make mac and cheese 2 days ahead and refrigerate. The day before your event, form and bread the balls, then refrigerate overnight. Fry just before serving. This works beautifully when freezer space is limited.
Mac and Cheese Component: Make the mac and cheese up to 3 days ahead and keep it refrigerated. Form balls when convenient within that window. This flexibility is helpful for busy schedules.
Partial Prep Strategy: If you’re short on time, form unbreaded balls and freeze them. When ready to cook, thaw slightly (10-15 minutes at room temperature), bread while still cold, and fry. This saves time on shaping while still delivering great results.
Freezing Tips for Success: When freezing breaded balls, make sure they’re frozen solid individually before storing together in bags. This prevents them from sticking into one giant frozen mass. Label bags with date and frying instructions for future reference.
Don’t Freeze the Mac and Cheese Sauce Alone: While you can freeze fully assembled mac and cheese, don’t freeze just the cheese sauce and plan to cook pasta later. The emulsion breaks down during freezing and won’t reincorporate properly when thawed.
Frying from Frozen: When frying frozen balls, don’t thaw them first—this causes structure to break down. Fry directly from freezer, working in small batches. The oil temperature will drop more dramatically when adding frozen items, so be extra vigilant about temperature control and allow oil to return to 350°F between batches.
Serving Suggestions
Create a complete party spread by pairing your mac and cheese balls with complementary items:
Dipping Sauce Bar: Set up a dipping station with multiple sauces for variety. Include marinara sauce for classic Italian vibes, ranch dressing for creamy coolness, sriracha mayo for spicy kick, honey mustard for sweet-tangy contrast, BBQ sauce for smoky sweetness, cheese sauce for extra indulgence, and buffalo sauce for heat lovers. Small bowls labeled with sauce names encourage guests to try different combinations.
Game Day Spread: Serve alongside buffalo wings, loaded potato skins, mozzarella sticks, jalapeño poppers, chicken tenders, and a vegetable platter with ranch. Add chips and dip, sliders, and pizza rolls for the ultimate sports-watching feast that satisfies every appetite.
Elegant Cocktail Party: Present mac and cheese balls on a tiered serving platter with fancy toothpicks. Pair with prosciutto-wrapped asparagus, caprese skewers, shrimp cocktail, stuffed mushrooms, and a cheese board for upscale entertaining that impresses without intimidating.
Kids’ Party Favorites: Serve with chicken nuggets, mini hot dogs (pigs in a blanket), fruit kabobs, veggie sticks with ranch, pizza bagels, and popcorn. Set up a “sauce tasting” station where kids can try different dips with their mac and cheese balls—they’ll love the interactive element.
Main Course Companion: While typically served as appetizers, these make excellent side dishes alongside burgers, BBQ ribs, grilled chicken, pulled pork sandwiches, or steak. They’re a fun, elevated alternative to regular mac and cheese as a side.
Beverage Pairings: These rich, cheesy bites pair beautifully with crisp beverages that cut through the richness. Try cold beer (especially lagers or IPAs), sparkling wine or champagne, iced tea, lemonade, or craft sodas. For kids, serve with fruit punch, apple juice, or chocolate milk.
Presentation Ideas: Serve in a lined basket for casual gatherings, on a slate board for rustic appeal, in paper cones for carnival-style fun, or on individual appetizer plates with sauce drizzles for elegant presentation. Garnish the serving platter with fresh herbs like parsley or chives for color.
FAQs Section
Q: Can I bake mac and cheese balls instead of frying them?
A: Yes! Arrange breaded balls on a baking sheet lined with parchment paper, spray generously with cooking spray, and bake at 400°F for 20-25 minutes, turning halfway through, until golden brown. They won’t be quite as crispy as fried versions but are significantly healthier and still delicious. For extra crispiness, finish under the broiler for 1-2 minutes, watching carefully.
Q: Why did my mac and cheese balls fall apart while frying?
A: This usually happens because the mac and cheese wasn’t cold enough, the balls weren’t chilled long enough after breading, or the mac and cheese was too loose/saucy to begin with. Always refrigerate mac and cheese until very firm (overnight is best), chill formed balls for 30 minutes, chill again after breading for 30 minutes, and make sure your mac and cheese has thick sauce. If mac seems too loose, strain excess liquid or stir in extra cheese before forming balls.
Q: Can I use boxed mac and cheese for this recipe?
A: Absolutely! Boxed mac and cheese works perfectly and is actually ideal for this recipe since it tends to be thick and creamy. Use 2 boxes of standard size (14 oz total), prepare according to package directions using slightly less milk than called for (to keep it extra thick), chill overnight, and proceed with the recipe. This is a great way to elevate inexpensive boxed mac into impressive appetizers.
Q: How do I know when the oil is the right temperature without a thermometer?
A: While a thermometer is strongly recommended, you can test oil by dropping a small cube of bread into it. If the bread browns in about 60 seconds, the oil is approximately 350°F. You can also stick the handle of a wooden spoon into the oil—if bubbles form around it immediately and rise steadily, the oil is ready. However, these methods are less precise than using a thermometer.
Q: Can I make these gluten-free?
A: Yes! Use gluten-free pasta for the mac and cheese, substitute gluten-free flour for regular flour in the breading station, and use gluten-free panko breadcrumbs (or crushed gluten-free cornflakes) instead of regular panko. Everything else remains the same. The results are just as crispy and delicious.
Q: What’s the best cheese combination for mac and cheese balls?
A: Sharp cheddar is classic and reliable, delivering strong cheese flavor. For even better results, combine 2 cups sharp cheddar with 1 cup Gruyère for nuttiness, or use 2 cups cheddar with 1 cup mozzarella for extra stretch and that famous cheese pull. Pepper jack adds spicy kick, while Fontina creates ultra-creamy texture. Experiment with blends to find your favorite combination.
Q: How far in advance can I fry mac and cheese balls before serving?
A: For absolute best results, fry and serve immediately while hot and crispy. If necessary, you can fry up to 1 hour ahead, keep them warm in a 200°F oven on a wire rack (to maintain crispiness), and serve. However, they’ll gradually lose crispiness over time. For parties, fry in batches throughout the event, bringing out fresh trays every 30 minutes rather than frying everything at once.
Conclusion
There you have it—everything you need to create absolutely incredible, crispy fried mac and cheese balls that will make you the star of every gathering! These golden, crunchy bites with their creamy, cheesy centers represent comfort food at its finest, transformed into a fun, shareable format that appeals to everyone from kids to adults. Whether you’re hosting game day parties, holiday celebrations, birthday bashes, or simply treating yourself to an indulgent snack, these homemade mac and cheese balls deliver every single time.
Remember the keys to success: start with cold, firm mac and cheese, don’t skip any chilling steps, maintain proper oil temperature at 350°F, fry in small batches, and season generously at every stage. Master these fundamentals and you’ll create restaurant-quality fried mac and cheese bites that rival anything you’d find at upscale gastropubs or trendy restaurants.
The beauty of these crispy mac and cheese balls lies in their incredible versatility. Add bacon for smoky richness, jalapeños for heat, make them gluten-free, bake instead of fry for a lighter version, or freeze batches for ultimate convenience. This recipe adapts beautifully to whatever your occasion demands.
Ready to experience the ultimate cheese pull and hear the satisfying crunch of golden breading? Pin this recipe to your favorite Pinterest board so you’ll always have it ready when party planning begins! Make these fried mac and cheese balls this weekend and let me know in the comments how they turned out. What dipping sauce was your favorite? Did you try any creative add-ins? I absolutely love hearing about your kitchen adventures and seeing your delicious creations!
Don’t forget to snap a photo of your gorgeous, golden mac and cheese balls—especially that cheese pull!—and share it on social media. Tag me so I can see your masterpiece and celebrate with you! Here’s to crispy, cheesy perfection and appetizers that disappear in minutes!