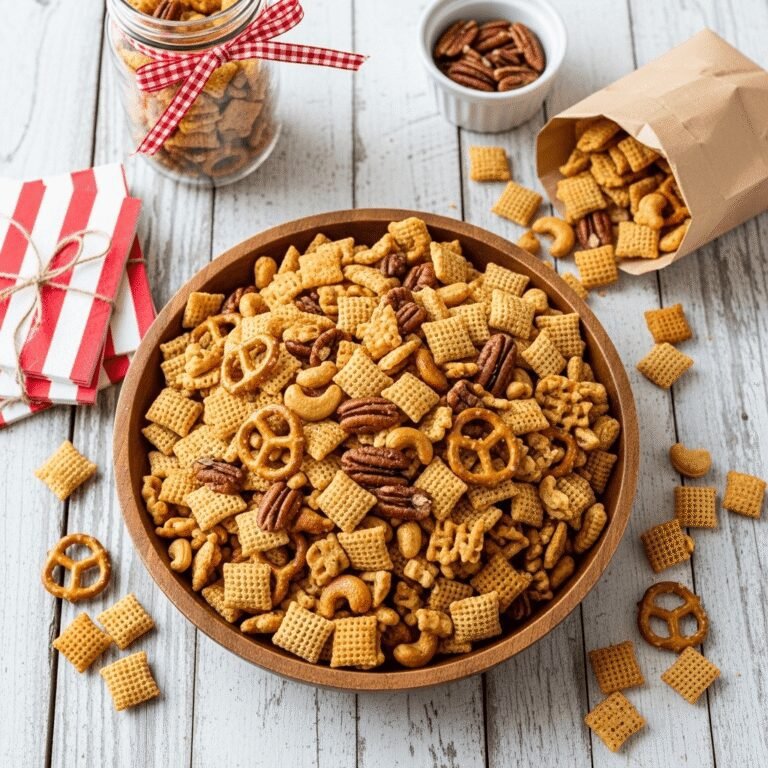
The Best Homemade Chex Mix Recipe – Crunchy, Savory & Perfectly Seasoned!
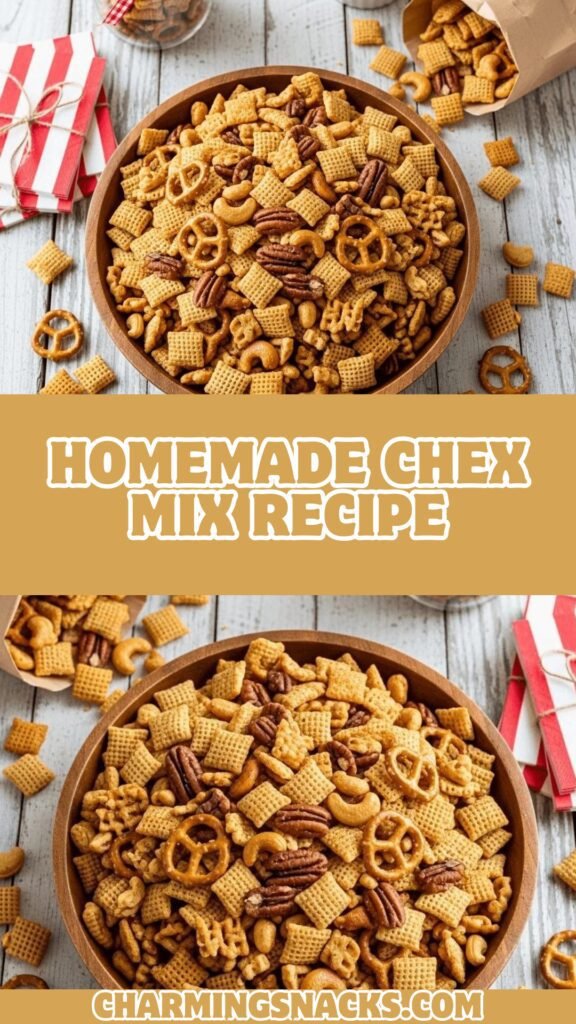
Is there anything more nostalgic and utterly addictive than a big bowl of homemade Chex Mix? This classic savory snack mix combines crispy Chex cereal, crunchy nuts, pretzels, and bagel chips all coated in a buttery, garlicky, perfectly seasoned blend that’s impossible to stop munching on. Whether you call it Chex Mix, party mix, or snack mix, one thing’s for certain—once you make it from scratch, you’ll never go back to the store-bought version!
This easy Chex Mix recipe has been a beloved American tradition for decades, gracing holiday parties, game day gatherings, road trips, and gift tins across the country. It’s the ultimate crowd-pleasing snack that works for absolutely any occasion. I make big batches during the holidays for gift-giving, whip it up for football Sundays, pack it for road trips, and honestly, sometimes I just make it on a random Tuesday because the craving hits!
Perfect for Christmas parties, Thanksgiving gatherings, Super Bowl celebrations, movie nights, or just everyday snacking, this customizable savory snack mix is endlessly versatile. You can adjust the seasonings, swap ingredients based on what you have in your pantry, make it spicy or keep it mild, and even create sweet variations. Once you learn the basic technique, you’ll be creating your own signature Chex Mix blends that everyone will beg you to make again and again!
History / Background
The story of Chex Mix is a fascinating journey through American culinary history and the evolution of convenience cooking. It all began in 1952 when the Ralston Purina Company (now Ralston Foods) started printing a recipe on the back of their Chex cereal boxes. This was during the post-World War II era when American home cooks were embracing convenience foods and creative ways to entertain at home.
The original recipe was called “Chex Party Mix” and was incredibly simple—it combined Wheat Chex and Rice Chex cereals with nuts, pretzels, and a seasoned butter coating. The genius of this recipe was that it transformed an everyday breakfast cereal into a savory, sophisticated cocktail party snack. During the 1950s and 60s, when cocktail parties and home entertaining were at their peak, Chex Party Mix became an absolute sensation.
What made Chex Mix particularly special was its versatility and the concept of “oven party mix.” Before this recipe became popular, most party snacks were either store-bought or labor-intensive. Chex Mix offered a middle ground—it was homemade (which showed you cared), but incredibly easy to prepare in large quantities. The slow oven-baking method ensured every piece was evenly coated and perfectly crispy.
Throughout the decades, the recipe evolved. The company introduced Corn Chex in 1958, giving home cooks another variety to work with. By the 1960s and 70s, regional variations started appearing as creative home cooks added their own touches—some added Worcestershire sauce for umami depth, others included different nuts, and many started experimenting with seasoning blends. The recipe became so iconic that “Chex Mix” essentially became a generic term for any savory snack mix, similar to how “Kleenex” represents all tissues.
The 1980s and 90s saw an explosion of Chex Mix creativity. Home cooks started making sweet versions with chocolate and peanut butter, spicy variations with hot sauce and cayenne, and even themed versions for holidays. The recipe appeared in countless community cookbooks, church fundraiser collections, and family recipe boxes, with each version reflecting the cook’s personal preferences and regional influences.
In 1985, Ralston introduced pre-made Chex Mix in bags, but true enthusiasts insisted that homemade was superior—fresher, more customizable, and made with better-quality ingredients. The tradition of making homemade Chex Mix, particularly during the holiday season, became deeply embedded in American food culture. It’s one of those recipes that connects generations, with grandmothers teaching grandchildren the “secret” family ratio and seasoning blend.
Today, homemade Chex Mix remains a beloved tradition. It represents more than just a snack—it’s about the ritual of making it, the aroma that fills your house during baking, the gift-giving tradition, and the memories associated with sharing it. It’s proof that sometimes the simplest recipes become the most enduring, especially when they bring people together and can be adapted to reflect personal tastes and traditions.
Why You’ll Love This Recipe
This classic Chex Mix recipe is about to become your signature snack! I’ve been making this for years, perfecting the seasoning blend and technique to create the ultimate savory snack mix that’s perfectly balanced, irresistibly crunchy, and dangerously addictive. Unlike store-bought versions that taste stale and oversalted, homemade Chex Mix is fresh, flavorful, and customized exactly to your taste.
Here’s why this homemade snack mix will become your go-to recipe:
- Incredibly budget-friendly – Makes a huge batch for just a few dollars, much cheaper than buying pre-made
- Perfect for gift-giving – Package in festive tins or jars for thoughtful, homemade holiday gifts
- Endlessly customizable – Adjust ingredients and seasonings to create your signature blend
- Makes a massive batch – One recipe yields about 12-14 cups, enough for a crowd
- Lasts for weeks – Store in airtight containers for up to 3-4 weeks of snacking
- Allergy-friendly adaptable – Easy to make nut-free, gluten-free, or vegan
- Kid-friendly – Even picky eaters love this crunchy, savory snack
- No special skills required – If you can melt butter and stir, you can make this!
- Fills your house with amazing aromas – The smell while baking is incredible
- Great for parties or solo snacking – Works for any occasion
- Healthier than chips – Contains whole grain cereal and can include nutritious nuts
- Nostalgic and comforting – Tastes like childhood and family gatherings
Ingredient Notes
The beauty of homemade Chex Mix is that it’s incredibly forgiving and flexible. Here’s what you need to know about each component:
Chex Cereal – The foundation of your mix! Traditional recipes use a combination of Rice Chex, Wheat Chex, and Corn Chex for varied texture and flavor. Rice Chex is the lightest and crispiest, Wheat Chex adds hearty texture and nutty flavor, and Corn Chex provides sweetness and crunch. You can use just one variety or mix all three—each box is typically 12-14 ounces. For gluten-free versions, stick with Rice Chex and Corn Chex.
Mixed Nuts – Adds protein, healthy fats, and rich flavor. Classic choices include peanuts, cashews, pecans, almonds, or walnuts. Use raw, unsalted nuts for best results since you’re adding plenty of seasoning. Salted nuts can make your mix too salty. For nut-free versions, substitute with extra pretzels, bagel chips, or roasted chickpeas.
Pretzels – Provides salty crunch and helps absorb the buttery seasoning. Small pretzel twists or sticks work best—they’re the perfect size for snacking. Avoid large soft pretzels. Gluten-free pretzels work perfectly for dietary restrictions.
Bagel Chips – Adds substantial crunch and helps create those irresistible crunchy clusters. You can buy pre-made bagel chips or make your own by slicing bagels thin and toasting them. Melba toast or Wheat Thins can substitute in a pinch.
Butter – The key to that rich, toasted flavor. Always use real butter, not margarine—the flavor difference is significant. Melted butter helps the seasonings adhere to every piece. For dairy-free versions, coconut oil or vegan butter work surprisingly well.
Worcestershire Sauce – Adds deep umami flavor and savory complexity. This is a secret weapon ingredient! Make sure to use Worcestershire sauce, not soy sauce (though soy sauce can work in a pinch). For vegetarian/vegan versions, use vegan Worcestershire sauce.
Seasonings – A blend of garlic powder, onion powder, and seasoned salt creates that classic Chex Mix flavor. Some people add a dash of cayenne for heat. The key is balancing these flavors so nothing overpowers.
Optional Add-Ins – Get creative with dried wasabi peas, cheese crackers, oyster crackers, sesame sticks, sunflower seeds, pumpkin seeds, dried cranberries (for sweet versions), or even popcorn!
Equipment Needed
Making perfect Chex Mix requires minimal equipment—you probably have everything you need already!
- Large roasting pan or two 9×13-inch baking pans – For baking the mix in a single layer for even toasting
- Large mixing bowl – For tossing everything together with the seasoned butter
- Small saucepan – For melting butter and mixing seasonings
- Wooden spoon or large spatula – For stirring and tossing the mix while baking
- Measuring cups – For accurate ingredient proportions
- Measuring spoons – For precise seasoning amounts
- Whisk – For mixing butter and seasonings smoothly
- Oven mitts – For safely handling hot pans (you’ll be stirring every 15 minutes)
- Cooling racks – For cooling the mix completely after baking
- Airtight containers or zip-top bags – For storing your finished Chex Mix
- Large spoon or ladle – For transferring mix to storage containers
Homemade Chex Mix Recipe
This classic homemade Chex Mix recipe features crispy cereal, crunchy nuts, pretzels, and bagel chips all coated in a buttery, garlicky seasoning blend and oven-toasted to perfection. Make a big batch for parties, gifts, or snacking—it stores for weeks!
- Total Time: 1 hour 10 minutes
- Yield: 12 cups (about 24 servings) 1x
Ingredients
- 3 cups Rice Chex cereal
- 3 cups Wheat Chex cereal (or use Corn Chex for gluten-free)
- 3 cups Corn Chex cereal
- 2 cups mixed nuts (peanuts, cashews, pecans, or almonds)
- 2 cups small pretzel twists
- 1½ cups bagel chips, broken into bite-sized pieces
- 6 tablespoons (¾ stick) unsalted butter
- 2 tablespoons Worcestershire sauce
- 1½ teaspoons seasoned salt
- 1 teaspoon garlic powder
- 1 teaspoon onion powder
- ½ teaspoon black pepper
- ¼ teaspoon cayenne pepper (optional, for heat)
Instructions
- Preheat and prep: Preheat your oven to 250°F (120°C). This low temperature is crucial for even toasting without burning. Line a large roasting pan or two 9×13-inch baking sheets with parchment paper (optional, but makes cleanup easier).
- Combine dry ingredients: In your largest mixing bowl, combine all three varieties of Chex cereal, mixed nuts, pretzels, and broken bagel chips. Gently toss everything together to distribute evenly. Make sure pieces are fairly uniform in size for even coating and toasting.
- Make the seasoned butter: In a small saucepan over medium-low heat, melt the butter completely. Once melted, remove from heat and whisk in Worcestershire sauce, seasoned salt, garlic powder, onion powder, black pepper, and cayenne (if using). Whisk until smooth and well combined—the mixture should be thin and pourable.
- Coat the mix: Pour the seasoned butter mixture evenly over the cereal mixture in the bowl. Using a large spoon or your hands, gently toss and stir until every piece is coated with the buttery seasoning. Take your time with this step—even coating is key to great flavor. You want to see a light sheen on everything.
- Spread for baking: Transfer the coated mix to your prepared roasting pan (or divide between two baking sheets). Spread it out in an even layer—don’t pile it up or the pieces won’t toast evenly. The more surface area exposed, the crispier your mix will be.
- Bake with stirring: Place the pan in the preheated oven. Bake for 1 hour total, stirring every 15 minutes. Use a large spatula or wooden spoon to toss the mix, bringing pieces from the edges to the center and bottom to top. This ensures even toasting and prevents burning. The mix should gradually become more golden and crispy.
- Cool completely: Remove the pan from the oven. Spread the hot Chex Mix onto parchment paper or clean baking sheets to cool completely—this takes about 30 minutes. The mix will crisp up even more as it cools. Don’t taste it immediately (I know it’s tempting!)—it’s extremely hot and won’t have the right texture yet.
- Store: Once completely cooled, transfer to airtight containers or zip-top bags. Store at room temperature for up to 3-4 weeks. Make sure it’s completely cool before storing or condensation will make it soggy.
Notes
- Low and slow is key: The 250°F temperature and 1-hour baking time allows the mix to toast evenly without burning. Don’t increase the temperature to speed things up!
- Stir religiously: Those every-15-minute stirs are non-negotiable. Skipping them results in burnt edges and pale centers.
- Completely cool before storing: Hot Chex Mix will steam in containers and lose its crispiness. Be patient!
- Customize your mix: Feel free to adjust the cereal-to-add-ins ratio. Some prefer more nuts, others more pretzels.
- Gluten-free version: Use Rice Chex and Corn Chex only, gluten-free pretzels, and gluten-free bagel chips or crackers.
- Nut-free version: Omit nuts and increase pretzels, bagel chips, or add roasted chickpeas for crunch.
- Make it spicy: Add extra cayenne, red pepper flakes, or a dash of hot sauce to the butter mixture.
- Prep Time: 10 minutes
- Cook Time: 1 hour
- Category: Snack
- Method: Baking
- Cuisine: American
- Diet: Gluten Free
Nutrition
- Serving Size: ½ cup
- Calories: 175
- Sugar: 2g
- Sodium: 320mg
- Fat: 10g
- Saturated Fat: 3g
- Unsaturated Fat: 6g
- Trans Fat: 0g
- Carbohydrates: 18g
- Fiber: 2g
- Protein: 4g
- Cholesterol: 8mg
Tips & Variations
The best part about homemade Chex Mix is making it your own! Here are endless ways to customize:
Flavor Variations:
- Ranch Chex Mix: Replace seasonings with 2-3 tablespoons dry ranch seasoning mix
- Cajun/Spicy: Add 1 tablespoon Cajun seasoning and extra cayenne
- BBQ Chex Mix: Use 2 tablespoons BBQ seasoning or dry rub
- Italian: Add Italian seasoning, parmesan cheese, and dried basil
- Everything Bagel: Toss with everything bagel seasoning after baking
- Lemon Pepper: Add 2 tablespoons lemon pepper seasoning
- Buffalo: Mix in buffalo seasoning or drizzle with buffalo sauce before baking
- Taco: Use taco seasoning and add crushed tortilla chips
Sweet Variations:
- Chocolate Peanut Butter: After baking and cooling, toss with melted chocolate and peanut butter
- Cinnamon Sugar: Coat with melted butter, cinnamon, and sugar instead of savory seasonings
- Caramel: Drizzle with caramel sauce after baking (similar to Puppy Chow)
- S’mores: Add mini marshmallows and chocolate chips after baking
Mix-In Variations:
- Add dried wasabi peas for spicy kick
- Include cheese crackers (add during last 15 minutes of baking)
- Toss in dried cranberries or raisins after baking for sweet-savory
- Add sesame sticks or chow mein noodles
- Mix in popcorn (add after baking to keep it crispy)
- Include roasted chickpeas for extra protein
- Add pumpkin seeds or sunflower seeds
Dietary Modifications:
- Vegan: Use vegan butter and vegan Worcestershire sauce
- Gluten-Free: Use only Rice and Corn Chex, GF pretzels, and GF crackers
- Nut-Free: Omit all nuts, double up on pretzels and bagel chips
- Lower Sodium: Reduce seasoned salt to ¾ teaspoon, use unsalted butter and unsalted nuts
- Lower Fat: Use only 4 tablespoons butter (still tasty but less rich)
Pro Chef Tips
Want to make Chex Mix that tastes better than anyone else’s? These professional techniques make all the difference:
1. Use freshly opened cereal for maximum crispiness. Stale cereal will never get as crispy as fresh, no matter how long you bake it. Check your cereal’s freshness date and listen for that satisfying crunch when you bite into a piece before starting.
2. Toast your nuts separately first. For the absolute best flavor, spread your raw nuts on a separate pan and toast at 350°F for 8-10 minutes before adding to your mix. This brings out their natural oils and creates deeper, richer flavor. Cool completely before mixing with cereal.
3. The butter-to-cereal ratio is critical. Too much butter makes the mix soggy and greasy; too little leaves it underseasoned and dry. The recipe’s 6 tablespoons for about 14 cups of mix creates perfect coating without sogginess.
4. Don’t skip the parchment paper cooling step. Spreading hot mix on parchment allows air circulation all around each piece, which creates maximum crispiness. Leaving it in the pan traps steam underneath and creates sogginess.
5. Slightly underbake rather than overbake. The mix continues to crisp as it cools, so remove it when it’s just beginning to turn golden. If you wait until it’s deeply golden in the oven, it will be too dark and potentially burnt once cooled.
6. Store with a moisture absorber. Professional snack makers include small silica gel packets (food-safe) in storage containers to prevent humidity from softening the mix. Alternatively, store in a very airtight container in a cool, dry place.
7. Make your butter coating off-heat. Once butter is melted, remove the saucepan from heat before adding seasonings. This prevents Worcestershire sauce from sputtering and ensures seasonings don’t scorch or become bitter.
8. Season in waves for complex flavor. Mix your seasonings into the butter, but also reserve a small amount of garlic powder and onion powder to toss with the cooled mix for an extra flavor boost that really pops.
Common Mistakes to Avoid
Even simple recipes have pitfalls. Here’s what to watch out for:
1. Baking at too high a temperature. This is the #1 mistake! People get impatient and crank up the heat to 300°F or higher, resulting in burnt edges and pale centers. The low 250°F temperature allows gentle, even toasting. Trust the process—low and slow wins the race with Chex Mix.
2. Skipping or forgetting to stir every 15 minutes. Those stirs are absolutely essential for even toasting. The pieces on the edges toast much faster than those in the center. Set a timer on your phone so you don’t forget! Missing even one stir can result in burned edges.
3. Not allowing the mix to cool completely before storing. Hot Chex Mix creates condensation in containers, which makes everything soft and soggy within hours. Wait the full 30 minutes for cooling—the mix will continue to crisp up during this time. Patience is rewarded with weeks of crunchy snacking!
4. Using stale or old cereal and nuts. Check expiration dates! Stale cereal won’t crisp up properly no matter what you do, and rancid nuts will ruin the entire batch with bitter, off flavors. Taste your nuts before using—they should be sweet and fresh, never bitter.
5. Overfilling the pan. Spreading mix too thick prevents even air circulation and toasting. If you’re making a double batch, use two pans rather than piling everything into one. The mix should be no more than 1½ inches deep for best results.
Storage & Meal Prep
Properly stored Chex Mix stays fresh and crunchy for weeks—that’s part of what makes it so perfect for holiday gift-giving and entertaining!
Room Temperature Storage (Best Method): Store completely cooled Chex Mix in airtight containers, zip-top bags, or sealed tins at room temperature for 3-4 weeks. The key is truly airtight—any moisture exposure will soften it. Mason jars with tight-fitting lids work beautifully. Keep containers in a cool, dry pantry away from heat sources and direct sunlight.
Maintaining Maximum Crispness:
- Make sure mix is 100% cool before storing
- Use containers with good seals (not just lids that sit on top)
- Store in a cool, dry location—humidity is the enemy
- Don’t store near the stove, dishwasher, or other heat/moisture sources
- Consider adding a small silica gel packet (food-safe) to large containers
Gift-Giving Storage: For gift-giving, Chex Mix is perfect! Package in:
- Decorative tins lined with parchment paper
- Mason jars with festive ribbons and gift tags
- Cellophane bags tied with colorful bows
- Holiday-themed containers from craft stores
Make sure to include storage instructions with gifts: “Store in airtight container at room temperature for up to 3 weeks.”
Signs It’s Time to Discard: While Chex Mix lasts a long time, throw it out if you notice:
- Stale or off smell
- Soft, chewy texture (moisture got in)
- Any visible mold (rare but possible in humid conditions)
- Rancid flavor from old nuts
Make-Ahead & Freezer Notes
Great news—Chex Mix is one of the ultimate make-ahead snacks!
Make-Ahead Timeline: Chex Mix is best made at least one day ahead to allow flavors to fully develop and meld. The seasonings become more pronounced and balanced after 24 hours of storage. For holiday entertaining:
- 4 weeks ahead: Perfect timing—it stays fresh for 3-4 weeks
- 2 weeks ahead: Ideal for gift-giving prep
- 1 week ahead: Great for party planning
- 1 day ahead: Minimum timing for flavor development
Freezing Instructions: While not commonly frozen, Chex Mix can be frozen for extended storage:
- Cool completely after baking
- Package in freezer-safe zip-top bags or airtight containers
- Remove as much air as possible to prevent freezer burn
- Label with date
- Freeze for up to 2-3 months
- To use: Let thaw at room temperature for 30 minutes, then spread on a baking sheet and crisp in a 250°F oven for 10-15 minutes if needed
Refreshing Stale Chex Mix: If your Chex Mix loses its crunch from humidity:
- Spread on a baking sheet
- Bake at 250°F for 10-15 minutes, stirring once halfway through
- Cool completely before re-storing
- This works great for rescuing slightly soft mix!
Batch Making: Making multiple batches for gifts? Here’s the strategy:
- Double or triple the recipe (use multiple pans)
- Bake batches simultaneously if you have oven space
- Label each batch with date made
- Rotate through batches for freshest gifts
Serving Suggestions
Chex Mix is incredibly versatile for serving! Here’s how to make it shine:
Party Presentation:
- Serve in large wooden bowls or rustic baskets lined with parchment
- Create a “snack station” with multiple varieties in labeled containers
- Fill vintage glass jars for a nostalgic display
- Use tiered stands for different Chex Mix flavors
- Set out small paper cups or napkins for easy grabbing
Occasions Perfect for Chex Mix:
- Holiday parties – Christmas, Thanksgiving, New Year’s Eve
- Game day gatherings – Super Bowl, playoff parties, tailgating
- Movie nights – Better than microwave popcorn!
- Road trips – Pack in zip-top bags for travel snacking
- After-school snacks – Healthier than chips
- Office parties – Easy to transport and share
- Camping trips – Doesn’t require refrigeration
- Bake sales – Package individually for fundraisers
Beverage Pairings:
- Beer (especially for game day)
- Soda or sparkling water
- Lemonade or iced tea
- Hot cocoa (for winter gatherings)
- Coffee (surprisingly good pairing!)
- Cocktails at holiday parties
Create a Snack Buffet: Pair your Chex Mix with:
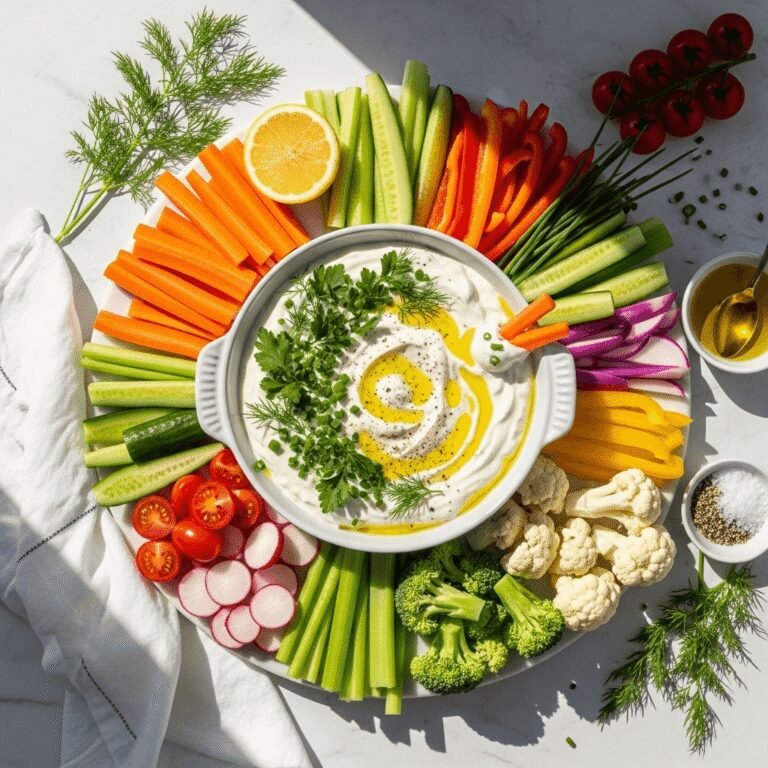
- Fresh vegetable crudités and dip
- Cheese and crackers board
- Fresh fruit platter
- Popcorn in various flavors
- Other savory snacks like chips and salsa
- Sweet treats like cookies or brownies for contrast
Individual Servings: For portion control or parties:
- Package in small cups or bowls
- Fill decorative paper cones
- Use cupcake liners in muffin tins
- Portion into small cellophane bags
FAQs Section
Q: Can I make Chex Mix in the microwave or slow cooker? A: Yes! Slow cooker method: Combine coated mix in a slow cooker, cook on LOW for 2-3 hours, stirring every 30 minutes with the lid slightly ajar to let moisture escape. Microwave method: Spread coated mix in a large microwave-safe bowl, microwave on HIGH for 6 minutes total, stirring every 2 minutes. However, the oven method produces the most evenly toasted, crispiest results.
Q: Why did my Chex Mix turn out soggy? A: Sogginess usually comes from one of three issues: storing it before it completely cooled (creating condensation), using too much butter in the coating, or not baking long enough. Make sure to bake the full hour, stirring every 15 minutes, and cool completely—at least 30 minutes—before storing in airtight containers.
Q: Can I use salted nuts and salted butter? A: You can, but your mix will be very salty. If using salted ingredients, reduce or omit the seasoned salt to prevent over-salting. It’s always easier to add salt at the end than to fix something that’s too salty. Taste the seasoned butter before coating your mix and adjust as needed.
Q: How do I make Chex Mix gluten-free? A: Use only Rice Chex and Corn Chex (both are gluten-free), substitute gluten-free pretzels (many brands available), and use gluten-free crackers or bagel chips. Check that your Worcestershire sauce is gluten-free (some brands contain malt vinegar). The rest of the ingredients are naturally gluten-free!
Q: Can I make sweet Chex Mix instead of savory? A: Absolutely! For sweet Chex Mix, replace the savory seasonings with cinnamon and sugar. Melt butter, toss with cereal and add-ins, then coat with a mixture of ½ cup sugar and 2 teaspoons cinnamon. Bake as directed. You can also make chocolate peanut butter versions by tossing cooled mix with melted chocolate and peanut butter, then coating with powdered sugar (like Puppy Chow/Muddy Buddies).
Q: What’s the best way to package Chex Mix for gifts? A: For gifts, package completely cooled Chex Mix in airtight containers with decorative elements. Mason jars look beautiful tied with ribbon and a gift tag. Decorative tins lined with parchment paper are classic and reusable. Cellophane bags tied with festive bows show off the mix beautifully. Always include storage instructions: “Store in airtight container for up to 3 weeks.”
Q: Why is my Chex Mix not getting crispy? A: This usually happens because the oven temperature is too low (make sure your oven is truly at 250°F—use an oven thermometer), the mix is piled too thick in the pan (spread in a thin layer), or you’re not baking long enough. The full 1-hour baking time is necessary. Also, the mix continues to crisp as it cools, so give it the full 30 minutes of cooling time before judging the final texture.
Q: Can I double or triple this recipe? A: Yes! This recipe scales beautifully. When doubling or tripling, use multiple baking pans—don’t try to cram everything into one pan or the mix won’t toast evenly. You can bake multiple pans simultaneously if they fit in your oven with space for air circulation. Rotate pan positions halfway through if baking multiple pans on different racks.
Conclusion
There you have it—everything you need to know to make the absolute best homemade Chex Mix! This classic savory snack mix is so much better than anything you’ll find in a store—fresher, more flavorful, perfectly seasoned to your taste, and made with love. Whether you’re making it for holiday gift-giving, game day snacking, or just because you’re craving that addictive, buttery, garlicky crunch, this recipe delivers every single time.
The beauty of homemade Chex Mix is that once you master the basic technique, you can customize it endlessly to create your own signature blends. Make it spicy for heat lovers, keep it mild for kids, add extra nuts for protein, or create sweet versions for dessert lovers. It’s the ultimate flexible recipe that adapts to your preferences and whatever you have in your pantry!
I’d love to hear about your Chex Mix adventures! What flavor variations did you try? Are you team extra spicy or classic savory? Did you give it as gifts or keep it all for yourself (no judgment!)? Drop a comment below and share your experience—I read every comment and love hearing your stories!
If this recipe made your snacking (or gift-giving!) easier and more delicious, please save it to your favorite Pinterest board so you can find it again and again. Share it with friends who need the perfect make-ahead party snack or holiday gift idea—they’ll be thanking you after their first crunchy, buttery, perfectly seasoned handful!
Happy snacking, and here’s to never buying store-bought Chex Mix again! 🥨