Easy Peanut Butter Energy Balls Recipe: No Bake Energy Bites
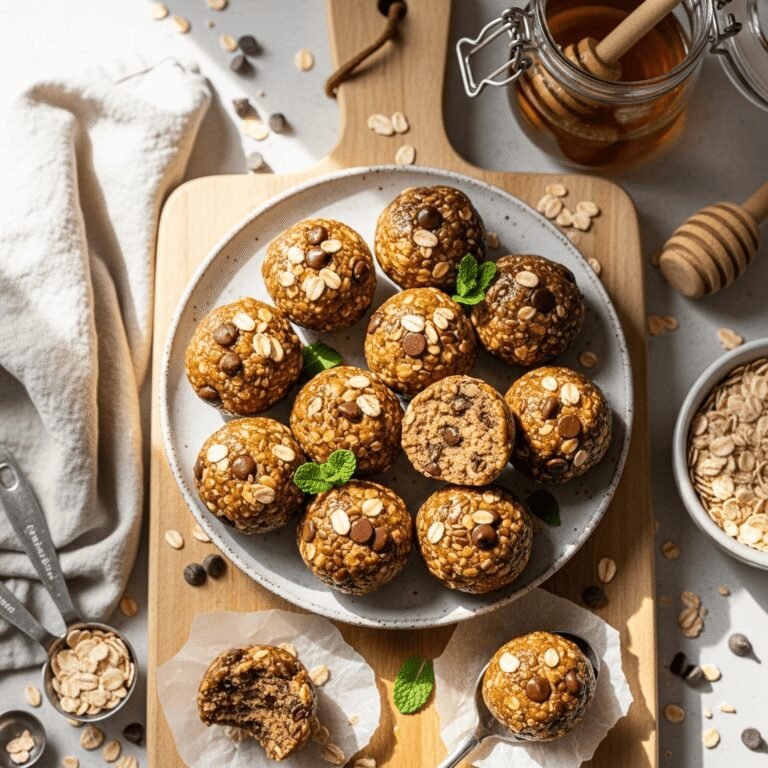
Peanut butter energy balls are delicious, nutritious no-bake bites made with wholesome ingredients like oats, peanut butter, honey, and mix-ins like chocolate chips or dried fruit, creating the perfect portable snack that delivers sustained energy without refined sugar or processed ingredients. This easy peanut butter energy balls recipe requires no cooking and comes together in just 15 minutes using simple pantry staples, making them ideal for meal prep, after-school snacks, pre-workout fuel, or anytime you need a healthy treat that actually tastes like dessert. Whether you’re packing lunchboxes, fueling workouts, or just craving something sweet yet nutritious, these no bake energy balls deliver protein, fiber, and natural energy in convenient, poppable form.
What makes this healthy peanut butter balls recipe so irresistible is the perfect balance of creamy peanut butter, natural sweetness from honey, satisfying texture from rolled oats, and indulgent additions like chocolate chips that make them feel like a treat rather than “health food.” Unlike store-bought energy bars loaded with preservatives and unpronounceable ingredients, these contain only wholesome foods you can actually recognize. The best part? They’re endlessly customizable, naturally gluten-free when using certified GF oats, and beloved by kids and adults alike.
This easy energy bites recipe works beautifully for countless occasions—meal prep Sundays, kids’ lunchboxes, post-workout recovery, afternoon pick-me-ups, healthy desserts, road trip snacks, or anytime you want sustained energy without the sugar crash. They’re budget-friendly, naturally vegetarian, can be made vegan, require zero cooking skills, and store beautifully for weeks. Best of all, these peanut butter energy balls prove that healthy eating doesn’t mean sacrificing flavor—just smart, delicious choices!
History / Background
Peanut butter energy balls represent the modern evolution of energy-dense, portable foods that humans have created for centuries, from ancient travelers’ pemmican to World War II soldiers’ D-rations. To understand these simple no-bake bites, we need to explore both the history of convenient, nutritious portable foods and how the wellness movement transformed snacking culture.
Throughout history, humans have needed portable, shelf-stable, energy-dense foods for travel, work, and survival. Ancient cultures created various combinations of nuts, seeds, dried fruits, and honey formed into compact shapes. Native American pemmican combined dried meat with fat and berries; Middle Eastern travelers made energy balls from dates, nuts, and honey. The common thread was combining protein, healthy fats, and natural sugars for sustained energy in portable form.
The specific combination of peanut butter and oats as a base emerged more recently. Peanut butter itself became widely available in America in the early 1900s after Dr. John Harvey Kellogg (of cereal fame) patented a process for making peanut paste. Rolled oats, another health food innovation, became kitchen staples around the same time. However, combining them into no-bake energy balls is a relatively modern innovation.
The energy ball concept gained momentum in the 1960s-1970s with the natural foods movement and the rise of homemade granola culture. Health-conscious cooks began creating homemade “power balls” or “energy bites” as alternatives to candy and commercial snacks. These early versions often featured combinations like peanut butter, honey, oats, wheat germ, and dried fruit—whole food ingredients that provided lasting energy.
The recipe exploded in popularity in the 2000s-2010s for several converging reasons: the rise of food blogging and Pinterest made recipes easily shareable, the paleo and clean eating movements emphasized whole food snacking, busy families needed healthy grab-and-go options, and fitness culture demanded convenient pre/post-workout fuel. The fact that energy balls required zero cooking made them perfect for food blogs—anyone could make them successfully and share beautiful photos.
Today, peanut butter energy balls have become a wellness culture staple, appearing in countless variations across Pinterest, Instagram, and food blogs. They represent how ancient concepts of portable, nutritious food have been reimagined for contemporary life, honoring both traditional wisdom and modern nutritional understanding while delivering convenience and deliciousness.
Why You’ll Love This Recipe
These peanut butter energy balls are about to become your favorite healthy snack for busy days. This easy peanut butter energy balls recipe delivers nutritious, satisfying bites that taste like cookie dough using simple ingredients you probably already have in your pantry. Whether you’re meal prepping, fueling workouts, or just want a better-for-you treat, you’ll appreciate how these no bake energy balls create wholesome snacking with zero guilt and maximum flavor.
Here’s why this recipe deserves a permanent spot in your meal prep routine:
- No Baking Required – Just mix and roll, ready in 15 minutes
- Only 6 Basic Ingredients – Simple pantry staples
- Naturally Sweetened – Honey instead of refined sugar
- Protein-Packed – Keeps you full and energized
- Kid-Approved – Children love these “cookie dough” balls
- Budget-Friendly – Costs pennies per serving
- Meal Prep Perfect – Lasts 2 weeks in the fridge
- Portable – Perfect grab-and-go snack
- Customizable – Endless flavor variations
- Naturally Gluten-Free – When using certified GF oats
- School-Safe – Can be made nut-free with sunflower butter
- Satisfies Sweet Cravings – Healthy dessert alternative
Ingredient Notes
Understanding your ingredients helps you make the best peanut butter energy balls possible. Let’s break down each component:
Peanut Butter – The star ingredient providing protein, healthy fats, and binding power. Use 1 cup natural peanut butter (creamy or crunchy). Natural peanut butter (just peanuts and salt) works best, though conventional peanut butter also works. The oils in natural peanut butter help bind ingredients. Almond butter, cashew butter, or sunflower seed butter (for nut-free) all substitute equally well.
Rolled Oats – Provides fiber, texture, and substance. Use 2 cups old-fashioned rolled oats (not instant or steel-cut). Rolled oats create the perfect chewy texture and absorb moisture from other ingredients. For gluten-free, use certified gluten-free oats. Quick oats can substitute but create softer texture.
Honey – Natural sweetener and binder. Use ½ cup pure honey. Honey adds sweetness while helping ingredients stick together. The thickness of honey creates the right consistency. Maple syrup substitutes equally well for vegan version. Agave nectar works but is slightly thinner.
Mini Chocolate Chips – Optional but highly recommended for treat factor. Use ½-¾ cup mini chocolate chips (or regular chips). Chocolate makes these feel indulgent while still being wholesome. Dark chocolate chips add antioxidants. Can omit for sugar-free version or substitute dried fruit.
Vanilla Extract – Enhances flavor complexity. Use 1 teaspoon pure vanilla extract. Vanilla adds depth and makes these taste more like cookie dough. Don’t skip it—it makes a noticeable difference.
Salt – Balances sweetness and enhances flavors. Use ¼ teaspoon fine sea salt (adjust if peanut butter is salted). Salt is crucial for balanced flavor—without it, energy balls taste flat and overly sweet.
Optional Mix-Ins – Shredded coconut, chia seeds, flax seeds, dried cranberries, chopped nuts, cinnamon, protein powder, or cocoa powder for customization.
Equipment Needed
You’ll need these simple tools to make perfect peanut butter energy balls:
- Large Mixing Bowl – For combining all ingredients
- Measuring Cups and Spoons – For accurate measurements
- Wooden Spoon or Sturdy Spatula – For mixing thick dough
- Cookie Scoop or Tablespoon – For portioning uniform balls
- Baking Sheet or Plate – For holding rolled balls
- Parchment Paper – Lines baking sheet to prevent sticking
- Airtight Container – For storing finished energy balls
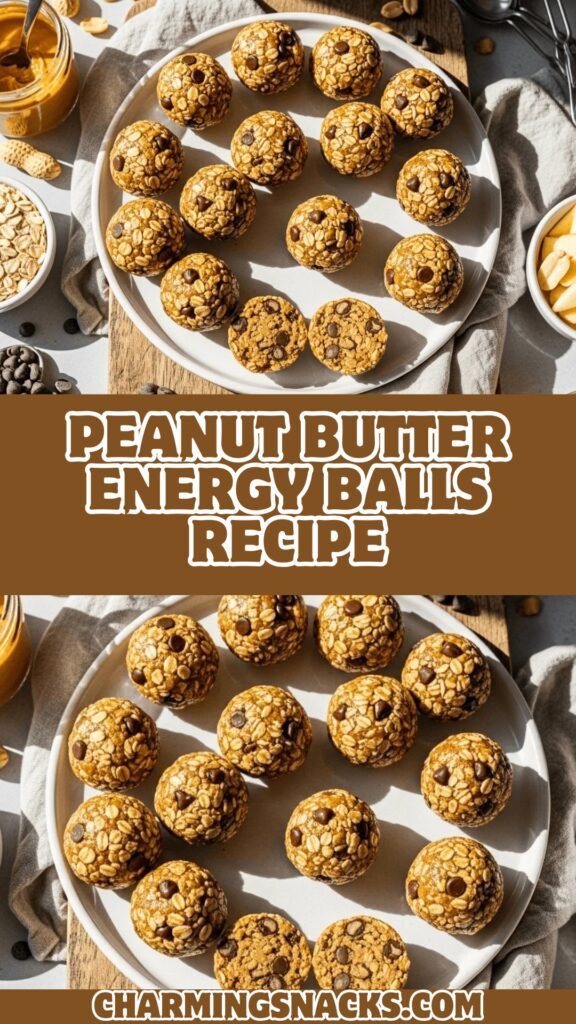
Peanut Butter Energy Balls Recipe
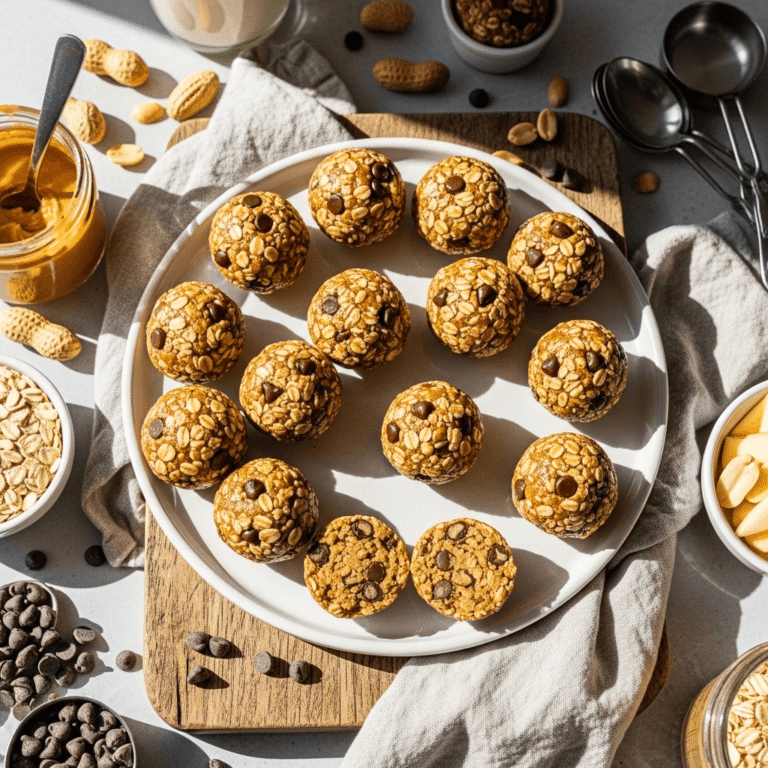
Peanut butter energy balls are easy no-bake bites made with oats, peanut butter, honey, and chocolate chips. This healthy snack recipe is perfect for meal prep!
- Total Time: 15 minutes (plus 30 minutes chilling)
- Yield: About 24 energy balls 1x
Ingredients
For the Energy Balls:
- 1 cup natural peanut butter (creamy or crunchy)
- 2 cups old-fashioned rolled oats
- ½ cup honey (or maple syrup for vegan)
- ½-¾ cup mini chocolate chips
- 1 teaspoon vanilla extract
- ¼ teaspoon fine sea salt
Optional Mix-Ins (choose 1-2):
- ½ cup shredded coconut
- 2 tablespoons chia seeds
- 2 tablespoons ground flaxseed
- ⅓ cup dried cranberries or raisins
- ¼ cup chopped nuts
- 2 tablespoons cocoa powder
Instructions
- Prepare Workspace: Line a baking sheet or large plate with parchment paper. Set aside.
- Combine Wet Ingredients: In a large mixing bowl, combine peanut butter, honey, and vanilla extract. Stir until smooth and well combined. If peanut butter is very stiff, microwave for 15-20 seconds to soften.
- Add Dry Ingredients: Add rolled oats and salt to the peanut butter mixture. Stir with a sturdy wooden spoon or spatula until all oats are completely coated. The mixture will be thick and sticky.
- Add Mix-Ins: Fold in chocolate chips and any optional mix-ins you’re using. Stir until evenly distributed throughout the mixture.
- Chill (Optional but Recommended): For easier rolling, refrigerate the mixture for 15-30 minutes. This firms up the peanut butter and honey, making rolling much easier. You can skip this if you’re in a hurry.
- Roll into Balls: Using a cookie scoop or tablespoon, portion out about 1-1½ tablespoons of mixture. Roll between your palms to form smooth balls. Place on the prepared parchment-lined sheet.
- Chill to Set: Refrigerate energy balls for at least 30 minutes to firm up before eating. They’ll be soft at room temperature but will firm beautifully when chilled.
- Store: Transfer to an airtight container and store in the refrigerator for up to 2 weeks or freeze for up to 3 months.
Notes
- Natural peanut butter works best—stir well before using if oil has separated.
- If mixture is too dry and won’t hold together, add more peanut butter 1 tablespoon at a time.
- If mixture is too wet and won’t form balls, add more oats 2 tablespoons at a time.
- Chilling before rolling makes the process much easier and less messy.
- Energy balls firm up significantly when refrigerated—they’re meant to be eaten cold.
- Use certified gluten-free oats if making for celiac diet.
- For nut-free version, substitute sunflower seed butter for peanut butter.
- Prep Time: 15 minutes
- Cook Time: 0 minutes
- Category: Dessert
- Method: No-Bake
- Cuisine: American
- Diet: Vegetarian
Nutrition
- Serving Size: 1 energy ball
- Calories: 125
- Sugar: 8g
- Sodium: 45mg
- Fat: 6g
- Saturated Fat: 1g
- Unsaturated Fat: 4g
- Trans Fat: 0g
- Carbohydrates: 15g
- Fiber: 2g
- Protein: 4g
- Cholesterol: 0mg
Tips & Variations
Transform your peanut butter energy balls to match any preference with these creative variations:
Chocolate Peanut Butter Energy Balls: Add 2 tablespoons cocoa powder to the mixture for intense chocolate flavor.
Almond Joy Energy Balls: Use almond butter instead of peanut butter, add ½ cup shredded coconut and ½ cup dark chocolate chips.
Protein Power Energy Balls: Add 2-3 tablespoons vanilla protein powder for extra protein boost.
Superfood Energy Balls: Mix in 2 tablespoons each of chia seeds, ground flaxseed, and hemp hearts.
Cinnamon Raisin Energy Balls: Add 1 teaspoon cinnamon and ⅓ cup raisins instead of chocolate chips.
Peanut Butter & Jelly Energy Balls: Swirl in 2 tablespoons strawberry or grape jam (creates ribbons throughout).
Nut-Free Energy Balls: Substitute sunflower seed butter or tahini for peanut butter.
Vegan Energy Balls: Use maple syrup instead of honey.
Keto-Friendly Option: Replace honey with sugar-free maple syrup, use sugar-free chocolate chips, and reduce oats (note: these won’t hold together as well).
Pro Chef Tips
Elevate your peanut butter energy balls from good to absolutely perfect with these professional techniques:
Stir Peanut Butter Thoroughly First: Natural peanut butter separates with oil on top. Before measuring, stir the entire jar thoroughly until completely smooth and homogeneous. Unstirred peanut butter with excess oil creates wet, sticky energy balls that won’t hold shape.
Measure Peanut Butter Carefully: Pack peanut butter firmly into measuring cups to ensure accurate measurement. Too little and balls won’t stick together; too much and they’ll be greasy and won’t firm up properly.
Don’t Skip the Chilling: Refrigerating the mixture before rolling isn’t just a suggestion—it makes rolling infinitely easier. Warm peanut butter and honey are sticky and messy. Chilled mixture rolls smoothly into perfect spheres with minimal hand-sticking.
Use a Cookie Scoop: A 1-tablespoon cookie scoop creates perfectly uniform energy balls that look professional and ensure consistent portions. Uniform size also means even texture and flavor throughout.
Wet Your Hands: If mixture sticks to your palms while rolling, lightly wet your hands with cold water. This prevents sticking without adding excess moisture to the balls.
Adjust Consistency as Needed: Every brand of peanut butter and honey has slightly different moisture content. If mixture won’t hold together, add more peanut butter 1 tablespoon at a time. If too wet, add more oats 2 tablespoons at a time. The final mixture should hold together easily when pressed but not be overly sticky.
Store Cold: Energy balls are meant to be eaten cold from the refrigerator. At room temperature, they soften significantly. For best texture and easier eating, store in the fridge and eat directly from cold storage.
Common Mistakes to Avoid
Sidestep these frequent pitfalls for perfect peanut butter energy balls every time:
Not Stirring Natural Peanut Butter: If natural peanut butter isn’t thoroughly mixed (oil reincorporated), you’ll measure mostly oil or mostly solids, throwing off the recipe’s moisture balance. Always stir the entire jar completely before measuring.
Making Them Too Large: Oversized energy balls are difficult to eat and don’t chill properly. Stick to 1-1½ tablespoon portions for the right ratio of ingredients and proper texture.
Skipping the Refrigeration: Energy balls need to chill to firm up properly. Eating them at room temperature means soft, sticky balls that fall apart. Always refrigerate at least 30 minutes before eating.
Using Instant Oats: Instant oats are too fine and absorb too much moisture, creating gummy, paste-like texture. Always use old-fashioned rolled oats for proper chewy texture.
Not Adjusting for Dry/Wet Mixture: Every kitchen is different, and ingredient brands vary in moisture. If mixture seems too dry or too wet, adjust with more peanut butter or more oats rather than proceeding with wrong consistency.
Storing at Room Temperature: Room temperature storage causes energy balls to soften, become greasy, and potentially spoil faster. Always store in the refrigerator in an airtight container.
Storage & Meal Prep
Here’s how to handle storage and prep for peanut butter energy balls:
Refrigerator Storage: Store energy balls in an airtight container in the refrigerator for up to 2 weeks. They stay fresh, maintain texture, and are ready to grab anytime.
Room Temperature: Energy balls can sit at room temperature for 2-3 hours (like in a lunchbox) without issues, but for best texture and food safety, keep refrigerated until ready to eat.
Meal Prep Strategy: Make a double batch on Sunday and store in the refrigerator. Portion into weekly containers or bags for easy grab-and-go snacking all week. Perfect for packing lunches, pre-workout fuel, or afternoon snacks.
Travel: Energy balls travel reasonably well for a few hours in a lunchbox or bag, though they’ll soften at room temperature. Include an ice pack if carrying for extended periods.
Portion Control: Pre-portion energy balls into small containers or bags to prevent overeating and make portion control effortless.
Make-Ahead & Freezer Notes
Plan ahead with these time-saving strategies for peanut butter energy balls:
Best Make-Ahead Timeline (Up to 2 Weeks): Energy balls are perfect for making ahead. Prepare a full batch and store in the refrigerator for up to 2 weeks. They actually taste better after a day as flavors meld.
Freezer-Friendly (Up to 3 Months): Energy balls freeze beautifully! Place rolled balls on a parchment-lined baking sheet and freeze until solid (about 1 hour). Transfer frozen balls to a freezer-safe bag or container. Freeze for up to 3 months.
Thawing: Remove desired number of energy balls from freezer and let thaw in the refrigerator for 2-3 hours or at room temperature for 30-45 minutes. You can also eat them partially frozen for a firmer, chewier texture.
Batch Cooking: Make multiple batches with different flavor variations and freeze for variety. Label containers clearly with flavors and dates.
Meal Prep Sunday: Dedicate 15 minutes on Sunday to making a batch or two. You’ll have healthy snacks ready for the entire week with zero daily effort.
Serving Suggestions
Create balanced nutrition and complete the peanut butter energy balls experience with these serving ideas:
As Healthy Snacks:
- Mid-morning energy boost
- Post-workout recovery fuel
- Afternoon pick-me-up
- Study session brain food
For Kids:
- Lunchbox treats
- After-school snacks
- Sports practice fuel
- Healthier dessert option
Pre/Post Workout:
- 1-2 balls before cardio
- 2-3 balls after strength training
- Protein and carbs for recovery
- Sustained energy for endurance
Breakfast Addition:
- Alongside Greek yogurt
- With fruit and coffee
- Quick breakfast on-the-go
- Paired with green smoothie
Dessert Alternative:
- Satisfies sweet cravings
- Healthier than cookies
- Portion-controlled treat
- Guilt-free indulgence
Party/Entertaining:
- Arrange on platter for healthy option
- Include on dessert table
- Perfect for kids’ parties
- Wellness-themed gatherings
Beverage Pairings: Energy balls pair wonderfully with coffee, tea, smoothies, protein shakes, or cold milk.
FAQs Section
Q: Can I make these without honey?
A: Yes! Maple syrup substitutes equally well for vegan version. The consistency is similar and the flavor is great. Agave nectar also works but is slightly thinner.
Q: Why won’t my energy balls stick together?
A: Usually because there’s not enough binding agent (peanut butter or honey). Add more peanut butter 1 tablespoon at a time until mixture holds together when pressed. Also ensure you’re using old-fashioned oats, not instant.
Q: Can I make these nut-free for school?
A: Absolutely! Substitute sunflower seed butter (sunbutter) for peanut butter. Everything else remains the same. They’re just as delicious and completely nut-free.
Q: Do I have to refrigerate these?
A: Yes, for best texture and food safety. Energy balls are meant to be eaten cold—they firm up in the fridge and have the best texture. Room temperature makes them soft and greasy.
Q: How long do energy balls last?
A: In the refrigerator in an airtight container, energy balls last up to 2 weeks. In the freezer, they last up to 3 months. Mark the container with the date for easy tracking.
Q: Can I use quick oats instead of rolled oats?
A: Quick oats will work but create softer, less chewy texture. Old-fashioned rolled oats are strongly preferred for the best texture and structural integrity.
Q: Are these actually healthy?
A: Yes! They contain whole grains (oats), protein and healthy fats (peanut butter), natural sweeteners (honey), and fiber. They’re far superior to processed snacks. While they do contain sugar from honey and chocolate, they’re naturally sweetened and nutrient-dense.
Q: Can I add protein powder?
A: Yes! Add 2-3 tablespoons of your favorite protein powder. You may need to add 1-2 extra tablespoons of peanut butter or honey to compensate for the dry protein powder.
Conclusion
There you have it—everything you need to create perfect, nutritious, delicious peanut butter energy balls that will transform your snacking and meal prep routine! This easy peanut butter energy balls recipe proves that healthy eating doesn’t mean sacrificing flavor or satisfaction. The combination of creamy peanut butter, wholesome oats, natural sweetness, and optional chocolate chips creates bites that taste like cookie dough while fueling your body with protein, fiber, and sustained energy.
Remember the keys to success: stir natural peanut butter thoroughly before measuring, use old-fashioned rolled oats, chill the mixture before rolling for easiest handling, adjust consistency as needed with more peanut butter or oats, and always store in the refrigerator. Master these fundamentals and you’ll create no bake energy balls that become a household favorite.
The beauty of this healthy peanut butter balls recipe lies in its incredible versatility and meal prep convenience. Make them for weekly snacking, pack in lunchboxes, fuel your workouts, satisfy sweet cravings healthfully, or customize with endless mix-ins—these easy energy bites adapt beautifully while always delivering wholesome nutrition and delicious flavor.
Ready to revolutionize your snacking with this simple, nutritious recipe? Pin this recipe to your favorite Pinterest board so you’ll always have it ready for your next meal prep session! Make these peanut butter energy balls this weekend and let me know in the comments how they turned out. What mix-ins did you add? I absolutely love hearing about your cooking adventures and seeing your delicious creations!
Don’t forget to snap a photo of those gorgeous energy balls and share it on social media. Tag me so I can see your masterpiece and celebrate with you! Here’s to easy meal prep, healthy snacking, and recipes that make wellness delicious!