Easy Pizza Sliders Recipe: Quick Baked Mini Pizza Sandwiches

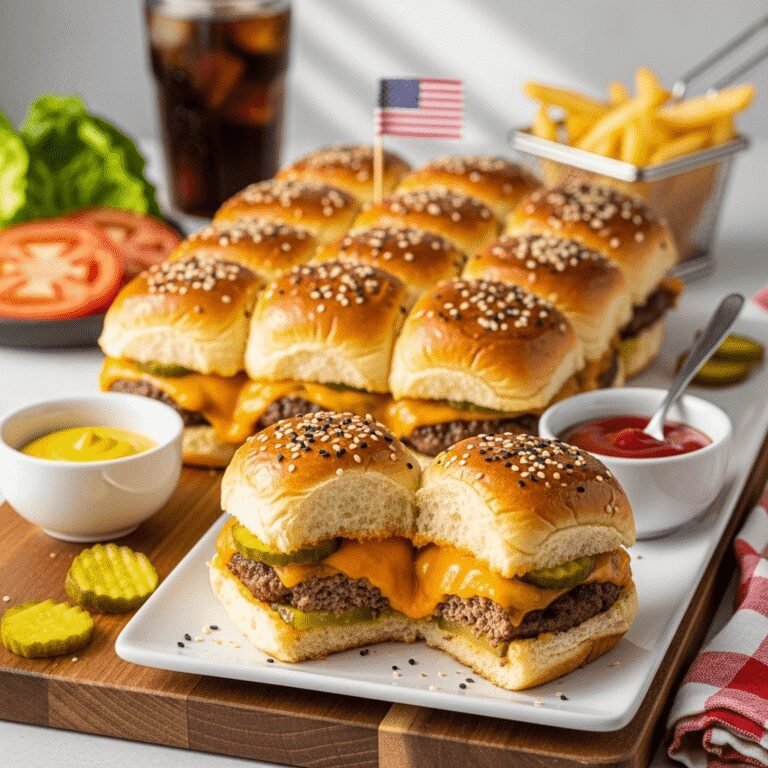
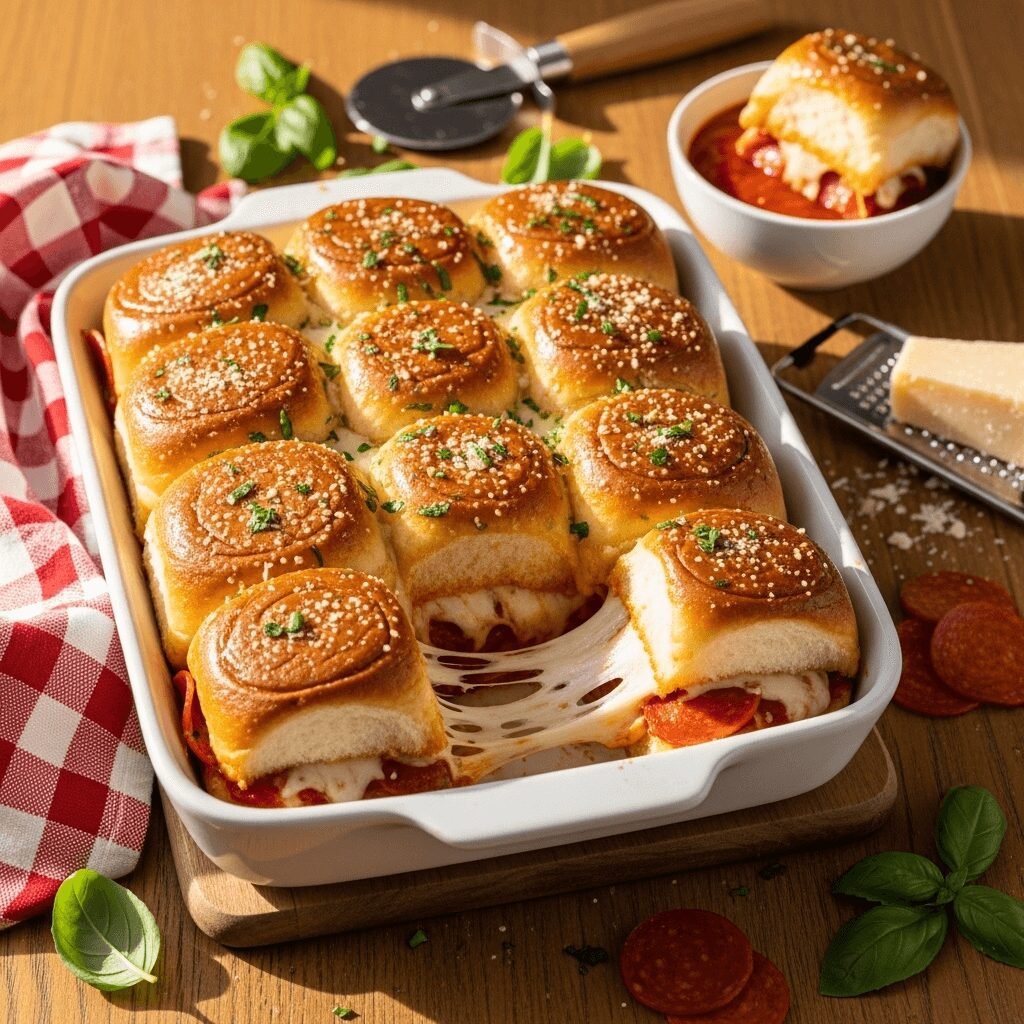
Pizza sliders are the ultimate crowd-pleasing appetizer—soft Hawaiian rolls filled with pepperoni, mozzarella cheese, and pizza sauce, then brushed with garlic butter and baked until golden and gooey. These easy pizza sliders combine all the beloved flavors of classic pizza in convenient, bite-sized sandwiches that are perfect for game day, parties, or busy weeknight dinners. Whether you’re feeding hungry kids, hosting a Super Bowl gathering, or looking for a fun twist on pizza night, these baked pizza sliders deliver maximum flavor with minimal effort.
What makes these mini pizza sandwiches so irresistible is how they transform simple ingredients into something that feels special. The soft, slightly sweet Hawaiian rolls provide the perfect base, soaking up garlic butter while maintaining their pillowy texture. Inside, layers of melted mozzarella and pepperoni mingle with tangy pizza sauce, creating that classic pizza taste in every bite. The garlic butter topping becomes golden and crispy on top while keeping the rolls tender underneath, and a sprinkle of Italian seasoning and Parmesan adds that authentic pizzeria aroma.
This pizza slider recipe works beautifully for countless occasions—game day parties, birthday celebrations, potlucks, movie nights, after-school snacks, or anytime you need food that’s fun, shareable, and guaranteed to disappear fast. They’re kid-friendly, budget-friendly, and come together in just 30 minutes using ingredients you likely already have. Best of all, these sliders can be customized with your favorite pizza toppings and assembled ahead of time, making entertaining stress-free while delivering restaurant-quality results that will have everyone asking for seconds.
History / Background
Pizza sliders represent the evolution of two beloved American food traditions: pizza and sliders. To understand this recipe, we need to explore both components.
Pizza’s journey to America began with Italian immigration in the late 19th century, particularly in cities like New York, Boston, and Chicago. While pizza existed in Italy for centuries, the American version evolved with more cheese, larger sizes, and innovative toppings. By the mid-20th century, pizza had become thoroughly American, with regional styles developing across the country. Pizza’s popularity exploded in the post-World War II era as returning soldiers who’d tasted pizza in Italy sought it at home, and chains like Pizza Hut and Domino’s brought it to every corner of the country.
The slider, meanwhile, has roots in the early 20th century. White Castle, founded in 1921 in Wichita, Kansas, popularized small, square hamburgers that could be eaten in a few bites—perfect for workers’ quick lunch breaks. The term “slider” likely came from how these small burgers could “slide” down easily, or from how they slid across the greasy griddle during cooking. Sliders became synonymous with small, easy-to-eat sandwiches that were perfect for sharing.
The combination of pizza flavors with the slider format is a more recent innovation, emerging from home cooking creativity and food blog culture in the 2000s and 2010s. As “loaded” and “stuffed” recipes became popular on Pinterest and food blogs, home cooks began experimenting with transforming classic dishes into slider format. The use of Hawaiian rolls specifically gained popularity because their slightly sweet flavor, soft texture, and convenient pre-connected format made them ideal for baking multiple sliders at once.
Pizza sliders also reflect the broader trend toward “easy entertaining” food—dishes that look impressive, feed a crowd, and require minimal skill or time. They embody the American love for convenience foods elevated through creative preparation. The fact that they bake all together in one pan, require no individual assembly after baking, and can be customized endlessly made them perfect for sharing on social media and recipe sites.
Today, pizza sliders have become a staple of game day menus, kids’ parties, and casual gatherings across America. They represent the ongoing evolution of comfort food—taking familiar flavors and reimagining them in formats that are fun, shareable, and perfectly suited to how Americans eat and entertain today.
Why You’ll Love This Recipe
These pizza sliders are about to become your go-to recipe for easy entertaining and quick family meals. This simple baked pizza slider recipe delivers all the flavors you love about pizza in a fun, portable format that’s perfect for sharing. Whether you’re a busy parent, frequent host, or just someone who loves easy comfort food, you’ll appreciate how these mini pizza sandwiches come together quickly using accessible ingredients.
Here’s why this recipe deserves a permanent spot in your cooking rotation:
- Lightning Fast – Ready in just 30 minutes from start to finish, perfect for last-minute meals
- Uses Simple Ingredients – Everything you need is available at any grocery store
- Kid-Approved – Children absolutely love these bite-sized pizza sandwiches
- Perfect for Crowds – One pan makes 12 sliders, easily doubled or tripled for large groups
- Budget-Friendly – Costs just a few dollars to make, feeding many people affordably
- Minimal Cleanup – Bakes in one dish with hardly any mess to clean
- Customizable – Endless topping variations to suit any preference or dietary need
- Make-Ahead Friendly – Assemble hours in advance and bake when ready
- No Individual Assembly – Bake all together, then simply slice and serve
- Always Disappears – These are the kind of sliders that get completely devoured every time
- Great for Any Occasion – Perfect for game day, parties, dinners, or snacks
- Fun Presentation – Looks impressive despite being incredibly easy to make
Ingredient Notes
Understanding your ingredients helps you make the best pizza sliders possible. Let’s break down each component:
Hawaiian Rolls – The foundation of these sliders. Hawaiian sweet rolls (typically sold in packs of 12 still connected) are essential—their soft, slightly sweet texture and small size make them perfect for sliders. King’s Hawaiian is the most popular brand. The rolls come connected, which allows you to slice through all of them at once horizontally. Don’t separate them until after baking. Regular dinner rolls can substitute, but Hawaiian rolls’ sweetness and texture are ideal.
Mozzarella Cheese – Provides that essential pizza cheese pull and gooey texture. Use shredded mozzarella for easy layering and even melting. For best results, shred from a block rather than buying pre-shredded, which contains anti-caking agents that affect melting. Whole milk mozzarella melts better than part-skim. You’ll need about 2 cups total.
Pepperoni – The classic pizza topping that adds savory, slightly spicy flavor. Use regular sliced pepperoni from the deli section. Mini pepperonis work great for better coverage. Turkey pepperoni can substitute for a lighter option. For best results, layer pepperoni generously—don’t be shy!
Pizza Sauce – Provides essential tomato flavor and moisture. Use your favorite jarred pizza sauce or marinara sauce—both work beautifully. For more intense flavor, use thick pizza sauce rather than watery marinara. You can also use pasta sauce in a pinch. About 1 cup is sufficient for 12 sliders.
Butter – Creates that irresistible garlic butter topping that makes these sliders special. Use unsalted butter so you control salt levels. The butter will be melted and brushed over the tops, creating golden, crispy tops while keeping rolls tender. Don’t skip this step—it’s what transforms simple sliders into something crave-worthy.
Garlic – Essential for the signature garlic butter topping. Fresh minced garlic provides the best flavor, but garlic powder works in a pinch (use 1 teaspoon garlic powder per 3 cloves fresh garlic). The garlic infuses the butter with aromatic flavor that permeates the entire slider.
Italian Seasoning – Adds authentic pizza flavor with its blend of oregano, basil, thyme, and other herbs. This is the secret to making these taste like actual pizza rather than just cheese sandwiches. Sprinkle generously over the butter-brushed tops.
Parmesan Cheese – Grated Parmesan adds sharp, nutty flavor and helps the tops brown beautifully. Use fresh-grated or good-quality pre-grated Parmesan. This is optional but highly recommended for that final touch of Italian flavor.
Equipment Needed
You’ll need these simple tools to make perfect pizza sliders:
- 9×13-inch Baking Dish – Standard size for baking the connected roll sliders
- Sharp Serrated Knife – Essential for slicing through all rolls horizontally at once
- Small Saucepan or Microwave-Safe Bowl – For melting butter
- Pastry Brush or Spoon – For brushing garlic butter over sliders
- Cutting Board – For safe slicing and prep work
- Measuring Cups and Spoons – For accurate ingredient measurements
- Aluminum Foil – To cover during baking and prevent over-browning
- Spatula – For serving individual sliders once baked

Pizza Sliders Recipe
Easy pizza sliders feature soft Hawaiian rolls filled with pepperoni, mozzarella cheese, and pizza sauce, brushed with garlic butter and baked until golden. These mini pizza sandwiches are perfect for parties and quick dinners!
- Total Time: 30 minutes
- Yield: 12 sliders (serves 6-12) 1x
Ingredients
For the Sliders:
- 1 package (12-count) Hawaiian sweet rolls, connected
- 1 cup pizza sauce or marinara sauce
- 2 cups shredded mozzarella cheese
- 4-5 oz pepperoni slices (about 30-40 slices)
- Optional: additional toppings like olives, mushrooms, bell peppers
For the Garlic Butter Topping:
- 4 tablespoons unsalted butter, melted
- 2-3 cloves garlic, minced
- 1 teaspoon Italian seasoning
- ¼ cup grated Parmesan cheese
- Pinch of salt
- Optional: red pepper flakes for heat
Instructions
- Preheat Oven: Preheat your oven to 350°F (175°C). Lightly grease a 9×13-inch baking dish or line with parchment paper.
- Slice Rolls: Without separating the rolls, use a sharp serrated knife to slice through the entire sheet of connected rolls horizontally, creating a top and bottom half. Place the bottom half in the prepared baking dish, cut side up.
- Add Sauce: Spread pizza sauce evenly over the bottom layer of rolls, making sure to cover all the way to the edges. Use about ¾ to 1 cup of sauce.
- Layer Cheese and Pepperoni: Sprinkle half the mozzarella cheese (1 cup) over the sauce. Layer pepperoni slices evenly across the cheese—overlap them generously for maximum flavor. Add any additional toppings you’re using. Top with remaining mozzarella cheese (1 cup).
- Add Top Buns: Place the top half of the rolls over the cheese and toppings, creating sandwiches. Press down gently to compress slightly.
- Make Garlic Butter: In a small bowl, combine melted butter, minced garlic, Italian seasoning, Parmesan cheese, and a pinch of salt. Mix well.
- Brush with Butter: Generously brush the garlic butter mixture over the top of the rolls, making sure to cover the entire surface. The butter will soak in and create a golden, flavorful crust.
- Cover and Bake: Cover the baking dish with aluminum foil. Bake for 15 minutes covered, then remove foil and bake an additional 5-7 minutes until the tops are golden brown and cheese is melted and bubbly.
- Slice and Serve: Remove from oven and let cool for 2-3 minutes. Using a sharp knife, cut along the lines between rolls to separate into individual sliders. Serve warm with extra pizza sauce for dipping if desired.
Notes
- Don’t separate rolls before slicing—keep them connected for easier assembly.
- Layer ingredients generously for maximum flavor in every bite.
- Cover with foil for the first 15 minutes to prevent tops from browning too quickly.
- Customize with your favorite pizza toppings (sausage, mushrooms, olives, etc.).
- These are best served warm and fresh from the oven.
- Leftovers can be stored in the refrigerator and reheated.
- For crispier bottoms, place baking dish on lower oven rack.
- Prep Time: 10 minutes
- Cook Time: 20 minutes
- Category: Appetizer
- Method: Baking
- Cuisine: American
- Diet: Gluten Free
Nutrition
- Serving Size: 2 sliders
- Calories: 445
- Sugar: 8g
- Sodium: 985mg
- Fat: 24g
- Saturated Fat: 12g
- Unsaturated Fat: 10g
- Trans Fat: 0g
- Carbohydrates: 35g
- Fiber: 2g
- Protein: 20g
- Cholesterol: 62mg
Tips & Variations
Transform your pizza sliders to match any preference with these creative variations:
Supreme Pizza Sliders: Add cooked Italian sausage, sliced mushrooms, diced bell peppers, and sliced black olives between the cheese layers for loaded supreme flavor. This creates a heartier, more substantial slider.
Meat Lovers Pizza Sliders: Layer pepperoni, cooked ground beef or Italian sausage, crumbled bacon, and ham for an ultra-meaty version that carnivores will devour. Use extra cheese to hold all the toppings together.
Vegetarian Pizza Sliders: Skip the pepperoni and load up with vegetables like mushrooms, bell peppers, onions, olives, tomatoes, and spinach. Add extra cheese to keep them satisfying and flavorful.
BBQ Chicken Pizza Sliders: Replace pizza sauce with BBQ sauce, use shredded cooked chicken instead of pepperoni, and add red onions and cilantro. This creates a sweet-savory twist that’s incredibly popular.
Hawaiian Pizza Sliders: Add pineapple chunks and diced ham along with the mozzarella for that controversial but delicious sweet-savory combination. The Hawaiian rolls make this version extra cohesive.
Spicy Pizza Sliders: Mix red pepper flakes into the pizza sauce, use spicy Italian sausage, add jalapeño slices, and use pepper jack cheese instead of (or in addition to) mozzarella for serious heat.
White Pizza Sliders: Skip the red sauce and use garlic butter or Alfredo sauce as the base. Add ricotta cheese along with mozzarella, and top with spinach and chicken for elegant white pizza flavor.
Mini Meatball Sliders: Add small cooked meatballs (halved or quartered) along with the pepperoni for extra protein and a meatball sub-inspired version.
Pro Chef Tips
Elevate your pizza sliders from good to absolutely perfect with these professional techniques:
Don’t Separate the Rolls Before Baking: This is crucial for success. Keeping rolls connected allows you to slice through all of them at once horizontally, layer ingredients efficiently, and ensures even baking. The connected format also helps rolls stay moist by steaming slightly against each other. Separate into individual sliders only after baking.
Use a Sharp Serrated Knife for Slicing: A dull knife tears the soft rolls instead of cleanly slicing them. A sharp serrated bread knife allows you to saw through the connected rolls horizontally in one smooth motion, creating clean, even layers for filling. This makes assembly much easier and creates better-looking sliders.
Layer Strategically for Best Results: Start with sauce directly on bread (creates moisture barrier), then cheese (melts into sauce), then pepperoni (stays flat against cheese), then more cheese on top (holds everything together and creates that cheese pull). This layering order prevents soggy bottoms and ensures even flavor distribution.
Cover with Foil Initially: Aluminum foil prevents the tops from browning too quickly before the cheese melts and sliders heat through. Bake covered for 15 minutes, then uncover for the final 5-7 minutes. This two-stage baking creates golden tops without burning while ensuring gooey, melted interiors.
Brush Garlic Butter Generously: Don’t be shy with the garlic butter—it’s what makes these sliders special. Brush liberally over every bit of the top surface, allowing it to soak into the rolls and run down the sides slightly. The butter creates golden, crispy tops while keeping rolls tender and flavorful.
Let Rest Before Cutting: Allow sliders to rest 2-3 minutes after removing from oven before cutting into individual pieces. This brief resting period lets cheese set slightly, making sliders easier to cut cleanly and reducing mess. If you cut immediately, all the cheese and toppings slide out.
Customize Boldly: Don’t be afraid to experiment with toppings and flavors. Pizza sliders are endlessly customizable—use your favorite pizza combinations. Just ensure you don’t overload with wet ingredients (which create soggy sliders) and always include enough cheese to hold everything together.
Common Mistakes to Avoid
Sidestep these frequent pitfalls for perfect pizza sliders every time:
Separating the Rolls Before Assembly: This makes the recipe exponentially harder and more time-consuming. Keeping rolls connected is the entire point—it allows efficient layering and even baking. Don’t separate them until after baking is complete.
Using Too Much Sauce: Excessive sauce makes the bottom rolls soggy and creates a mess when eating. Use just enough to coat the bottom layer—about ¾ to 1 cup total is sufficient. Spread thinly and evenly rather than pooling sauce in spots. Serve extra sauce on the side for dipping instead.
Skipping the Foil Cover: Baking uncovered from the start causes tops to brown too quickly before cheese melts and sliders heat through. You’ll end up with burnt tops and cold, unmelted cheese inside. Always start covered with foil, then uncover for the last few minutes.
Not Brushing Enough Butter on Top: The garlic butter is essential for flavor and texture. Insufficient butter means pale, dry tops that lack flavor. Brush generously over the entire surface—the rolls should look well-coated and slightly shiny.
Cutting Too Soon: Slicing into sliders immediately after removing from oven causes all the melted cheese and toppings to slide out, creating a mess. Let rest 2-3 minutes so cheese sets slightly. This brief wait makes all the difference for clean cuts and neat presentation.
Overloading with Toppings: While it’s tempting to add everything, too many toppings (especially wet vegetables) make sliders soggy, messy, and difficult to eat. Stick to 2-3 toppings max plus cheese and sauce. Drain any vegetables well before adding.
Storage & Meal Prep
Here’s how to handle storage and prep for pizza sliders:
Immediate Serving is Best: Pizza sliders are ideal served hot and fresh from the oven when cheese is melted and gooey. The contrast of crispy garlic butter tops with soft, cheesy centers is what makes them special. Serve within 10-15 minutes of baking for optimal taste and texture.
Refrigerator Storage: Store leftover sliders in an airtight container in the refrigerator for up to 3-4 days. Separate layers with parchment paper to prevent sticking. The sliders will firm up when cold but reheat well.
Reheating Methods:
- Oven (Best): Reheat at 350°F for 10-12 minutes until warmed through and cheese is melted again. Cover with foil to prevent drying out.
- Microwave (Quick): Heat individual sliders for 30-45 seconds until warm. Microwaving makes rolls slightly chewy but works for quick reheating.
- Air Fryer: Reheat at 350°F for 5-7 minutes for crispy exteriors and warm centers.
Component Prep: If you want to prep ahead without assembling, store components separately:
- Rolls: Keep at room temperature in original packaging until ready to use
- Cheese and Pepperoni: Store in refrigerator in zip-top bags
- Sauce: Keep refrigerated in original jar or container
- Garlic Butter: Make ahead and store refrigerated, then melt when needed
Make-Ahead & Freezer Notes
Plan ahead with these time-saving strategies for pizza sliders:
Assemble Ahead (Best Method): Assemble sliders completely through step 5 (before adding garlic butter), cover tightly with plastic wrap, and refrigerate for up to 8 hours before baking. When ready to bake, remove from refrigerator, brush with garlic butter, and bake as directed, adding 3-5 extra minutes to compensate for cold start.
Partial Prep: Make garlic butter mixture up to 3 days ahead and store refrigerated. Melt gently before using. Slice rolls and keep at room temperature (if baking same day) or refrigerate in a zip-top bag for up to 24 hours.
Freezing Unbaked Sliders: Assemble completely (including garlic butter), wrap tightly in plastic wrap then aluminum foil, and freeze for up to 2 months. Bake from frozen at 350°F, covered with foil for 25-30 minutes, then uncovered for 5-10 minutes until golden and heated through.
Freezing Baked Sliders: Let baked sliders cool completely, wrap tightly in foil or place in freezer bags, and freeze for up to 2 months. Reheat from frozen at 350°F for 20-25 minutes, covered with foil, until warmed through.
Party Planning Timeline: For stress-free entertaining:
- Morning of party: Assemble sliders, cover, refrigerate
- 30 minutes before serving: Preheat oven, brush with garlic butter
- Just before guests arrive: Bake according to recipe
This approach ensures fresh, hot sliders with minimal last-minute work.
Serving Suggestions
Create memorable spreads and complete the pizza slider experience with these serving ideas:
Game Day Spread: Serve pizza sliders as the star of your appetizer table alongside buffalo wings, mozzarella sticks, nachos, jalapeño poppers, and a vegetable platter with ranch dip. The variety ensures something for everyone.
Pizza Party: Make pizza sliders the main attraction alongside regular pizza, Caesar salad, garlic bread, and Italian sodas. This creates a complete pizza-themed meal that’s fun and filling.
Kids’ Party: These are perfect for children’s birthday parties or playdates. Serve with fruit salad, veggie sticks with dip, chips, and juice boxes. Kids can easily handle sliders and love the pizza flavor.
Casual Dinner: Pair with a simple green salad, garlic bread, and roasted vegetables for a complete weeknight dinner. Add soup (tomato or minestrone) for a heartier meal.
Potluck Contribution: Transport assembled sliders in the baking dish covered with foil. Bake at the host’s house just before serving. These always stand out at potlucks and disappear quickly.
Movie Night: Serve warm sliders with popcorn, candy, and cold drinks for the ultimate movie night spread. They’re easy to eat while watching without needing plates or utensils.
Beverage Pairings: Pizza sliders pair wonderfully with cold beer (especially lagers or IPAs), Italian sodas, root beer, lemonade, iced tea, or for adults, red wine (Chianti or Sangiovese) or white wine (Pinot Grigio).
Dipping Sauces: Offer extra warmed pizza sauce, marinara, ranch dressing, garlic butter, or honey (surprisingly good with pepperoni!) for dipping. Multiple sauce options make eating more fun and interactive.
FAQs Section
Q: Can I use regular dinner rolls instead of Hawaiian rolls?
A: Yes, though results will differ. Regular dinner rolls work but lack the slight sweetness and ultra-soft texture of Hawaiian rolls. If using regular rolls, choose soft rolls rather than crusty ones, and ensure they’re connected (or arrange in a single layer touching each other) for similar results.
Q: How do I keep the bottoms from getting soggy?
A: Use sauce sparingly (about ¾-1 cup total), spread it thinly and evenly, and ensure pepperoni and cheese layers create barriers between sauce and bread. Also, don’t assemble more than 8 hours before baking, as bread absorbs moisture over time. Baking on a lower oven rack helps crisp the bottom.
Q: Can I make these without pepperoni?
A: Absolutely! Make vegetarian versions with vegetables, try sausage or ham, or simply make cheese pizza sliders with just sauce and cheese. Any pizza topping works—customize to your preferences. Just ensure toppings aren’t too wet.
Q: Why aren’t my sliders browning on top?
A: Insufficient butter, baking at too low temperature, or not uncovering for the final baking time. Ensure you brush butter generously over all surfaces, bake at 350°F, and remove foil for the last 5-7 minutes to allow browning.
Q: Can kids help make these?
A: Yes! Pizza sliders are great for cooking with children. Kids can help layer ingredients, brush on butter (with supervision), and customize their section with favorite toppings. Just handle the knife work and hot oven yourself.
Q: How many sliders should I plan per person?
A: For appetizers, plan 2-3 sliders per person. For a main course (especially with kids), plan 3-4 sliders per person. Adjust based on what else you’re serving—if it’s part of a larger spread, fewer per person is fine.
Q: Can I make these in different sizes?
A: Yes! Use slider-sized rolls for smaller appetizer portions, or use larger dinner rolls for more substantial sandwiches. Adjust baking time accordingly—smaller rolls need less time (about 15-18 minutes total), larger rolls need more (25-30 minutes total).
Q: What if I don’t have Italian seasoning?
A: Make your own by mixing equal parts dried oregano, basil, and thyme. Or simply use just oregano for a simpler but still authentic pizza flavor. Dried basil alone also works in a pinch.
Conclusion
There you have it—everything you need to create incredible, crowd-pleasing pizza sliders that will become your most-requested recipe! These easy baked pizza sliders prove that impressive party food doesn’t require complicated techniques or expensive ingredients—just quality basics prepared with care and creativity. The combination of soft, buttery Hawaiian rolls with gooey cheese, savory pepperoni, and tangy pizza sauce creates pure comfort food magic that appeals to kids and adults alike.
Remember the keys to success: keep rolls connected until after baking, don’t overdo the sauce, layer ingredients strategically, cover with foil initially, brush garlic butter generously, and let rest briefly before cutting. Master these simple techniques and you’ll create mini pizza sandwiches that rival anything from restaurants or pizzerias.
The beauty of this pizza slider recipe lies in its incredible versatility and convenience. Customize with favorite toppings, prepare components ahead to save time, make them vegetarian or load them with meat—these sliders adapt beautifully to any preference while remaining quick, easy, and absolutely delicious.
Ready to become famous for bringing the best appetizers to every gathering? Pin this recipe to your favorite Pinterest board so you’ll always have it ready when party inspiration strikes! Make these pizza sliders this weekend and let me know in the comments how they turned out. Did they disappear as fast as expected? What toppings did you use? I absolutely love hearing about your cooking adventures and seeing your delicious creations!
Don’t forget to snap a photo of your gorgeous golden sliders—especially that cheese pull moment—and share it on social media. Tag me so I can see your masterpiece and celebrate with you! Here’s to easy entertaining, kid-friendly meals, and recipes that make everyone happy! 🍕✨