Southern Cheese Straws – Crispy, Cheesy, Irresistible Appetizer

There’s something absolutely magical about Southern cheese straws that makes them disappear from the appetizer table faster than you can say “pass me another!” These crispy, savory, cheese-packed sticks are a beloved tradition across the American South, combining sharp cheddar cheese with buttery pastry dough and a hint of cayenne pepper to create an addictive snack that’s perfect for any occasion. Whether you call them cheese straws, cheese wafers, or cheese crisps, one thing is certain – once you start eating them, it’s nearly impossible to stop.
What makes this easy cheese straws recipe so incredibly popular is its perfect balance of rich, sharp cheese flavor with a delicate, crispy texture that practically melts in your mouth. These aren’t your average cheese crackers from a box – homemade Southern cheese straws are buttery, flaky, and packed with so much cheese flavor that each bite feels like a special treat. The slight kick from cayenne pepper adds just enough warmth to keep things interesting without overwhelming the beautiful cheese flavor.
These classic cheese straws are perfect for so many occasions – holiday parties, baby showers, wedding receptions, afternoon tea, cocktail hour, game day gatherings, or simply as an elegant homemade hostess gift. They’re sophisticated enough to serve at the fanciest events yet comforting and familiar enough for casual family snacking. In the South, no special occasion is complete without a tin of cheese straws, and once you taste this homemade version, you’ll understand why generations of Southern cooks have been making these beloved treats for over a century.
History / Background
Cheese straws have a rich history deeply rooted in Southern hospitality and tradition, dating back to the late 19th and early 20th centuries. While the exact origin is difficult to pinpoint, these savory treats became a staple in upper-class Southern homes during the Victorian era, when elaborate tea parties and social gatherings were central to social life. The recipe likely evolved from British cheese biscuits and savory pastries, adapted by Southern cooks who had access to excellent local sharp cheddar cheese.
The tradition of cheese straws became particularly prominent in states like South Carolina, Georgia, Mississippi, and Virginia, where they were considered essential for any proper reception or social event. In Charleston, South Carolina, cheese straws are practically synonymous with Southern entertaining – no wedding reception, funeral reception, or ladies’ luncheon would be considered complete without them. Many Charleston families guard their cheese straw recipes like precious heirlooms, passing them down through generations with secret tweaks and modifications.
During the mid-20th century, cheese straws became even more popular as they were featured in Junior League cookbooks across the South. These community cookbooks helped standardize the recipe while also preserving regional variations – some families prefer theirs super thin and crispy, while others like them thicker and more substantial. Some recipes call for a cookie press to create perfectly uniform straws, while others embrace a more rustic hand-cut approach.
The cultural significance of cheese straws in the South cannot be overstated. They represent hospitality, tradition, and the Southern belief that food made with care shows love for your guests. Receiving a tin of homemade cheese straws is considered a genuine gesture of affection and respect. Many Southern brides include their grandmother’s cheese straw recipe in their wedding planning, ensuring these crispy treats are available for guests. Today, cheese straws remain a beloved Southern tradition, bridging the gap between old-fashioned elegance and modern entertaining, and they’re finally gaining popularity beyond the Mason-Dixon line as more people discover their irresistible appeal.
Why You’ll Love This Recipe
This homemade cheese straws recipe delivers authentic Southern flavor with a straightforward technique that even beginner bakers can master successfully. While the finished product looks and tastes impressively gourmet, the actual process is surprisingly simple – you’re essentially making a rich, cheesy dough, shaping it, and baking it until golden and crispy. The result is a batch of elegant, addictive appetizers that will make you look like a culinary genius.
Here’s why this recipe will become your go-to party appetizer:
- Make-ahead friendly – The dough can be prepared days in advance and refrigerated, or shaped straws can be frozen for months, making party prep stress-free
- Impressive but easy – These look like they came from an expensive bakery or gourmet shop, but they require just basic baking skills and simple ingredients
- Budget-friendly elegance – Using pantry staples and cheese, you can make dozens of cheese straws for a fraction of what you’d pay for store-bought gourmet crackers
- Customizable heat level – Adjust the cayenne pepper to suit your taste, from barely-there warmth to a serious kick that spice lovers will appreciate
- Perfect gift idea – Package these in decorative tins or cellophane bags tied with ribbon for thoughtful homemade gifts that people actually want to receive
- Long shelf life – Properly stored cheese straws stay fresh and crispy for weeks, making them ideal for advance preparation
- Crowd-pleaser guaranteed – The combination of sharp cheese, butter, and a hint of spice appeals to nearly everyone from kids to sophisticated food lovers
- Versatile for any occasion – Elegant enough for weddings, casual enough for game day, appropriate for literally any gathering you can imagine
- No special equipment required – While a cookie press makes uniform straws easy, you can achieve beautiful results with just a knife and rolling pin
Ingredient Notes
Understanding your ingredients ensures the best possible cheese straws every time:
Sharp Cheddar Cheese – This is absolutely the star of the show, so quality matters tremendously. Use extra-sharp cheddar for the most intense, authentic flavor. The cheese must be freshly shredded from a block – pre-shredded cheese contains anti-caking agents that prevent proper dough formation and create a grainy texture. Orange or white cheddar both work beautifully; choose based on your color preference. For the most traditional Southern flavor, look for a good quality aged cheddar with a sharp, tangy bite.
Unsalted Butter – Provides richness, flavor, and helps create that tender, crispy texture. Use real butter (not margarine), and make sure it’s softened to room temperature so it creams properly with the cheese. European-style butter with higher fat content creates even richer, more flavorful cheese straws if you want to splurge.
All-Purpose Flour – Forms the structure of your cheese straws. All-purpose flour is perfect for the ideal texture – not too delicate, not too tough. Measure your flour correctly by spooning it into the measuring cup and leveling it off rather than scooping directly from the bag, which can pack in too much flour.
Cayenne Pepper – Adds that signature Southern warmth without making the cheese straws spicy enough to be uncomfortable. Start with the amount listed and adjust to taste. The heat should be subtle and warming, complementing the cheese rather than competing with it. You can substitute with a pinch of white pepper for a milder version.
Kosher Salt – Enhances all the flavors and balances the richness of the cheese and butter. If using table salt, reduce the amount slightly as it’s more concentrated than kosher salt.
Cold Water – Just a tiny bit helps bring the dough together. The amount needed can vary based on humidity and how your flour measures, so add it gradually.
Paprika (Optional) – Some traditional recipes include a small pinch of paprika for color and a subtle smoky-sweet flavor. Sweet paprika works beautifully, or use smoked paprika for extra depth.
Equipment Needed
You’ll need just basic baking equipment to make perfect cheese straws:
- Food processor or stand mixer – Makes quick work of combining the dough, though you can also use a hand mixer or even mix by hand
- Box grater or food processor shredding disk – For shredding cheese from a block (essential for best texture)
- Large mixing bowl – If mixing by hand or for combining ingredients
- Rolling pin – For rolling out the dough if making hand-cut straws
- Sharp knife or pizza cutter – For cutting uniform strips of dough
- Ruler – Helpful for measuring consistent widths (optional but nice for uniformity)
- Cookie press with star tip (optional) – Traditional method for extruding perfectly shaped cheese straws
- Baking sheets – You’ll need 2-3 for multiple batches
- Parchment paper or silicone baking mats – Prevents sticking and ensures even baking
- Wire cooling racks – Essential for proper cooling to maintain crispiness
- Airtight containers or tins – For storing your finished cheese straws
- Plastic wrap – For wrapping dough if making ahead

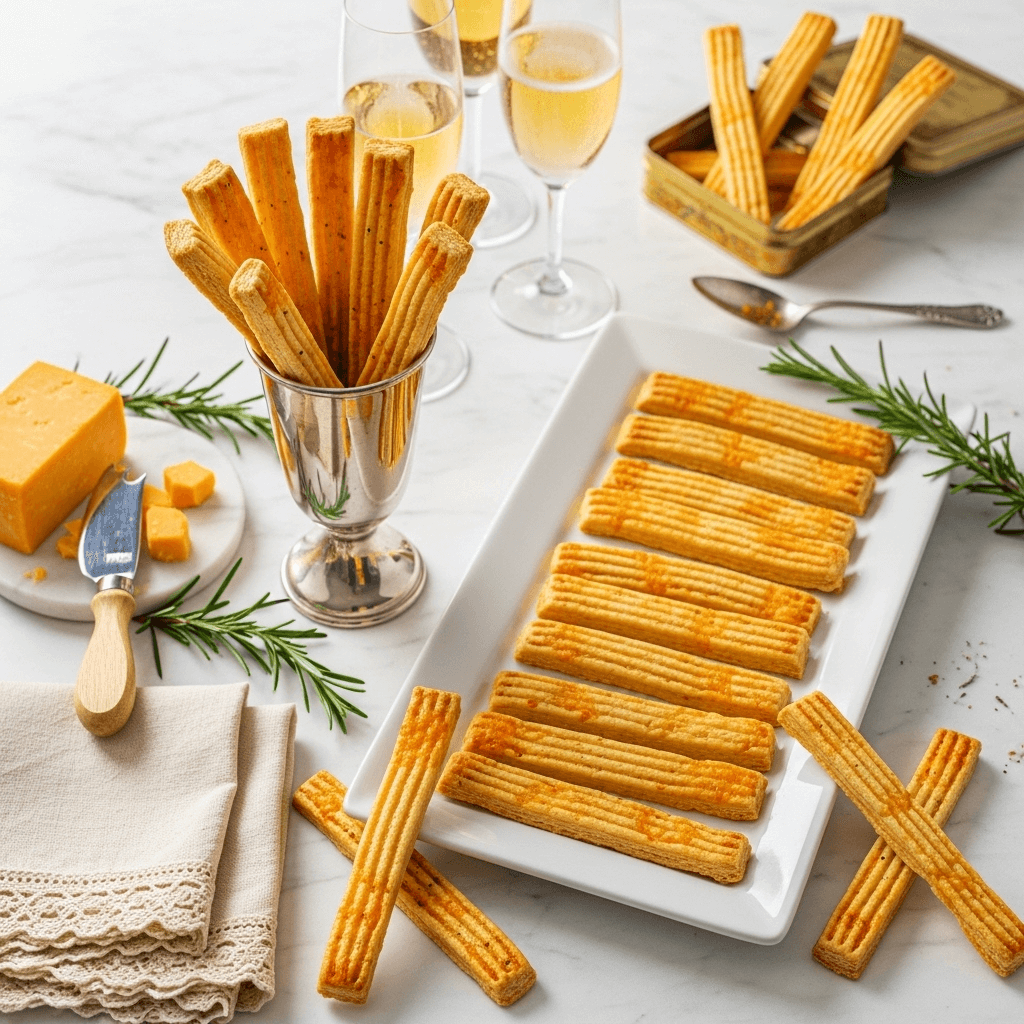
Southern Cheese Straws
These classic Southern Cheese Straws are crispy, buttery, and packed with sharp cheddar cheese flavor and a hint of cayenne heat. Perfect for parties, gifts, or snacking, they’re surprisingly easy to make and stay fresh for weeks in an airtight container.
- Total Time: 40 minutes
- Yield: About 60-70 cheese straws 1x
Ingredients
- 8 ounces extra-sharp cheddar cheese (freshly shredded, about 2 cups packed)
- ½ cup (1 stick) unsalted butter (softened to room temperature)
- 1½ cups all-purpose flour
- ¾ teaspoon kosher salt
- ½ teaspoon cayenne pepper (adjust to taste)
- ¼ teaspoon paprika (optional)
- 2-3 tablespoons cold water (as needed)
Instructions
- Prep your ingredients: Shred the cheddar cheese from a block using a box grater or food processor – this is crucial for the right texture. Let the butter sit at room temperature for about 30 minutes until softened but not melted. Preheat your oven to 350°F (175°C) and line two baking sheets with parchment paper.
- Combine cheese and butter: In a food processor, combine the shredded cheddar cheese and softened butter. Pulse about 15-20 times until the mixture is well combined and forms a cohesive, creamy mixture. You can also do this with a stand mixer using the paddle attachment, or even by hand with a sturdy wooden spoon, though it requires more elbow grease.
- Add dry ingredients: Add the flour, salt, cayenne pepper, and paprika (if using) to the cheese mixture. Pulse or mix on low speed until the mixture resembles coarse crumbs. It should look sandy and not quite come together yet – this is normal.
- Add water gradually: With the processor running (or while mixing), add cold water one tablespoon at a time until the dough just begins to come together into a ball. You might need 2-3 tablespoons depending on your humidity and flour. The dough should hold together when pinched but not be wet or sticky. Stop as soon as it forms a cohesive mass – overworking makes tough cheese straws.
- Shape the cheese straws – Method 1 (Hand-Cut): Divide the dough in half. On a lightly floured surface, roll out one portion to about ⅛-inch thickness, forming a rectangle. Using a sharp knife or pizza cutter and a ruler, cut the dough into strips about ¼ inch wide and 4-5 inches long. Transfer carefully to the prepared baking sheet, spacing them about ½ inch apart (they don’t spread much). Repeat with remaining dough.
- Shape the cheese straws – Method 2 (Cookie Press): If using a cookie press fitted with a star-shaped disk, load the dough into the press according to manufacturer instructions. Press strips directly onto the parchment-lined baking sheets in 4-5 inch lengths, spacing them ½ inch apart. This creates the traditional ridged cheese straw appearance.
- Bake to perfection: Bake in the preheated 350°F oven for 12-15 minutes, until the cheese straws are firm and just beginning to turn golden brown at the edges. They should not be overly browned – you want them golden but still pale in the center. Watch carefully during the last few minutes as they can go from perfect to overdone quickly.
- Cool completely: Remove from the oven and let the cheese straws cool on the baking sheet for 5 minutes, then carefully transfer to wire racks to cool completely. They’ll continue to crisp as they cool. Handle gently as they’re delicate while still warm. Once completely cool, they’ll be perfectly crisp and sturdy.
- Store properly: Once completely cooled, store cheese straws in an airtight container or tin at room temperature. Layer them carefully with parchment paper between layers if stacking to prevent breakage. Properly stored, they’ll stay fresh and crispy for 2-3 weeks.
Notes
- Fresh cheese is non-negotiable – Pre-shredded cheese will not work properly. Always shred from a block.
- Don’t overwork the dough – Mix just until combined to keep cheese straws tender rather than tough.
- Watch baking time carefully – Overbaked cheese straws become bitter and too hard. They should be golden but not deeply browned.
- Cool completely before storing – Any residual warmth creates condensation that makes them soggy.
- Adjust cayenne to taste – Start with ¼ teaspoon if you’re sensitive to spice, or increase to ¾ teaspoon if you love heat.
- Prep Time: 20 minutes
- Cook Time: 20 minutes
- Category: Appetizer
- Method: Baking
- Cuisine: Southern American
- Diet: Vegetarian
Nutrition
- Serving Size: 3 cheese straws (about 30g)
- Calories: 145
- Sugar: 0g
- Sodium: 185mg
- Fat: 11g
- Saturated Fat: 7g
- Unsaturated Fat: 3g
- Trans Fat: 0g
- Carbohydrates: 9g
- Fiber: 0g
- Protein: 5g
- Cholesterol: 32mg
Tips & Variations
Make these Southern cheese straws your own with these creative variations:
Extra Spicy Cheese Straws: Double the cayenne pepper to 1 teaspoon, or add ¼ teaspoon of chipotle powder for a smoky heat that serious spice lovers will appreciate. You can also add a pinch of crushed red pepper flakes for visible heat.
Herb and Cheese Straws: Add 1 tablespoon of fresh rosemary (finely minced) or 1 teaspoon of dried Italian herbs to the dough for an elegant herbed variation that’s perfect for wine and cheese parties.
Everything Bagel Cheese Straws: Before baking, brush the shaped straws lightly with beaten egg white and sprinkle with everything bagel seasoning for a fun modern twist on the classic.
Parmesan Pepper Cheese Straws: Replace half the cheddar with freshly grated Parmesan cheese and add 1 teaspoon of coarsely ground black pepper for a sophisticated Italian-inspired version.
Ranch Cheese Straws: Add 2 tablespoons of ranch seasoning powder to the dough for a flavor kids and adults both love.
Bacon Cheddar Straws: Fold in ⅓ cup of finely crumbled crispy bacon to the dough for an irresistible smoky, savory variation.
Sweet and Savory: Add 1 tablespoon of finely chopped fresh chives and ½ teaspoon of onion powder for an extra savory kick.
Twisted Presentation: After cutting strips, twist each one a few times before placing on the baking sheet for an elegant spiral appearance.
Mini Cheese Straws: Cut the straws into 2-3 inch lengths instead of 4-5 inches for bite-sized cocktail party appetizers.
Pro Chef Tips
Elevate your cheese straws from good to absolutely incredible with these professional techniques:
Temperature is Everything: The butter should be truly room temperature – soft enough to blend easily but not greasy or melted. If it’s too cold, it won’t incorporate properly with the cheese. If it’s too warm, the dough becomes greasy and spreads during baking. The ideal temperature is around 65-68°F.
The Cheese Matters More Than You Think: Invest in a quality aged sharp cheddar. The difference between mediocre cheese and excellent cheese is dramatic in such a simple recipe. Look for aged cheddars (12+ months) with crystalline texture and complex flavor. Avoid “mild” cheddar as it won’t provide enough flavor punch.
Chill Before Cutting: If your dough becomes too soft while working with it, wrap it and refrigerate for 15-20 minutes. Chilled dough cuts cleaner and holds its shape better during baking. This is especially helpful if your kitchen is warm.
Uniform Thickness Equals Even Baking: Whether using a cookie press or rolling by hand, consistent thickness is crucial for even baking. Uneven straws mean some will be perfectly done while others are underdone or burnt. Use guides (like ⅛-inch thick dowels on either side of your rolling pin) for perfect consistency.
Don’t Skip the Cooling Time: Cheese straws firm up significantly as they cool. What seems slightly underbaked and soft when hot becomes perfectly crisp at room temperature. Removing them too early means gummy straws; leaving them too long means burnt ones. The sweet spot is when edges are just golden.
Freeze for Emergency Entertaining: Keep shaped, unbaked cheese straws in your freezer so you can bake fresh batches anytime. They bake beautifully from frozen with just 1-2 extra minutes added to the baking time. This is the secret of Southern hostesses who always seem ready for unexpected guests.
The Twice-Baked Trick: If your finished cheese straws have softened during storage, refresh them by baking at 300°F for 3-5 minutes. They’ll crisp right back up and taste freshly made.
Common Mistakes to Avoid
Don’t let these common pitfalls ruin your beautiful cheese straws:
Using Pre-Shredded Cheese: This is the number one mistake that prevents success. Pre-shredded cheese contains cellulose (anti-caking powder) that prevents the cheese from properly binding with the butter and creating smooth dough. It results in crumbly, grainy cheese straws that fall apart. Always shred fresh cheese from a block – there’s no workaround for this.
Overmixing the Dough: Once you add the flour to the butter-cheese mixture, mix only until just combined. Overworking develops gluten in the flour, creating tough, hard cheese straws instead of tender, crispy ones. The dough should come together quickly – if you’re mixing for more than a minute after adding flour, you’ve gone too far.
Overbaking: The most common complaint about homemade cheese straws is that they’re too hard or taste burnt. They should be baked until just golden at the edges and still relatively pale in the center. Remember they continue to crisp as they cool, so slightly underbaked is better than overbaked. Set a timer and check at 10 minutes, then watch carefully.
Rolling Too Thick: Cheese straws should be delicate and crispy, not thick and cookie-like. Roll or press to about ⅛ inch thickness – they seem thin but they’re perfect. Thick straws won’t crisp properly and have a doughy center instead of that perfect crunch throughout.
Storing While Still Warm: If you pack cheese straws into containers while they’re even slightly warm, condensation forms and turns them from crispy to soggy within hours. Always let them cool completely to room temperature (at least 30-45 minutes) before storing.
Skipping the Parchment Paper: Without parchment or a silicone mat, cheese straws can stick to the pan and break when you try to remove them. The butter and cheese make them naturally prone to sticking, so always line your baking sheets.
Storage & Meal Prep
Proper storage keeps your cheese straws fresh and crispy for weeks:
Room Temperature Storage: Store completely cooled cheese straws in an airtight container or tin at room temperature. Layer them carefully with parchment paper between layers if stacking to prevent breakage and maintain crispiness. Properly stored, they stay fresh and crisp for 2-3 weeks. Keep them away from humid environments like near the stove or sink.
Avoiding Moisture: The enemy of crispy cheese straws is moisture. Never store them in the refrigerator, as the humidity will make them soft and chewy. Always ensure they’re completely cool before storing, and keep them in a truly airtight container. If you live in a humid climate, consider adding a food-safe silica packet to the container.
Refreshing Softened Straws: If your cheese straws have absorbed moisture and lost their crispiness, you can revive them. Spread them on a baking sheet and bake at 300°F for 3-5 minutes until they crisp back up. Let cool before serving – they’ll taste freshly made.
Gifting and Transport: For gifts or transporting to events, layer cheese straws in decorative tins with parchment paper between layers. They’re sturdy enough to travel well but fragile enough that careful packing prevents breakage. Tie with a beautiful ribbon and include a gift tag with the date made.
Vacuum Sealing: For the absolute longest shelf life, vacuum-sealed cheese straws can stay fresh for up to 6 weeks at room temperature. This method is perfect if you’re making large batches for events or gifts.
Make-Ahead & Freezer Notes
Strategic advance preparation makes entertaining stress-free:
Refrigerating the Dough: The unbaked dough can be wrapped tightly in plastic wrap and refrigerated for up to 5 days. Bring it to cool room temperature for about 20 minutes before rolling or pressing to make it workable. This make-ahead option is perfect for spreading out the work before a big event.
Freezing Unbaked Dough: For the longest advance preparation, form the dough into a disk, wrap tightly in plastic wrap, then place in a freezer bag. Freeze for up to 3 months. Thaw overnight in the refrigerator, then let come to room temperature before shaping and baking. The quality is virtually identical to fresh dough.
Freezing Shaped Unbaked Straws: This is the absolute best make-ahead method. Shape the cheese straws (cut or press into strips), arrange them on a parchment-lined baking sheet, and freeze until solid (about 2 hours). Transfer the frozen straws to freezer bags or containers. They’ll keep for up to 3 months. Bake directly from frozen, adding just 1-2 minutes to the baking time. No thawing needed!
Freezing Baked Cheese Straws: You can freeze fully baked cheese straws, though they’re not quite as crispy after thawing as freshly baked ones. Layer them with parchment paper in an airtight container and freeze for up to 2 months. Thaw at room temperature for about 30 minutes, then refresh in a 300°F oven for 3-5 minutes to restore crispiness.
Party Timeline for Stress-Free Entertaining:
- 3 months ahead: Make and freeze shaped unbaked straws
- 1 week ahead: Make and store baked straws in airtight containers
- Day before party: Bake frozen straws and store in containers
- Day of party: Arrange on serving platters 1-2 hours before guests arrive
Serving Suggestions
Create a complete entertaining spread with these perfect pairings:
Wine and Cocktail Pairings: Cheese straws are naturally suited to wine and cocktails. Serve with crisp white wines like Sauvignon Blanc, Pinot Grigio, or unoaked Chardonnay. Sparkling wines and Champagne are particularly elegant pairings. For cocktails, try with Old Fashioneds, martinis, bourbon cocktails, or Southern classics like mint juleps.
Cheese Board Addition: Include cheese straws on a cheese and charcuterie board for textural variety. They pair beautifully with soft cheeses like brie, aged cheddars, blue cheese, honey, fig jam, and assorted nuts.
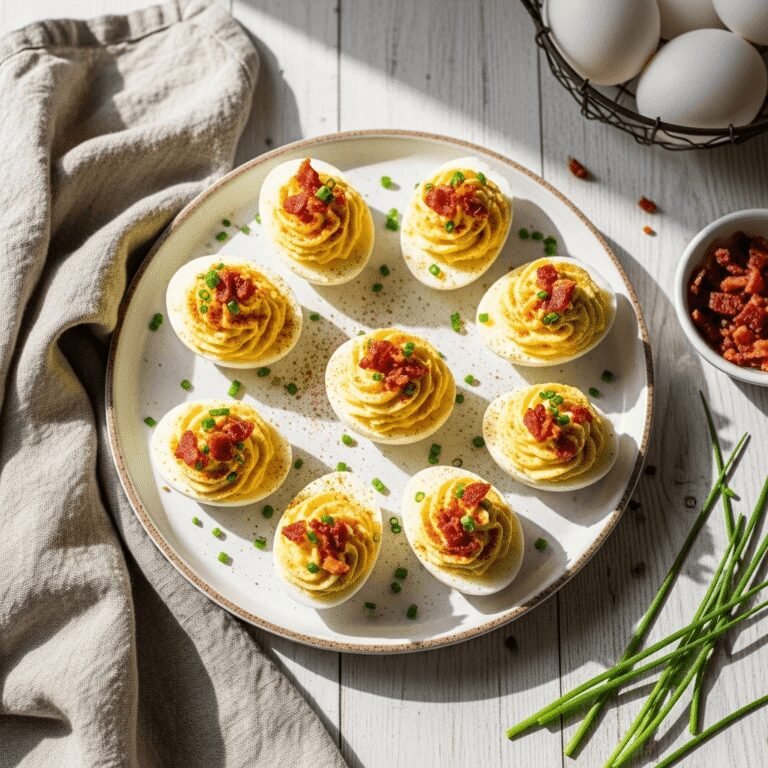
Party Spread Combinations: Serve alongside other Southern appetizers like pimento cheese dip, deviled eggs, bacon-wrapped dates, fried pickles, or shrimp and grits bites for an authentic Southern hospitality spread.
Afternoon Tea Service: Cheese straws are traditional at Southern tea parties. Serve on tiered trays alongside tea sandwiches, petit fours, scones with jam, and fresh fruit for an elegant afternoon tea.
Soup Partner: Cheese straws make an excellent accompaniment to creamy soups like tomato bisque, butternut squash soup, she-crab soup, or French onion soup. The crispy texture contrasts beautifully with smooth soups.
Salad Topper: Break cheese straws into pieces and use as crouton replacements on salads for a cheesy, crispy garnish that elevates simple greens.
Dip Companion: While delicious on their own, cheese straws also pair well with dips like spinach artichoke dip, warm crab dip, or even simple hummus.
Presentation Ideas: Serve in silver julep cups for a traditional Southern presentation, arrange standing up in a tall glass or vase for visual impact, or display on a silver tray with a linen napkin for elegant entertaining.
Gift Packaging: Layer in decorative tins, package in cellophane bags tied with gingham ribbon, or arrange in vintage mason jars for beautiful homemade gifts.
FAQs Section
Q: Can I use pre-shredded cheese?
A: Unfortunately, no. This is one recipe where pre-shredded cheese simply won’t work. The anti-caking agents (cellulose) in pre-shredded cheese prevent it from properly combining with the butter and forming a cohesive dough. You’ll end up with crumbly cheese straws that fall apart. Always shred fresh cheese from a block – it only takes a few minutes and makes all the difference.
Q: Why are my cheese straws tough instead of crispy?
A: The most common cause is overmixing the dough after adding flour, which develops too much gluten. Mix only until the dough just comes together. Another possibility is using too much water or flour. The dough should be just barely cohesive – not wet, not dry. Finally, make sure you’re rolling to the correct thickness (about ⅛ inch) – too thick and they won’t crisp properly.
Q: Can I make these gluten-free?
A: Yes, with some adjustments. Substitute a 1-to-1 gluten-free flour blend for the all-purpose flour. The texture will be slightly more delicate, and you may need to add an extra tablespoon of flour. Chill the dough before shaping, as gluten-free dough tends to be softer. The flavor will be nearly identical, though the texture may be slightly more crumbly.
Q: How spicy are cheese straws with cayenne pepper?
A: As written with ½ teaspoon of cayenne, the cheese straws have a gentle warmth that most people find pleasant but not painful. The heat builds slightly as you eat more, but it’s definitely on the mild side. If you’re very sensitive to spice, start with ¼ teaspoon. If you love heat, increase to ¾ teaspoon or even 1 teaspoon. You can also omit the cayenne entirely for completely mild cheese straws.
Q: What kind of cheese works best?
A: Extra-sharp cheddar is traditional and provides the best flavor. The sharper the better – look for aged cheddar (12+ months) with deep, complex flavor. Orange or white cheddar both work perfectly; the color doesn’t affect taste. You can experiment with other hard cheeses like Gruyère, aged Gouda, or Parmesan, but they create a different (though still delicious) flavor profile than traditional Southern cheese straws.
Q: Why do my cheese straws spread during baking?
A: Spreading usually means the butter was too soft or the dough was too warm when baking. The butter should be softened but not greasy or melted. If your kitchen is warm or you’ve been handling the dough a lot, refrigerate the shaped straws for 15-20 minutes before baking. They should hold their shape beautifully with properly prepared dough.
Q: Can I make these without a cookie press?
A: Absolutely! The cookie press creates those traditional ridged cheese straws, but hand-cut straws are just as delicious and arguably more rustic and charming. Simply roll the dough to ⅛-inch thickness and cut into strips with a knife or pizza cutter. They may not look quite as uniform, but the flavor and texture are identical. Many Southern cooks prefer hand-cut straws for their homemade appearance.
Q: How do I prevent my cheese straws from breaking?
A: Cheese straws are naturally somewhat delicate. Handle them gently while warm, as they firm up considerably when cool. When storing, layer them with parchment paper rather than piling them randomly. Make sure they’re baked just until golden but not overdone – overbaked straws become brittle and break easily. Proper baking time creates straws that are crisp but not fragile.
Conclusion
These Southern Cheese Straws prove that the best recipes are often the ones passed down through generations, refined over time to absolute perfection. With their irresistible combination of sharp cheddar cheese, butter, and just a hint of cayenne warmth, these crispy, savory treats represent the very best of Southern hospitality and home cooking. Whether you’re carrying on a family tradition or starting a new one, making homemade cheese straws is a rewarding experience that fills your home with amazing aromas and your guests with genuine delight.
The beauty of this easy cheese straws recipe lies in its simplicity and versatility. Make them for your next party and watch them disappear within minutes. Package them in decorative tins as thoughtful gifts that people will treasure. Keep a batch in your freezer for unexpected guests. However you choose to enjoy them, these crispy cheese straws will quickly become one of your most-requested recipes – the one friends and family beg you to make again and again.
Ready to experience the addictive deliciousness of homemade Southern cheese straws? Grab some quality sharp cheddar, roll up your sleeves, and get ready to discover why generations of Southern cooks have been making these irresistible treats for special occasions and everyday snacking. Don’t forget to save this recipe to your Pinterest boards so it’s ready whenever that cheese straw craving hits – and trust me, once you taste these, the cravings will be frequent! When you make these crispy, cheesy delights, I’d love to see your creations and hear how they turned out. Drop a comment below, share your family variations, or let me know what occasion you’re making them for. Happy baking!