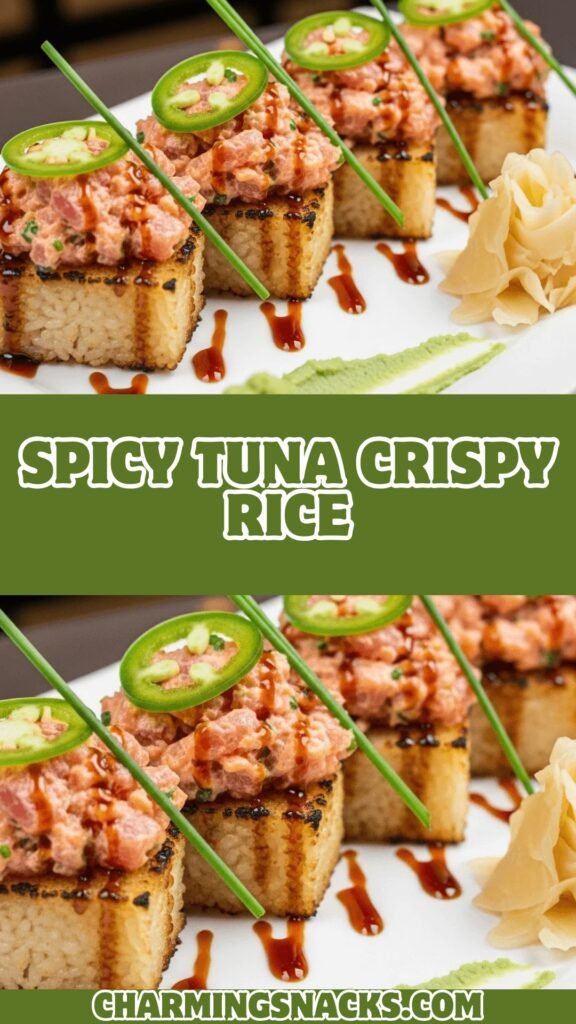
Spicy Tuna Crispy Rice (Restaurant-Style Sushi Appetizer!)
Get ready to make the viral appetizer that’s taking over restaurant menus and home kitchens everywhere! Spicy tuna crispy rice is the perfect fusion of Japanese flavors and modern culinary creativity—crispy pan-fried sushi rice topped with creamy, spicy tuna, and finished with a drizzle of savory sauce. It’s like the best sushi roll you’ve ever had, but in convenient, poppable bite-sized form!
If you’ve ever been to trendy sushi restaurants and swooned over those Instagram-worthy crispy rice appetizers (often called “crispy rice sushi” or “spicy tuna rice cakes”), this recipe brings that restaurant experience right to your home kitchen. They’re absolutely addictive—crunchy on the outside, tender on the inside, topped with buttery tuna that’s been mixed with spicy mayo, and garnished with all the delicious fixings.
Whether you’re hosting a dinner party, planning a date night at home, looking for an impressive appetizer for game day, or simply craving restaurant-quality sushi without the hefty price tag, these spicy tuna crispy rice bites deliver every single time. They’re surprisingly easy to make (no special sushi-making skills required!), endlessly customizable, and guaranteed to impress everyone at your table. Plus, they’re gluten-free friendly and can be made as spicy or mild as you prefer. Let’s dive into making the crispiest, most flavorful sushi-inspired appetizer you’ve ever created!
History / Background
Crispy rice topped with spicy tuna is a relatively modern invention that beautifully represents the evolution of Japanese-American fusion cuisine. While traditional sushi has existed for centuries in Japan, this particular dish was born in the trendy restaurant scene of Los Angeles in the early 2000s.
The creation is often credited to chef Nobu Matsuhisa (of the famous Nobu restaurants), whose innovative approach to Japanese cuisine helped popularize dishes that combined traditional Japanese ingredients with Western techniques and presentations. The crispy rice concept was inspired by the crispy rice that forms at the bottom of clay pots when making traditional Japanese rice—called “okoge”—which is considered a delicacy in Japanese home cooking.
Chefs began pan-frying blocks of seasoned sushi rice until golden and crispy, then topping them with various proteins. The spicy tuna version quickly became the most popular iteration, combining the beloved American sushi roll flavor combination (spicy tuna rolls have been a staple in American sushi restaurants since the 1980s) with this new textural element.
The dish exploded in popularity throughout Los Angeles, then spread to other major cities, and eventually became a viral sensation on social media platforms, particularly Instagram and TikTok. Home cooks discovered they could recreate this restaurant favorite without specialized equipment or years of sushi-making training.
Today, spicy tuna crispy rice represents the best of modern fusion cooking—respecting Japanese culinary traditions while creating something entirely new and accessible. It’s become a staple at everything from upscale sushi restaurants to casual dinner parties, proving that innovative food knows no boundaries.
Why You’ll Love This Recipe
These spicy tuna crispy rice bites are about to become your new favorite party trick! They taste like they came from an expensive sushi restaurant, but they’re surprisingly easy to make at home and cost a fraction of the price.
Here’s why you need to add this recipe to your rotation:
- Restaurant-quality at home – Impress your guests with upscale appetizers without leaving your kitchen
- Seriously addictive texture – Crispy, crunchy rice exterior with tender, creamy spicy tuna on top
- Perfect for entertaining – Makes 12-16 pieces, ideal for sharing at parties or date nights
- Customizable spice level – Adjust the heat from mild to fire depending on your preference
- Budget-friendly – Costs much less than ordering this appetizer at restaurants ($15-20 savings!)
- No special equipment needed – Just a regular non-stick pan and basic kitchen tools
- Ready in 30 minutes – Quick enough for weeknight cravings, impressive enough for special occasions
- Make-ahead friendly – Prep components separately and assemble when ready to serve
- Gluten-free adaptable – Use tamari instead of soy sauce for completely gluten-free bites
- Visually stunning – Picture-perfect presentation that photographs beautifully for social media
- Protein-packed – Fresh tuna provides lean protein and omega-3 fatty acids
- Fun to make – The cooking process is interactive and satisfying
- Crowd-pleaser – Even people who are “iffy” about raw fish love these!
- Versatile recipe – Use the crispy rice base for countless topping variations
Ingredient Notes
Let’s break down what makes these crispy rice bites so incredibly delicious! Understanding your ingredients helps you achieve restaurant-quality results every time.
Sushi Rice (Short-Grain Japanese Rice): This is essential! Sushi rice (also called Japanese short-grain rice) has the perfect sticky texture that holds together when formed into blocks. Regular long-grain rice won’t work—it’s too fluffy and won’t stick. Look for brands like Nishiki, Kokuho Rose, or Tamaki Gold. Substitution: Medium-grain white rice can work in a pinch, but avoid jasmine, basmati, or long-grain varieties.
Sushi-Grade Tuna (Ahi or Yellowfin): This is the star of the show! “Sushi-grade” means the fish has been frozen to kill parasites and is safe to eat raw. Purchase from reputable fish markets or Japanese grocery stores. Look for deep red color and fresh ocean smell (not fishy!). You’ll need about ½ pound. Substitution: Salmon, cooked shrimp, crab, or even vegan alternatives like marinated tofu work beautifully.
Rice Vinegar: Seasons the sushi rice with the traditional tangy flavor that makes sushi rice special. Don’t use regular white vinegar—it’s too harsh! Substitution: If you can’t find rice vinegar, use a splash of apple cider vinegar with a pinch of sugar.
Mayonnaise (for Spicy Mayo): The creamy base of your spicy sauce. Japanese Kewpie mayo is ideal (it’s richer and tangier), but regular mayo works fine. Substitution: Greek yogurt for a lighter option, though it won’t be quite as creamy.
Sriracha (or Chili Garlic Sauce): Provides the “spicy” in spicy tuna! Sriracha is most common, but sambal oelek, chili garlic sauce, or even gochujang work wonderfully. Adjust to your heat preference. Substitution: Omit for non-spicy version, or use hot sauce of choice.
Soy Sauce (or Tamari): Essential for that umami depth. Use low-sodium if you’re watching salt intake. Tamari is the gluten-free alternative. Substitution: Coconut aminos for soy-free/paleo diets.
Sesame Oil: A little goes a long way! This aromatic oil adds nutty depth to both the rice and the tuna mixture. Use toasted sesame oil for the best flavor.
Avocado: Adds creamy richness and beautiful color contrast. Choose ripe but firm avocados that slice cleanly. Optional but highly recommended!
Green Onions (Scallions): Fresh, mild onion flavor and gorgeous green color for garnish.
Sesame Seeds: Black and/or white sesame seeds add visual appeal and nutty crunch. Toast them lightly for even better flavor.
Furikake (Optional): This Japanese rice seasoning contains sesame seeds, nori, and dried fish. It adds incredible umami and authentic flavor but isn’t essential.
Neutral Oil for Frying: Vegetable, canola, or avocado oil with high smoke points work best for getting that crispy exterior.
Equipment Needed
You don’t need any specialized sushi equipment! Just regular kitchen tools:
- Rice cooker or medium pot – For cooking perfect sushi rice
- Large non-stick skillet – Essential for achieving crispy rice without sticking
- 8×8-inch baking dish or small loaf pan – For pressing and shaping the rice
- Sharp knife – For cutting rice blocks and dicing tuna
- Cutting board – Preferably one designated for raw fish
- Small mixing bowls – For spicy mayo and tuna mixture
- Measuring cups and spoons – For accurate measurements
- Spatula (metal or heat-safe) – For flipping rice carefully
- Plastic wrap or parchment paper – For lining the pan and pressing rice
- Paper towels – For patting tuna dry
- Whisk or fork – For mixing spicy mayo
Spicy Tuna Crispy Rice
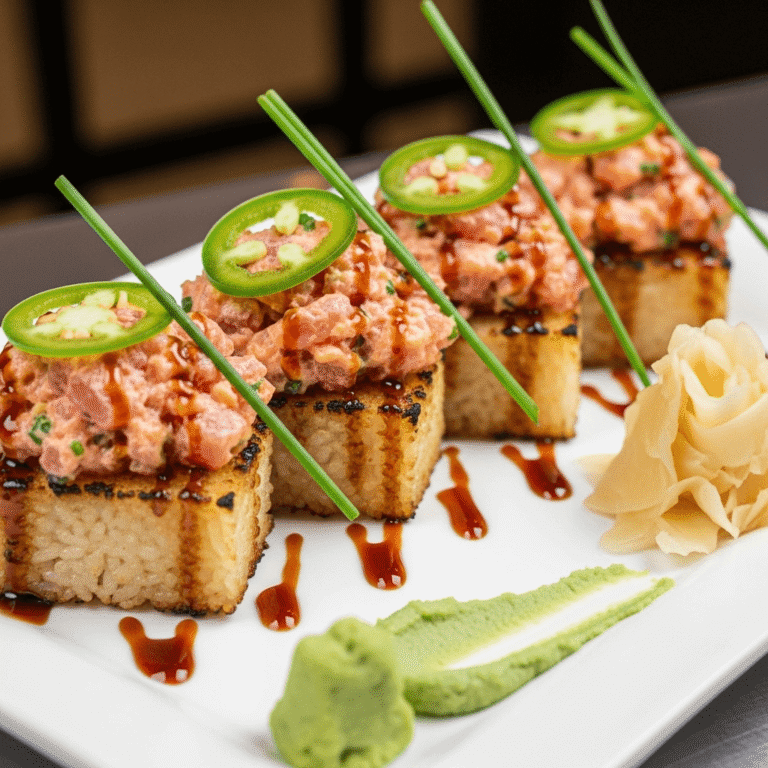
These restaurant-style spicy tuna crispy rice bites feature perfectly crispy pan-fried sushi rice topped with creamy, spicy tuna, avocado, and savory garnishes. They’re the ultimate impressive appetizer that tastes like it came from an upscale sushi restaurant but is surprisingly easy to make at home!
- Total Time: 55 minutes
- Yield: 12-16 pieces (4-6 servings as appetizer) 1x
Ingredients
For the Sushi Rice:
- 2 cups uncooked sushi rice (short-grain Japanese rice)
- 2½ cups water
- 3 tablespoons rice vinegar
- 1½ tablespoons sugar
- 1 teaspoon salt
- 1 teaspoon sesame oil
- 3-4 tablespoons neutral oil (vegetable or avocado oil, for frying)
For the Spicy Tuna:
- ½ pound sushi-grade tuna (ahi or yellowfin), finely diced
- 3 tablespoons mayonnaise (preferably Kewpie)
- 1-2 tablespoons sriracha (adjust to spice preference)
- 1 teaspoon sesame oil
- 1 teaspoon soy sauce or tamari
- 1 green onion, finely chopped (white and light green parts)
For Topping & Garnish:
- 1 ripe avocado, thinly sliced
- 2 green onions, thinly sliced (green parts)
- Black and white sesame seeds
- 1-2 tablespoons eel sauce (unagi sauce) – optional but delicious
- 1 tablespoon furikake seasoning (optional)
- Extra spicy mayo for drizzling
- Microgreens or cilantro (optional garnish)
Instructions
Prepare the Sushi Rice:
- Cook the rice: Rinse sushi rice under cold water in a fine-mesh strainer until the water runs clear (this removes excess starch). Cook rice according to package directions or in a rice cooker with 2½ cups water. Once cooked, let it steam for 10 minutes with the lid on.
- Season the rice: While rice cooks, mix rice vinegar, sugar, and salt in a small bowl until dissolved. When rice is done, transfer to a large bowl and gently fold in the vinegar mixture and sesame oil using a cutting motion (don’t stir or smash the rice). Let the rice cool to room temperature, about 30 minutes.
- Press the rice: Line an 8×8-inch baking dish or small loaf pan with plastic wrap, leaving overhang on the sides. Transfer the cooled rice into the pan and press down firmly and evenly using wet hands or the bottom of a measuring cup. You want a compact, even layer about ¾ to 1 inch thick. Cover with plastic wrap and refrigerate for at least 20 minutes (or up to overnight) to firm up.
Prepare the Spicy Tuna:
- Dice the tuna: Pat the tuna dry with paper towels. Using a sharp knife, cut the tuna into small, uniform dice (about ¼-inch cubes). Place in a medium bowl and refrigerate until ready to use.
- Make spicy mayo: In a small bowl, whisk together mayonnaise, sriracha, sesame oil, and soy sauce until smooth. Taste and adjust spice level.
- Mix spicy tuna: Just before assembling, add the spicy mayo mixture to the diced tuna along with chopped green onions (white parts). Gently fold together until tuna is evenly coated. Keep refrigerated until ready to serve.
Cook the Crispy Rice:
- Cut the rice: Remove the rice block from the pan using the plastic wrap overhang. Unwrap and place on a cutting board. Using a sharp knife dipped in water, cut the rice into 12-16 rectangular pieces (about 2 x 1.5 inches each). Wipe the knife clean between cuts for neat edges.
- Heat the oil: Heat 2-3 tablespoons of neutral oil in a large non-stick skillet over medium-high heat until shimmering but not smoking.
- Fry the rice: Working in batches, carefully place rice rectangles in the hot oil, flat side down. Don’t overcrowd the pan! Fry for 3-4 minutes without moving them, until the bottom is deeply golden and crispy. Carefully flip and fry the other side for another 2-3 minutes. Transfer to a paper towel-lined plate. Add more oil between batches as needed.
Assemble & Serve:
- Build the bites: Arrange crispy rice pieces on a serving platter. Top each piece with a generous spoonful of spicy tuna mixture. Add a thin slice of avocado on top of the tuna.
- Garnish: Drizzle with eel sauce and extra spicy mayo if desired. Sprinkle with sesame seeds, sliced green onions, and furikake. Add microgreens for an elegant touch.
- Serve immediately: These are best enjoyed right away while the rice is still warm and crispy! Provide small plates and chopsticks or forks.
Notes
Rice texture is key: Make sure your rice is well-pressed and completely cooled/chilled before cutting. This helps it hold together during frying.
Use high heat: The oil should be hot enough that the rice sizzles immediately when it hits the pan. This creates the crispy crust.
Don’t flip too early: Let the rice develop a golden crust before flipping. If it sticks, it’s not ready yet!
Fresh fish is essential: Only use sushi-grade fish from reputable sources. If you’re unsure about raw fish, use cooked shrimp or imitation crab.
Assembly timing: Assemble just before serving—the crispy rice softens if topped too far in advance.
Spice level: Start with 1 tablespoon of sriracha and add more if you like extra heat. You can always add more but can’t take it away!
- Prep Time: 15 minutes (plus 30 minutes for rice cooling)
- Cook Time: 10 minutes
- Category: Appetizer
- Method: Pan-Frying
- Cuisine: American Fusion
- Diet: Gluten Free
Nutrition
- Serving Size: 4 pieces
- Calories: 285
- Sugar: 3g
- Sodium: 420mg
- Fat: 12g
- Saturated Fat: 2g
- Unsaturated Fat: 9g
- Trans Fat: 0g
- Carbohydrates: 32g
- Fiber: 2g
- Protein: 14g
- Cholesterol: 25mg
Tips & Variations
The beauty of spicy tuna crispy rice is how versatile it is! Here are creative ways to make this recipe your own:
Protein Variations:
- Spicy Salmon: Use sushi-grade salmon instead of tuna for a richer, fattier option
- Shrimp: Use cooked, chilled shrimp tossed in spicy mayo (great for those nervous about raw fish!)
- Crab: Imitation crab or real crab meat mixed with spicy mayo
- Yellowtail: Another delicious white fish option with buttery texture
- Vegan: Marinated, cubed extra-firm tofu or diced king oyster mushrooms
- Cooked Option: Use canned tuna (drain well) for a budget-friendly cooked version
Sauce Variations:
- Spicy Mayo Alternatives: Mix mayo with gochujang, wasabi, or chili crisp
- Japanese BBQ Style: Top with teriyaki sauce instead of eel sauce
- Ponzu Twist: Drizzle with citrusy ponzu sauce for brightness
- Wasabi Cream: Mix wasabi paste into mayo for nose-tingling heat
- Sesame Ginger: Make a sauce with tahini, ginger, and soy sauce
Topping Ideas:
- Crispy fried shallots or garlic chips
- Pickled ginger for tang
- Fresh jalapeño slices for extra kick
- Tobiko (flying fish roe) for pop and color
- Nori strips cut into decorative pieces
- Crispy tempura flakes for extra crunch
- Fresh cilantro or shiso leaves
Flavor Additions to Rice:
- Mix furikake directly into the rice before pressing
- Add a touch of mirin for subtle sweetness
- Incorporate finely diced pickled vegetables
Heat Level Modifications:
- Mild: Use only 1 teaspoon sriracha or substitute with sweet chili sauce
- Medium: Use 1-2 tablespoons sriracha (recipe as written)
- Spicy: Add 2-3 tablespoons sriracha plus fresh jalapeños
- Extra Hot: Mix in togarashi (Japanese seven-spice) or add diced habanero
Presentation Variations:
- Cut rice into circles using a round cookie cutter
- Make bite-sized pieces for passed appetizers
- Shape into small balls and flatten slightly
- Use a muffin tin to create uniform rounds
Pro Chef Tips
Want restaurant-quality results? These professional techniques will elevate your spicy tuna crispy rice from good to extraordinary:
The overnight rice trick: For the crispiest exterior, make your rice the day before and let it chill in the fridge overnight. Cold, slightly dried-out rice develops the best crust when fried. This is the secret restaurants use!
Press with serious pressure: When pressing your rice into the pan, use significant force. Firmly packed rice holds together much better during frying and creates distinct layers—crispy outside, tender inside. Use a flat-bottomed measuring cup or small plate to really compress it.
The water-knife method: Professional sushi chefs keep a bowl of water nearby when cutting rice. Dip your knife in water between every single cut. This prevents sticking and gives you clean, professional-looking edges. Wipe the knife after dipping to avoid making the rice wet.
Temperature control is everything: Heat your pan over medium-high to high heat, but once the rice goes in, reduce slightly to medium-high. Too hot and the outside burns before the inside warms; too cool and you get oily, soggy rice instead of crispy. Listen for a steady sizzle—that’s the sound of perfection.
The patience game: The hardest part is not touching the rice! Let it sit undisturbed for the full 3-4 minutes. Resist the urge to peek or move it. When the rice is ready to flip, it will naturally release from the pan. If it sticks, give it another 30 seconds.
Dice your tuna properly: Use a very sharp knife and cut with smooth, single strokes (no sawing motion). Proper knife technique keeps the tuna’s texture clean and prevents mushiness. Cut against the grain for the most tender bites. All pieces should be uniform in size for even coverage.
Room temperature fish: Take your tuna out of the fridge 5-10 minutes before mixing. Room temperature fish absorbs the spicy mayo better and tastes less “cold” against the warm rice—it’s a subtle but noticeable difference.
The assembly line method: When hosting, set up stations: crispy rice on one tray, spicy tuna in a bowl, garnishes prepped in small bowls. This allows you to assemble quickly and ensures even distribution across all pieces.
Control your mayo ratio: Start with less spicy mayo than you think you need when mixing with tuna (about 2 tablespoons), then add more if needed. Over-sauced tuna becomes soup-like and slides off the rice. You want just enough to coat and bind.
Common Mistakes to Avoid
Don’t let these common pitfalls ruin your spicy tuna crispy rice! Here’s what to watch for:
Using the wrong rice: This is the biggest mistake! Long-grain rice (jasmine, basmati, etc.) will never work—it doesn’t have the starch content needed to stick together. You absolutely must use short-grain Japanese sushi rice. If the rice won’t hold together when pressed, the rice variety is wrong.
Trying to fry warm rice: Warm or freshly cooked rice is too soft and moist to fry properly. It will fall apart in the pan or become mushy instead of crispy. Always let your rice cool completely to room temperature (minimum 30 minutes) or ideally refrigerate it. Cold rice fries better every time!
Not using enough oil: Skimping on oil results in stuck rice and uneven browning. You need a generous layer (2-3 tablespoons) to cover the bottom of your pan. The rice should be sitting in oil, not just coated with it. Don’t be shy—this is how you get that golden, crispy crust!
Cutting the tuna too large: Big chunks of tuna are harder to eat in one bite and can slide off the rice. Aim for ¼-inch dice (about the size of small peas). Uniform pieces also look more professional and distribute evenly across each piece.
Over-handling the tuna: The more you stir and mix the tuna with the spicy mayo, the more the fish breaks down and becomes mushy. Mix gently and minimally—just until coated. Overmixing also warms up the fish, which compromises texture and food safety.
Assembling too early: The moment spicy tuna hits warm crispy rice, the rice begins to soften from the moisture. For maximum crispiness, assemble these within 5-10 minutes of serving. If hosting, fry the rice ahead but keep toppings separate until guests arrive.
Using dull knives: A dull knife tears the tuna instead of slicing it cleanly, creating ragged edges and mushy texture. It also makes cutting the pressed rice much harder, resulting in crumbly pieces. Always use a sharp knife for both the fish and rice.
Storage & Meal Prep
While these are best enjoyed fresh, you can definitely prep components ahead! Here’s how to store everything properly:
Spicy Tuna Storage: Store the mixed spicy tuna in an airtight container in the coldest part of your refrigerator for up to 24 hours maximum. Raw fish should never be stored longer than that. If you’re not using it right away, keep the tuna plain (unmixed) and add the spicy mayo just before serving—this extends freshness.
Pressed Rice Block: The uncooked pressed rice block stores beautifully! Wrap tightly in plastic wrap and refrigerate for up to 3 days. The longer it sits, the better it fries (the rice dries out slightly, creating crispier results). Cut and fry when ready to serve.
Crispy Fried Rice: Ideally, fry right before serving. However, if necessary, you can fry the rice pieces up to 2 hours ahead. Let them cool completely, then store uncovered at room temperature. Reheat in a 375°F oven for 5-7 minutes to re-crisp just before topping and serving. Don’t cover them or they’ll get soggy!
Assembled Bites: Once assembled with tuna and toppings, these should be eaten within 15-20 minutes for optimal texture. The rice will gradually soften as it absorbs moisture from the toppings.
Leftover Components:
- If you have leftover crispy rice without toppings, store in an airtight container in the fridge for 2-3 days. Reheat in a skillet with a touch of oil or in the oven.
- Leftover spicy tuna should be consumed within 24 hours. Use it in sushi rolls, poke bowls, or on crackers.
Not Recommended: Do not freeze assembled spicy tuna crispy rice. The rice texture becomes unpleasant and the raw fish quality degrades significantly.
Make-Ahead & Freezer Notes
Planning ahead makes entertaining so much easier! Here’s your make-ahead game plan:
Day-Before Prep (Highly Recommended):
- Cook and season the sushi rice
- Press it into your pan and refrigerate overnight
- The rice will be perfectly firm and ready to cut and fry the next day
- This is actually better than same-day rice because it fries crispier!
Morning-Of Prep:
- Cut the pressed rice into rectangles and place on a parchment-lined tray
- Cover with plastic wrap and refrigerate until ready to fry
- Prep all garnishes (slice green onions, prepare avocado, portion sauces)
- Make spicy mayo and store separately from fish
- Keep sushi-grade tuna whole in the fridge (dice 30 minutes before serving)
2 Hours Before Serving:
- Fry the rice pieces until crispy
- Let them cool to room temperature
- Store uncovered on a tray (covering creates condensation and sogginess)
30 Minutes Before Serving:
- Dice the tuna
- Mix with spicy mayo and green onions
- Slice avocado
- Warm the fried rice briefly in the oven if needed (5 minutes at 350°F)
Freezing Options:
- Pressed rice block: Can be frozen for up to 1 month. Thaw overnight in the refrigerator, then cut and fry as directed.
- Fried rice pieces: Freeze on a tray until solid, then transfer to a freezer bag for up to 2 months. Reheat from frozen in a 375°F oven for 8-10 minutes.
- Spicy tuna: Do NOT freeze. Raw fish should never be frozen after being thawed (sushi-grade fish has already been frozen once for safety).
Best Assembly Strategy for Parties: Fry rice ahead, keep components in separate bowls, and set up a “DIY station” where guests can top their own crispy rice. This keeps everything fresh and adds an interactive element!
Serving Suggestions
These spicy tuna crispy rice bites are versatile enough for many occasions! Here’s how to serve them:
As an Appetizer:
- Arrange on a slate or wooden serving board with garnishes
- Serve 2-3 pieces per person before a meal
- Pair with edamame, gyoza, or miso soup for a Japanese-inspired starter spread
- Offer with sake, Japanese beer (Asahi, Sapporo), or cucumber-infused water
For Parties:
- Set up a build-your-own crispy rice bar with different proteins and toppings
- Serve as passed appetizers on small plates with napkins
- Include them in a sushi platter alongside maki rolls and nigiri
- Pair with other fusion appetizers like lettuce wraps or spring rolls
As a Light Meal:
- Serve 6-8 pieces per person as a main course
- Accompany with a simple cucumber salad dressed in rice vinegar
- Add a bowl of miso soup or clear broth
- Include pickled vegetables (tsukemono) on the side
Beverage Pairings:
- Sake: Chilled junmai or nigori sake
- Wine: Crisp white wines like Sauvignon Blanc, Pinot Grigio, or dry Riesling
- Beer: Light Japanese lagers or wheat beers
- Cocktails: Sake martini, cucumber gimlet, or Asian pear mojito
- Non-alcoholic: Green tea, ramune (Japanese soda), or sparkling water with yuzu
Side Dishes That Complement:
- Seaweed salad (wakame)
- Cucumber sunomono (pickled cucumbers)
- Edamame sprinkled with sea salt
- Miso soup with tofu and scallions
- Asian slaw with sesame dressing
- Pickled ginger and wasabi on the side
Complete Japanese-Inspired Dinner Party Menu:
- Start: Miso soup
- Appetizer: Spicy tuna crispy rice
- Main: Teriyaki salmon or chicken katsu
- Side: Stir-fried vegetables
- Dessert: Mochi ice cream or matcha tiramisu
FAQs Section
Q: Is it safe to eat raw tuna at home?
A: Yes, when you purchase properly handled “sushi-grade” or “sashimi-grade” tuna from reputable sources! This designation means the fish has been frozen to FDA standards (-4°F for 7 days or -31°F for 15 hours) to kill parasites. Buy from trusted Japanese markets, high-end seafood counters, or specialty online retailers. Never use regular grocery store tuna meant for cooking. If you’re still concerned, use cooked shrimp, crab, or canned tuna as alternatives.
Q: Can I use leftover rice from takeout or day-old rice?
A: Leftover plain white rice can work if it’s short-grain and properly stored, but it needs to be seasoned with rice vinegar, sugar, and salt to taste like sushi rice. However, fried rice, flavored rice, or rice mixed with other ingredients won’t work. The rice also needs to be compact enough to hold together when cut—loose, separated grains won’t work.
Q: Why won’t my rice stay together when I try to flip it?
A: Several possible reasons: (1) You’re using the wrong type of rice (must be short-grain Japanese rice), (2) the rice wasn’t pressed firmly enough, (3) the rice is too warm (needs to be completely cooled/chilled), (4) you’re trying to flip too early before a crust forms, or (5) your pan isn’t hot enough. Make sure you’re checking all these factors!
Q: Can I make these without raw fish?
A: Absolutely! This recipe is highly adaptable. Use cooked and chilled shrimp mixed with spicy mayo, lump crab meat, canned tuna (drain well), or even smoked salmon. For vegetarian versions, try marinated tofu cubes, spicy avocado mash, or seasoned king oyster mushrooms. The crispy rice base works with virtually any topping!
Q: How do I get restaurant-level crispiness?
A: The secret is cold rice, hot oil, and patience! Use rice that’s been refrigerated (ideally overnight), heat your pan until the oil is shimmering, and resist the urge to move or flip the rice too early. Let it sit undisturbed for 3-4 minutes until a deep golden crust forms. Using enough oil is also crucial—don’t be stingy!
Q: Can I bake the rice instead of frying?
A: Yes! It won’t be quite as crispy but it’s a healthier alternative. Press the rice into a parchment-lined baking sheet, brush with oil, and bake at 425°F for 20-25 minutes, flipping halfway through, until golden and crispy. You can also use an air fryer at 375°F for 12-15 minutes.
Q: What’s the difference between spicy mayo and regular mayo?
A: Spicy mayo for sushi is simply mayo mixed with sriracha (or similar hot sauce), plus sometimes a touch of sesame oil and soy sauce for depth. The typical ratio is 3 parts mayo to 1 part sriracha, but adjust to your heat preference. Japanese Kewpie mayo is preferred because it’s creamier and tangier than American mayo.
Q: How far ahead can I prepare everything?
A: Press the rice up to 3 days ahead and refrigerate. Dice the tuna and mix with spicy mayo no more than 2-4 hours before serving (keep refrigerated). Fry the rice up to 2 hours ahead and keep at room temperature uncovered. Assemble everything within 10-15 minutes of serving for optimal crispiness and food safety.
Conclusion
And there you have it—the complete guide to making restaurant-worthy spicy tuna crispy rice right in your own kitchen! These irresistible bites prove that impressive, Instagram-worthy food doesn’t have to be complicated or require years of culinary training. With crispy, golden rice as your base and creamy, spicy tuna as your crown, you’ve got a show-stopping appetizer that’ll have everyone asking for the recipe.
The best part? Once you master this technique, you’ve unlocked endless possibilities for customization. Change up the protein, experiment with different sauces and toppings, adjust the spice level to your preference—these crispy rice bites are your canvas for creativity!
Ready to wow your guests (or just treat yourself)? I’d absolutely love to hear how your spicy tuna crispy rice turned out! Did you try any creative variations? What toppings did you use? Drop a comment below and share your experience with this recipe. And if you’re as obsessed with these as I am, please PIN this recipe to your favorite Pinterest boards so you can make it.