Easy Taco Dip Recipe: 7-Layer Mexican Dip
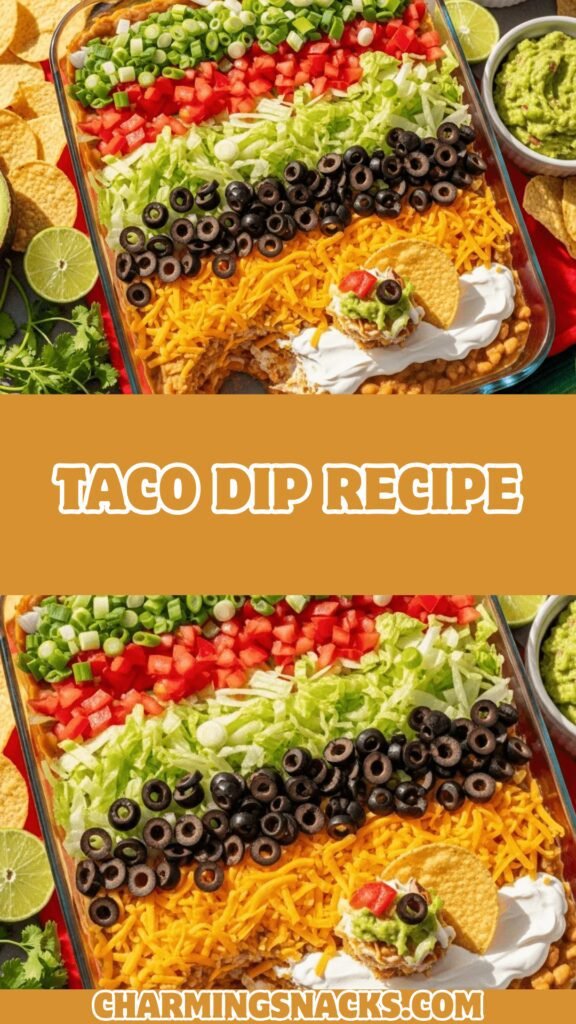
Taco dip is the ultimate crowd-pleasing appetizer—a creamy, layered masterpiece featuring refried beans, seasoned sour cream, fresh vegetables, cheese, and all your favorite taco toppings, perfect for scooping with tortilla chips. This easy taco dip recipe transforms simple ingredients into a show-stopping dish that’s ready in just 15 minutes, making it ideal for game day parties, potlucks, family gatherings, or any occasion where you need a guaranteed hit. Whether you’re hosting a Super Bowl party, bringing a dish to a cookout, or simply craving a satisfying snack, this layered taco dip delivers maximum flavor with minimal effort and always disappears within minutes.
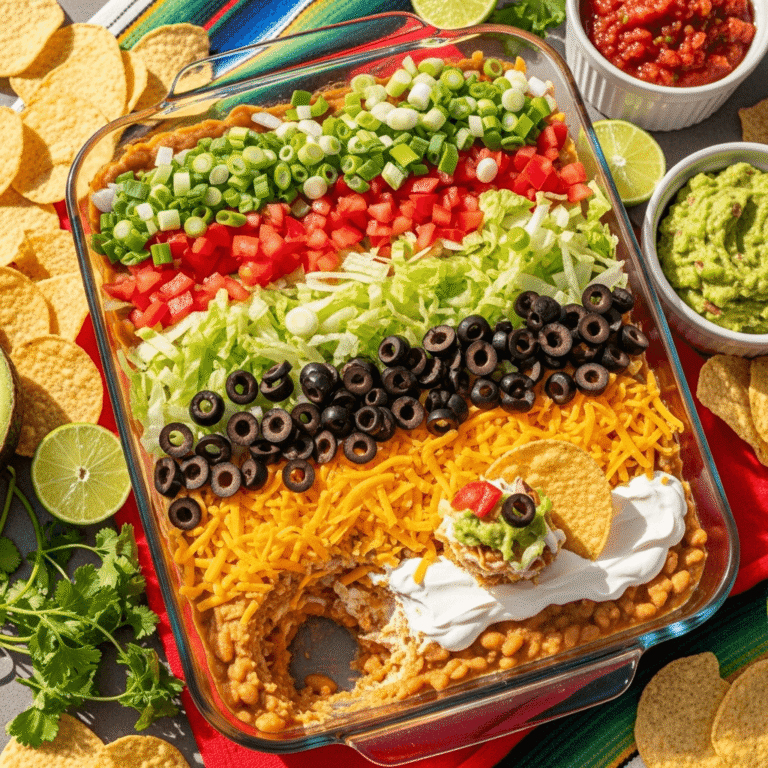
What makes this 7-layer taco dip so irresistible is the perfect combination of textures and flavors in every scoop—creamy refried beans provide a hearty base, tangy sour cream adds richness, fresh lettuce and tomatoes bring crunch and brightness, while melted cheese and zesty seasonings tie everything together. Unlike hot dips that require baking, this cold taco dip stays fresh for hours without needing to be kept warm, making it perfect for parties where food sits out. Each layer complements the others, creating that addictive combination that keeps everyone coming back to the chip bowl.
This layered Mexican dip works beautifully for countless occasions—game day spreads, Cinco de Mayo celebrations, tailgating, birthday parties, casual dinners, movie nights, or anytime you need an easy appetizer that feeds a crowd. It’s naturally gluten-free (when served with appropriate chips), can be customized with endless variations, costs just a few dollars to make, and requires zero cooking skills. Best of all, this easy Mexican dip proves that impressive party food doesn’t require complicated techniques—just fresh ingredients layered strategically for maximum visual appeal!
History / Background
Taco dip, also known as layered taco dip or 7-layer dip, represents the delicious evolution of American party food culture, where Tex-Mex flavors meet the convenience-focused entertaining style that became popular in the latter half of the 20th century. To understand this dip, we need to explore both the rich tradition of Mexican cuisine and how American home cooks adapted these flavors for casual gatherings.
The origins of layered dips in American cuisine trace back to the mid-20th century when entertaining at home became increasingly popular. The 1950s-1970s saw an explosion of dip recipes as hostesses sought easy, impressive dishes that could be made ahead and served cold. Chip-and-dip became synonymous with casual parties, with everything from onion dip to spinach artichoke dip becoming household staples.
The specific innovation of 7-layer taco dip likely emerged in the 1970s-1980s as Tex-Mex cuisine gained mainstream popularity throughout the United States. Tacos, nachos, and Mexican-inspired dishes became American favorites, and creative home cooks began deconstructing these flavors into dip format. The genius was taking all the beloved components of tacos and nachos—beans, cheese, sour cream, lettuce, tomatoes, olives—and layering them in a glass dish for beautiful presentation and easy serving.
The “7-layer” designation became the standard, though recipes vary and might have anywhere from 5 to 9 layers depending on the cook. The number became more marketing than mandate—what mattered was the visual appeal of distinct colorful layers and the combination of flavors. The dip aligned perfectly with several trends: Tex-Mex food popularity, the desire for make-ahead entertaining dishes, the emphasis on visual presentation (the glass dish showing off layers), and the need for dishes that could sit at room temperature during parties.
Taco dip gained particular prominence through community cookbooks, Junior League publications, and eventually, food blogs and Pinterest in the 2000s-2010s. The visual appeal of layered dips made them perfect for social media sharing, with countless variations appearing online. Today, taco dip has become an American classic, particularly beloved for game day gatherings and casual entertaining, representing how Mexican culinary traditions were adapted into convenient American party food.
Why You’ll Love This Recipe
This taco dip is about to become your go-to party appetizer for every casual gathering. This easy taco dip recipe delivers impressive presentation and bold flavors using simple ingredients that require absolutely no cooking—just layer and serve! Whether you’re feeding a crowd at a football party or need a last-minute potluck contribution, you’ll appreciate how this layered taco dip creates universal appeal with straightforward preparation.
Here’s why this recipe deserves a permanent spot in your entertaining arsenal:
- Ready in 15 Minutes – No cooking required, just simple assembly
- Always a Crowd-Pleaser – This is always the first appetizer to disappear
- Budget-Friendly – Feeds a crowd for just a few dollars
- Make-Ahead Friendly – Prepare hours before guests arrive
- Naturally Gluten-Free – Perfect for various dietary needs
- Customizable – Easy to adjust ingredients based on preferences
- Serves a Crowd – One batch feeds 12-15 people easily
- No Hot Serving Required – Stays perfect at room temperature
- Kid-Approved – Children love the familiar taco flavors
- Impressive Presentation – Looks gourmet in a glass dish
- Versatile – Works as appetizer, snack, or light meal
- Game Day Essential – Perfect for football, tailgating, and sports watching
Ingredient Notes
Understanding your ingredients helps you make the best taco dip possible. Let’s break down each layer:
Refried Beans – The hearty foundation that provides substance and protein. Use one 16-ounce can refried beans (traditional or vegetarian). Refried beans create a creamy, spreadable base that holds other layers. For extra flavor, use seasoned refried beans or add taco seasoning to plain beans.
Sour Cream – Creates the creamy layer that adds tangy richness. Use 1 cup sour cream mixed with taco seasoning for flavor. Full-fat sour cream provides best texture, but light sour cream works too. Greek yogurt can substitute for tangier, protein-packed version.
Taco Seasoning – Essential for flavoring the sour cream layer. Use 2-3 tablespoons store-bought or homemade taco seasoning. This transforms plain sour cream into zesty, Mexican-inspired layer.
Shredded Cheese – Adds richness and classic taco flavor. Use 1½-2 cups shredded Mexican cheese blend, cheddar, or Monterey Jack. Shred from a block for best melting and flavor—pre-shredded works but contains anti-caking agents.
Fresh Lettuce – Provides crisp, fresh texture contrast. Use 1-2 cups shredded iceberg or romaine lettuce. Iceberg stays crispest longest, while romaine offers more nutrients. Chop finely for easier scooping.
Fresh Tomatoes – Add juicy, bright flavor and beautiful color. Use 1-2 large tomatoes, diced and drained. Roma tomatoes work best as they’re less watery. Always drain diced tomatoes on paper towels to prevent making dip soggy.
Black Olives – Provide salty, savory depth. Use ½ cup sliced black olives from a can, drained well. Optional but traditional in classic 7-layer dip.
Green Onions – Add mild onion flavor and pretty green color. Use ¼ cup sliced green onions (scallions). Both white and green parts work beautifully.
Optional Add-ins – Jalapeños, guacamole, salsa, cilantro, or hot sauce can customize your dip. These additions create endless variations.
Equipment Needed
You’ll need these simple tools to make perfect taco dip:
- 9×13-inch Glass Baking Dish or Large Serving Platter – For layering and presenting the dip
- Can Opener – For opening beans and olives
- Medium Mixing Bowl – For mixing sour cream with seasonings
- Spoon or Rubber Spatula – For spreading layers evenly
- Sharp Knife and Cutting Board – For chopping vegetables
- Paper Towels – For draining tomatoes
- Measuring Cups and Spoons – For accurate measurements
- Serving Spoons – For guests to serve themselves
Taco Dip Recipe
Taco dip features 7 delicious layers including refried beans, seasoned sour cream, cheese, lettuce, tomatoes, and more. This easy cold dip is perfect for parties and game day!
- Total Time: 15 minutes
- Yield: 12-15 servings 1x
Ingredients
For the Dip Layers:
- 1 can (16 oz) refried beans (traditional or vegetarian)
- 1 cup sour cream
- 2-3 tablespoons taco seasoning
- 1½-2 cups shredded Mexican cheese blend or cheddar
- 1½-2 cups shredded lettuce (iceberg or romaine)
- 1-2 large tomatoes, diced and drained
- ½ cup sliced black olives, drained
- ¼ cup sliced green onions
- Optional: ½ cup guacamole or mashed avocado
- Optional: jalapeño slices for topping
For Serving:
- Tortilla chips (round scoop-style work best)
- Optional: salsa or hot sauce on the side
Instructions
- Prepare Base Layer: Spread refried beans evenly across the bottom of a 9×13-inch glass baking dish or large serving platter. Use a spoon or spatula to create a smooth, even layer reaching the edges.
- Make Sour Cream Layer: In a medium bowl, mix sour cream with taco seasoning until well combined. Spread this mixture evenly over the bean layer, covering completely.
- Add Guacamole (Optional): If using guacamole, spread it as the next layer over the sour cream. This step is optional but adds delicious creaminess.
- Add Cheese Layer: Sprinkle shredded cheese evenly over the sour cream (or guacamole) layer, covering completely. Use generous amounts—cheese is essential!
- Prepare Vegetables: While assembling, drain diced tomatoes on paper towels for 5 minutes to remove excess moisture. This prevents watery dip.
- Add Lettuce Layer: Sprinkle shredded lettuce evenly over the cheese layer. Distribute evenly for best presentation.
- Add Tomato Layer: Scatter drained, diced tomatoes over the lettuce layer, distributing evenly.
- Add Final Toppings: Sprinkle sliced black olives over tomatoes, then top with sliced green onions. Add jalapeño slices if desired.
- Chill or Serve: Serve immediately, or cover with plastic wrap and refrigerate for up to 4 hours before serving. Serve with tortilla chips.
Notes
- For best texture, drain diced tomatoes on paper towels to prevent soggy dip.
- Dip can be assembled up to 4 hours ahead; add lettuce and tomatoes just before serving for crispest texture.
- Use a glass dish to show off beautiful layers.
- For lighter version, use Greek yogurt instead of sour cream.
- Customize layers based on preferences—there’s no wrong way to make taco dip!
- Store leftovers covered in refrigerator for up to 2 days, though texture is best fresh.
- Prep Time: 15 minutes
- Cook Time: 0 minutes
- Category: Appetizer
- Method: No-Cook
- Cuisine: Mexican
- Diet: Gluten Free
Nutrition
- Serving Size: About ¾ cup dip (without chips)
- Calories: 145
- Sugar: 2g
- Sodium: 385mg
- Fat: 10g
- Saturated Fat: 5g
- Unsaturated Fat: 4g
- Trans Fat: 0g
- Carbohydrates: 9g
- Fiber: 3g
- Protein: 6g
- Cholesterol: 24mg
Tips & Variations
Transform your taco dip to match any preference with these creative variations:
Meaty Taco Dip: Add a layer of seasoned taco meat (ground beef, chicken, or turkey) as the first or second layer for heartier, protein-packed dip.
Spicy Taco Dip: Mix diced jalapeños into the sour cream layer, add hot sauce, use pepper jack cheese, or top with pickled jalapeños for heat lovers.
Loaded Taco Dip: Add extra layers like corn, black beans, diced avocado, or salsa for even more variety and flavor.
Skinny Taco Dip: Use fat-free refried beans, Greek yogurt instead of sour cream, reduced-fat cheese, and load up on vegetables for lighter version.
Chicken Taco Dip: Add a layer of shredded rotisserie chicken mixed with taco seasoning for chicken taco-inspired version.
Breakfast Taco Dip: Use scrambled eggs as a layer, add cooked bacon or sausage, and serve with breakfast items for brunch dip.
Taco Salad Dip: Add crushed Doritos or Fritos as a bottom layer for taco salad-inspired crunch.
Individual Taco Dip Cups: Layer ingredients in clear plastic cups for individual servings perfect for parties.
Pro Chef Tips
Elevate your taco dip from good to absolutely perfect with these professional techniques:
Drain Tomatoes Thoroughly: Excess tomato liquid is the biggest culprit behind watery, soggy taco dip. After dicing tomatoes, spread them on paper towels and let sit for 5-10 minutes to drain completely. Pat with additional paper towels before adding to dip. This simple step prevents puddles of liquid from forming.
Spread Layers to the Edges: Each layer should reach all the way to the edges of the dish. This creates that beautiful cross-section when guests scoop and ensures every bite has all the flavors. Uneven layers mean some people get mostly beans while others get mostly toppings.
Add Vegetables Last for Best Texture: For make-ahead dip, assemble all creamy/cheese layers hours ahead, but wait to add lettuce and tomatoes until 1 hour before serving. This keeps vegetables crisp and fresh rather than wilted and soggy.
Use the Right Dish: A glass dish is ideal because it shows off those beautiful layers, which is part of the appeal. A 9×13-inch dish is standard, but you can use any large, shallow serving dish or even a platter.
Season Each Layer: Don’t rely solely on taco seasoning in the sour cream. Taste your beans—if they’re bland, mix in some seasonings. Season as you go for maximum flavor in every layer.
Room Temperature is Perfect: Unlike hot dips, this cold dip doesn’t need to be kept warm. It’s actually best at cool room temperature, making it perfect for parties where food sits out. Don’t serve it straight from the refrigerator—let it sit out for 15-20 minutes first.
Make it Pretty: Take an extra minute to arrange the top layers attractively. Concentric circles of olives, evenly distributed tomatoes, and neat rows of green onions make the difference between homemade-looking and professional-looking dip.
Common Mistakes to Avoid
Sidestep these frequent pitfalls for perfect taco dip every time:
Not Draining Tomatoes: Watery tomatoes create puddles of liquid that make the dip soggy and dilute flavors. Always drain diced tomatoes on paper towels for at least 5 minutes before adding to dip. This is the most important step for preventing watery dip.
Adding Lettuce Too Early: Lettuce wilts quickly when in contact with wet ingredients. If making ahead, add lettuce no more than 1-2 hours before serving. For best results, add lettuce and tomatoes just before guests arrive.
Using Cold Refried Beans: Cold beans are stiff and difficult to spread evenly. Let canned beans come to room temperature, or microwave briefly (30 seconds) to soften for easier spreading. Warm (not hot) beans spread smoothly.
Skipping the Seasoning in Sour Cream: Plain sour cream is boring and bland. The taco seasoning mixed into sour cream is essential for flavoring this layer. Don’t skip it—this seasoned layer provides the “taco” flavor that makes the dip special.
Uneven Layers: When layers are uneven or don’t reach the edges, some scoops have all ingredients while others have just beans or just toppings. Take time to spread each layer evenly for consistent flavor in every bite.
Serving with Wrong Chips: Thin, fragile chips break when scooping hearty dip. Use sturdy scoop-style tortilla chips (like Tostitos Scoops) that can handle the weight without breaking.
Storage & Meal Prep
Here’s how to handle storage and prep for taco dip:
Room Temperature: Don’t leave assembled taco dip at room temperature for more than 2 hours. It contains dairy and must be refrigerated for food safety.
Refrigerator Storage: Store leftover taco dip covered tightly with plastic wrap in the refrigerator for up to 2 days. The texture deteriorates over time as vegetables release moisture and lettuce wilts, so it’s best enjoyed fresh.
Best Served Fresh: This dip is truly at its best within 4-6 hours of assembly. While safe to eat for 2 days, the vegetables become soggy and less appealing. Plan to make it the day you’ll serve it.
Component Storage: For longest freshness, store components separately and assemble just before serving. Beans, seasoned sour cream, and cheese can be prepped 2 days ahead and stored separately.
Texture Changes: After refrigeration, you may notice liquid pooling on top from vegetables. Carefully drain off any excess liquid before serving, or use a paper towel to blot moisture.
Make-Ahead & Freezer Notes
Plan ahead with these time-saving strategies for taco dip:
Best Make-Ahead Method (4 Hours Before): Assemble the base layers (beans, sour cream, guacamole if using, cheese) up to 4 hours ahead. Cover tightly with plastic wrap and refrigerate. Add lettuce, tomatoes, and garnishes 30-60 minutes before serving for freshest texture.
Morning-Of Assembly: Prep all components in the morning—drain and dice tomatoes, shred cheese, chop vegetables, mix sour cream with seasonings. Store everything separately. Assemble 1-2 hours before guests arrive.
Component Prep (2 Days Ahead): Prepare individual components up to 2 days ahead:
- Mix sour cream with taco seasoning, refrigerate
- Shred cheese, store in airtight container
- Dice and drain tomatoes, store in airtight container
- Slice olives and green onions, store separately
- Assemble quickly before party
Not Freezing-Friendly: Taco dip does not freeze well. The sour cream, fresh vegetables, and cheese don’t maintain proper texture after freezing and thawing. This recipe must be made fresh or stored short-term in the refrigerator.
Party Timeline: For stress-free entertaining:
- 2 days before: Shop for ingredients
- Morning of party: Prep all components, store separately
- 2 hours before guests: Assemble base layers (beans, sour cream, cheese)
- 30 minutes before guests: Add lettuce, tomatoes, and garnishes
- When guests arrive: Set out chips and enjoy
Serving Suggestions
Create memorable gatherings and complete the taco dip experience with these serving ideas:
Classic Chip Service: Serve with sturdy tortilla chips—scoop-style chips work best for this hearty dip. Offer multiple chip varieties (regular, lime, blue corn) for variety.
Alternative Dippers: Offer options beyond chips:
- Tortilla strips
- Bell pepper strips
- Cucumber slices
- Jicama sticks
- Celery sticks
- Pita chips
Game Day Spread: Include on football watching tables alongside buffalo wings, sliders, nachos, and other finger foods.
Taco Bar Addition: Serve as an appetizer before a taco dinner or build-your-own-taco bar.
Potluck Perfect: Transport in the dish you’ll serve it in, cover tightly, and add final garnishes on-site.
Party Presentation Tips:
- Use a clear glass dish to show off layers
- Place dish on a large platter surrounded by chips
- Provide multiple serving spoons for easy access
- Set out small plates so guests can serve themselves
Complete Party Menu: Pair with:
- Margaritas, beer, or Mexican soda
- Guacamole and salsa
- Quesadillas
- Mexican street corn
- Churros or sopapillas for dessert
Beverage Pairings: Taco dip pairs wonderfully with margaritas, Mexican beer (Corona, Modelo), sangria, limeade, or iced tea.
FAQs Section
Q: Can I make this ahead of time?
A: Yes! Assemble base layers (beans, sour cream, cheese) up to 4 hours ahead. Add lettuce, tomatoes, and garnishes within 1 hour of serving for best texture. Fresh vegetables wilt quickly when in contact with other layers.
Q: How do I keep the dip from getting watery?
A: Always drain diced tomatoes thoroughly on paper towels before adding. Don’t add lettuce and tomatoes too far in advance. These two steps prevent most watery dip issues.
Q: Can I use Greek yogurt instead of sour cream?
A: Absolutely! Greek yogurt creates a tangier, higher-protein version. Use plain, full-fat Greek yogurt for best texture and mix with taco seasoning just like sour cream.
Q: What if I don’t like black olives?
A: Simply omit them! Taco dip is completely customizable. You can substitute jalapeños, corn, extra cheese, or just skip that layer entirely.
Q: Can I add meat to this dip?
A: Yes! Brown ground beef or turkey with taco seasoning and let cool slightly. Add as a layer between the beans and sour cream, or replace the bean layer entirely.
Q: Why is it called 7-layer dip when there might be more or fewer layers?
A: “7-layer” has become the generic name, but recipes vary. Traditional layers are beans, sour cream, guacamole, cheese, lettuce, tomatoes, and olives. You can adjust to your preference—5, 7, or 9 layers all work!
Q: How long can taco dip sit out at a party?
A: No more than 2 hours at room temperature for food safety. After 2 hours, refrigerate any leftovers. For longer parties, consider making two smaller batches and swapping them out.
Q: Can I use homemade refried beans?
A: Of course! Homemade refried beans taste even better than canned. Just ensure they’re smooth and spreadable (add a little water if too thick) and let cool to room temperature before using.
Conclusion
There you have it—everything you need to create the ultimate, crowd-pleasing taco dip that will make you the hero of every party! This easy taco dip recipe proves that impressive appetizers don’t require hours in the kitchen or complicated techniques—just 15 minutes of simple layering creates something absolutely irresistible. The combination of creamy beans, seasoned sour cream, melted cheese, and fresh vegetables delivers that perfect balance of textures and flavors that keeps everyone coming back for more.
Remember the keys to success: drain tomatoes thoroughly to prevent watery dip, spread each layer evenly to the edges, add fresh vegetables close to serving time, season the sour cream with taco seasoning, and serve with sturdy scoop chips. Master these fundamentals and you’ll create a layered taco dip that disappears in minutes at every gathering.
The beauty of this 7-layer taco dip lies in its incredible versatility and foolproof nature. Make it for game day, potlucks, family gatherings, or casual dinners—customize with meat, extra vegetables, or spicy additions—prepare components ahead for stress-free entertaining—this layered Mexican dip adapts beautifully while always delivering that addictive combination of flavors everyone loves.
Ready to add the ultimate party dip to your entertaining repertoire? Pin this recipe to your favorite Pinterest board so you’ll always have it ready when game day or party time arrives! Make this taco dip this weekend and let me know in the comments how it turned out. What layers did you include? I absolutely love hearing about your cooking adventures and seeing your delicious creations!
Don’t forget to snap a photo of those gorgeous colorful layers and share it on social media. Tag me so I can see your masterpiece and celebrate with you! Here’s to easy entertaining, crowd-pleasing recipes, and dips that make every gathering unforgettable!