Baked Brie with Honey: Easy, Elegant Appetizer in 15 Minutes

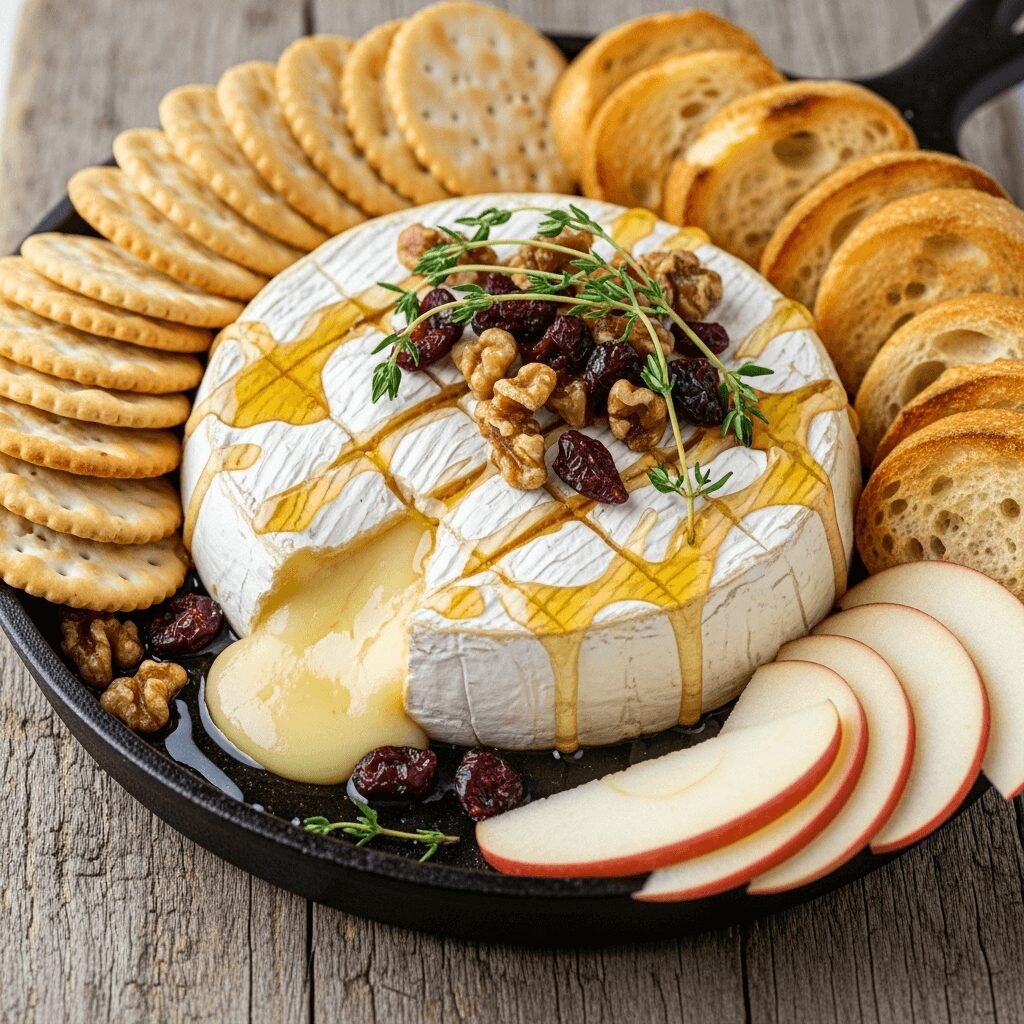
Picture this: a warm, gooey wheel of Brie cheese with a golden, slightly crispy top, drizzled with sweet honey and surrounded by your favorite crackers and fruit. That’s the magic of Baked Brie with Honey—one of the most impressive yet deceptively simple appetizers you’ll ever make! This elegant baked Brie recipe transforms a humble wheel of cheese into a show-stopping centerpiece that looks like it came from a fancy restaurant, but takes less time than ordering takeout.
Perfect for holiday gatherings, dinner parties, wine nights, book club meetings, or even a cozy date night at home, this easy baked Brie with honey delivers on both presentation and flavor. The creamy, melted interior contrasts beautifully with the slightly firm rind, while the honey adds a touch of sweetness that perfectly complements the rich, buttery cheese. Whether you’re hosting Thanksgiving, Christmas, New Year’s Eve, or a casual weekend get-together, this honey baked Brie appetizer never fails to impress.
What makes this recipe truly special is its incredible versatility and foolproof nature. You can customize it with nuts, dried cranberries, fresh herbs, or a splash of balsamic—the options are endless. Plus, it requires just two main ingredients (Brie and honey!) and about 15 minutes from start to finish. Your guests will think you spent hours preparing this gorgeous appetizer, but you’ll know the delicious secret: it’s one of the easiest recipes in your collection. Trust me, once you serve this warm baked Brie with honey drizzle at your next gathering, it’ll become your signature dish!
History / Background
Baked Brie has an interesting culinary journey that bridges French cheese-making traditions with American appetizer culture. Brie cheese itself dates back to the 8th century in the Brie region of France, located east of Paris. This soft, cow’s milk cheese with its distinctive white, bloomy rind became known as the “Queen of Cheeses” and was a favorite of French royalty, including King Louis XVI.
The tradition of heating Brie isn’t entirely new in French cuisine—the French have long enjoyed warmed Brie, though traditionally it was more commonly served at room temperature to allow its flavors to fully develop. However, the concept of baking Brie as we know it today—wrapped in pastry or simply warmed until gooey—is largely an American innovation that gained popularity during the 1980s and 1990s.
This era marked the rise of entertaining at home and the democratization of “fancy” foods. Dishes that once seemed exclusive to fine dining became accessible to home cooks, and appetizer culture exploded. Brie en croûte (Brie wrapped in puff pastry) became a restaurant staple, and home cooks soon discovered that baking Brie without the pastry was even easier and just as delicious.
The addition of honey is a natural pairing rooted in the European tradition of serving cheese with sweet accompaniments. In France, it’s common to pair cheese with fruit preserves, honey, or membrillo (quince paste). The French have a saying: “Honey and cheese are married in heaven.” This combination works because the sweetness of honey enhances the complex, earthy flavors of Brie while cutting through its richness.
The honey-topped baked Brie we love today represents a beautiful fusion of French sophistication and American ease—a testament to how culinary traditions evolve when they cross borders. It’s become such a beloved appetizer in the United States that it’s now a staple at holiday gatherings, particularly around Thanksgiving and Christmas, when its warmth and indulgence feel especially appropriate.
What makes this dish particularly special is its ability to make everyone feel like they’re experiencing something luxurious and special, when in reality, it’s one of the most accessible “fancy” foods you can make. It democratizes elegance, proving that impressive entertaining doesn’t require professional training or hours of preparation.
Why You’ll Love This Recipe
This Baked Brie with Honey isn’t just another appetizer—it’s your secret weapon for effortless entertaining that looks like you spent hours in the kitchen. The combination of creamy, melted cheese with sweet honey creates an addictive flavor profile that appeals to virtually everyone, from cheese novices to sophisticated foodies.
Once you discover how incredibly simple this elegant baked Brie recipe is and how enthusiastically your guests devour it, you’ll wonder why you haven’t been making it for every gathering!
Here’s why this easy honey baked Brie will become your go-to appetizer:
- Ridiculously Simple – Just two main ingredients and 15 minutes total time create a restaurant-quality appetizer that looks professionally crafted
- Impressively Elegant – Presents beautifully with minimal effort, making you look like a culinary genius without the stress
- Budget-Friendly Luxury – Creates an upscale appetizer for 6-8 people using one affordable wheel of Brie and pantry staples
- Foolproof Results – Nearly impossible to mess up—if you can turn on an oven and drizzle honey, you can master this recipe
- Crowd-Pleaser Guarantee – The sweet-savory combination appeals to all age groups and taste preferences
- Versatile and Customizable – Easily adapted with different toppings, nuts, herbs, or sweet additions to match any theme or season
- Ready in Minutes – From refrigerator to table in about 15 minutes, making it perfect for last-minute entertaining
- Minimal Cleanup – One baking dish, one spoon for honey—that’s it! No complicated prep or messy cleanup
- Works Year-Round – Perfect for holidays, but equally appropriate for casual summer gatherings or spring brunches
- Dietary Friendly – Naturally gluten-free and vegetarian, accommodating many dietary restrictions when paired with appropriate dippers
The moment you cut into that warm, gooey baked Brie wheel and watch the creamy cheese ooze out, dripping with golden honey, you’ll understand why this simple recipe has become a timeless entertaining essential. It’s not just an appetizer—it’s an experience that brings people together!
Ingredient Notes
Understanding your ingredients ensures the best possible baked Brie experience:
Brie Cheese – The star of the show! Choose a wheel that’s 8-16 ounces depending on your crowd size. An 8-ounce wheel serves 4-6 people perfectly, while a 13-16 ounce wheel accommodates 8-10 guests. Look for Brie that feels slightly firm to the touch—it shouldn’t be rock-hard (underripe) or feel like it’s about to burst (overripe). The rind should be white and fuzzy, without any ammonia smell. Both single and double-cream Brie work beautifully; double-cream is richer and more luxurious. Room temperature Brie bakes more evenly than cold, so remove it from the refrigerator 30 minutes before baking if possible. The rind is completely edible and adds texture, though some people prefer to remove the top before baking (more on that later).
Honey – Your choice of honey affects the final flavor! Mild honeys like clover, orange blossom, or acacia let the Brie shine, while robust honeys like buckwheat, chestnut, or wildflower add more complex flavor dimensions. Local, raw honey provides the most interesting flavors and supports local beekeepers. Avoid artificial “honey-flavored syrup”—real honey makes all the difference. If your honey has crystallized, gently warm it in a bowl of hot water or microwave it for 10-15 seconds until it flows smoothly.
Optional Enhancements – While Brie and honey alone are perfection, consider these popular additions:
- Nuts – Chopped walnuts, pecans, almonds, or pistachios add crunch and sophistication
- Dried Fruit – Cranberries, figs, apricots, or cherries provide chewy texture and complementary sweetness
- Fresh Herbs – Thyme, rosemary, or sage add aromatic complexity
- Garlic – One or two minced cloves create a savory depth
- Balsamic Reduction – A drizzle adds tangy sophistication
- Chili Flakes – A pinch provides gentle heat that contrasts beautifully with honey’s sweetness
Equipment Needed
You’ll need just a few basic kitchen items:
- Small Baking Dish or Oven-Safe Plate – Should be just slightly larger than your Brie wheel; a shallow ceramic baking dish, cast iron skillet, or oven-safe serving plate works perfectly
- Sharp Knife – For scoring the top rind (optional) or slicing if needed
- Oven – Preheated to 350°F (175°C)
- Aluminum Foil (optional) – For covering if the top browns too quickly
- Small Spoon or Honey Dipper – For drizzling honey
- Oven Mitts – For safely handling the hot dish
- Serving Knife or Spreader – For guests to scoop the melted cheese
- Serving Board or Platter – For presenting the baked Brie with accompaniments

Baked Brie with Honey
This elegant Baked Brie with Honey is the easiest impressive appetizer you’ll ever make! A creamy wheel of Brie cheese is baked until warm and gooey, then drizzled with golden honey for the perfect sweet-savory combination. Ready in just 15 minutes, it’s ideal for entertaining and pairs beautifully with crackers, bread, and fresh fruit.
- Total Time: 15 minutes
- Yield: 6-8 servings 1x
Ingredients
- 1 wheel Brie cheese (8-16 oz, depending on serving size)
- 2-4 tablespoons honey (to taste)
- Optional: 2 tablespoons chopped walnuts or pecans
- Optional: 1 tablespoon fresh thyme leaves
- Optional: 2 tablespoons dried cranberries or figs
- Optional: pinch of red pepper flakes
- For serving: crackers, sliced baguette, apple slices, pear slices, grapes
Instructions
- Preheat Oven – Set your oven to 350°F (175°C). Let it preheat completely while you prepare the Brie—this ensures even baking and prevents the cheese from spending too long in the oven.
- Prepare the Brie – Remove any plastic or paper packaging from the Brie. If desired, you can leave the Brie whole, or carefully slice off the top rind using a sharp knife (this allows toppings to sink into the cheese, but it’s completely optional—the rind is edible and many people prefer leaving it intact). Place the Brie in a small, oven-safe baking dish, cast iron skillet, or directly on an oven-safe serving plate.
- Score the Top (Optional) – If keeping the rind intact, you can score the top in a crosshatch pattern with a sharp knife, making shallow cuts about ¼-inch deep. This allows heat to penetrate more evenly and creates an attractive presentation. This step is optional but recommended.
- Add Optional Toppings – If using nuts, dried fruit, fresh herbs, or garlic, arrange them on top of the Brie now, pressing them gently into any cuts you’ve made. These will warm and become fragrant as the cheese bakes.
- Bake the Brie – Place the baking dish in the preheated oven and bake for 10-12 minutes for an 8-oz wheel, or 12-15 minutes for a larger wheel. The Brie is done when it feels soft to the touch and slightly jiggly when you gently shake the dish. You should see the cheese just beginning to ooze slightly at the sides. Don’t overbake—you want it warm and melty inside, not completely liquified!
- Check for Doneness – Gently press the center of the Brie with your finger (carefully—it’s hot!). It should feel soft and yielding, like pressing a marshmallow. If it still feels firm, return it to the oven for 2-3 more minutes. Every oven and wheel of Brie is slightly different, so trust your senses more than exact timing.
- Drizzle with Honey – Remove the baked Brie from the oven carefully using oven mitts. Immediately drizzle the honey generously over the top, letting it pool in any cuts or crevices and drip down the sides. The residual heat will slightly warm the honey, making it even more fluid and aromatic.
- Add Final Garnishes – If you didn’t add herbs or nuts before baking, now is the time! Sprinkle fresh thyme, additional nuts, or a pinch of red pepper flakes over the honey-drizzled surface for extra visual appeal and flavor.
- Serve Immediately – Transfer the baking dish to a serving board or platter (place it on a decorative trivet or folded napkin if the dish is very hot). Arrange crackers, sliced bread, apple slices, pear wedges, and grapes around the warm Brie. Provide a small spreading knife or spoon for scooping.
- Enjoy While Warm – Encourage guests to dig in while the Brie is still warm and gooey. The cheese will begin to firm up as it cools, though it will remain delicious. Simply reheat briefly if needed.
Notes
- Don’t skip preheating your oven—cold ovens lead to uneven melting
- The Brie rind is completely edible, though some people prefer to remove it
- If the top starts browning too quickly, tent loosely with aluminum foil
- Serve immediately for the best texture; baked Brie is at its peak when warm
- For a flavor variation, try maple syrup, hot honey, or fig jam instead of plain honey
- Leftover baked Brie can be refrigerated and gently rewarmed, though texture changes slightly
- Prep Time: 5 minutes
- Cook Time: 10 minutes
- Category: Appetizer
- Method: Baking
- Cuisine: French-American
- Diet: Vegetarian
Nutrition
- Serving Size: 1 ounce Brie + ½ tablespoon honey (based on 8 servings from 8-oz wheel)
- Calories: 125
- Sugar: 4g
- Sodium: 180mg
- Fat: 9g
- Saturated Fat: 6g
- Unsaturated Fat: 3g
- Trans Fat: 0g
- Carbohydrates: 5g
- Fiber: 0g
- Protein: 6g
- Cholesterol: 30mg
Tips & Variations
The beauty of baked Brie is its incredible adaptability. Here are creative ways to customize it:
Sweet Variations:
- Cranberry Pecan – Top with dried cranberries and chopped pecans before baking, finish with honey
- Apple Cinnamon – Add thin apple slices and a sprinkle of cinnamon before baking
- Fig and Walnut – Use fig jam instead of honey and top with toasted walnuts
- Maple Pecan – Substitute maple syrup for honey and add candied pecans
- Berry Compote – Top with warm berry compote instead of honey for a jammy sweetness
Savory Variations:
- Herbed Brie – Skip honey, add fresh rosemary, thyme, and garlic before baking, drizzle with olive oil
- Caramelized Onion – Top with caramelized onions and fresh thyme
- Sun-Dried Tomato and Basil – Add chopped sun-dried tomatoes and fresh basil
- Mushroom and Thyme – Top with sautéed mushrooms and fresh thyme
- Bacon Jam – Replace honey with bacon jam for ultimate savory indulgence
Spicy Variations:
- Hot Honey Brie – Use hot honey or add red pepper flakes to regular honey
- Jalapeño Honey – Top with sliced jalapeños and honey
- Sriracha Honey – Mix sriracha into honey before drizzling
- Chili Crisp Brie – Top with chili crisp oil instead of honey
Wrapped Variations:
- Puff Pastry Wrapped – Wrap Brie in puff pastry before baking (add 15-20 minutes to baking time)
- Prosciutto Wrapped – Wrap the wheel in thin prosciutto slices before baking
- Phyllo Wrapped – Wrap in phyllo dough layers for extra crunch
Presentation Variations:
- Bread Bowl Brie – Hollow out a small round bread loaf and bake the Brie inside
- Individual Portions – Use small individual Brie rounds for personal servings
Pro Chef Tips
Elevate your baked Brie from good to absolutely restaurant-quality:
Room Temperature Matters – Remove Brie from the refrigerator 30-60 minutes before baking. Cold cheese takes longer to melt and may cook unevenly, with an over-melted exterior and still-firm center. Room temperature Brie bakes more uniformly, creating that perfect gooey consistency throughout.
Choose the Right Size Dish – Your baking dish should be just slightly larger than the Brie wheel—about ½ to 1 inch of space around the perimeter is ideal. Too large, and the cheese may spread too thin; too small, and it has nowhere to expand slightly as it warms. The right fit also makes for better presentation.
Don’t Overbake – This is the most common mistake! Brie should be warm and soft, not completely liquified. When properly baked, it will hold its shape but feel jiggly when gently shaken, like perfectly set panna cotta. Overbaked Brie becomes runny and loses its appealing texture. Start checking at 10 minutes for small wheels, 12 minutes for larger ones.
The Touch Test – Gently press the center of the Brie with your finger (carefully—it’s hot). It should feel like pressing a soft marshmallow or your earlobe. If it still feels firm like cold butter, it needs more time. This tactile test is more reliable than timing alone.
Score Strategically – If scoring the top rind, make shallow crosshatch cuts about ¼-inch deep. This allows toppings to nestle into the cheese and helps heat penetrate evenly, but don’t cut all the way through—you want to maintain structural integrity.
Toast Your Nuts – If using nuts as a topping, toast them first in a dry skillet for 3-5 minutes until fragrant. This intensifies their flavor and adds extra crunch. Let them cool slightly before adding to the Brie.
Quality Honey Makes a Difference – Invest in good honey! The flavor really shines through. Local, raw honey from farmers’ markets often has complex floral notes that elevate this simple dish. Warm the honey slightly before drizzling for better flow and presentation.
Create Layers of Flavor – For maximum impact, add some toppings before baking (like garlic or herbs), then add others after (like delicate fresh herbs or flaky sea salt). This creates complexity rather than one-dimensional flavor.
Serve on a Warm Plate – Warm your serving dish slightly by rinsing with hot water and drying. This helps maintain the Brie’s temperature longer, keeping it gooey for the duration of your party.
Common Mistakes to Avoid
Even this simple recipe has potential pitfalls. Here’s how to avoid them:
Overbaking Until Liquified – The #1 mistake! Many people bake Brie until it’s completely melted and runny, creating a puddle of cheese rather than a gooey wheel. Brie should be soft and slightly jiggly but still hold its basic shape. Remove it from the oven when it feels soft to the touch but before it loses structure. Remember, it continues cooking briefly from residual heat after removal.
Not Preheating the Oven – Placing Brie in a cold oven means it spends too long warming up, which can cause uneven melting—tough exterior, weird texture inside. Always preheat completely to 350°F first. This ensures quick, even baking that creates the perfect creamy interior.
Using the Wrong Size Brie – Buying Brie that’s too large for your gathering means lots of leftovers (which don’t reheat as well), while too small leaves guests wanting more. Calculate about 1.5-2 ounces of Brie per person. For 6-8 people, an 8-12 ounce wheel is perfect.
Forgetting to Remove Packaging – I know this sounds obvious, but plastic wrap or paper labels must be completely removed before baking! Check carefully for any stickers or wrapping, especially on the sides and bottom. Plastic in the oven creates toxic fumes and ruins your cheese.
Adding Honey Before Baking – Always drizzle honey after baking, not before. Honey added pre-baking can burn, caramelize too darkly, or create a tough, candy-like coating. The residual heat from the baked Brie is perfect for slightly warming the honey without cooking it.
Not Serving Immediately – Baked Brie is at its absolute best served warm. As it cools, it firms up and loses that luxurious, gooey texture everyone loves. If you need to hold it, keep it in a 200°F oven until serving time, or plan to bake it right before guests arrive so it’s perfect when served.
Storage & Meal Prep
While baked Brie is best enjoyed immediately, here’s how to handle leftovers:
Refrigerator Storage – If you have leftover baked Brie (rare, but it happens!), let it cool completely, then wrap tightly in plastic wrap or transfer to an airtight container. Refrigerate for up to 3 days. The texture will firm up considerably and won’t be quite the same as freshly baked, but it’s still delicious.
Reheating Leftover Baked Brie – To reheat, place the Brie in a baking dish and warm in a 300°F oven for 5-7 minutes until softened. Don’t microwave—it makes the texture rubbery and uneven. The reheated version won’t have quite the same creamy consistency as the original, but it’s still enjoyable.
Unbaked Storage – You can prepare the Brie (remove from packaging, score the top, arrange in baking dish) several hours ahead. Cover loosely with plastic wrap and leave at room temperature for up to 2 hours, or refrigerate for up to 6 hours. Add toppings right before baking.
Alternative Uses for Leftover Brie – Cold leftover baked Brie is actually delicious spread on sandwiches, melted into scrambled eggs, stirred into pasta, or served on a cheese board. Don’t feel like you must reheat it—embrace its second life!
Make-Ahead & Freezer Notes
This is one recipe best made fresh, but here are your options:
Make-Ahead Timeline – Baked Brie is such a quick recipe that there’s limited need for advance prep. However, you can prepare all your accompaniments (slice bread, arrange fruit, portion crackers) several hours ahead and refrigerate. Toast nuts and measure honey in advance. When guests arrive, simply bake the Brie—it takes just 15 minutes total.
Freezing Unbaked Brie – While you can freeze unbaked Brie (wrap tightly and freeze for up to 2 months), I don’t particularly recommend it. Freezing affects the texture, making it more crumbly and less creamy when baked. If you must freeze, thaw completely in the refrigerator before baking, which takes 8-12 hours.
Freezing Baked Brie – Not recommended. The texture becomes grainy and separates when frozen and reheated. This is a fresh-is-best situation.
Party Strategy – The best make-ahead approach is having everything ready to go, then baking the Brie during the party’s cocktail hour. Set a timer, pull it out when ready, and serve immediately. The wonderful aroma as it bakes builds anticipation!
Multiple Rounds – If hosting a longer party, consider baking two smaller wheels in succession rather than one large one. Serve the first batch, then bake the second midway through the event. This ensures everyone experiences warm, gooey Brie at its peak.
Serving Suggestions
While baked Brie is stunning on its own, the right accompaniments elevate it to extraordinary:
Classic Dippers:
- Crackers – Water crackers, wheat crackers, rosemary crackers, or buttery Ritz
- Bread – Toasted baguette slices, crostini, breadsticks, or artisan bread chunks
- Fresh Fruit – Apple slices, pear slices, fresh figs, grapes, or strawberries
- Dried Fruit – Apricots, figs, dates, or dried cranberries
- Vegetables – Cucumber slices, celery sticks, or blanched green beans (less common but delicious)
Build a Complete Cheese Board: Surround your baked Brie with complementary items:
- Assorted crackers in different flavors and textures
- Fresh and dried fruits for color and flavor contrast
- Nuts (almonds, walnuts, pecans, cashews)
- Olives or cornichons for briny contrast
- Other cheeses (aged cheddar, blue cheese, goat cheese)
- Small bowls of preserves or fruit spreads
- Fresh herbs for garnish
Beverage Pairings:
- Wine – Champagne, Prosecco, Chardonnay, Pinot Noir, or Beaujolais work beautifully
- Beer – Belgian ales, wheat beers, or light lagers
- Cocktails – Aperol Spritz, French 75, or simple wine spritzers
- Non-Alcoholic – Sparkling apple cider, grape juice, or flavored sparkling water
Occasion-Specific Serving:
- Holidays – Add seasonal garnishes like pomegranate seeds, fresh cranberries, or sugared rosemary
- Summer – Serve with fresh peaches, berries, and light rosé wine
- Fall – Pair with apples, pears, candied pecans, and apple cider
- Winter – Add dried figs, walnuts, and hot spiced wine
Presentation Ideas:
- Serve on a wooden cutting board for rustic charm
- Use a marble slab for elegant sophistication
- Arrange on a large platter with everything artfully displayed
- Place in a small cast iron skillet and serve directly from it
- Create height by stacking crackers and arranging fruit in cascading piles
FAQs Section
Can I eat the rind on Brie cheese?
Yes, absolutely! The white, bloomy rind on Brie is completely edible and safe to eat. It’s actually a type of mold (Penicillium candidum) that’s deliberately added during cheesemaking. The rind has a slightly earthy, mushroomy flavor and firmer texture than the creamy interior. Some people love it, while others prefer to remove it—it’s entirely personal preference. When baking, the rind helps hold the cheese together, so I recommend keeping it intact.
How do I know when my Brie is done baking?
The Brie is perfectly baked when it feels soft and slightly jiggly when you gently shake the dish, similar to Jello or panna cotta. You can also do the touch test—gently press the center with your finger (carefully, as it’s hot). It should feel soft like a marshmallow, not firm like cold butter. You might see slight oozing at the edges. Small wheels (8 oz) usually need 10-12 minutes, while larger wheels (16 oz) need 12-15 minutes at 350°F.
Can I make this without honey?
Absolutely! While honey is traditional and delicious, you can substitute maple syrup, fig jam, apricot preserves, balsamic glaze, or even leave it plain and focus on savory toppings like herbs, garlic, and olive oil. Each variation creates a different but equally delicious flavor profile. For a completely savory version, try caramelized onions or sautéed mushrooms instead of any sweet topping.
Do I need to remove the top rind before baking?
No, it’s completely optional! Many people prefer to bake Brie with the rind intact—it helps the cheese hold its shape and adds texture and flavor. However, some recipes call for removing the top rind, which allows toppings to sink directly into the cheese and makes it slightly easier to scoop. If you do remove it, use a sharp knife to carefully slice off just the top layer of white rind before baking. The bottom and sides should stay intact to prevent cheese puddles.
Can I use a different type of cheese?
While Brie is traditional, Camembert (Brie’s close cousin) works identically—it’s slightly stronger in flavor and more rustic. You could also try a small wheel of goat cheese, though the texture will be different (more crumbly, less gooey). Regular firm cheeses like cheddar or gouda don’t work for this recipe as they don’t melt the same way. Stick with soft-ripened cheeses for best results.
What if my Brie completely melts and becomes runny?
This means it was overbaked. While not ideal, it’s not ruined! Simply let it cool for 5-10 minutes—it will firm up slightly and become more scoopable. Serve it as a “fondue-style” dip rather than a sliceable cheese. Next time, reduce baking time by 2-3 minutes and remove it from the oven when it’s just starting to soften rather than completely liquified.
How far in advance can I prepare this?
Baked Brie is best made just before serving, but you can do all your prep work (arrange Brie in dish, prepare toppings, slice accompaniments) several hours ahead. The actual baking takes only 10-15 minutes, so I recommend putting it in the oven about 20 minutes before you want to serve appetizers. This ensures it’s warm, gooey, and at peak deliciousness when guests are ready to eat.
Conclusion
This Baked Brie with Honey proves that the most impressive dishes are often the simplest ones! With just two main ingredients, 15 minutes of your time, and minimal effort, you can create an elegant, show-stopping appetizer that makes you look like a professional chef. The combination of warm, creamy cheese and sweet golden honey is pure magic—it’s comfort food that somehow feels fancy and special.
What I absolutely love about this easy baked Brie recipe is how it adapts to any occasion and skill level. Whether you’re a nervous beginner or an experienced home cook, whether you’re hosting a casual game night or an elegant dinner party, this honey baked Brie appetizer delivers every single time. The endless customization options mean you’ll never get bored, and your guests will never suspect how incredibly easy it was to make!
I hope this recipe becomes as essential in your entertaining arsenal as it is in mine! Have you made baked Brie before? What’s your favorite topping combination? I’d love to hear about your experiences in the comments below—and please rate this recipe to help other home cooks! If you loved this warm, gooey, honey-drizzled Brie as much as I think you will, please save this recipe to your Pinterest boards so you’ll always have it ready for your next gathering. Your guests will be singing your praises, I promise!
Happy entertaining, and here’s to easy elegance! 🧀