Crispy Baked Buffalo Wings (Better Than Fried!)

Get ready to make the most incredible baked buffalo wings that are so crispy, juicy, and flavorful, you’ll never miss the deep fryer! These game-day favorites deliver that perfect combination of crispy skin, tender meat, and tangy buffalo sauce that everyone craves, but they’re baked in the oven for a healthier, easier approach. Whether you’re hosting the Super Bowl party, having friends over for movie night, or just treating yourself to some seriously good comfort food, these crispy oven baked wings are about to become your new signature dish.
What makes these wings so special? The secret is in the technique – a combination of baking powder magic, high-heat roasting, and proper preparation creates wings that are impossibly crispy on the outside while staying incredibly juicy inside. No deep fryer required, no gallons of oil to deal with, and significantly less mess to clean up. Just toss these beauties in classic buffalo sauce (or your favorite flavor!), serve with cool ranch or blue cheese dressing and crunchy celery sticks, and watch them disappear faster than you can say “touchdown!” These easy buffalo wings are so good, your guests will be convinced you have a secret restaurant hookup.
History / Background
Buffalo wings have one of the most fascinating and well-documented origin stories in American culinary history. The iconic dish was born on October 30, 1964, at the Anchor Bar in Buffalo, New York, created by Teressa Bellissimo. According to the most popular version of the story, Teressa’s son Dominic arrived late one night with a group of hungry friends. Teressa improvised with what she had on hand – chicken wings, which were typically used only for stock at the time and considered virtually worthless as a menu item.
She deep-fried the wings without breading, tossed them in a sauce made from Frank’s RedHot cayenne pepper sauce and butter, and served them with celery sticks and blue cheese dressing on the side to cool the heat. The combination was an instant hit with Dominic’s friends, and word spread quickly throughout Buffalo. By the 1970s, buffalo wings had become a regional sensation, and by the 1980s and 90s, they’d conquered the entire nation.
The dish perfectly embodied American bar food culture – shareable, messy, intensely flavored, and perfect with cold beer. Wings became synonymous with sports viewing, particularly football, and spawned countless variations, competitions, and even dedicated wing restaurants like Buffalo Wild Wings and Wingstop. The traditional preparation involved deep-frying, which created that irresistibly crispy skin that made wings so addictive.
However, as home cooks embraced wing culture, the challenges of deep-frying at home became apparent – the mess, the oil disposal, the safety concerns, and the calories. Enter the baked wing revolution! Food scientists and home cooks discovered that a combination of baking powder (which raises the pH of the skin, promoting browning and crispiness), high heat, and proper technique could create wings nearly as crispy as fried versions.
Today, baked buffalo wings represent the evolution of this classic dish – maintaining all the flavor and satisfaction of the original while being more accessible to home cooks and slightly healthier without sacrificing that crucial crispiness. They’ve become a Pinterest sensation, with thousands of home cooks sharing their techniques for achieving restaurant-quality wings in a standard home oven.
Why You’ll Love This Recipe
These crispy baked buffalo wings are absolute perfection, and they’ve become one of the most popular game-day recipes on Pinterest for excellent reasons!
Here’s why this recipe will rock your world:
- Genuinely crispy skin – The baking powder trick creates wings that rival deep-fried versions for crunch
- So much healthier – Uses 70% less fat than traditional fried wings without sacrificing flavor or texture
- Zero special equipment needed – Just a baking sheet and your regular oven; no deep fryer required
- Less mess, easier cleanup – No splattered oil all over your kitchen or dealing with disposing of used frying oil
- Perfect for crowds – Easy to scale up for parties; make as many wings as your oven can handle
- Customizable heat level – Control exactly how spicy you want them, from mild to “call the fire department”
- Budget-friendly party food – Wings are affordable, especially when you catch them on sale
- Naturally gluten-free and keto-friendly – Perfect for various dietary needs (when using compliant sauce)
- Hands-off cooking – Once they’re in the oven, you’re free to prep other party foods or relax
- Foolproof results – This technique works every single time, even for beginners
- Game day essential – The ultimate football food that pleases every crowd
- Leftover friendly – They reheat beautifully, maintaining most of their crispiness
Whether you’re a wing fanatic, a game-day host, or someone who just loves really good finger food, these wings deliver the goods every single time. They’re crispy, saucy, tangy, and absolutely irresistible!
Ingredient Notes
Let’s break down what makes these oven baked buffalo wings so incredibly delicious. Each ingredient plays a crucial role in creating wing perfection.
Chicken Wings – You’ll want whole chicken wings, which you can either buy pre-separated into drumettes and flats (also called “party wings”), or buy whole and cut them yourself. The drumette is the mini drumstick-shaped piece, and the flat (or wingette) is the double-boned middle section. Most people discard or freeze the wing tips for making stock. Plan for about 4-6 wing pieces per person for an appetizer, or 8-10 per person as a main course. Fresh or frozen wings both work perfectly – just ensure frozen wings are completely thawed and thoroughly dried before proceeding.
Baking Powder (NOT Baking Soda!) – This is the absolute secret weapon for crispy baked wings! Baking powder is alkaline, which raises the pH of the chicken skin. This breaks down the proteins more quickly, allowing the skin to brown faster and more efficiently, resulting in that coveted crispy texture. Critical: Use aluminum-free baking powder if you’re sensitive to the metallic taste some people detect with regular baking powder. Do NOT substitute baking soda – it’s much stronger and will make your wings taste soapy and terrible.
Salt – Essential for seasoning the chicken and drawing out moisture from the skin through a process similar to dry-brining. This helps create even crispier results. Kosher salt or sea salt works best, but table salt is fine if that’s what you have (just use slightly less).
Black Pepper and Garlic Powder – These add extra flavor to the wings themselves before saucing. They’re optional but recommended for more depth. Some recipes also include paprika or onion powder.
Buffalo Sauce – Traditionally made by combining Frank’s RedHot cayenne pepper sauce with melted butter in a roughly 1:1 ratio. Frank’s is the original sauce used at the Anchor Bar, and it has the perfect tangy, peppery flavor that defines buffalo wings. The butter mellows the heat, adds richness, and helps the sauce coat the wings. You can use store-bought buffalo wing sauce for convenience, but homemade tastes fresher and allows you to control the heat level and butter ratio.
Butter – Creates a rich, velvety sauce when combined with hot sauce. Use unsalted butter so you can control the salt level. For a dairy-free version, use ghee or vegan butter, though the flavor will be slightly different.
Equipment Needed
You don’t need any fancy equipment to make perfect crispy wings! Here’s what you’ll need:
- Large rimmed baking sheet (half-sheet pan, approximately 18×13 inches)
- Wire cooling rack (that fits inside your baking sheet – this is crucial for air circulation!)
- Aluminum foil (for lining the baking sheet for easier cleanup)
- Large mixing bowl (for tossing wings with baking powder and seasonings)
- Paper towels (for drying the wings thoroughly)
- Small saucepan (for making the buffalo sauce)
- Whisk or spoon (for mixing sauce)
- Large bowl or pot with lid (for tossing wings in sauce)
- Tongs (for flipping wings and serving)
- Meat thermometer (optional but helpful for beginners)
Optional but helpful:
- Kitchen scale (for portioning wings evenly)
- Silicone brush (for applying sauce if you prefer brushing to tossing)
Baked Buffalo Wings
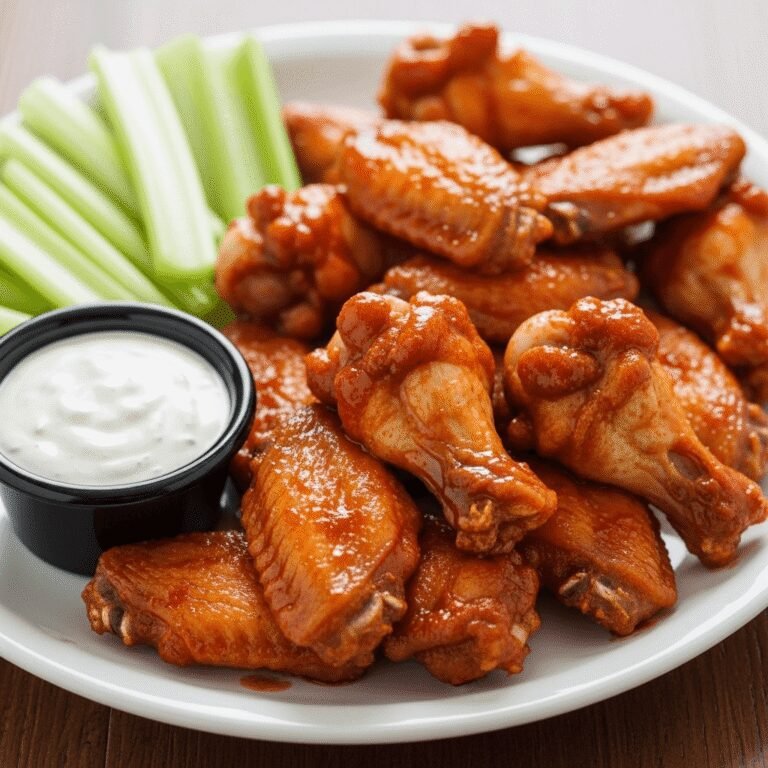
Incredibly crispy baked buffalo wings with that perfect restaurant-quality crunch, tossed in tangy, buttery buffalo sauce! These oven-baked wings are healthier than fried but just as addictively delicious. The secret? Baking powder and high heat create impossibly crispy skin while keeping the meat juicy. Perfect for game day, parties, or any time you’re craving classic buffalo wings!
- Total Time: 55 minutes - 9 hours
- Yield: 4-6 servings 1x
Ingredients
For the Wings:
- 3 pounds chicken wings (about 24-30 pieces, drumettes and flats separated)
- 1½ tablespoons baking powder (aluminum-free preferred)
- 1 teaspoon kosher salt
- ½ teaspoon black pepper
- ½ teaspoon garlic powder (optional)
- ¼ teaspoon paprika (optional)
For the Buffalo Sauce:
- ½ cup Frank’s RedHot sauce (or your favorite cayenne pepper sauce)
- 4-6 tablespoons unsalted butter, melted (use more butter for milder wings)
- 1 tablespoon white vinegar (optional, for extra tang)
- ¼ teaspoon Worcestershire sauce (optional, for depth)
- Pinch of garlic powder (optional)
For Serving:
- Ranch dressing or blue cheese dressing
- Celery sticks
- Carrot sticks
- Extra napkins (trust me!)
Instructions
Step 1: Prepare the Wings
If using whole wings, separate them at the joints into drumettes and flats. Discard the wing tips or save them for making stock. Pat the wings completely dry using paper towels – this is absolutely crucial! Any moisture on the skin will prevent crisping. Press firmly and really get them as dry as possible, even if you need to use multiple paper towels. For best results (optional but highly recommended), place the dried wings uncovered on a wire rack set over a baking sheet in the refrigerator for 1-8 hours. This drying time allows the skin to dry out even more, resulting in maximum crispiness. If you’re short on time, you can skip this step, but the texture will be even better if you dry them.
Step 2: Preheat and Prep
Remove wings from the refrigerator 20 minutes before cooking to take the chill off (this ensures even cooking). Preheat your oven to 250°F (120°C). Line a rimmed baking sheet with aluminum foil for easier cleanup. Place a wire cooling rack on top of the foil-lined baking sheet and spray the rack with cooking spray to prevent sticking.
Step 3: Season the Wings
Place the dried wings in a large bowl. In a small bowl, mix together the baking powder, salt, black pepper, garlic powder, and paprika. Sprinkle this mixture evenly over the wings and toss thoroughly until every wing is evenly coated. The mixture should coat all surfaces of the wings uniformly. Arrange the wings on the prepared wire rack in a single layer, making sure they’re not touching or overlapping. Space them out for proper air circulation.
Step 4: Low-Temp Baking Phase
Bake the wings at 250°F for 30 minutes. This low-temperature phase gently renders some of the fat from the skin and starts the cooking process without browning. The wings will look pale and won’t be crispy yet – this is completely normal and expected!
Step 5: High-Heat Crisping Phase
After 30 minutes, increase the oven temperature to 425°F (220°C). Continue baking for 20-25 minutes, then flip the wings over with tongs. Bake for an additional 20-25 minutes until the wings are deep golden brown, crispy, and the internal temperature reaches 165°F. The skin should be bubbly and crispy, and the wings should feel light and crispy when you pick them up. Total time at high heat is 40-50 minutes.
Step 6: Make the Buffalo Sauce
While the wings finish their final baking time, make your buffalo sauce. In a small saucepan over low heat, melt the butter. Remove from heat and whisk in the Frank’s RedHot sauce until smooth and well combined. If using, add the vinegar, Worcestershire sauce, and garlic powder. Taste and adjust – add more hot sauce for spicier wings or more butter for milder wings. Keep warm until wings are ready.
Step 7: Sauce the Wings
Remove the crispy wings from the oven and let them rest for 2-3 minutes (this makes them even crispier!). Transfer the wings to a large bowl with a lid or a large pot. Pour the buffalo sauce over the wings, cover with the lid, and shake vigorously until all wings are evenly coated. Alternatively, you can toss them with tongs or a spoon, but shaking in a covered container creates the most even coating.
Step 8: Serve Immediately
Transfer the sauced wings to a serving platter. Serve immediately with ranch or blue cheese dressing, celery sticks, and carrot sticks. Have plenty of napkins ready – things are about to get deliciously messy!
Notes
- The baking powder trick is essential: Don’t skip it! This is what makes wings crispy without frying. Make absolutely sure you’re using baking powder, NOT baking soda.
- Dry, dry, dry: The drier the wings before seasoning, the crispier they’ll become. Take your time with this step.
- Wire rack is crucial: Baking wings directly on a pan creates soggy bottoms. The rack allows air circulation all around for even crisping.
- Don’t crowd the pan: Wings need space. If necessary, use two baking sheets rather than cramming them together.
- Timing varies: Oven temperatures vary, so start checking at 40 minutes total high-heat time. Wings are done when golden brown, crispy, and 165°F internal temp.
- Sauce amount: This recipe makes enough sauce for a medium coating. Double the sauce if you like your wings extra saucy.
- Prep Time: 10 minutes (plus optional 1-8 hours for drying)
- Cook Time: 45-50 minutes
- Category: Appetizer
- Method: Baking
- Cuisine: American
- Diet: Gluten Free
Nutrition
- Serving Size: 5-6 wing pieces
- Calories: 485
- Sugar: 0g
- Sodium: 1,240mg
- Fat: 38g
- Saturated Fat: 14g
- Unsaturated Fat: 22g
- Trans Fat: 0g
- Carbohydrates: 1g
- Fiber: 0g
- Protein: 32g
- Cholesterol: 165mg
Tips & Variations
The beauty of baked buffalo wings is how easily you can customize them! Here are delicious ways to make this recipe your own:
Extra Crispy Method: After saucing, return the wings to the wire rack and bake for an additional 5 minutes at 425°F. This sets the sauce and creates an even crispier exterior with a slightly sticky glaze.
Milder Buffalo Wings: Increase the butter to ½ cup (8 tablespoons) and reduce the hot sauce to ⅓ cup. You can also use a milder hot sauce like Cholula or a buffalo sauce specifically labeled “mild.”
Extra Hot Wings: Use a spicier hot sauce like Tabasco, add cayenne pepper to the sauce, or mix in some ghost pepper sauce. Reduce butter to 3 tablespoons for maximum heat intensity.
Honey Buffalo Wings: Add 2 tablespoons of honey to your buffalo sauce for a sweet-heat combination that’s absolutely addictive.
Garlic Parmesan Wings: Skip the buffalo sauce entirely. After baking, toss wings in melted butter mixed with minced garlic, grated Parmesan cheese, and Italian seasoning.
BBQ Wings: Replace buffalo sauce with your favorite BBQ sauce. Brush on during the last 10 minutes of baking to caramelize slightly.
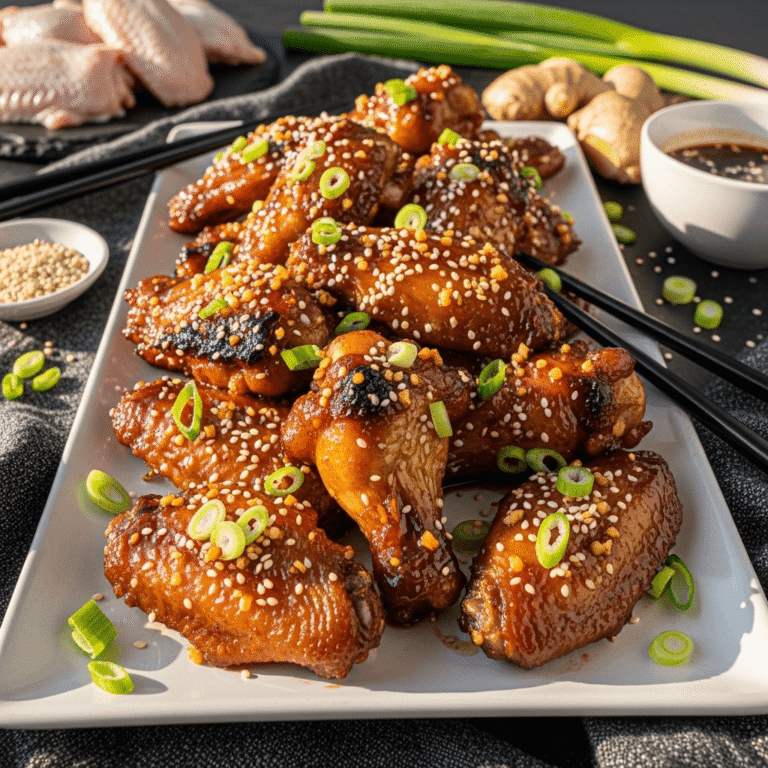
Asian-Glazed Wings: Toss in a mixture of soy sauce, honey, rice vinegar, sesame oil, ginger, and garlic instead of buffalo sauce. Garnish with sesame seeds and green onions.
Lemon Pepper Wings: Season with extra black pepper and lemon pepper seasoning before baking. After baking, toss with melted butter, fresh lemon juice, and more lemon pepper.
Nashville Hot Wings: Brush wings with a mixture of hot sauce, cayenne, brown sugar, and the oil from the bottom of your baking pan for authentic Nashville hot flavor.
Dry Rub Wings: Skip sauce entirely and use a generous dry rub of your choice (Cajun, jerk, ranch, etc.) before baking for less messy, intensely flavored wings.
Korean-Style Gochujang Wings: Toss in a sauce made from gochujang (Korean chili paste), soy sauce, honey, rice vinegar, sesame oil, and garlic.
Pro Chef Tips
Want to take your wings from great to absolutely restaurant-quality? Here are professional techniques that make all the difference:
Separate wings by size before baking. Drumettes are typically larger and meatier than flats, so they sometimes need a few extra minutes. For the most even cooking, arrange similar-sized pieces together, and if needed, remove smaller flats a few minutes early while larger drumettes finish.
Use the refrigerator drying method whenever possible. Professional wings benefit from the overnight drying technique. Pat wings dry, season with just salt, and place uncovered on a rack in the fridge for up to 24 hours. This dries out the skin dramatically, resulting in the crispiest possible texture. The baking powder is added just before cooking.
Don’t sauce all your wings at once if serving over time. Sauce makes wings lose crispiness gradually. If your party is long, keep half the wings unsauced and crispy, saucing them in batches as guests eat. This ensures everyone gets crispy wings throughout the event.
Create a temperature gradient in your oven. Every oven has hot spots. Rotate your baking sheet 180 degrees halfway through the high-heat phase for the most even browning. If you’re using two sheets, switch their rack positions as well.
Let wings “rest” before saucing. After removing from the oven, let wings sit on the rack for 2-3 minutes. This brief rest allows the exterior to set up and become even crispier. If you sauce immediately, the skin can sometimes steam and lose crispness.
Make a “double-sauce” for maximum flavor. Toss wings in sauce, return them to the oven rack for 5 minutes to set the sauce, then toss in a second coating of fresh sauce. This creates intense flavor with a beautiful glossy finish and crispy texture underneath.
Control moisture during cooking. If you notice steam building up in your oven (visible on the glass), crack the oven door slightly during the last 15 minutes of baking. Excess moisture is the enemy of crispiness.
Use a probe thermometer for perfect doneness. Insert into the thickest part of several drumettes. When they hit 165°F, they’re safe and perfectly cooked. Going higher (up to 180°F) will make them more tender but risks drying out the meat.
Common Mistakes to Avoid
Even experienced cooks sometimes struggle with wings. Here are the pitfalls to watch out for:
Not drying the wings thoroughly: This is the #1 reason for soggy wings. Surface moisture creates steam during baking, which prevents the skin from crisping. Pat wings aggressively with paper towels, pressing firmly to remove every bit of moisture. If they feel damp at all, use more paper towels. This step cannot be rushed or skipped!
Using baking soda instead of baking powder: This is a recipe-ruining mistake. Baking soda is much more alkaline and will make your wings taste soapy, bitter, and metallic. The boxes look similar, so double-check! Baking powder is the only correct choice.
Skipping the wire rack: Baking wings directly on the baking sheet causes the bottom to steam and stay rubbery. The rack allows hot air to circulate 360 degrees around each wing, crisping every surface. Don’t skip this crucial piece of equipment!
Crowding the pan: Touching wings create steam pockets and prevent proper browning. Each wing needs breathing room. If you’re making a large batch, use multiple baking sheets or bake in batches rather than cramming them together. Patience pays off with perfectly crispy wings.
Opening the oven door repeatedly: Every time you open the door, the oven temperature drops significantly, extending cooking time and potentially affecting crispiness. Resist the urge to peek constantly. Check only when necessary – once to flip, once to check doneness near the end.
Using too much baking powder: More is not better! Too much baking powder creates a bitter, chemical taste and can actually prevent proper browning. Stick to the recipe amount of 1½ tablespoons for 3 pounds of wings.
Saucing too early: If you sauce wings while they’re still extremely hot, the sauce can become too thin and runny, sliding right off. The brief 2-3 minute rest allows the wings to cool just enough that the sauce adheres beautifully without compromising crispiness.
Storage & Meal Prep
While wings are definitely best served fresh, you can store and reheat them successfully!
Refrigerator Storage: Store leftover wings (sauced or unsauced) in an airtight container in the refrigerator for up to 3-4 days. Place paper towels in the bottom of the container to absorb excess moisture. If possible, store sauced and unsauced wings separately – unsauced wings reheat crispier.
Reheating for Best Results: Never microwave wings if you want them crispy – they’ll turn rubbery and soggy. Instead, reheat in a 375°F oven on a wire rack over a baking sheet for 10-15 minutes until heated through and re-crisped. For even crispier results, broil for the final 2-3 minutes, watching closely. You can also reheat in an air fryer at 375°F for 5-8 minutes for excellent results.
Meal Prep Strategy: You can prep wings through the seasoning stage up to 24 hours ahead. Place seasoned wings on the rack, cover the entire setup with plastic wrap, and refrigerate. When ready to cook, remove plastic wrap and bake as directed, potentially adding 5-10 minutes to compensate for the cold start.
Keeping Wings Warm for Parties: If you need to keep wings warm for an extended period, place them in a 200°F oven. They’ll stay warm and maintain decent crispiness for up to 1 hour. Don’t go lower in temperature or they’ll dry out.
Make-Ahead & Freezer Notes
Wings are surprisingly freezer-friendly with the right technique!
Freezing Cooked Unsauced Wings (Best Method): Bake wings completely until crispy but don’t sauce them. Let cool completely, then freeze in a single layer on a baking sheet until solid. Transfer to freezer-safe bags, removing as much air as possible. Freeze for up to 3 months. To serve, reheat from frozen on a wire rack at 375°F for 20-25 minutes until hot and crispy, then sauce fresh buffalo sauce. This method gives you the closest to fresh-made quality.
Freezing Raw Wings: You can freeze raw wings (unseasoned) for up to 9 months. Thaw completely in the refrigerator overnight, pat dry thoroughly, then proceed with the recipe as normal. Never cook frozen raw wings – they must be thawed first or the timing will be completely off.
Freezing Sauced Wings: This works but isn’t ideal, as the sauce makes the coating less crispy when reheated. If you do this, freeze in airtight containers for up to 2 months. Reheat in a 375°F oven for 20-25 minutes. The flavor will still be good, but expect a less crispy texture.
Make-Ahead for Parties: The absolute best strategy for entertaining is to bake wings to completion 1-2 hours before guests arrive. Keep them at room temperature (they’ll stay safe for up to 2 hours). Just before serving, reheat at 400°F for 5-8 minutes to re-crisp, then sauce and serve. This gives you restaurant-fresh wings without the stress of last-minute cooking.
Sauce Storage: Buffalo sauce keeps in the refrigerator for up to 2 weeks in an airtight container. Make a big batch and have it ready to go whenever wing cravings strike!
Serving Suggestions
Crispy baked buffalo wings are incredibly versatile and perfect for so many occasions! Here’s how to serve them like a pro:
Classic Game Day Spread: Arrange wings on a large platter lined with paper for easy cleanup. Serve with small bowls of ranch and blue cheese dressing, celery sticks, carrot sticks, and plenty of napkins. Add a side of tortilla chips with salsa or nacho cheese dip, and you’ve got the ultimate game-watching feast.
Wing Bar Station: Set up a DIY wing bar with plain crispy wings and multiple sauce options (buffalo, BBQ, honey mustard, ranch, teriyaki) so guests can customize their wings. Include various dipping sauces and veggie sticks.
Buffalo Wing Dinner: Make wings the main course! Serve alongside loaded potato wedges or crispy french fries, a fresh garden salad or coleslaw, and cornbread or dinner rolls. Add a cold beer or iced tea, and you’ve got a satisfying meal.
Super Bowl Party Platter: Arrange wings on a large cutting board or platter with small bowls of dipping sauces in the center. Surround with celery and carrot sticks, pickle spears, and jalapeño slices. Add small labels for different spice levels if you’ve made multiple varieties.
Wing Salad: Slice cooled buffalo wings and serve over a bed of romaine lettuce with cherry tomatoes, shredded cheese, croutons, and ranch dressing for a protein-packed buffalo chicken salad.
Perfect Side Dishes:
- Classic French fries or sweet potato fries
- Loaded potato skins or potato wedges
- Creamy coleslaw (helps cool the heat)
- Macaroni and cheese
- Corn on the cob
- Onion rings
- Mozzarella sticks
- Jalapeño poppers
- Garden salad with ranch
- Cornbread or garlic bread
Dipping Sauce Options:
- Classic ranch dressing (the crowd favorite)
- Chunky blue cheese dressing (traditional pairing)
- Extra buffalo sauce for heat lovers
- Honey mustard for sweet-tangy contrast
- Garlic aioli
- Sriracha mayo
- BBQ sauce
Beverage Pairings: Serve with cold beer (lagers and pilsners work great), iced tea, lemonade, soda, or for wine lovers, a crisp Riesling or Sauvignon Blanc that can handle the heat.
Party Presentation: Use parchment paper liners in baskets for authentic wing joint presentation. Serve with wet wipes or damp towels since things get messy!
FAQs Section
Can I make these wings without a wire rack?
A wire rack is strongly recommended for the crispiest results, but if you absolutely don’t have one, you can bake directly on a greased baking sheet. Flip the wings every 15 minutes during the high-heat phase to prevent the bottoms from getting soggy. The results won’t be quite as crispy all around, but they’ll still be good.
What’s the difference between baking powder and baking soda?
Baking powder contains baking soda plus an acid and a stabilizer. Baking powder is milder and creates the right chemical reaction for crispy wings. Baking soda is much more alkaline and will make your wings taste terrible and metallic. They’re not interchangeable! Always use baking powder for this recipe.
Can I use frozen wings?
Yes, but they must be completely thawed first. Frozen wings contain too much ice and moisture, which will prevent crisping and throw off cooking times. Thaw wings completely in the refrigerator overnight, then pat them extremely dry before proceeding with the recipe.
Why do my wings taste slightly bitter?
This usually happens if you used too much baking powder or didn’t distribute it evenly. Measure carefully and toss thoroughly to coat all wings uniformly. Also ensure you’re using baking powder, not baking soda. Some people are more sensitive to the taste of aluminum-based baking powder, so try aluminum-free versions if you detect a metallic taste.
How do I make wings less spicy for kids?
Use more butter and less hot sauce in your buffalo sauce (try a 2:1 butter to hot sauce ratio). You can also make some wings with BBQ sauce, honey mustard, or even just butter and garlic powder instead of buffalo sauce. Keep unsauced wings available and let everyone sauce their own according to preference.
Can I make these in an air fryer?
Absolutely! Season wings the same way with baking powder and salt. Air fry at 360°F for 12 minutes, flip, then continue cooking at 380°F for another 10-12 minutes until crispy and golden. Work in batches to avoid overcrowding. Air fryer wings cook faster and can be even crispier than oven-baked!
What’s the best way to separate whole wings?
If buying whole wings, look for two joints that connect the drumette, flat, and tip. Using a sharp knife or kitchen shears, cut through the joints (not the bone – find the natural separation point where cartilage connects). The tip is often discarded or saved for stock, while the drumette and flat are the parts you’ll cook.
How can I tell when wings are done?
Wings are done when they’re deep golden brown, feel light and crispy when picked up, and reach an internal temperature of 165°F in the thickest part of the meat. The skin should be bubbly and crispy. If wings are browning too fast but not reaching temperature, reduce heat to 400°F for the final cooking time.
Conclusion
And there you have it – everything you need to know to make absolutely perfect crispy baked buffalo wings that’ll blow away anything from a restaurant or sports bar! These wings prove once and for all that you don’t need a deep fryer or fancy equipment to achieve that irresistible combination of crispy skin, tender meat, and tangy buffalo sauce that makes wings so legendary.
Whether you’re gearing up for the big game, throwing a casual party, or just treating yourself to some seriously good comfort food, these easy oven baked wings deliver every single time. The baking powder technique is truly magical, and once you master it, you’ll be making wings constantly. Plus, knowing you’re eating something significantly healthier than deep-fried wings while still getting all that crispy satisfaction? That’s a total win.
I absolutely love hearing from readers who’ve tried this recipe! Did your wings turn out as crispy as promised? Which sauce variation did you try? Did you host the ultimate game day party with these beauties? Drop a comment below and share your experience – I read every single one and love seeing your photos! If these wings changed your wing game like they did mine, please save this recipe to your Pinterest boards and share it with your fellow wing lovers. Let’s spread the crispy wing love far and wide!
Now grab those wings and get baking! Your taste buds (and your guests) are going to thank you. Game on! 🍗