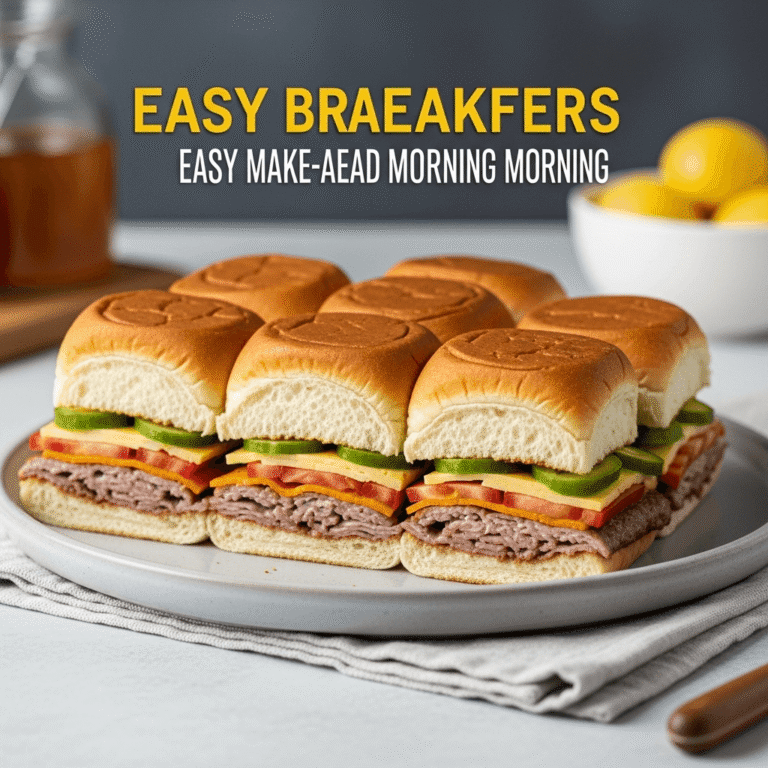
Breakfast Sliders: Easy Make-Ahead Morning Sandwiches

If you’re tired of the same old breakfast routine and want something that’ll make your family actually excited to get out of bed, these breakfast sliders are about to become your new morning hero! Imagine soft, fluffy Hawaiian rolls loaded with scrambled eggs, melty cheese, crispy bacon or sausage, all topped with a savory butter glaze and baked to golden perfection. These easy breakfast sliders are perfect for feeding a crowd, meal prepping for busy weekday mornings, or creating a special brunch spread that looks impressive but requires minimal effort. Trust me, once you try this batch-style breakfast sandwich method, you’ll never go back to making individual sandwiches again!
Introduction of Recipe
Breakfast sliders are mini breakfast sandwiches made by layering scrambled eggs, breakfast meat (bacon, sausage, or ham), and cheese between connected Hawaiian sweet rolls, then topping everything with a seasoned butter mixture before baking until warm and melty. This genius recipe transforms the traditional breakfast sandwich into a shareable, pull-apart format that’s perfect for feeding hungry families, brunch gatherings, or meal prep enthusiasts who want grab-and-go breakfast options all week long.
What makes these make-ahead breakfast sliders so incredibly popular is their convenience factor combined with crowd-pleasing flavors. Instead of standing at the stove flipping individual sandwiches while everyone waits impatiently, you simply assemble one pan, pop it in the oven, and serve a dozen perfect breakfast sandwiches all at once. The Hawaiian rolls provide a subtle sweetness that perfectly complements savory breakfast ingredients, while the butter topping adds richness and helps achieve that irresistible golden-brown finish.
Serve these breakfast slider sandwiches for weekend brunch with family, holiday morning gatherings, sleepover breakfasts, office breakfast meetings, tailgate parties, or as part of your weekly meal prep routine. They’re ideal for Christmas morning, Mother’s Day brunch, Easter breakfast, or any time you want a special morning meal without the stress. These sliders also travel beautifully to potlucks, making them perfect for church breakfasts or community events. Whether you’re feeding toddlers or teenagers, busy professionals or retired grandparents, everyone loves these satisfying little sandwiches!
History / Background
The concept of breakfast sliders is a relatively modern American innovation that emerged from the intersection of several beloved food traditions. To understand where breakfast sliders came from, we need to look at the evolution of both the slider format and the breakfast sandwich itself.
The slider, as we know it, traces back to early 20th-century America, but the breakfast sandwich has even deeper roots. The idea of putting breakfast foods between bread dates back centuries across various cultures, but the American breakfast sandwich as we know it really took off in the 1970s and 1980s with the rise of fast-food breakfast menus. McDonald’s introduction of the Egg McMuffin in 1971 revolutionized breakfast on-the-go, making breakfast sandwiches a mainstream American staple.
Meanwhile, Hawaiian sweet rolls—the foundation of modern sliders—have their own fascinating history. Despite their name, these rolls were actually created by Robert Taira, a Japanese-American baker who founded King’s Hawaiian in the 1950s. He adapted a Portuguese sweet bread recipe (pão doce) that Portuguese immigrants had brought to Hawaii in the 19th century. The slightly sweet, pillowy-soft texture became wildly popular, and by the 1970s, King’s Hawaiian products were being distributed across the mainland United States.
The genius combination of using connected Hawaiian rolls for batch-style sandwiches likely emerged in the 2000s through home cooks and food bloggers looking for efficient entertaining solutions. The “sliders” trend exploded on Pinterest and food blogs around 2010-2015, with creative home cooks applying the connected-roll, bake-all-at-once method to everything from burgers to Italian subs—and eventually, breakfast sandwiches.
Breakfast sliders represent quintessentially American innovation: taking convenience foods and comfort food traditions, then streamlining them into something even more practical and shareable. They embody our love for meal prep, batch cooking, and finding ways to make special occasions easier without sacrificing flavor or satisfaction. What makes this recipe special is how it solves a universal problem—feeding multiple people a hot breakfast at the same time—while creating something that actually tastes better than individual sandwiches because everything bakes together, melding flavors beautifully.
Why You’ll Love This Recipe
These easy breakfast sliders are the ultimate morning game-changer, offering restaurant-quality breakfast sandwiches with a fraction of the effort. The combination of fluffy scrambled eggs, savory breakfast meat, and melty cheese nestled in sweet rolls creates the perfect balance of flavors and textures that’ll have everyone reaching for seconds!
Here’s why breakfast sliders deserve a permanent spot in your morning routine:
- Incredibly Time-Efficient: Make 12 breakfast sandwiches in the same time it takes to make 2 individual ones
- Perfect for Meal Prep: Prepare on Sunday, enjoy all week with easy reheating
- Feeds a Crowd: One pan makes 12 sliders—ideal for family gatherings or brunch parties
- Customizable: Endless variations to suit different tastes and dietary preferences
- Budget-Friendly: Uses affordable, everyday breakfast ingredients
- Kid-Approved: Children love the mini sandwich format and slightly sweet rolls
- Make-Ahead Friendly: Assemble the night before and bake fresh in the morning
- Portable: Perfect for on-the-go mornings, lunchboxes, or road trip snacks
- Impressive Presentation: Looks fancy enough for company but easy enough for everyday
- No Soggy Sandwiches: The baking method keeps everything perfectly textured
- Freezer-Friendly: Make big batches and freeze for future busy mornings
- Minimal Cleanup: Everything happens in just a few dishes
Ingredient Notes
Understanding your ingredients helps you create the best possible breakfast sliders and adapt them to your preferences:
Hawaiian Sweet Rolls: These soft, slightly sweet rolls are essential for authentic slider texture and flavor. The 12-count package of King’s Hawaiian Original Hawaiian Sweet Rolls fits perfectly in a 9×13 baking dish and provides that signature sweet-savory contrast. Substitution: Regular slider buns or potato rolls work, but you’ll lose some of that special sweetness. Brioche rolls are an excellent alternative if you want rich, buttery flavor.
Eggs: The foundation of your breakfast filling. Use large eggs for consistent results. You’ll scramble them before assembly, so they cook evenly and distribute well across all the sliders. Tip: Slightly undercook the scrambled eggs since they’ll continue cooking in the oven.
Breakfast Meat: Traditional options include crispy bacon, breakfast sausage patties or crumbles, or deli ham. Each brings different flavors—bacon adds smokiness, sausage provides hearty spice, and ham offers milder, leaner protein. Substitution: Turkey bacon, Canadian bacon, vegetarian sausage, or even leftover pulled pork all work wonderfully.
Cheese: American cheese is classic for its superior melting properties and creates that diner-style breakfast sandwich experience. Cheddar adds sharper flavor while still melting beautifully. Substitution: Pepper jack (for spice), Swiss (for nuttiness), Colby Jack (for mild creaminess), or Monterey Jack all melt well and taste delicious.
Butter: Forms the base of that incredible savory topping that makes the tops golden and flavorful. Real butter is essential—don’t substitute margarine here. Salted or unsalted both work; adjust added salt accordingly.
Seasonings: Garlic powder, onion powder, and optional Everything Bagel seasoning or poppy seeds add that signature savory flavor to the butter topping. These aromatics elevate the sliders from simple to spectacular.
Optional Add-Ins: Sautéed vegetables like bell peppers, onions, or mushrooms add nutrition and flavor. Hot sauce or sriracha in the eggs kicks up the heat. Fresh herbs like chives or parsley add color and freshness.
Equipment Needed
You’ll need just a few basic kitchen tools to make perfect breakfast sliders:
- 9×13-inch Baking Dish (glass, ceramic, or metal)
- Large Non-Stick Skillet (for cooking eggs and meat)
- Sharp Serrated Knife (for slicing rolls and cutting finished sliders)
- Cutting Board
- Whisk (for beating eggs)
- Spatula (for scrambling eggs)
- Small Saucepan or Microwave-Safe Bowl (for melting butter mixture)
- Pastry Brush (for applying butter topping)
- Measuring Cups and Spoons
- Mixing Bowls
- Aluminum Foil (for covering during baking)
- Optional: Parchment Paper (for easier cleanup)
Breakfast Sliders
These easy breakfast sliders feature fluffy scrambled eggs, crispy bacon, and melted cheese on Hawaiian sweet rolls, topped with savory garlic butter and baked until golden. Perfect for meal prep, feeding a crowd, or holiday morning brunches!
- Total Time: 40 minutes
- Yield: 12 sliders 1x
Ingredients
For the Sliders:
- 1 package (12 count) Hawaiian sweet rolls
- 8 large eggs
- ¼ cup whole milk or half-and-half
- Salt and black pepper to taste
- 1 tablespoon butter (for scrambling eggs)
- 12 slices cooked bacon (or 1 pound cooked breakfast sausage)
- 8-10 slices American or cheddar cheese
- Optional: 2 tablespoons diced bell peppers or green onions
For the Butter Topping:
- ½ cup (1 stick) unsalted butter
- 1 teaspoon garlic powder
- ½ teaspoon onion powder
- 1 tablespoon Everything Bagel seasoning (or 2 teaspoons poppy seeds + ½ teaspoon sesame seeds)
- Optional: 1 tablespoon fresh chopped parsley
Instructions
- Preheat and Prep: Preheat your oven to 350°F (175°C). Spray a 9×13-inch baking dish with non-stick cooking spray or line with parchment paper for easy cleanup.
- Cook the Bacon: If not already cooked, cook your bacon in a large skillet over medium heat until crispy, about 6-8 minutes, flipping halfway through. Transfer to a paper towel-lined plate to drain. If using sausage, cook according to package directions, crumble if needed, and drain excess grease. Set aside.
- Scramble the Eggs: In a medium bowl, whisk together the eggs, milk, salt, and pepper until well combined and slightly frothy. If adding vegetables like bell peppers, sauté them first in the skillet for 2-3 minutes until softened. Heat 1 tablespoon butter in a large non-stick skillet over medium-low heat. Pour in the egg mixture and let it sit for about 30 seconds, then gently push the eggs from the edges toward the center with a spatula, creating soft curds. Continue cooking and folding gently until the eggs are just set but still slightly wet (they’ll continue cooking in the oven). Remove from heat immediately to prevent overcooking. The entire process should take about 3-4 minutes.
- Slice the Rolls: Without separating the individual rolls, use a large serrated knife to carefully slice the entire block of Hawaiian rolls horizontally, creating a complete top half and bottom half. Keep them connected—this is crucial for the pull-apart slider experience! Place the bottom half in your prepared baking dish.
- Layer the Fillings: Evenly distribute the scrambled eggs across the bottom rolls, spreading them to cover the entire surface. Layer the cooked bacon strips (you may need to break them into pieces to fit evenly) or crumbled sausage over the eggs. Lay the cheese slices across the top, overlapping slightly and tearing pieces as needed to ensure complete coverage with no gaps.
- Add the Top Rolls: Carefully place the top half of the rolls over the layered fillings, creating one big “sandwich slab.” Press down very gently to compact everything slightly, but don’t squish—you want to maintain the fluffy texture.
- Make the Butter Topping: In a small saucepan over low heat (or in a microwave-safe bowl), melt the butter completely. Remove from heat and stir in the garlic powder, onion powder, and Everything Bagel seasoning (or poppy/sesame seeds). Mix well to combine. The mixture should be fragrant and well-incorporated.
- Brush the Topping: Using a pastry brush, generously brush the entire top surface of the rolls with the seasoned butter mixture. Make sure to get into all the crevices between the rolls and brush the edges too—don’t be shy with the butter! It creates that golden, flavorful crust. Sprinkle with fresh parsley if using.
- Cover and Bake: Cover the baking dish tightly with aluminum foil. This is important—the foil traps steam, which melts the cheese perfectly and keeps the sliders moist. Bake for 15 minutes covered.
- Uncover and Finish: Remove the foil carefully (watch for hot steam!) and continue baking for an additional 5-7 minutes, or until the tops are golden brown and the cheese is fully melted. The tops should have a beautiful sheen and slight crispness while the interior remains soft and gooey.
- Rest and Serve: Remove from the oven and let rest for 3-5 minutes. This resting period allows the cheese to set slightly and makes cutting much easier. Using a sharp serrated knife, cut along the lines between the rolls to separate into individual sliders. Serve immediately while hot and melty, or wrap individually for meal prep!
Notes
- Egg Cooking: Slightly undercook the scrambled eggs—they should be just barely set and still look a bit wet. They’ll finish cooking in the oven. Overcooked eggs become rubbery when baked.
- Keep Rolls Connected: Never separate the individual rolls before baking. The connected format is what makes these “sliders” and ensures even heating.
- Cheese Coverage: Make sure every bit of the filling is covered with cheese to prevent dry spots. Overlap slices and tear pieces as needed for complete coverage.
- Butter Application: Use all the butter mixture! It seems like a lot, but it’s what creates that restaurant-quality golden top and prevents dry rolls.
- Make-Ahead: Assemble completely (before adding butter) up to 24 hours ahead. Cover and refrigerate. Brush with freshly made butter mixture just before baking, adding 2-3 extra minutes to covered baking time.
- Freezing: These freeze beautifully! See make-ahead section for detailed freezing and reheating instructions.
- Prep Time: 20 minutes
- Cook Time: 20 minutes
- Category: Breakfast
- Method: Baking
- Cuisine: American
- Diet: Gluten Free
Nutrition
- Serving Size: 1 slider
- Calories: 295
- Sugar: 5g
- Sodium: 640mg
- Fat: 18g
- Saturated Fat: 9g
- Unsaturated Fat: 8g
- Trans Fat: 0g
- Carbohydrates: 20g
- Fiber: 1g
- Protein: 14g
- Cholesterol: 165mg
Tips & Variations
The versatility of breakfast sliders means endless customization possibilities to match your preferences:
Meat Variations:
- Sausage Lovers: Use 1 pound breakfast sausage (regular, spicy, or maple) instead of bacon
- Ham & Cheese: Classic deli ham with Swiss cheese for a traditional combination
- Turkey Bacon: Lighter option that still provides smoky flavor
- Steak & Eggs: Thinly sliced leftover steak with caramelized onions
- Pulled Pork: Leftover BBQ pulled pork makes amazing breakfast sliders
- Vegetarian: Skip meat and load up with sautéed mushrooms, spinach, and peppers
Cheese Options:
- Mexican Style: Pepper jack cheese with salsa and jalapeños
- Southern Comfort: Sharp cheddar with country ham
- Gourmet: Gruyere or fontina for sophisticated flavor
- Classic Diner: American cheese for that nostalgic breakfast sandwich taste
- Extra Cheesy: Use two types of cheese for more complex flavor
Flavor Variations:
- Southwest Breakfast Sliders: Add taco seasoning to eggs, use pepper jack cheese, top with salsa
- Italian Breakfast: Use mozzarella and provolone, add Italian sausage and marinara
- Everything Breakfast: Use Everything Bagel seasoning in the butter and add cream cheese
- Denver Style: Add diced ham, bell peppers, and onions to the eggs
- California Style: Add avocado slices and fresh tomato after baking
Dietary Adaptations:
- Lower Carb: Use low-carb rolls or make “roll-ups” with eggs as the wrapper
- Gluten-Free: Substitute gluten-free slider buns (assemble individually)
- Dairy-Free: Use vegan cheese and dairy-free butter alternative
- High Protein: Add extra eggs and use double the meat
- Vegetable-Packed: Mix in diced bell peppers, spinach, mushrooms, and tomatoes
Pro Chef Tips
Elevate your breakfast sliders from good to extraordinary with these professional techniques:
1. The Soft Scramble Secret: The key to perfect eggs in breakfast sliders is cooking them to just 80% done—they should still look slightly wet and glossy. Remove them from heat while they’re still soft curds. They’ll finish cooking in the oven, resulting in creamy, tender eggs rather than rubbery ones. Add a tablespoon of cream cheese or sour cream to your eggs for extra creaminess.
2. Temperature Control: Let your scrambled eggs cool for 5 minutes before assembling the sliders. If you add piping hot eggs directly to the rolls, they create steam that makes the bottom rolls soggy. Room temperature or slightly warm eggs are ideal for assembly.
3. Strategic Layering Order: Always layer in this specific order: rolls, eggs, meat, cheese, top rolls. This arrangement ensures the cheese melts down into the eggs and meat, binding everything together. The cheese also acts as a protective barrier between the top rolls and fillings, preventing sogginess.
4. The Bacon Trick: Pat your cooked bacon with paper towels to remove excess grease before adding to sliders. Too much grease can make the bottom rolls soggy and the filling slide around. For even better results, bake your bacon in the oven at 400°F for 15-18 minutes—it comes out perfectly flat and crispy with less grease.
5. Butter Infusion Time: After making your seasoned butter mixture, let it sit for 5 minutes before brushing. This allows the garlic and onion powder to hydrate and bloom in the butter, creating deeper, more developed flavors that penetrate the rolls.
6. The Double-Brush Method: Brush half the butter mixture on before covering with foil, then brush the remaining half on during the last 2-3 minutes of uncovered baking. This creates layers of flavor and ensures maximum golden-brown crispiness on top while keeping the interior moist.
7. Strategic Scoring: Before brushing with butter, lightly score the tops of the rolls along the separation lines using a sharp knife. This creates natural breaking points and allows the butter to seep slightly between rolls, flavoring every bite and making serving easier without squishing.
Common Mistakes to Avoid
Even though breakfast sliders are straightforward, watch out for these common pitfalls:
1. Overcooking the Scrambled Eggs: This is the most common mistake! Eggs continue cooking in the oven, so if you scramble them until fully cooked before assembly, they’ll be dry, rubbery, and overcooked in the final product. Always slightly undercook your eggs—they should still look wet and creamy when you take them off the heat. Remember: you’re not eating them immediately, they’re going into a hot oven!
2. Skipping the Foil Cover: Baking breakfast sliders uncovered the entire time causes the tops to brown too quickly while the cheese remains unmelted and the interior stays cold. The foil-covered phase creates a steamy environment that melts the cheese perfectly and warms everything through evenly. Always cover for the first portion of baking!
3. Using Cold Ingredients: Assembling sliders with ingredients straight from the refrigerator leads to uneven heating—the center may still be cold when the tops are golden brown. Let your cooked eggs, meat, and cheese sit at room temperature for 10-15 minutes before assembly, or add a few extra minutes to your covered baking time if working with cold ingredients.
4. Not Drying the Bacon: Excess bacon grease creates soggy bottom rolls and can make the filling slide around when you cut the sliders. Always drain bacon thoroughly on paper towels and pat away excess grease. If using sausage, drain it well and consider patting with paper towels too.
5. Separating the Rolls Too Early: If you separate the individual rolls before baking, you lose the magic of sliders! They won’t steam together properly, the edges dry out, and you lose that pull-apart experience everyone loves. Keep them connected throughout the entire assembly and baking process—only separate after they’re baked and have rested.
Storage & Meal Prep
Breakfast sliders are meal prep champions, making busy mornings infinitely easier:
Refrigerator Storage: Store leftover breakfast sliders in an airtight container or wrap individually in plastic wrap or foil. Refrigerate for up to 4 days. The rolls may soften slightly as they absorb moisture from the eggs, but they’ll still taste delicious. Individual wrapping makes grab-and-go mornings effortless.
Reheating from Refrigerator: For best results, reheat individual sliders in the microwave for 30-45 seconds on high, or wrap in foil and reheat in a 300°F oven for 10-12 minutes. For multiple sliders, return them to a baking dish, cover with foil, and reheat at 325°F for 15-20 minutes. An air fryer works wonderfully—reheat at 320°F for 4-6 minutes for crispy tops and warm centers.
Meal Prep Strategy: These breakfast sliders are perfect for Sunday meal prep! Make a full batch (or double batch), let cool completely, then wrap individual sliders in plastic wrap or parchment paper, place in a large freezer bag or container, and refrigerate. Each morning, grab one or two, microwave briefly, and you have a hot, satisfying breakfast in under a minute.
Room Temperature: If serving at a brunch buffet, breakfast sliders hold well at room temperature for up to 2 hours. After that, refrigerate any leftovers for food safety.
Preventing Sogginess: To minimize moisture absorption during storage, place a paper towel in the storage container—it absorbs excess condensation. You can also store the sliders uncovered in the refrigerator for the first 30 minutes after baking to allow steam to escape, then cover and continue refrigerating.
Make-Ahead & Freezer Notes
These make-ahead breakfast sliders are perfect for busy families and advance meal planning:
Night-Before Assembly: The absolute best make-ahead method is assembling the sliders completely (except for the butter topping) the night before. Layer everything in the baking dish, cover tightly with plastic wrap, and refrigerate overnight. In the morning, let the dish sit at room temperature for 15-20 minutes while your oven preheats. Make the butter mixture fresh, brush it on, and bake as directed, adding 2-3 extra minutes to the covered baking time to account for starting cold.
Freezing Unbaked Sliders: For longer-term storage, you can freeze assembled but unbaked breakfast sliders. Assemble completely (without the butter topping), wrap the entire pan tightly in plastic wrap, then cover with aluminum foil. Freeze for up to 2 months. To bake from frozen: unwrap, make fresh butter mixture, brush on top, cover with foil, and bake at 350°F for 25 minutes covered, then 5-7 minutes uncovered. Or thaw overnight in the refrigerator and bake as directed.
Freezing Baked Sliders: The most convenient method for grab-and-go breakfasts! Bake the sliders completely, let cool to room temperature, then wrap individual sliders tightly in plastic wrap. Place wrapped sliders in a large freezer bag, remove as much air as possible, and freeze for up to 3 months. Label with the date and contents.
Reheating Frozen Baked Sliders: Remove from freezer and unwrap. Microwave on high for 1-2 minutes (starting at 1 minute, then checking), flipping halfway through. Or wrap in foil and reheat in a 325°F oven for 20-25 minutes. For crispier tops, unwrap for the last 5 minutes of oven reheating. The microwave is faster but the oven yields better texture.
Batch Cooking: Consider making a double or triple batch when you’re already going through the effort. Freeze the extras in meal prep portions, and you’ll have quick breakfasts ready for weeks! Label freezer bags with contents and date so you know what you have available.
Serving Suggestions
Breakfast sliders pair beautifully with numerous sides and beverages to create a complete morning meal:
Classic Breakfast Sides:
- Fresh Fruit Salad: Colorful mix of melon, berries, and grapes provides refreshing contrast
- Hash Browns or Tater Tots: Crispy potatoes are the perfect breakfast companion
- Fresh Fruit Smoothies: Blend up berry, tropical, or green smoothies for nutrition
- Yogurt Parfaits: Layer Greek yogurt with granola and berries for lighter balance
- Breakfast Potatoes: Roasted or skillet potatoes with peppers and onions
Beverage Pairings:
- Coffee Bar: Set up with regular and decaf coffee, various creamers, and sweeteners
- Fresh Squeezed Orange Juice: Nothing beats fresh citrus in the morning
- Hot Chocolate: Perfect for winter brunch gatherings or kids’ parties
- Mimosas or Bellinis: For adult brunch celebrations
- Iced Tea or Lemonade: Refreshing options for warmer weather brunches
Brunch Spread Ideas: Create an impressive spread by serving breakfast sliders alongside: fruit kabobs, mini muffins or croissants, bacon strips (for those who want extra), avocado toast station, yogurt parfait bar, and fresh pastries. This creates a beautiful buffet perfect for celebrations!
Dipping Sauces: While delicious on their own, some people love dipping their breakfast sliders in: maple syrup (the sweet-savory combo is amazing!), hot sauce or sriracha, ketchup (classic choice), hollandaise sauce (for eggs Benedict vibes), or salsa and sour cream (for Southwest versions).
Holiday Breakfast: Breakfast sliders are perfect for holiday mornings like Christmas, Easter, Thanksgiving, or Mother’s Day brunch. Serve with champagne, fresh fruit platters, and pastries for a special celebration meal that doesn’t stress the cook!
FAQs Section
Q: Can I use regular sandwich rolls instead of Hawaiian rolls?
A: Yes, though Hawaiian rolls are highly recommended for their signature sweetness and soft texture. Regular slider buns, potato rolls, or brioche rolls all work as substitutions. Keep in mind that other rolls typically don’t come in the connected format, so you’ll need to arrange them close together in the pan and they won’t have that perfect pull-apart quality. The slight sweetness of Hawaiian rolls creates a unique sweet-savory balance that’s hard to replicate, but the sliders will still be delicious with alternatives!
Q: Do I have to use bacon? What other breakfast meats work?
A: Not at all! While bacon is traditional and delicious, breakfast sliders are incredibly versatile. Breakfast sausage (patties or crumbles), ham, Canadian bacon, turkey bacon, chorizo, or even vegetarian sausage all work beautifully. You can also skip meat entirely and make vegetarian breakfast sliders with extra vegetables like sautéed mushrooms, spinach, bell peppers, and tomatoes. The key is using approximately ¾ to 1 pound of whatever protein you choose.
Q: Can I make these breakfast sliders without eggs?
A: While eggs are traditional, you can absolutely customize! Some alternatives include: using just cheese and meat (essentially breakfast grilled cheese sliders), adding a layer of breakfast potatoes instead of eggs, using tofu scramble for a vegan option, or creating a sweet version with Nutella and sliced bananas. The slider format works with almost any filling combination you can imagine!
Q: Why are my breakfast sliders soggy on the bottom?
A: Soggy bottom rolls usually result from one of three issues: (1) The scrambled eggs were too wet or not drained properly—always slightly undercook eggs and let them cool briefly before assembly. (2) Too much bacon grease wasn’t drained—always pat bacon very dry with paper towels. (3) Ingredients were too hot when assembled—let cooked components cool for 5-10 minutes before layering. Using parchment paper in the bottom of your pan can also help absorb excess moisture.
Q: How far in advance can I assemble breakfast sliders?
A: For best results, assemble breakfast sliders up to 24 hours before baking. Prepare all components, layer everything in the baking dish (except the butter topping), cover tightly with plastic wrap, and refrigerate. Make the butter mixture fresh just before baking and brush it on right before going into the oven. Add 2-3 extra minutes to the covered baking time since you’re starting with cold sliders. Don’t assemble more than 24 hours ahead as the bread can become too soggy.
Q: Can I double this recipe?
A: Absolutely! This recipe doubles or even triples easily. You’ll need additional 9×13 baking dishes or large baking sheets. Double all ingredients proportionally, including the butter topping. You can bake multiple pans simultaneously if your oven has space—just rotate their positions halfway through baking for even browning. Alternatively, bake in batches. This is perfect for large family gatherings, holiday mornings, or serious meal prep sessions!
Q: What’s the best way to reheat frozen breakfast sliders?
A: For frozen baked breakfast sliders, you have several options depending on your time and texture preferences. Microwave method (fastest): Unwrap and microwave on high for 1-2 minutes, checking at 1 minute and adding time as needed. Oven method (best texture): Wrap in foil and bake at 325°F for 20-25 minutes, unwrapping for the last 5 minutes for crispier tops. Air fryer method (crispy tops): Reheat at 320°F for 6-8 minutes from frozen. All methods work well—choose based on your morning schedule!
Q: Can I add vegetables to my breakfast sliders?
A: Yes! Adding vegetables boosts nutrition and flavor. Sauté diced bell peppers, onions, mushrooms, or spinach in a little butter until softened, then mix them into your scrambled eggs before assembly. Pat vegetables dry with paper towels to remove excess moisture. You can also add sliced tomatoes or avocado after baking for fresh crunch. Just be mindful that vegetables add moisture, so ensure they’re well-drained to prevent soggy sliders.
Conclusion
There you have it—everything you need to know to make absolutely perfect breakfast sliders that will revolutionize your morning routine! These easy breakfast sliders prove that feeding a crowd (or meal prepping for yourself) doesn’t have to be complicated or time-consuming. With simple ingredients, straightforward assembly, and foolproof baking instructions, you can create restaurant-quality breakfast sandwiches that’ll have everyone asking for seconds—and the recipe!
What makes this recipe truly special is its incredible versatility and convenience factor. Whether you’re hosting a holiday brunch, preparing grab-and-go breakfasts for busy weekday mornings, feeding hungry teenagers, or creating a special weekend treat for your family, these make-ahead breakfast sliders deliver every single time. The ability to customize them with your favorite ingredients means you’ll never get bored, and the make-ahead and freezer-friendly nature makes them practical for real life.
I love how breakfast sliders bring people together around the breakfast table without keeping the cook chained to the stove. You get to actually enjoy the morning meal with your family instead of playing short-order cook while everyone else eats. Plus, there’s something wonderfully satisfying about pulling apart warm, melty breakfast sliders—it feels special even on ordinary days.
The meal prep potential alone makes this recipe worth mastering. Imagine opening your freezer on a chaotic Tuesday morning and finding individually wrapped, homemade breakfast sliders ready to heat and eat in under two minutes. That’s the kind of advance planning that makes busy weeks manageable and mornings less stressful!
Ready to transform your breakfast routine? Make a batch of these breakfast sliders this weekend and experience the magic for yourself! I’d love to hear about your creations—what fillings did you choose? Did you go classic with bacon and eggs, or get creative with different flavors? Leave a comment below sharing your experience and any variations you tried! Don’t forget to PIN this recipe to your breakfast or meal prep boards so you can find it easily whenever you need it. And please share this recipe with your friends and family who are always asking for easy breakfast ideas—they’ll thank you every morning!