Crispy Halloumi Fries (Restaurant-Style in 20 Minutes!)

Get ready to discover your new favorite appetizer obsession! These crispy halloumi fries are about to change your snacking game forever. Imagine golden, crunchy exteriors giving way to warm, squeaky, salty cheese that’s unlike anything you’ve ever tasted. If you’ve never tried halloumi before, you’re in for a treat – this magical Cypriot cheese doesn’t melt like regular cheese, which means you can fry, grill, or bake it into the most incredible crispy fries that rival any restaurant appetizer. These easy halloumi fries are perfect for parties, game day snacks, or whenever you want something special that’s still surprisingly simple to make. Trust me, once you make these crispy halloumi cheese sticks, you’ll be finding excuses to serve them at every gathering!
Introduction to Halloumi Fries
Halloumi fries are thick-cut strips of halloumi cheese that are coated in a light breading and then fried, baked, or air-fried until gloriously golden and crispy on the outside while remaining delightfully soft and squeaky on the inside. Unlike mozzarella sticks that melt into gooey puddles, halloumi has an incredibly high melting point, which means it holds its shape beautifully during cooking. The result is a unique texture that’s both crispy and chewy – something you absolutely have to experience to understand! These golden halloumi fries have become wildly popular in restaurants, cafes, and pubs across the UK, Australia, and increasingly in the United States as more people discover this incredible cheese. They’re perfect as an appetizer before dinner, a show-stopping party snack, a side dish for Mediterranean meals, or even as a vegetarian main course when paired with salads. Serve them with a drizzle of honey, a squeeze of lemon, or your favorite dipping sauce, and watch them disappear faster than you can say “pass the halloumi!”
History & Background of Halloumi Fries
To understand halloumi fries, we first need to talk about halloumi cheese itself – a culinary treasure with ancient roots. Halloumi originated in Cyprus, where it has been made for centuries, possibly dating back to the Medieval Byzantine period. This semi-hard, unripened cheese is traditionally made from a mixture of goat’s and sheep’s milk, though modern versions often include cow’s milk as well.
What makes halloumi truly special is its unique preparation method. The curds are heated in whey, which gives the cheese its distinctive layered texture and high melting point. After forming, the cheese is folded with mint leaves (traditionally) and preserved in brine, which contributes to its salty flavor and long shelf life. This preservation method meant that Cypriot shepherds could store the cheese for months, making it an invaluable protein source.
For centuries, halloumi was enjoyed grilled or fried as slabs in Cypriot cuisine, often served for breakfast or as part of mezze spreads. The cheese remained relatively unknown outside of Cyprus and the Middle East until the late 20th century, when it began gaining popularity in the UK through Cypriot immigrant communities.
The evolution from traditional fried halloumi slabs to the “fries” format is a more recent innovation, likely emerging in the early 2000s as restaurants sought creative ways to present this cheese to Western audiences already familiar with French fries and mozzarella sticks. By cutting the cheese into finger-sized pieces and adding a crispy coating, chefs created an irresistible finger food that bridges Mediterranean tradition with modern casual dining.
The trend exploded in the 2010s, with halloumi fries appearing on menus across the UK, Australia, and trendy restaurants worldwide. Social media played a huge role in their popularity – the photogenic golden sticks with their unique squeaky texture became Instagram favorites. Today, you’ll find halloumi fries everywhere from upscale gastropubs to casual cafes, and now, thanks to how easy they are to make, in home kitchens across America!
Why You’ll Love This Halloumi Fries Recipe
These aren’t just another cheese appetizer – they’re a completely unique experience that will have everyone asking what they just ate and begging for the recipe! What makes this recipe absolutely brilliant is how it transforms a simple block of cheese into something that tastes like it came from an upscale restaurant, all while being shockingly easy to prepare at home.
Here’s why these halloumi fries are absolutely irresistible:
- Incredibly Unique – Nothing else tastes quite like halloumi with its squeaky, chewy texture
- Super Quick – From start to finish in just 20 minutes
- Naturally Vegetarian – Perfect for vegetarian guests or meatless meals
- Won’t Melt Away – Unlike mozzarella sticks, these hold their shape beautifully
- Crowd-Pleasing – Even cheese skeptics become instant converts
- Versatile Cooking Methods – Fry, bake, or air-fry with great results
- Restaurant-Quality at Home – Tastes like a $15 appetizer you made for $5
- Great for Meal Prep – Prep ahead and cook when ready
- Customizable – Works with countless coatings and dipping sauces
- Impressive Presentation – Always looks amazing on the plate
- Protein-Packed Snack – Much more satisfying than regular fries
- Gluten-Free Friendly – Easy to adapt with GF flour and breadcrumbs
- No Special Skills Required – If you can coat and fry, you’ve got this
Ingredient Notes
Let’s break down what you need to create these incredible crispy halloumi cheese fries:
Halloumi Cheese – This is your star ingredient! Look for halloumi in the specialty cheese section of your grocery store, often near feta or in the international foods aisle. A standard block weighs about 8-9 ounces and will make approximately 12-16 fries depending on how thick you cut them. When shopping, you might see traditional Cypriot halloumi (usually made with sheep and goat milk) or more common versions made with cow’s milk – both work perfectly. The cheese should feel firm and springy, not soft. It comes packed in brine, so you’ll need to drain and pat it dry before using. Don’t substitute with other cheeses – halloumi’s unique high melting point is what makes this recipe work! Some brands to look for include Krinos, Nablus, or Zuercher.
All-Purpose Flour – The flour creates the first layer of coating that helps the egg adhere to the cheese. It also contributes to that crispy exterior texture. All-purpose wheat flour works great, but you can easily substitute with gluten-free all-purpose flour if needed. Some people prefer seasoned flour (add garlic powder, paprika, or oregano) for extra flavor right from the start.
Eggs – Beaten eggs act as the “glue” that holds your breadcrumb coating to the halloumi. They create a barrier that helps the breading stay crispy. You’ll need about 2 eggs for a standard block of halloumi. If you’re looking for a vegan alternative, you can use aquafaba (chickpea liquid) or a flax egg, though the coating won’t be quite as sturdy.
Breadcrumbs – This is where you get that golden, crunchy exterior! Panko breadcrumbs are my top choice because their larger, flakier structure creates an incredibly crispy coating with lots of texture. Regular fine breadcrumbs work too but produce a denser coating. For gluten-free halloumi fries, use certified GF breadcrumbs. You can also use crushed cornflakes for extra crunch, or even crushed nuts for a gourmet twist. Season your breadcrumbs with salt, pepper, dried oregano, or za’atar for Mediterranean flair.
Oil for Frying – If you’re pan-frying or deep-frying, choose an oil with a high smoke point like vegetable oil, canola oil, sunflower oil, or peanut oil. You’ll need enough to come about ½ inch up the side of your pan for shallow frying, or 2-3 inches for deep frying. Olive oil works but has a lower smoke point, so watch your temperature carefully.
Seasonings (Optional) – While halloumi is naturally salty, you can enhance the coating with dried oregano, garlic powder, smoked paprika, black pepper, or za’atar. A pinch of cayenne adds a nice kick!
Equipment Needed
The beauty of this recipe is its simplicity – you won’t need any fancy equipment:
- Sharp knife – For cutting the halloumi into even strips
- Cutting board – Preferably one you use for cheese and dairy
- Three shallow bowls or plates – For your breading station (flour, egg, breadcrumbs)
- Fork or whisk – For beating the eggs
- Large skillet or frying pan – If pan-frying (cast iron works beautifully)
- Baking sheet – If baking in the oven
- Parchment paper – To prevent sticking when baking
- Air fryer basket (optional) – If using an air fryer method
- Paper towels – For draining excess oil and patting cheese dry
- Tongs or slotted spatula – For flipping fries safely
- Wire cooling rack – Helps keep fries crispy by allowing air circulation
- Thermometer (optional) – For monitoring oil temperature if deep frying
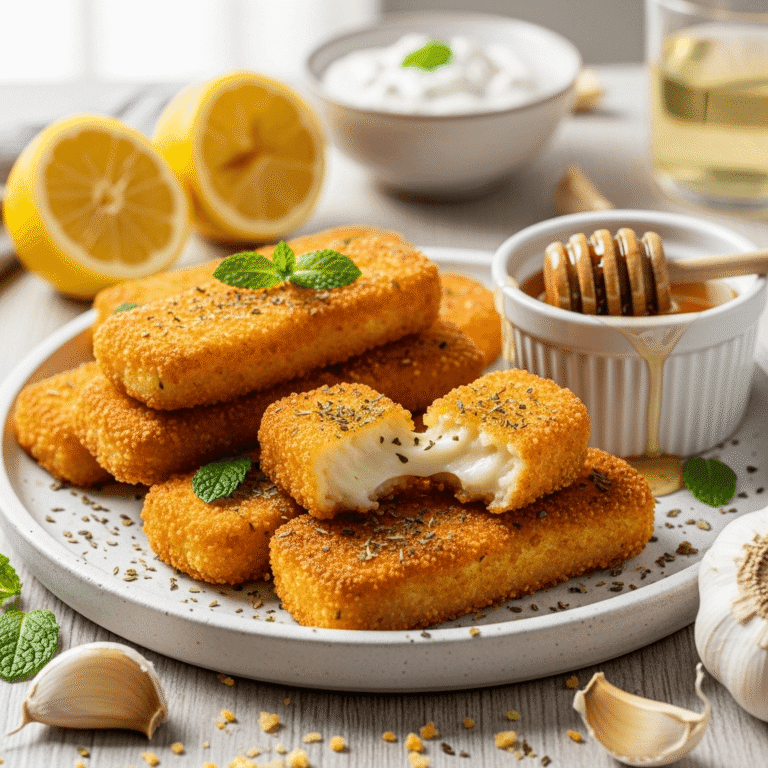
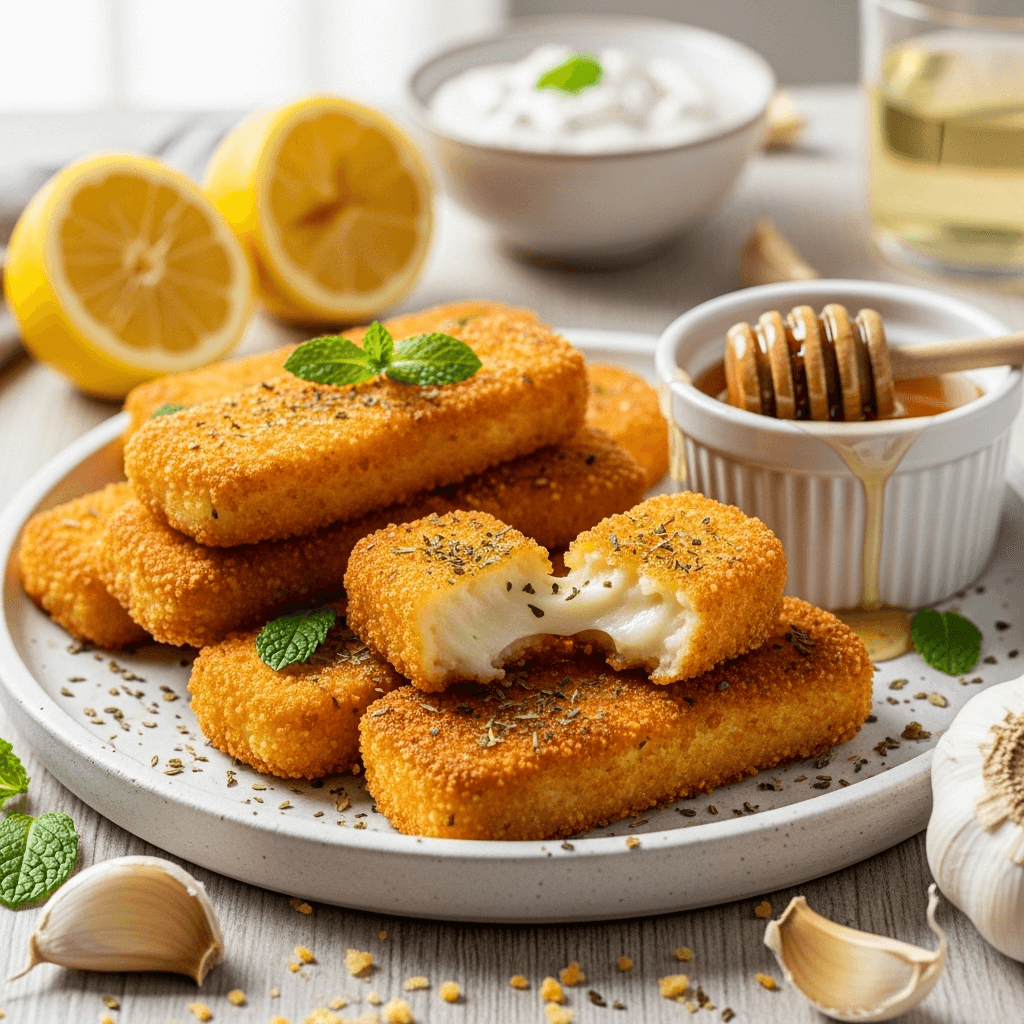
Halloumi Fries
These crispy halloumi fries are golden, crunchy on the outside and warm, squeaky, and delicious on the inside. This easy halloumi fries recipe comes together in just 20 minutes and tastes like restaurant-quality appetizers! Perfect for parties, game day, or whenever you want an impressive vegetarian snack.
- Total Time: 20 minutes
- Yield: 4 servings (12-16 fries) 1x
Ingredients
- 8-9 oz block halloumi cheese
- ½ cup all-purpose flour (or gluten-free flour)
- 2 large eggs
- 1 cup panko breadcrumbs (or regular breadcrumbs)
- 1 teaspoon dried oregano (optional)
- ½ teaspoon garlic powder (optional)
- ¼ teaspoon black pepper
- Vegetable oil for frying (about 1-2 cups, or cooking spray for baking/air frying)
- Lemon wedges for serving
- Honey or your favorite dipping sauce
Instructions
- Prepare the Halloumi: Remove the halloumi from its package and drain the brine. Pat the cheese completely dry with paper towels – this is important for the coating to stick properly. Cut the block lengthwise into ½-inch thick slices, then cut each slice into sticks resembling French fries (about ½ inch thick and 3-4 inches long). You should get 12-16 fries depending on your block size.
- Set Up Your Breading Station: Arrange three shallow bowls in a row. In the first bowl, place the flour. In the second bowl, beat the eggs until well combined. In the third bowl, mix the breadcrumbs with oregano, garlic powder, and black pepper.
- Coat the Fries: Working with one halloumi stick at a time, first dredge it in flour, shaking off the excess. Then dip it into the beaten egg, letting any excess drip off. Finally, coat it thoroughly in the seasoned breadcrumbs, pressing gently to help them adhere. Place the coated fries on a plate. Repeat until all fries are coated.
- Prep for Frying: If pan-frying, heat about ½ inch of oil in a large skillet over medium-high heat until it reaches 350°F (or until a small piece of bread dropped in sizzles immediately). If baking, preheat your oven to 400°F and line a baking sheet with parchment paper, then spray the fries lightly with cooking spray. If air frying, preheat your air fryer to 380°F and spray the basket with oil.
- Cook the Halloumi Fries:
- Pan-Frying Method: Working in batches to avoid overcrowding, carefully place 4-6 fries in the hot oil. Fry for 2-3 minutes per side until golden brown and crispy. Use tongs to flip them carefully. Transfer to a paper towel-lined plate.
- Baking Method: Arrange fries in a single layer on the prepared baking sheet. Bake for 15-18 minutes, flipping once halfway through, until golden and crispy.
- Air Fryer Method: Arrange fries in a single layer in the air fryer basket (work in batches if needed). Air fry for 8-10 minutes, flipping halfway through, until golden brown.
- Serve Immediately: Transfer the hot fries to a serving plate. Serve right away while they’re still warm and crispy with lemon wedges for squeezing and honey for drizzling, or your favorite dipping sauce.
Notes
- Don’t Skip Drying: The halloumi must be completely dry or the coating won’t stick properly.
- Temperature Control: If pan-frying, maintain medium to medium-high heat. Too hot and the coating burns before the cheese warms; too cool and you get greasy fries.
- Work in Batches: Don’t overcrowd the pan or air fryer. This drops the oil temperature and makes soggy fries.
- Serve Hot: Halloumi fries are best enjoyed immediately while hot and crispy. They become chewy as they cool.
- Double Coating: For extra crispy fries, do a double coat – dip in egg and breadcrumbs twice.
- Make It Gluten-Free: Simply swap in gluten-free flour and breadcrumbs.
- Storage Note: These are best fresh, but leftovers can be reheated (see storage section).
- Prep Time: 10 minutes
- Cook Time: 10 minutes
- Category: Appetizer
- Method: Pan-Frying
- Cuisine: Mediterranean
- Diet: Vegetarian
Nutrition
- Serving Size: 3-4 fries
- Calories: 285
- Sugar: 1g
- Sodium: 580mg
- Fat: 18g
- Saturated Fat: 8g
- Unsaturated Fat: 9g
- Trans Fat: 0g
- Carbohydrates: 16g
- Fiber: 1g
- Protein: 15g
- Cholesterol: 115mg
Tips & Variations
The basic crispy halloumi fries are delicious, but here are creative ways to make them your own:
Coating Variations:
- Za’atar Spiced: Mix 2 tablespoons za’atar into your breadcrumbs for Middle Eastern flavor
- Parmesan Crusted: Add ½ cup grated Parmesan to your breadcrumbs for extra cheesy goodness
- Spicy Halloumi Fries: Add 1 teaspoon cayenne pepper and ½ teaspoon chili powder to breadcrumbs
- Herb-Crusted: Mix in fresh chopped parsley, dill, and mint with your breadcrumbs
- Lemon Pepper: Add 2 teaspoons lemon zest and extra black pepper to the coating
- Sesame Crust: Mix black and white sesame seeds into panko for Asian-inspired fries
Dipping Sauce Ideas:
- Honey Drizzle: Classic and simple – the sweetness cuts the saltiness perfectly
- Lemon Yogurt: Mix Greek yogurt with lemon juice, garlic, and fresh herbs
- Spicy Harissa Mayo: Combine mayo with harissa paste for heat
- Pomegranate Molasses: Tangy-sweet Middle Eastern syrup
- Tzatziki: Cool cucumber-yogurt sauce
- Sweet Chili Sauce: Thai-inspired sweet and spicy
- Balsamic Reduction: Thick, sweet-tart drizzle
Serving Style Variations:
- Loaded Halloumi Fries: Top with chopped tomatoes, cucumbers, red onion, and drizzle with tahini
- Mediterranean Nachos: Use halloumi fries as the base instead of chips, top with olives, tomatoes, and feta
- Halloumi Fry Salad: Serve warm fries over mixed greens with lemon vinaigrette
- Fry Sandwich: Stack in pita bread with vegetables and sauce for a vegetarian gyro alternative
Pro Chef Tips
Want restaurant-quality halloumi fries every time? These professional secrets will level up your results:
Temperature is Critical: Whether frying, baking, or air frying, getting the temperature right is essential. For pan-frying, use a thermometer to maintain 350-360°F. Too hot and the coating burns before the cheese warms through; too cool and the coating absorbs oil and becomes soggy. The oil should sizzle vigorously when you add the fries but not smoke.
The Double-Dip Technique: For an extra-thick, super-crispy coating that really clings to the cheese, do a double breading. After the first coat of flour-egg-breadcrumbs, dip the fries back into the egg and breadcrumbs one more time. This creates an incredibly crunchy shell that protects the cheese even better.
Press and Pat: When coating in breadcrumbs, don’t just roll the fries – actually press the breadcrumbs into the cheese with your hands. This helps them adhere much better and prevents the coating from sliding off during cooking. Pat firmly but gently all around.
Rest Before Cooking: After breading all your fries, let them rest on a plate in the refrigerator for 15-30 minutes before cooking. This allows the coating to set and bond to the cheese, dramatically reducing the chances of the breading falling off during cooking.
Oil Depth Matters: When pan-frying, the oil should come at least halfway up the sides of the fries. If it’s too shallow, you’ll have to flip them multiple times, increasing the risk of the coating coming off. Aim for about ½ inch depth in your pan.
The Shake Test: Before you start frying, test your oil temperature by dropping in a few breadcrumbs. They should sizzle enthusiastically and turn golden in about 30 seconds. If they sink and slowly bubble, the oil is too cool. If they immediately burn, it’s too hot.
Keep Them Moving: When baking or air frying, flip or shake the fries at least once during cooking to ensure even browning on all sides. The bottom tends to brown faster than the top.
Common Mistakes to Avoid
Learn from these common pitfalls to ensure perfect halloumi fries every time:
Mistake #1: Not Drying the Halloumi Thoroughly – This is the number one reason coatings don’t stick! Halloumi comes packed in salty brine, and any moisture on the surface will prevent the flour from adhering. After draining, use paper towels to pat every surface completely dry. Some people even let it air-dry for 10 minutes on paper towels.
Mistake #2: Cutting the Fries Too Thin – While it’s tempting to make them look like actual French fries, halloumi sticks that are too thin (less than ⅜ inch) become overly chewy and can dry out. They also don’t have that satisfying contrast of crispy outside and soft inside. Aim for ½ inch thick strips for the best texture.
Mistake #3: Overcrowding the Pan or Fryer – When you add too many fries at once, the oil temperature drops dramatically, resulting in greasy, soggy fries with pale coatings. The fries should have space around them and float freely. Fry in batches of 4-6 pieces max, and let the oil come back to temperature between batches.
Mistake #4: Waiting Too Long to Serve – Halloumi fries are absolutely best straight from the oil or oven while they’re piping hot. As they cool, the cheese firms up and becomes quite chewy (still edible, but not as delightful). The coating also loses its crispness as it sits. Plan your timing so you can serve them immediately.
Mistake #5: Using Low-Fat Halloumi – Some brands make “light” or low-fat versions of halloumi. While this sounds healthier, these versions don’t have the same texture or flavor as traditional halloumi. They can become rubbery or grainy when heated. Stick with full-fat, traditional halloumi for the best results.
Storage & Meal Prep
While halloumi fries are definitely best fresh, here’s how to handle storage if you have leftovers:
Room Temperature: Honestly, don’t leave these sitting out. Cooked halloumi fries should be eaten within an hour of cooking for best quality. After that, refrigerate any leftovers.
Refrigerator Storage: Place cooled fries in an airtight container lined with paper towels (to absorb any moisture) and refrigerate for up to 2 days. I’ll be honest – they won’t be as good as fresh. The cheese becomes quite firm and chewy when cold, and the coating softens. But they’re still edible and can be revived with reheating.
Reheating Tips: Never microwave leftover halloumi fries – this makes them rubbery and the coating soggy. Instead:
- Oven Method: Reheat on a baking sheet at 400°F for 6-8 minutes until warmed through and the coating crisps up again.
- Air Fryer Method: Reheat at 380°F for 4-5 minutes for best results.
- Pan Method: Heat a small amount of oil in a skillet and quickly pan-fry for 2-3 minutes, turning once.
Texture Note: Reheated halloumi will be slightly chewier than fresh, but the coating can regain much of its crispiness with proper reheating.
Make-Ahead & Freezer Notes
Great news – you can prep these in advance to make entertaining easier!
Prep-Ahead Breaded Fries: The best make-ahead method is to bread the halloumi fries completely (through step 3), then arrange them in a single layer on a parchment-lined baking sheet. Cover tightly with plastic wrap and refrigerate for up to 24 hours. When ready to serve, cook straight from the refrigerator using your preferred method. The chilling time actually helps the coating adhere even better!
Freezing Breaded Fries (Unbaked): After breading the fries, place them on a baking sheet in a single layer and freeze until solid (about 2 hours). Then transfer to a freezer bag or container, separating layers with parchment paper. Freeze for up to 2 months. When ready to cook, you can fry or bake them directly from frozen – just add 2-3 minutes to the cooking time. Do not thaw first as this creates moisture that makes the coating soggy.
Freezing Cooked Fries: While possible, I don’t really recommend this. The texture suffers significantly. If you do freeze cooked fries, let them cool completely, freeze in a single layer on a baking sheet, then transfer to a freezer bag for up to 1 month. Reheat from frozen in a 400°F oven for 10-12 minutes.
Best Practice: I recommend prepping raw, breaded fries and freezing those for the freshest taste and best texture when you’re ready to serve.
Serving Suggestions
These versatile halloumi fries work for so many occasions! Here’s how to serve them:
As an Appetizer:
- Arrange on a wooden board with lemon wedges and small bowls of honey and hot sauce
- Serve on individual small plates with a dollop of dipping sauce
- Present on a platter with fresh herbs (mint, parsley, dill) scattered around
- Include as part of a Mediterranean mezze spread with hummus, pita, and olives
Meal Pairings:
- With Salads: Serve warm halloumi fries over a Greek salad, fattoush, or simple mixed greens
- Soup Companion: Perfect alongside tomato soup, lentil soup, or roasted red pepper soup
- In Wraps: Stuff into warm pita with vegetables, lettuce, and tahini sauce
- Grain Bowls: Add to quinoa or rice bowls with roasted vegetables
Beverage Pairings:
- Wine: Pairs beautifully with crisp white wines like Sauvignon Blanc, Pinot Grigio, or Greek Assyrtiko
- Beer: Light lagers, wheat beers, or citrusy IPAs complement the salty cheese
- Cocktails: Gin and tonic, Aperol Spritz, or a refreshing mojito
- Non-Alcoholic: Sparkling lemonade, iced mint tea, or sparkling water with cucumber
Party Serving Ideas:
- Game Day Spread: Serve in paper cones or baskets lined with parchment
- Cocktail Party: Arrange on a tiered platter for elegant presentation
- Casual Gathering: Set out in the center of the table with multiple dipping sauces
- Kids’ Party: Serve with mild honey or ketchup for kid-friendly appeal
Garnishing:
- Fresh lemon or lime wedges for squeezing
- Drizzle of honey or pomegranate molasses
- Fresh herbs like mint, parsley, or cilantro
- Sprinkle of flaky sea salt
- Dusting of sumac or za’atar
- Crumbled feta on top for extra cheese appeal
Frequently Asked Questions
What does halloumi taste like? Halloumi has a mild, slightly salty flavor similar to feta but much less tangy. It’s not as sharp as aged cheeses and has a pleasant, milky taste. The texture is what really makes it special – it’s firm and slightly rubbery (in a good way!), with a distinctive squeak when you bite into it. When fried or grilled, the outside gets crispy and slightly caramelized while the inside stays soft and chewy.
Why doesn’t halloumi melt like other cheese? Halloumi has a very high melting point due to its unique production process. During manufacturing, the curds are cooked in whey at high temperatures, which changes the protein structure. This, combined with the high protein and low moisture content, means halloumi softens when heated but maintains its shape rather than melting into a puddle. This property makes it perfect for grilling, frying, and making into fries!
Can I bake these instead of frying to make them healthier? Absolutely! The baking method is detailed in the recipe instructions. Baked halloumi fries are definitely lighter than fried versions and still delicious, though they won’t be quite as golden or crispy. For best results when baking, spray the breaded fries generously with cooking oil spray before baking, and flip them halfway through. The air fryer is another excellent option that uses less oil than pan-frying while still getting very crispy results.
Where can I buy halloumi cheese? Halloumi has become much more widely available in recent years! Check the specialty cheese section of your regular grocery store (near feta and other Mediterranean cheeses), or look in stores like Whole Foods, Trader Joe’s, Sprouts, or international markets. Middle Eastern grocery stores almost always carry it. If you can’t find it locally, it’s also available online through Amazon or specialty food retailers. Look for brands like Krinos, Zuercher, or Trader Joe’s house brand.
Can I make these ahead for a party? Yes! The best method is to bread all the fries completely, then arrange them on a baking sheet and refrigerate (covered) for up to 24 hours before cooking. You can also freeze breaded uncooked fries for up to 2 months and cook them directly from frozen. I don’t recommend making them more than 1 hour before serving if you want them at their best – they really need to be enjoyed fresh and hot.
Are halloumi fries vegetarian? Traditional halloumi is vegetarian – it’s made from milk, salt, and rennet. However, some strict vegetarians avoid rennet because it’s typically animal-derived. If this is a concern, look for halloumi made with vegetarian rennet (the package will specify). Brands like Organic Valley and some store brands now offer vegetarian versions. Halloumi is never vegan since it’s made from dairy milk.
Why did my breading fall off during cooking? This usually happens for a few reasons: (1) The halloumi wasn’t completely dry before breading, (2) The coating wasn’t pressed firmly enough into the cheese, (3) The oil wasn’t hot enough (causing the breading to absorb oil and slide off), or (4) You flipped the fries too early or too roughly. Make sure to pat the cheese very dry, press the breadcrumbs on firmly, let the first side develop a golden crust before flipping (2-3 minutes), and use gentle tongs when turning.
Conclusion
And there you have it – everything you need to make absolutely incredible, crispy halloumi fries at home! These golden, squeaky, irresistible bites prove that sometimes the best recipes are the ones that showcase simple, quality ingredients with basic cooking techniques. Once you taste that perfect combination of crunchy coating and warm, soft halloumi, you’ll understand why these have become such a sensation in restaurants around the world.
The beauty of these crispy halloumi cheese fries is their versatility – serve them as an elegant appetizer, a satisfying snack, or even part of a meal. They’re impressive enough for dinner parties yet easy enough for weeknight treats. And now that you know the secrets to perfectly crispy results every time, you’ll be making these on repeat!
I’d absolutely love to hear how your halloumi fries turn out! Drop a comment below telling me your favorite dipping sauce, share a photo on Pinterest to inspire other home cooks, or tag me on social media with your creations. And if you loved this recipe, please give it a five-star rating and share it with your friends – these easy halloumi fries are way too delicious to keep to yourself! Now go make some squeaky, crispy cheese magic happen in your kitchen! 🧀✨