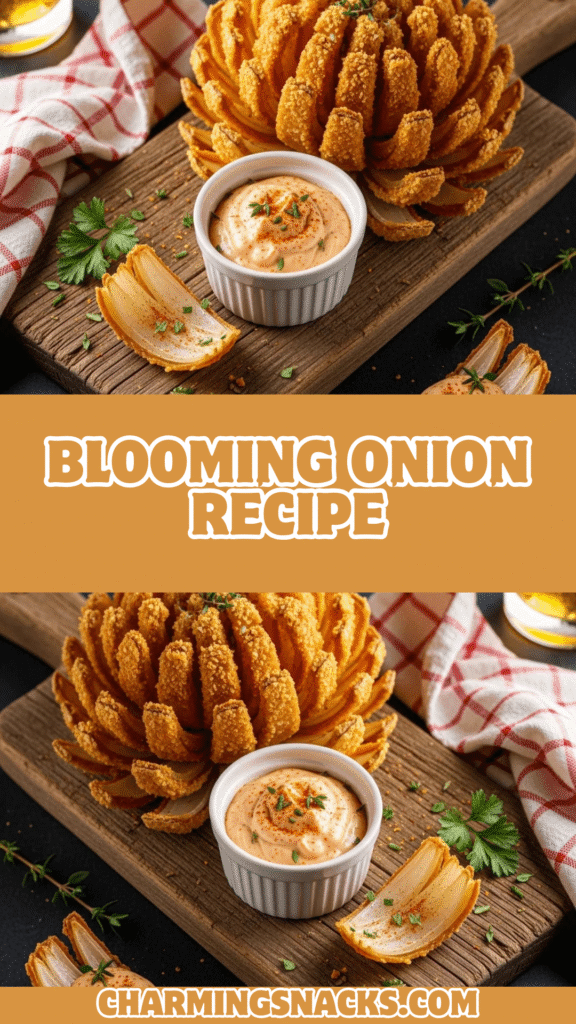
Crispy Blooming Onion Recipe – Restaurant-Style Appetizer Made at Home!
Have you ever seen a blooming onion arrive at your table and felt that rush of pure excitement? That gorgeous, flower-shaped masterpiece of crispy, golden perfection is one of the most impressive appetizers you can serve. And guess what? You don’t need to go to a steakhouse chain to enjoy it – making a homemade blooming onion is easier than you think!
This crispy blooming onion recipe transforms a simple onion into a showstopping appetizer that’ll have everyone at your table reaching for more. With its perfectly seasoned, crunchy coating and tender onion petals underneath, it’s the ultimate crowd-pleaser for game day parties, family gatherings, or any time you want to impress your guests without spending hours in the kitchen.
Whether you’re hosting a Super Bowl party, planning a casual Friday night dinner, or just craving that restaurant favorite, this easy blooming onion at home delivers all the flavor and wow-factor without the hefty restaurant price tag. Served with a creamy, tangy dipping sauce, every petal is pure comfort food magic. Let’s dive into making this iconic appetizer that’ll have everyone asking for your secret!
History & Background of the Blooming Onion
The blooming onion isn’t an ancient culinary tradition – it’s actually a relatively modern American invention that became an instant classic. This iconic appetizer was created in 1988 by Tim Gannon, one of the founders of Outback Steakhouse, along with their corporate chef. They wanted a signature item that would set their restaurant apart and create buzz.
The concept was inspired by a dish called “onion mum” that Gannon had seen at a New Orleans restaurant, but the Outback team took it to the next level with their special seasoning blend and presentation. They called it the “Bloomin’ Onion” (with their trademarked spelling), and it became so popular that it’s now one of the most recognizable appetizers in American casual dining history.
What made this dish revolutionary was the theatrical presentation – the onion is cut to resemble a blooming flower, creating dozens of crispy “petals” perfect for pulling off and dipping. The engineering behind cutting an onion this way without it falling apart is actually quite clever, and it creates maximum surface area for that irresistible crispy coating.
While Outback Steakhouse popularized the dish in the United States, similar fried onion concepts have existed in various forms across different cultures. However, the American blooming onion with its signature spicy-savory coating and creamy dipping sauce has become a category of its own. It represents that uniquely American approach to comfort food – bigger, bolder, and designed to be shared.
Today, the blooming onion has transcended its restaurant origins and become a beloved recipe that home cooks want to recreate. It’s the kind of dish that makes any gathering feel special, turning an ordinary meal into an event. And the best part? Making it at home means you can customize the seasonings, control the ingredients, and enjoy it fresh from your own kitchen.
Why You’ll Love This Recipe
This homemade blooming onion recipe brings all the restaurant excitement straight to your kitchen, and trust me, once you make it, you’ll wonder why you ever waited in line for a table! There’s something incredibly satisfying about creating this impressive appetizer yourself, and the flavor is absolutely phenomenal when it’s fresh and hot from your own fryer.
The beauty of making this crispy fried blooming onion at home is that you control everything – the spice level, the coating thickness, and most importantly, you get to enjoy it piping hot without paying premium restaurant prices. Plus, your guests will be absolutely blown away when you bring this golden beauty to the table. Here’s why this recipe deserves a spot in your cooking rotation:
- Restaurant-Quality Results: Achieve that same crispy, golden perfection you pay $10-12 for at steakhouses, all in your home kitchen
- Impressive Presentation: This is the ultimate showstopper appetizer that makes any gathering feel special and gets everyone talking
- Customizable Heat Level: Adjust the spices to match your family’s preferences – make it mild for kids or crank up the cayenne for heat lovers
- Budget-Friendly: One large onion costs just a couple of dollars and feeds 4-6 people as an appetizer – that’s serious value
- Perfect for Sharing: The pull-apart petals make it interactive and fun, encouraging everyone to dig in and enjoy together
- Surprisingly Achievable: Despite looking complicated, the technique is straightforward with just a little patience and the right cutting method
- Game Day Hero: This appetizer instantly elevates your party spread and pairs perfectly with beer, wings, and all your favorite snacks
- Make-Ahead Friendly: You can prep the onion hours ahead and fry it right before serving for maximum freshness and minimum stress
Ingredient Notes
Creating the perfect blooming onion at home starts with choosing the right ingredients. Each component plays a crucial role in achieving that signature crispy exterior and flavorful bite. Let’s break down what you’ll need and why each ingredient matters:
Large Sweet Onion: The star of the show! You’ll want a colossal or jumbo sweet onion (Vidalia, Walla Walla, or sweet yellow) weighing about 1 pound. Sweet onions work better than regular yellow onions because they’re milder and have a more pleasant flavor when fried. The larger the onion, the more impressive your bloom will be. Avoid red onions as they can taste bitter when fried.
All-Purpose Flour: This creates the base coating that gives you that crispy crunch. The flour helps the egg mixture stick and creates a substantial coating on each petal. You can substitute with gluten-free all-purpose flour blend if needed, though the texture may be slightly different.
Eggs: Acts as the binding agent that helps the seasoned flour mixture adhere to the onion petals. The protein in eggs creates structure when fried. You’ll need 2-3 large eggs, beaten well with a splash of milk.
Milk or Buttermilk: Thins out the egg mixture for better coating coverage. Buttermilk adds a slight tang and helps tenderize the onion, but regular milk works perfectly fine. For a richer flavor, use whole milk.
Paprika: Provides that beautiful reddish-golden color and a subtle sweet-smoky flavor. Use regular paprika for mild flavor or smoked paprika for depth.
Cayenne Pepper: Brings the heat! This is adjustable based on your preference. Start with 1/2 teaspoon for mild heat, or go up to 1 teaspoon for something spicier.
Garlic Powder & Onion Powder: These create that savory, umami-rich flavor that makes the coating so addictive. Don’t substitute with fresh garlic as it will burn during frying.
Ground Cumin: Adds warmth and earthiness to the spice blend. This is a key flavor component that sets blooming onions apart from regular fried onions.
Dried Thyme & Oregano: Provide herbal notes that balance the richness. These dried herbs can withstand high heat without burning.
Salt & Black Pepper: Essential for seasoning and bringing all the flavors together. Use kosher salt for better control over seasoning.
Vegetable Oil for Frying: You’ll need a neutral oil with a high smoke point like vegetable, canola, or peanut oil. Plan on 2-3 quarts depending on your pot size.
For the Dipping Sauce: Mayonnaise, ketchup, horseradish, paprika, garlic powder, and a touch of cayenne create that signature creamy, tangy, slightly spicy sauce that’s essential to the experience.
Equipment Needed
Having the right tools makes creating your crispy blooming onion much easier and ensures better results. Here’s everything you’ll need:
- Large Sharp Knife: Essential for making precise cuts through the onion without breaking the petals
- Cutting Board: A stable, large cutting board gives you room to work safely
- Large Deep Pot or Dutch Oven: You’ll need at least a 5-quart capacity to hold enough oil for deep frying (pot should be deep enough that oil is at least 3-4 inches deep)
- Candy or Deep-Fry Thermometer: Critical for maintaining oil temperature at 350°F – this ensures crispy results without burning
- Large Mixing Bowls: At least 2-3 shallow bowls for your flour mixture, egg wash, and final coating station
- Whisk: For mixing the egg wash and combining the seasoned flour
- Spider Strainer or Large Slotted Spoon: Makes it easier to safely lower and lift the onion from hot oil
- Paper Towels: For draining excess oil after frying
- Baking Sheet: To hold the breaded onion before frying and for draining afterward
- Small Bowl: For mixing the dipping sauce
- Measuring Cups and Spoons: For accurate seasoning measurements
- Kitchen Shears (Optional): Can help with spreading the petals if needed
- Serving Platter: A large plate or wooden board makes for beautiful presentation

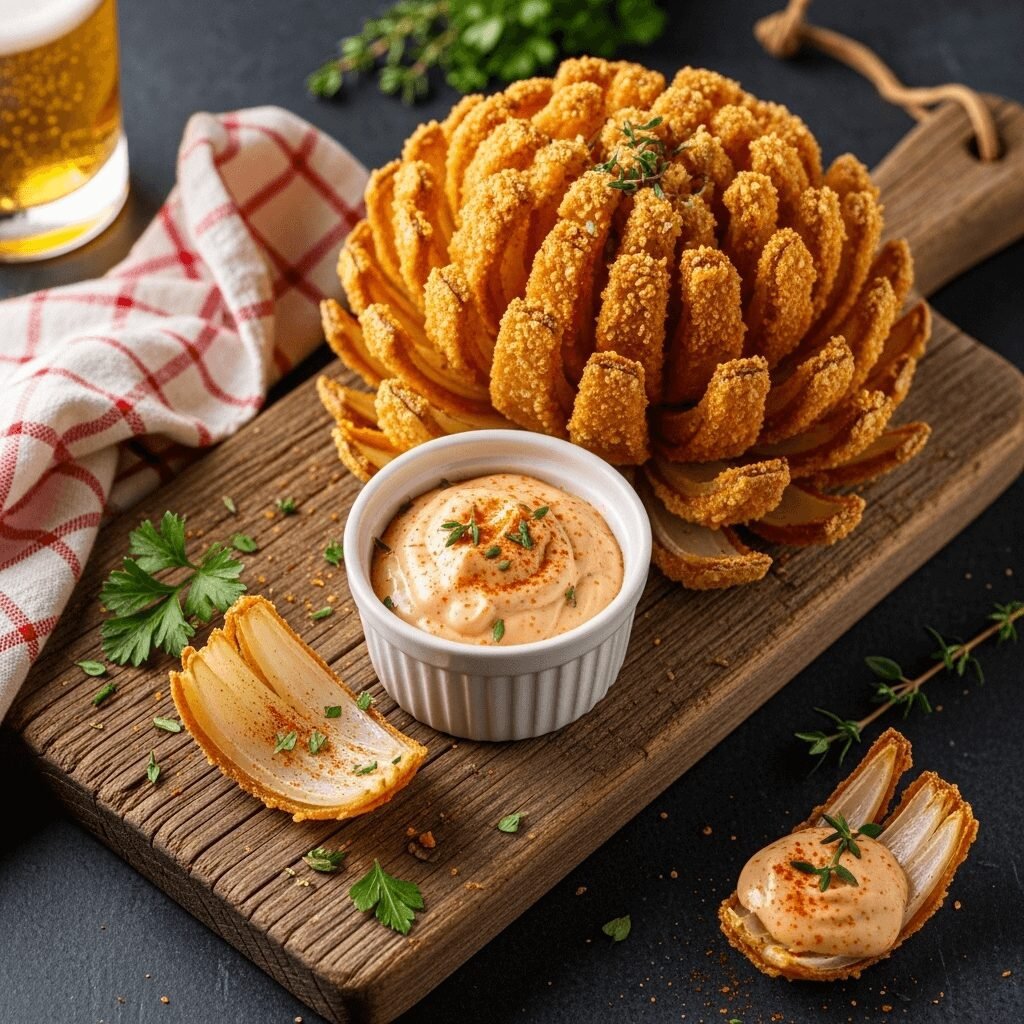
Crispy Blooming Onion Recipe
A spectacular restaurant-style blooming onion made at home with crispy, seasoned petals and a creamy dipping sauce. This show-stopping appetizer features a perfectly cut onion coated in a flavorful spiced batter and fried to golden perfection. Easier than you think and absolutely delicious!
- Total Time: 30 minutes
- Yield: 4-6 servings 1x
Ingredients
For the Onion:
- 1 extra-large sweet onion (about 1 pound)
- 2 cups all-purpose flour, divided
- 3 large eggs
- 1/4 cup milk
- Vegetable oil for frying (2-3 quarts)
For the Seasoning Mix:
- 2 teaspoons paprika
- 1 teaspoon cayenne pepper (adjust to taste)
- 1 teaspoon garlic powder
- 1 teaspoon onion powder
- 1 teaspoon ground cumin
- 1/2 teaspoon dried thyme
- 1/2 teaspoon dried oregano
- 1 teaspoon black pepper
- 1 tablespoon salt
For the Dipping Sauce:
- 1/2 cup mayonnaise
- 2 tablespoons ketchup
- 2 tablespoons prepared horseradish
- 1/2 teaspoon paprika
- 1/4 teaspoon garlic powder
- 1/4 teaspoon cayenne pepper
- Pinch of salt
Instructions
Step 1: Prepare the Onion
Cut off 1/2 inch from the top (pointy end) of the onion and peel off the papery skin, leaving the root end intact. Place the onion cut-side down on your cutting board. Starting about 1/2 inch from the root, make vertical cuts all the way down through the onion to the cutting board. Rotate and continue cutting to create 12-16 evenly spaced sections. Turn the onion over and gently separate the petals, being careful not to break them off.
Step 2: Soak the Onion
Place the cut onion in a large bowl of ice water and let it sit for 10-15 minutes. This helps the petals open up more and removes some of the onion’s sharpness. Remove and pat thoroughly dry with paper towels, getting between the petals as much as possible.
Step 3: Prepare the Coating Station
In a shallow bowl, mix together the seasoning blend. Add 1 1/2 cups flour to the seasoning mix and whisk to combine. Reserve the remaining 1/2 cup flour in a separate bowl. In another shallow bowl, whisk together eggs and milk until well combined.
Step 4: First Coating
Dust the onion all over with the reserved 1/2 cup plain flour, getting between all the petals. Turn upside down and tap to remove excess flour.
Step 5: Egg Wash
Dip the floured onion into the egg mixture, using your hands or a spoon to coat between all the petals thoroughly. Let excess egg drip off.
Step 6: Final Coating
Coat the onion generously with the seasoned flour mixture, again making sure to get between all the petals. Press the coating gently to adhere. Place on a baking sheet and let rest for 5-10 minutes.
Step 7: Heat the Oil
In your large pot or Dutch oven, heat oil to 350°F (use your thermometer to monitor). You need enough oil so the onion will be about 3/4 submerged.
Step 8: Fry the Onion
Carefully place the onion in the hot oil root-side up. Fry for 3 minutes, then carefully flip using tongs or a spider strainer. Fry for another 3-4 minutes until deep golden brown all over. The total frying time is about 6-8 minutes.
Step 9: Drain
Carefully remove the onion and place it on a paper towel-lined baking sheet or plate. Let drain for 1-2 minutes.
Step 10: Make the Sauce
While the onion cools slightly, whisk together all dipping sauce ingredients in a small bowl. Adjust seasoning to taste.
Step 11: Serve
Transfer the blooming onion to a serving platter, place the dipping sauce in the center or alongside, and serve immediately while hot and crispy.
Notes
- The onion must be completely dry before coating or the batter won’t stick properly
- Don’t skip the ice water soak – it helps the petals bloom beautifully
- Maintain oil temperature at 350°F for best results; too cool and it’ll be greasy, too hot and it’ll burn
- If your onion is browning too quickly, reduce heat slightly
- For extra crispy results, you can do a second light coating of seasoned flour
- The dipping sauce can be made up to 3 days ahead and refrigerated
- If onion petals start to break during cutting, you cut too close to the root
- Prep Time: 20 minutes
- Cook Time: 10 minutes
- Category: Appetizer
- Method: Deep Frying
- Cuisine: American
- Diet: Vegetarian
Nutrition
- Serving Size: 1/6 of blooming onion with sauce
- Calories: 385
- Sugar: 6g
- Sodium: 895mg
- Fat: 24g
- Saturated Fat: 3g
- Unsaturated Fat: 19g
- Trans Fat: 0g
- Carbohydrates: 36g
- Fiber: 3g
- Protein: 7g
- Cholesterol: 95mg
Tips & Variations
Spice Level Adjustments: For a milder version perfect for kids, reduce or omit the cayenne pepper and use sweet paprika instead of regular. For extra heat, add 1/2 teaspoon of chipotle powder to the seasoning mix or increase cayenne to 1 1/2 teaspoons.
Gluten-Free Blooming Onion: Substitute all-purpose flour with a 1:1 gluten-free flour blend. The texture will be slightly different but still delicious. Make sure your seasoning blend doesn’t contain any hidden gluten.
Air Fryer Method: While not quite as crispy as deep-fried, you can make a lighter version in an air fryer. Coat as directed, spray generously with cooking spray, and air fry at 375°F for 15-20 minutes, flipping halfway through and spraying again.
Baked Version: For an even healthier option, place the coated onion on a parchment-lined baking sheet, spray generously with cooking spray, and bake at 425°F for 25-30 minutes until golden and crispy.
BBQ-Seasoned Onion: Replace the cumin and cayenne with smoked paprika and add 1 tablespoon brown sugar to the flour mixture for a sweet and smoky BBQ flavor profile.
Ranch-Style Coating: Add 2 tablespoons of ranch seasoning mix to your flour coating and serve with ranch dressing instead of the traditional sauce.
Asian-Inspired Version: Add 1 teaspoon five-spice powder and 1/2 teaspoon ground ginger to the coating. Serve with a sauce made from mayo, sriracha, soy sauce, and lime juice.
Extra Crispy Technique: After the first coating, refrigerate the onion for 30 minutes before the egg wash and final coating. This helps the coating adhere better and creates an extra-crunchy texture.
Different Onion Varieties: While sweet onions are traditional, you can use Vidalia, Walla Walla, Maui, or even large white onions. Each offers a slightly different flavor profile.
Cheese Lover’s Version: Add 1/2 cup finely grated Parmesan to the final flour coating for a cheesy twist that adds umami depth.
Pro Chef Tips
Perfect Cutting Technique: The secret to a blooming onion that stays intact is leaving about 3/4 inch of the root end uncut. Think of the root as the foundation holding all the petals together. Use a sharp knife and make confident, smooth cuts rather than sawing back and forth, which can tear the onion.
Temperature Control is Everything: Invest in a quality thermometer and monitor your oil temperature constantly. If the temperature drops below 325°F when you add the onion, the coating will absorb too much oil and become greasy instead of crispy. Let the oil return to 350°F between batches if making multiple onions.
The Ice Bath Secret: Soaking the cut onion in ice water for 10-15 minutes does double duty. It causes the petals to curl and open more dramatically, creating that “blooming” effect, and it also removes some of the sulfur compounds that make onions harsh. Don’t skip this step if you want that dramatic presentation!
Proper Drying is Critical: This is where many home cooks fail. The onion must be completely dry before breading, or the flour will turn gummy instead of forming a crispy coating. Use paper towels to pat between each petal thoroughly. I even use a small fan to air-dry mine for 5 minutes after towel drying.
Resting Time Matters: After coating the onion, let it rest for 5-10 minutes before frying. This allows the coating to set and adhere better, which means less coating falling off during frying and more crispiness for you to enjoy.
Strategic Frying Position: Start with the root side up for the first half of frying. This allows the heat to reach between the petals more easily. When you flip it, the petals will continue to open beautifully, and any coating that wasn’t perfectly adhered will get a chance to crisp up.
Don’t Overcrowd: If making multiple blooming onions, fry them one at a time. Adding too much to the oil drops the temperature drastically and results in greasy, soggy onions. Patience pays off with perfectly crispy results.
Fresh Oil Matters: Use fresh oil for best flavor. Oil that’s been used multiple times or has been sitting open for months can impart off-flavors. Your blooming onion is too special for old oil!
The Sauce Temperature Trick: Serve your dipping sauce at cool room temperature, not cold from the fridge. The temperature contrast between the hot onion and cool sauce is part of what makes this appetizer so crave-worthy.
Presentation Enhancement: Right before serving, give the blooming onion a light dusting of fresh paprika or a pinch of flaky sea salt. This adds visual appeal and a final pop of flavor that makes it look even more restaurant-worthy.
Common Mistakes to Avoid
Cutting Too Close to the Root: This is the number one mistake that causes blooming onions to fall apart. Always leave at least 3/4 inch of the root intact. The root holds everything together – cut into it and your beautiful bloom becomes a pile of fried onion pieces.
Skipping the Drying Step: Wet onions mean soggy coating. Any moisture on the onion prevents the flour from adhering properly and creates a gummy texture instead of crispy crunch. Take your time thoroughly drying every petal – it makes all the difference between disappointing and spectacular results.
Inconsistent Oil Temperature: Starting with oil that’s not hot enough or letting the temperature drop too much during frying results in greasy, heavy onions. Always preheat to 350°F and adjust heat as needed to maintain temperature. Too hot (over 375°F) and the outside burns before the inside cooks.
Overhandling the Onion: Being too rough when separating petals, coating, or transferring to oil can cause petals to break off. Handle your onion gently like the delicate flower it is! Use a spider strainer or two large slotted spoons to support it when moving in and out of the oil.
Not Making Enough Sauce: There’s never enough dipping sauce! Trust me, you’ll want more than you think. Double the sauce recipe because your guests will go through it fast, and it keeps for several days in the fridge anyway. Running out of sauce is a blooming onion tragedy.
Storage & Meal Prep
Storing Leftover Blooming Onion: Let’s be honest – there are rarely leftovers when you make a blooming onion! But if you do have some, store them in an airtight container in the refrigerator for up to 2 days. The coating will soften in storage, but you can revive much of the crispiness with proper reheating.
Reheating Instructions: The oven is your best friend for reheating. Preheat to 375°F, place the onion on a baking sheet, and heat for 10-12 minutes until warmed through and crispy again. Avoid the microwave as it will make the coating completely soggy and steam the onion into mush.
Air Fryer Reheating: If you have an air fryer, this is actually the ideal reheating method. Place the blooming onion in the basket and reheat at 350°F for 5-7 minutes. It’ll crisp up beautifully and taste nearly as good as fresh.
Dipping Sauce Storage: The dipping sauce actually improves with time as the flavors meld! Store it in an airtight container in the refrigerator for up to 1 week. Bring to room temperature before serving for best flavor, or make it fresh while the onion is frying.
Next Day Enjoyment: If you’re planning to have leftovers, consider keeping some petals uncooked. They won’t be quite the same as fresh, but you can bread individual sections and fry them fresh the next day as onion rings. Not traditional, but still delicious!
Make-Ahead & Freezer Notes
Preparing in Advance: You can cut and soak the onion up to 4 hours ahead. After the ice bath, pat completely dry, wrap gently in paper towels, and refrigerate in a container until ready to coat and fry. Don’t bread it until you’re ready to fry, as the coating will get soggy.
Breading Ahead: For party prep, you can bread the onion up to 2 hours ahead. Place it on a baking sheet, cover loosely with plastic wrap (don’t press down or you’ll smash the coating), and refrigerate. Bring to room temperature for 15 minutes before frying for more even cooking.
Freezing Raw Breaded Onion: Technically you can freeze a breaded onion before frying, but I don’t recommend it. The ice crystals that form will create moisture that makes the coating soggy when you try to fry it. The onion itself also becomes mushy. Fresh is definitely best here.
Freezing Fried Blooming Onion: While possible, freezing a cooked blooming onion significantly degrades the texture. If you must freeze leftovers, wrap tightly in aluminum foil and freeze for up to 1 month. Reheat from frozen in a 350°F oven for 20-25 minutes, but don’t expect the same crispy magic as fresh.
Make-Ahead Sauce: The dipping sauce is perfect for making ahead! In fact, it’s better when made at least 2 hours ahead or even the night before. The flavors meld beautifully, and it’s one less thing to worry about when you’re managing hot oil. Store covered in the refrigerator for up to 1 week.
Party Planning Strategy: For gatherings, prep your sauce 1-2 days ahead, cut and soak your onions the morning of, and set up your breading station 30 minutes before you want to start frying. This way everything comes together smoothly when it’s showtime.
Serving Suggestions
A homemade blooming onion is a star appetizer that deserves an equally delicious supporting cast. Here are my favorite ways to serve this crispy creation:
Classic Steakhouse Pairing: Serve your blooming onion as the appetizer before a juicy grilled steak, loaded baked potatoes, and a crisp wedge salad with blue cheese dressing. Add a side of sautéed mushrooms and you’ve got a complete steakhouse experience at home.
Game Day Spread: Make your blooming onion the centerpiece of an epic appetizer table alongside buffalo wings, loaded nachos, mozzarella sticks, and jalapeño poppers. Keep cold beer, soda, and plenty of napkins nearby!
BBQ Feast: This crispy onion is perfect alongside ribs, pulled pork sandwiches, coleslaw, baked beans, and cornbread. The crunchy texture contrasts beautifully with tender, saucy meats.
Burger Bar Companion: Set up a burger station with your blooming onion as the starter. Include various toppings, condiments, and sides like sweet potato fries, onion rings, and pickle spears.
Beer Pairing: Serve with ice-cold lagers, IPAs, or amber ales. The crispy, salty coating pairs perfectly with the carbonation and hop bitterness of beer. For non-alcoholic options, try ginger beer or sparkling lemonade.
Additional Dipping Sauces: While the classic horseradish sauce is traditional, offer a variety of dips: ranch dressing, chipotle mayo, honey mustard, BBQ sauce, or even a spicy sriracha aioli for guests who want options.
Side Dish Ideas: Round out the meal with french fries, sweet potato fries, fried pickles, mac and cheese, coleslaw, or a fresh garden salad to balance the richness.
Beverage Pairings: Beyond beer, try sweet tea, cola, lemonade, or even a crisp white wine like Pinot Grigio. The key is something refreshing that cuts through the richness.
Presentation Ideas: Serve on a large wooden cutting board lined with parchment paper, or on a white platter with the dipping sauce in a small bowl in the center. Garnish with fresh parsley for a pop of color.
Frequently Asked Questions
Can I make a blooming onion without a deep fryer?
Absolutely! You don’t need a dedicated deep fryer – a large, heavy-bottomed pot or Dutch oven works perfectly. Just make sure it’s deep enough to hold at least 3-4 inches of oil safely. Use a candy thermometer to monitor the temperature, and you’ll get the same delicious results. Some people even have success with large electric skillets if they’re deep enough.
Why is my blooming onion falling apart?
The most common reason is cutting too close to the root. You need to leave at least 3/4 inch of the root intact to hold all the petals together. Also, be gentle when separating the petals and coating the onion. Rough handling can cause petals to break off. Finally, make sure your onion is completely dry before breading, as moisture can prevent the coating from adhering properly.
Can I use a regular yellow onion instead of a sweet onion?
You can, but I don’t recommend it. Regular yellow onions have a sharper, more pungent flavor that can be overwhelming when fried in such quantity. Sweet onions like Vidalia or Walla Walla are milder and naturally sweeter, which creates a better balance with the savory, spicy coating. If you must use yellow onions, soak them longer in the ice water to mellow the flavor.
How do I know when the oil is at the right temperature?
The most reliable method is using a candy or deep-fry thermometer clipped to the side of your pot. You want 350°F for perfect results. If you don’t have a thermometer, you can test by dropping a small cube of bread into the oil – it should turn golden brown in about 60 seconds. Another method is dipping the handle of a wooden spoon in the oil; if bubbles form around it immediately, the oil is ready.
Can I make this in an air fryer?
Yes, though the results won’t be quite as crispy as deep-fried. Coat your onion as directed, place it in the air fryer basket, and spray generously with cooking oil spray. Air fry at 375°F for 15-20 minutes, flipping halfway through and spraying again. Check frequently to prevent burning. The texture will be crispier than baked but not quite as indulgent as traditional fried.
What’s the best type of oil for frying?
Use a neutral oil with a high smoke point. Vegetable oil, canola oil, and peanut oil are all excellent choices. Avoid olive oil (too low smoke point and strong flavor) and butter (will burn). You need an oil that can maintain 350°F without smoking or breaking down. Peanut oil gives the most authentic restaurant flavor if you don’t have allergies.
How far in advance can I cut the onion?
You can cut and soak the onion up to 4 hours ahead. After the ice bath, pat it completely dry, wrap gently in paper towels, and store in the refrigerator in a container until you’re ready to bread and fry it. Don’t bread it more than 2 hours ahead, or the coating will become soggy. For best results, bread and fry within 30 minutes.
Conclusion
There’s something truly special about making a restaurant-style blooming onion in your own kitchen. That moment when you carry it to the table, golden and crispy and absolutely gorgeous, and everyone’s eyes light up – it never gets old! This isn’t just an appetizer; it’s an experience, a conversation starter, and honestly, one of the most fun recipes you can make at home.
The best part? Once you master this technique, you’ll realize it’s not nearly as intimidating as it looks. Sure, it takes a bit of patience and attention to detail, but the reward is so worth it. You’ll save money compared to restaurant prices, you can customize the spice level exactly how you like it, and you get to enjoy it fresh and hot – the ultimate crispy, tangy, shareable indulgence.
Whether you’re making this easy blooming onion recipe for game day, a special dinner party, or just because it’s Friday and you deserve something awesome, I promise it’ll be a hit. So grab that jumbo onion, heat up that oil, and get ready to become everyone’s favorite cook. And don’t forget to make extra dipping sauce – you’ll need it!
Ready to make this showstopping appetizer? Save this recipe to your Pinterest boards so you can find it whenever you need to impress! And after you make it, I’d love to hear how it turned out – drop a comment below and let me know if you adjusted the spices, what you served it with, or how fast it disappeared from your table. Happy cooking, friends! 🧅