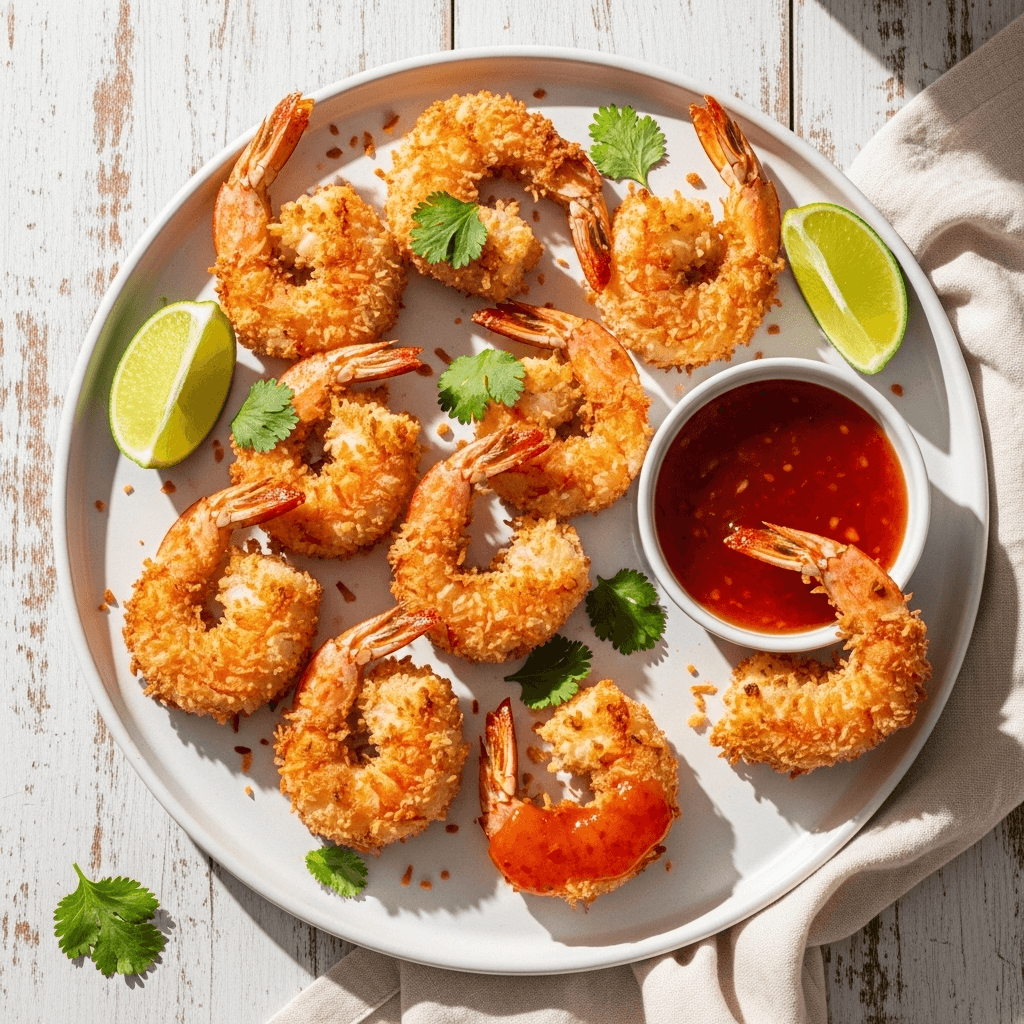
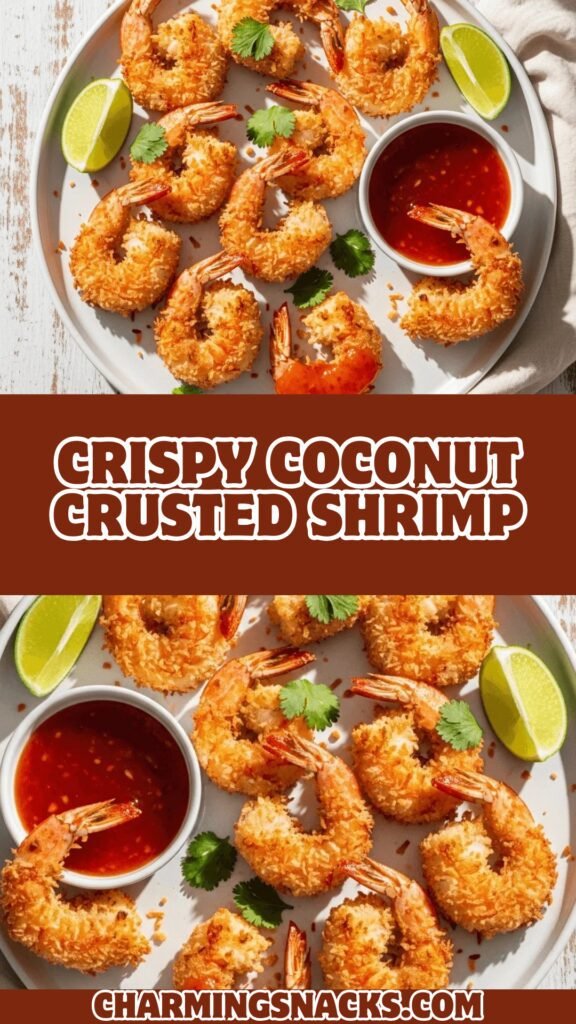
Crispy Coconut Crusted Shrimp with Sweet Chili Dipping Sauce
There’s something absolutely magical about biting into a perfectly golden, crispy coconut crusted shrimp. That satisfying crunch gives way to tender, juicy shrimp encased in a sweet, toasted coconut coating that’s simply irresistible. This coconut crusted shrimp recipe is a showstopper appetizer that looks and tastes like it came straight from a tropical resort restaurant, but it’s surprisingly easy to make right in your own kitchen.
Whether you’re hosting a dinner party, planning a special date night at home, or just craving restaurant-quality seafood, these crispy coconut shrimp deliver every single time. They’re perfect for game day gatherings, holiday appetizer spreads, summer cookouts, or as a fun weeknight dinner when you want to treat your family to something special. Serve them with a sweet and tangy dipping sauce, and watch them disappear from the platter in minutes. Trust me, you’ll want to make a double batch because everyone always comes back for seconds!
History / Background
Coconut shrimp has become an iconic dish in American coastal cuisine, particularly associated with tropical beach destinations and tiki-style restaurants. While the exact origin is debated, this beloved appetizer likely emerged in the 1950s and 1960s when Polynesian and tropical-themed restaurants were exploding in popularity across the United States, especially in California, Hawaii, and Florida.
The concept of coating shrimp in coconut and frying them crispy draws inspiration from various Asian and Caribbean cooking traditions where coconut is a staple ingredient. In Southeast Asian cuisine, coconut has been used in batters and coatings for centuries, while Caribbean cooking has long celebrated the natural pairing of seafood with coconut. American chefs brilliantly combined these influences to create what we now know as coconut shrimp.
The dish gained mainstream popularity in the 1980s and 1990s when chain restaurants like Red Lobster and Outback Steakhouse added their versions to menus nationwide. Today, coconut crusted shrimp is a beloved restaurant appetizer and a favorite homemade treat that brings vacation vibes to any table. It represents that perfect fusion of cultures that makes American cuisine so wonderfully diverse and exciting.
Why You’ll Love This Recipe
This easy coconut shrimp recipe is about to become your new favorite way to prepare shrimp. The combination of crispy, golden coconut flakes with perfectly cooked tender shrimp creates an addictive texture contrast that’s absolutely restaurant-worthy. Unlike many restaurant versions that can be greasy or overcooked, this homemade version gives you complete control over the quality and freshness of every ingredient.
Here’s why this recipe is a winner:
- Restaurant-quality results at home – Save money while impressing your guests with professional-looking and tasting coconut shrimp
- Quick and easy preparation – Ready in under 30 minutes from start to finish, making it perfect for last-minute entertaining
- Family-friendly favorite – Even picky eaters love the sweet, mild coconut flavor paired with shrimp
- Customizable heat level – Make the dipping sauce as mild or spicy as you prefer
- Budget-friendly elegance – Creates an upscale appetizer experience without breaking the bank
- Perfect for meal prep – You can bread the shrimp ahead of time and fry them when ready to serve
- Crowd-pleaser guaranteed – I’ve never served these without receiving requests for the recipe
- Versatile serving options – Works as an appetizer, main course, or party finger food
Ingredient Notes
Large Shrimp (1 pound): Look for 16-20 count shrimp per pound for the best size. You want them large enough to have a good shrimp-to-coating ratio. Fresh or previously frozen works perfectly – just make sure they’re completely thawed and patted dry. You can use peeled and deveined shrimp with tails on (for presentation) or tails off (for easier eating).
Sweetened Shredded Coconut (1½ cups): The sweetened variety adds a lovely caramelized flavor when fried. Look for the finely shredded coconut, not the large flakes, as it adheres better to the shrimp. If you prefer unsweetened coconut, that works too, though you’ll lose some of that signature sweet flavor.
All-Purpose Flour (½ cup): This creates the first layer that helps everything else stick to the shrimp. You can substitute with gluten-free flour blend if needed.
Eggs (2 large): The binding agent that helps the coconut coating adhere. Make sure they’re well-beaten with a splash of water for easier coating.
Panko Breadcrumbs (1 cup): These Japanese-style breadcrumbs create extra crunch and help the coconut stick better. Regular breadcrumbs work in a pinch, but panko gives superior crispiness.
Seasonings (1 teaspoon each: salt, garlic powder, paprika): These add depth of flavor to what could otherwise be a one-dimensional coating. The paprika adds a beautiful golden color too.
Vegetable Oil (for frying): You’ll need enough for shallow frying, about 1-2 inches in your pan. Canola, peanut, or vegetable oil all work beautifully because of their high smoke points.
Sweet Chili Sauce (½ cup): The classic dipping sauce for coconut shrimp. You can find this in the Asian section of most grocery stores. Some brands are spicier than others, so taste and adjust as needed.
Equipment Needed
- Large skillet or deep frying pan – At least 10-12 inches wide for frying multiple shrimp at once
- Three shallow bowls or pie plates – For your dredging station (flour, egg, coconut mixture)
- Paper towels – For draining excess oil from fried shrimp
- Large plate or baking sheet – For holding breaded shrimp before frying
- Tongs or fork – For turning shrimp while frying
- Cooking thermometer – Optional but helpful to maintain proper oil temperature (350°F)
- Wire cooling rack – Optional, for keeping fried shrimp crispy while you finish the batch
- Mixing bowls – For combining your coconut coating mixture
- Small serving bowl – For your dipping sauce

Coconut Crusted Shrimp
Crispy, golden coconut crusted shrimp with a sweet and crunchy exterior, tender juicy interior, and served with sweet chili dipping sauce. This restaurant-quality appetizer is easy to make at home and perfect for entertaining or a special dinner.
- Total Time: 27 minutes
- Yield: 4 servings (about 20 shrimp) 1x
Ingredients
- 1 pound large shrimp (16-20 count), peeled and deveined, tails on or off
- ½ cup all-purpose flour (or gluten-free flour blend)
- 2 large eggs
- 2 tablespoons water
- 1½ cups sweetened shredded coconut
- 1 cup panko breadcrumbs
- 1 teaspoon salt
- 1 teaspoon garlic powder
- 1 teaspoon paprika
- ½ teaspoon black pepper
- Vegetable oil for frying (about 2 cups)
- ½ cup sweet chili sauce (for serving)
- Fresh lime wedges (optional, for garnish)
- Chopped fresh cilantro (optional, for garnish)
Instructions
- Prepare the shrimp: Pat shrimp completely dry with paper towels. This is crucial for getting the coating to stick properly. If using shrimp with tails, leave them on for easy handling. Season lightly with a pinch of salt and pepper.
- Set up your breading station: Place flour in the first shallow bowl. In the second bowl, whisk together eggs and water until well combined. In the third bowl, mix together shredded coconut, panko breadcrumbs, salt, garlic powder, paprika, and black pepper until evenly distributed.
- Bread the shrimp: Working with one shrimp at a time, dredge it in flour, shaking off excess. Dip into the egg mixture, letting excess drip off. Finally, press the shrimp into the coconut mixture, coating both sides generously and pressing gently so the coating adheres. Place breaded shrimp on a plate or baking sheet. Repeat with remaining shrimp.
- Heat the oil: Pour about 1-2 inches of vegetable oil into a large, deep skillet. Heat over medium-high heat until it reaches 350°F. To test without a thermometer, drop a pinch of the coconut mixture into the oil – it should sizzle immediately and float to the surface.
- Fry the shrimp: Carefully add 4-5 shrimp to the hot oil, being careful not to overcrowd the pan. Fry for 2-3 minutes on the first side until golden brown and crispy. Flip and cook for another 1-2 minutes until the second side is golden and the shrimp are cooked through (they should be opaque and pink).
- Drain and keep warm: Using tongs, transfer fried shrimp to a paper towel-lined plate or wire rack. If desired, keep finished shrimp warm in a 200°F oven while you fry the remaining batches.
- Serve immediately: Arrange coconut shrimp on a serving platter. Serve hot with sweet chili sauce for dipping. Garnish with fresh lime wedges and chopped cilantro if desired.
Notes
- Don’t skip patting the shrimp dry – moisture is the enemy of a crispy coating
- Maintain consistent oil temperature between 340-360°F for the crispiest results
- Don’t overcrowd the pan or the temperature will drop and shrimp will absorb too much oil
- These are best served immediately while the coating is at peak crispiness
- For a lighter version, you can bake these at 425°F for 10-12 minutes, flipping halfway through
- Prep Time: 15 minutes
- Cook Time: 12 minutes
- Category: Appetizer
- Method: Pan-Frying
- Cuisine: American
- Diet: Gluten Free
Nutrition
- Serving Size: 5 shrimp (approximately 4 ounces)
- Calories: 385
- Sugar: 8g
- Sodium: 720mg
- Fat: 22g
- Saturated Fat: 10g
- Unsaturated Fat: 11g
- Trans Fat: 0g
- Carbohydrates: 28g
- Fiber: 2g
- Protein: 20g
- Cholesterol: 195mg
Tips & Variations
Spicy Coconut Shrimp: Add ½ teaspoon cayenne pepper or red pepper flakes to your coconut mixture for a kick. You can also mix sriracha into your dipping sauce.
Baked Coconut Shrimp: For a lighter option, arrange breaded shrimp on a wire rack set over a baking sheet. Spray lightly with cooking spray and bake at 425°F for 10-14 minutes, flipping halfway through, until golden and crispy.
Gluten-Free Version: Use gluten-free flour and gluten-free panko breadcrumbs. The rest of the recipe remains the same.
Extra Crispy Coating: Double-coat your shrimp by dipping them through the egg and coconut mixture twice. This creates an extra-thick, crunchy crust.
Asian-Inspired Twist: Add 1 teaspoon of Chinese five-spice powder to your coating mixture and serve with a soy-ginger dipping sauce.
Tropical Mango Salsa: Skip the sweet chili sauce and serve with fresh mango salsa made from diced mango, red onion, jalapeño, cilantro, and lime juice.
Coconut-Lime Variation: Add 1 tablespoon of lime zest to your coconut mixture for a bright, citrusy flavor that cuts through the richness.
Air Fryer Method: Spray breaded shrimp with cooking spray and arrange in a single layer in your air fryer basket. Cook at 400°F for 8-10 minutes, flipping halfway through.
Pro Chef Tips
The secret to ultra-crispy coconut shrimp is temperature control. Use a cooking thermometer and maintain your oil between 340-360°F. If the oil is too cool, the shrimp will absorb oil and become greasy. Too hot, and the coating burns before the shrimp cooks through.
Toast some of your coconut before breading for deeper flavor. Spread ½ cup of the coconut on a baking sheet and toast at 350°F for 3-5 minutes until lightly golden. Mix this with your untoasted coconut for a more complex, nutty flavor.
Press the coating firmly onto the shrimp. Don’t just dip – actually press and pat the coconut mixture onto each shrimp. This ensures maximum coverage and prevents the coating from falling off during frying.
Let breaded shrimp rest for 10 minutes before frying. This allows the coating to set up and adhere better, resulting in less coating loss during cooking.
Use the tail as a handle when breading. If you leave the tails on, hold the shrimp by the tail when coating, which keeps the tail clean for an attractive presentation and makes them easier to eat.
Fry in small batches. Overcrowding the pan drops the oil temperature dramatically, leading to soggy, greasy shrimp. Patience pays off here!
Season immediately after frying. A light sprinkle of flaky sea salt right when the shrimp come out of the oil takes them from great to extraordinary.
Common Mistakes to Avoid
Using wet shrimp: This is the number one mistake! Any moisture on the shrimp will prevent the coating from adhering properly. Always pat your shrimp completely dry with paper towels before beginning the breading process.
Skipping the three-step breading process: Each layer serves a purpose – the flour creates a dry surface, the egg acts as glue, and the coconut mixture creates the crispy coating. Skipping any step results in coating that falls off.
Overcrowding the frying pan: When you add too many shrimp at once, the oil temperature drops significantly, resulting in soggy, oil-soaked shrimp instead of crispy ones. Fry in batches of 4-5 shrimp maximum.
Overcooking the shrimp: Shrimp cook incredibly quickly – they’re done when they turn pink and opaque, which takes just 3-4 minutes total. Overcooked shrimp become rubbery and tough. Remember, they’ll continue cooking slightly after you remove them from the oil.
Using old or rancid coconut: Coconut contains oils that can go rancid. Always smell your shredded coconut before using it – it should smell sweet and fresh, not musty or off. Store coconut in the freezer for maximum freshness.
Not maintaining oil temperature: Temperature fluctuations lead to inconsistent results. If you don’t have a thermometer, fry a test shrimp first to gauge cooking time and adjust heat accordingly.
Forgetting to season the coating mixture: Plain coconut and breadcrumbs need help! The garlic powder, paprika, and salt in the coating are essential for a flavorful crust.
Storage & Meal Prep
Refrigerator Storage: Store leftover coconut shrimp in an airtight container in the refrigerator for up to 2 days. While they’ll stay safe to eat, the coating will lose some of its crispiness. To restore crispiness, reheat them in the oven or air fryer rather than the microwave.
Reheating Instructions: The best way to reheat coconut shrimp is in a 375°F oven for 8-10 minutes, or in an air fryer at 350°F for 4-5 minutes. This helps crisp up the coating again. Place them on a wire rack over a baking sheet for best results. Avoid microwaving, as this makes them soggy and rubbery.
Breaded and Ready: For the freshest results, bread your shrimp up to 4 hours in advance and keep them refrigerated on a parchment-lined baking sheet. Cover loosely with plastic wrap. Fry them right before serving for optimal crispiness.
Storing Dipping Sauce: Sweet chili sauce keeps in the refrigerator for several weeks in an airtight container. If you make a homemade version, it will keep for up to one week refrigerated.
Leftovers Ideas: Cold coconut shrimp can be chopped and added to tropical salads, tacos, or rice bowls for a delicious next-day lunch. The flavor is still great, even if they’re not quite as crispy.
Make-Ahead & Freezer Notes
Freezing Uncooked Breaded Shrimp: This is the best make-ahead option! Bread the shrimp completely, then arrange them in a single layer on a parchment-lined baking sheet. Freeze until solid (about 2 hours), then transfer to a freezer-safe bag or container. They’ll keep for up to 2 months. When ready to cook, fry them straight from frozen, adding an extra 1-2 minutes to the cooking time.
Freezing Cooked Shrimp: While possible, I don’t recommend freezing already-fried coconut shrimp as the coating becomes soggy and the texture suffers significantly when thawed and reheated. If you must freeze them, use within 1 month and reheat in a hot oven to restore some crispiness.
Thawing Instructions: If you’re starting with frozen raw shrimp, thaw them overnight in the refrigerator or place them in a sealed bag and submerge in cold water for 30 minutes. Never thaw shrimp at room temperature.
Make-Ahead Prep: You can set up your breading station and mix your coconut coating mixture up to one day in advance. Store the coconut mixture in an airtight container at room temperature. Beat eggs fresh when you’re ready to bread the shrimp.
Party Planning: If you’re entertaining, bread all your shrimp in the morning and refrigerate them on a parchment-lined tray. About 20 minutes before guests arrive, start frying in batches. Keep finished shrimp warm in a 200°F oven until ready to serve.
Serving Suggestions
Coconut shrimp are incredibly versatile and pair beautifully with a variety of sides and accompaniments. Here are my favorite ways to serve them:
Classic Appetizer Spread: Arrange the shrimp on a platter with sweet chili sauce, pineapple chunks, and lime wedges for a tropical presentation that’s perfect for parties.
Tropical Dinner Plate: Serve over coconut rice with grilled pineapple slices and a side of sautéed bok choy or Asian-style green beans for a complete island-inspired meal.
Taco Night: Turn these into amazing shrimp tacos! Serve in warm flour tortillas with shredded cabbage, mango salsa, avocado slices, and a drizzle of cilantro-lime crema.
Salad Topper: Place warm coconut shrimp over a bed of mixed greens with mandarin oranges, sliced almonds, and a citrus vinaigrette for a restaurant-quality salad.
Rice Bowl: Create a beautiful grain bowl with jasmine rice, edamame, cucumber, shredded carrots, avocado, and these crispy shrimp, drizzled with sweet chili sauce and sriracha mayo.
Side Dish Pairings: French fries or sweet potato fries, coleslaw, cucumber salad, steamed jasmine rice, roasted vegetables, or a simple garden salad all complement these shrimp perfectly.
Dipping Sauce Options: Beyond sweet chili sauce, try serving with orange marmalade mixed with horseradish, honey-mustard sauce, mango chutney, pineapple salsa, spicy mayo, or a tangy Thai peanut sauce.
Beverage Pairings: These pair wonderfully with Riesling, Sauvignon Blanc, light beer, mojitos, piña coladas, or sparkling water with lime.
FAQs Section
Can I use frozen shrimp for this recipe?
Absolutely! Frozen shrimp work perfectly for coconut shrimp. Just make sure they’re completely thawed and thoroughly patted dry before breading. I actually prefer to buy frozen shrimp because they’re often flash-frozen shortly after harvesting, which locks in freshness. Thaw them overnight in the refrigerator or in a bowl of cold water for about 30 minutes.
How do I know when the shrimp are cooked through?
Shrimp cook very quickly and are done when they turn from translucent gray to opaque pink/white. The coating should be golden brown after 3-4 minutes of total frying time. If you overcook them, they’ll become rubbery and tough. When in doubt, cut one open – the flesh should be opaque throughout with no translucent gray areas.
Can I bake these instead of frying?
Yes! While they won’t be quite as crispy as fried, baked coconut shrimp are still delicious and much lighter. Arrange breaded shrimp on a wire rack set over a baking sheet, spray generously with cooking spray, and bake at 425°F for 10-14 minutes, flipping halfway through. The wire rack allows air circulation for crisper results.
Why is my coconut coating falling off?
This usually happens for one of three reasons: the shrimp weren’t dry enough before breading, you didn’t press the coating firmly onto the shrimp, or the oil temperature wasn’t hot enough. Make sure to pat shrimp completely dry, press the coconut mixture firmly onto each shrimp, and maintain your oil temperature at 350°F.
What size shrimp should I buy?
I recommend 16-20 count shrimp per pound (also called “extra-large” or “jumbo”). This size gives you a good ratio of shrimp to coating and makes an impressive presentation. You can use smaller shrimp (21-25 count), but adjust cooking time down slightly. Avoid anything smaller than 26-30 count as they can overcook quickly.
Can I make these dairy-free?
Great news – this recipe is already dairy-free! There’s no butter, milk, or cheese in the coating or the sweet chili dipping sauce. Just double-check your sweet chili sauce label to ensure it doesn’t contain any dairy ingredients, though most brands don’t.
What’s the best oil for frying coconut shrimp?
Use oils with high smoke points that won’t impart strong flavors. Vegetable oil, canola oil, and peanut oil are all excellent choices. Avoid olive oil or butter, which have lower smoke points and can burn at the temperatures needed for frying. You need enough oil to come 1-2 inches up the sides of your pan for proper shallow frying.
Conclusion
These crispy coconut crusted shrimp are truly a showstopper dish that brings restaurant-quality flavor and presentation right to your home kitchen. The combination of sweet, crunchy coconut coating with tender, juicy shrimp creates a texture and flavor experience that’s simply irresistible. Whether you’re serving them as an elegant appetizer for a dinner party, a fun family dinner, or a special date night treat, they never fail to impress.
The best part? They’re so much easier to make than they look! With just a simple three-step breading process and a few minutes of frying, you’ll have golden, crispy perfection on your plate. Plus, the make-ahead and freezer-friendly options mean you can always have this impressive dish ready to go whenever the craving strikes.
I’d love to hear how your coconut shrimp turn out! Did you try any of the variations? What dipping sauce did you serve them with? Drop a comment below and let me know. And if you love this recipe as much as my family does, please share it with your friends and pin it to your favorite Pinterest board so you can make it again and again. Here’s to bringing those tropical vacation vibes to your dinner table – you deserve it!
Happy cooking! 🍤