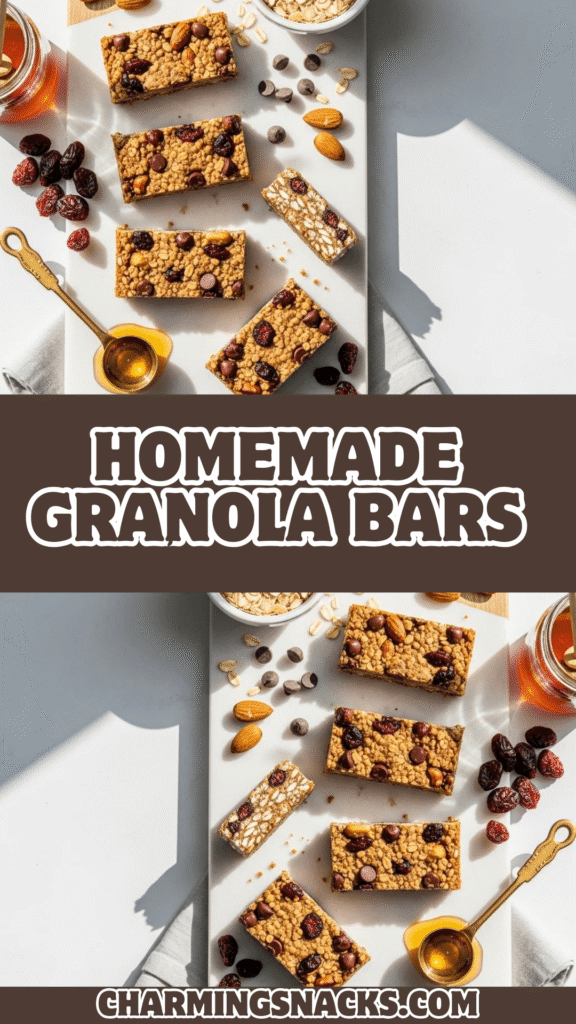
No-Bake Chewy Homemade Granola Bars (Better Than Store-Bought!)
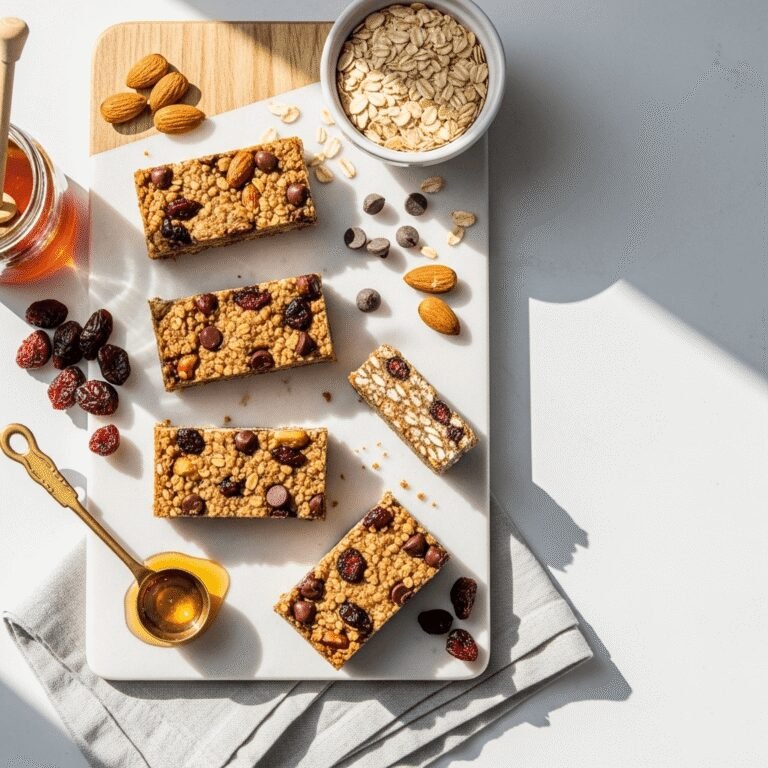
Say goodbye to expensive, overly processed store-bought granola bars and hello to these incredible homemade granola bars that are healthier, tastier, and surprisingly easy to make! These chewy, no-bake granola bars are packed with wholesome oats, nuts, seeds, and a touch of natural sweetness from honey. They’re the perfect grab-and-go snack for busy mornings, after-school treats, hiking fuel, or a healthy dessert alternative that everyone in the family will love.
What makes these homemade granola bars truly special is their versatility. You can customize them with your favorite mix-ins like chocolate chips, dried fruit, coconut, or nut butters, making them perfect for picky eaters or specific dietary needs. Plus, they require no baking at all – just mix, press, chill, and slice! In less than 20 minutes of active time, you’ll have a batch of nutritious snacks ready to fuel your week.
These healthy granola bars are ideal for meal prep Sundays, lunchbox additions, pre-workout energy boosts, road trip snacks, or anytime you need a wholesome bite that keeps you satisfied. Parents love them because they know exactly what’s going into their kids’ snacks, and kids love them because they actually taste amazing – not like cardboard!
History / Background
Granola bars as we know them today are a relatively modern invention, but their roots trace back to the late 19th century health food movement in America. The story begins with Dr. James Caleb Jackson, who created “granula” in 1863 – one of the first breakfast cereals made from graham flour. Dr. John Harvey Kellogg later developed a similar product at his Battle Creek Sanitarium, though he had to change the name due to trademark issues.
However, it wasn’t until the 1970s that granola bars became the portable snack phenomenon we recognize today. The health food movement of that decade, combined with Americans’ increasingly busy lifestyles, created a perfect market for convenient, nutritious snacks. Nature Valley introduced one of the first commercially successful granola bars in 1975, followed by Quaker Oats’ Chewy Granola Bars in the late 1970s.
These commercial products were revolutionary for their time, but they often contained high amounts of sugar, preservatives, and artificial ingredients. By the 1990s and 2000s, health-conscious consumers began questioning what was really in their “healthy” snacks. This sparked a homemade granola bar movement, with home cooks and food bloggers creating recipes that put control back in consumers’ hands.
The no-bake granola bar method gained popularity through food blogs and Pinterest in the 2010s, as busy parents and health enthusiasts sought ways to create nutritious snacks without heating up their kitchens. Today, homemade granola bars represent a return to real food – simple ingredients you can pronounce, customizable to individual tastes and dietary needs, and made with care rather than mass-produced in factories.
The beauty of homemade granola bars is that they connect us to a tradition of wholesome, intentional eating while fitting perfectly into our modern, fast-paced lives. They’re proof that healthy eating doesn’t have to be complicated or time-consuming.
Why You’ll Love This Recipe
These no-bake chewy granola bars are about to become your new favorite snack-prep recipe! They strike the perfect balance between healthy and delicious, with a satisfying chewy texture that rivals any store-bought version. The base recipe is simple enough for beginners but versatile enough to satisfy experienced home cooks who love to experiment with flavors.
Here’s why this recipe will become your go-to:
- No baking required – Keep your kitchen cool with this simple no-bake method that’s perfect for summer or busy weeknights
- Meal prep friendly – Make a batch on Sunday and have healthy snacks ready for the entire week
- Budget-friendly – Costs a fraction of store-bought bars and makes 16 generous servings
- Customizable for any diet – Easy to adapt for gluten-free, vegan, nut-free, or specific allergy needs
- Kid-approved taste – Actually delicious, not just “healthy-tasting,” so even picky eaters will request them
- Real, wholesome ingredients – You control exactly what goes in, with no preservatives or artificial additives
- Perfect texture – Chewy and satisfying, not crumbly or too hard like many homemade versions
- Naturally sweetened – Uses honey or maple syrup instead of refined sugar
- Protein-packed energy – Keeps you full and energized for hours, perfect for active lifestyles
- Allergy-friendly options – Easy to make nut-free, dairy-free, or accommodate other dietary restrictions
- Quick prep time – Only 15 minutes of hands-on work before they set in the fridge
Ingredient Notes
The secret to perfect homemade granola bars is understanding what each ingredient contributes. Here’s everything you need to know:
Old-Fashioned Rolled Oats – The foundation of your bars. Use old-fashioned oats, not quick oats or steel-cut. Old-fashioned oats provide the right texture and structure. Quick oats will make the bars too dense and mushy. For gluten-free granola bars, make sure your oats are certified gluten-free as oats are often processed in facilities with wheat.
Honey or Maple Syrup – This is your binding agent and natural sweetener. Honey creates slightly chewier bars with a distinct flavor, while maple syrup offers a more subtle sweetness and is vegan-friendly. Don’t skip or reduce the amount too much, as the sweetener is crucial for holding everything together. For a refined-sugar-free option, both work perfectly.
Nut Butter or Seed Butter – Peanut butter, almond butter, cashew butter, or sunflower seed butter all work beautifully. This adds richness, helps bind the bars, and provides protein and healthy fats. Natural nut butters (just nuts and maybe salt) work best. If your nut butter is separated, stir it well before measuring. For nut-free granola bars, use sunflower seed butter or tahini.
Coconut Oil – Helps the bars set firm in the refrigerator and adds richness. Use refined coconut oil if you don’t want coconut flavor, or virgin coconut oil if you enjoy that subtle tropical note. You can substitute with more nut butter, but coconut oil helps achieve that perfect chewy-yet-firm texture.
Vanilla Extract – Enhances all the other flavors and adds warmth. Pure vanilla extract is always preferred over imitation.
Salt – A small amount balances the sweetness and makes all the flavors pop. Don’t skip it!
Mix-ins (Nuts, Seeds, Dried Fruit, Chocolate Chips) – This is where you customize! Popular options include chopped almonds, walnuts, pecans, sunflower seeds, pumpkin seeds, dried cranberries, raisins, chopped dates, shredded coconut, mini chocolate chips, or cacao nibs. Aim for about 1½ to 2 cups total mix-ins. Just chop larger items like nuts into smaller pieces so the bars hold together better.
Optional: Protein Powder – For an extra protein boost, you can add 2-4 tablespoons of your favorite protein powder. Reduce the oats by the same amount to maintain the right consistency.
Optional: Ground Flaxseed or Chia Seeds – Adds fiber, omega-3s, and helps with binding. Use 2-3 tablespoons if desired.
Equipment Needed
You won’t need any fancy kitchen gadgets for this simple recipe. Here’s what to have ready:
- 9×9-inch square baking pan or 8×8-inch pan (for thicker bars)
- Parchment paper or aluminum foil (for easy removal and clean-up)
- Medium saucepan (for warming the wet ingredients)
- Large mixing bowl (for combining all ingredients)
- Measuring cups and spoons (for accurate measurements)
- Wooden spoon or sturdy spatula (for mixing the thick mixture)
- Sharp knife (for cutting bars cleanly)
- Spatula or back of a measuring cup (for pressing the mixture firmly into the pan)
- Cutting board (optional, for chopping nuts and dried fruit)
Homemade Granola Bars
Chewy, no-bake homemade granola bars loaded with oats, nuts, seeds, and naturally sweetened with honey. These healthy granola bars are perfect for meal prep, lunchboxes, and on-the-go snacking. So much better than store-bought!
- Total Time: 2 hours 15 minutes
- Yield: 16 bars 1x
Ingredients
Base:
- 2½ cups (250g) old-fashioned rolled oats
- ½ cup (120ml) honey or pure maple syrup
- ½ cup (130g) natural peanut butter or almond butter (or sunflower seed butter for nut-free)
- ¼ cup (60ml) coconut oil
- 1 teaspoon vanilla extract
- ½ teaspoon salt
- 2 tablespoons ground flaxseed (optional, for extra nutrition)
Mix-Ins (choose about 1½ to 2 cups total):
- ½ cup (60g) chopped almonds, walnuts, or pecans
- ¼ cup (35g) sunflower seeds or pumpkin seeds
- ⅓ cup (50g) mini chocolate chips or cacao nibs
- ⅓ cup (50g) dried cranberries, raisins, or chopped dates
- ¼ cup (20g) unsweetened shredded coconut
- 2 tablespoons chia seeds
Instructions
- Line the pan: Line a 9×9-inch baking pan with parchment paper, leaving some overhang on the sides for easy removal later. Alternatively, you can use aluminum foil lightly greased with coconut oil or cooking spray. This step is crucial for easily lifting out and cutting the bars later.
Make the Sticky Base:
- Warm the wet ingredients: In a medium saucepan over low heat, combine the honey (or maple syrup), nut butter, and coconut oil. Stir constantly for 2-3 minutes until everything is melted together and smooth. The mixture should be warm and pourable but not boiling. Remove from heat and stir in the vanilla extract and salt. This creates your “glue” that will hold all the dry ingredients together.
Combine Everything:
- Mix the dry ingredients: In a large mixing bowl, combine the oats, ground flaxseed (if using), and all your chosen mix-ins – nuts, seeds, dried fruit, chocolate chips, coconut, etc. Stir everything together so the ingredients are evenly distributed throughout.
- Pour and mix: Pour the warm honey mixture over the oat mixture. Using a sturdy wooden spoon or spatula, mix thoroughly until every single oat is coated and the mixture looks evenly moistened. This takes some elbow grease – keep stirring for 1-2 minutes to ensure everything is well combined. The mixture will be thick and sticky, which is exactly what you want.
Press and Chill:
- Transfer to pan: Dump the entire mixture into your prepared pan. Here’s the important part: using the back of a measuring cup, spatula, or your hands (lightly greased or dampened to prevent sticking), press down VERY firmly and evenly across the entire surface. Really compact it down – this is the key to bars that hold together rather than crumble. Press especially hard along the edges and corners. The top should be smooth and level.
- Chill until firm: Cover the pan with plastic wrap or foil and refrigerate for at least 2 hours, or until completely firm. For faster results, you can place them in the freezer for 45-60 minutes. The bars need to be completely set before cutting, or they’ll fall apart.
Cut and Serve:
- Remove and cut: Using the parchment paper overhang, lift the entire slab out of the pan and place it on a cutting board. Using a sharp knife (you can warm it under hot water and dry it for cleaner cuts), cut into 16 bars (4 rows by 4 rows). For clean cuts, wipe the knife between each slice.
- Store properly: Store the bars in an airtight container with parchment paper between layers to prevent sticking. Keep refrigerated for best texture, or store at room temperature for softer bars.
Notes
- Texture tip: The firmer you press the mixture into the pan, the better your bars will hold together. Don’t be gentle!
- Sweetness level: If you prefer less sweet bars, you can reduce the honey to ⅓ cup, but note that the bars may be slightly more crumbly.
- Mix-in flexibility: The mix-ins listed are suggestions. Use whatever combination you love, keeping the total around 1½ to 2 cups.
- Nut-free option: Replace nut butter with sunflower seed butter or tahini, and omit any tree nuts. Use seeds and oats as the base.
- Vegan version: Use maple syrup instead of honey.
- Gluten-free: Use certified gluten-free oats and check that all mix-ins are gluten-free.
- If bars are too crumbly: Next time, warm the mixture slightly before pressing (it spreads more easily), use a bit more honey/syrup, or press even more firmly.
- If bars are too soft: Increase the oats by ¼ cup or reduce the liquid ingredients slightly. Make sure to refrigerate fully.
- Prep Time: 15 minutes
- Cook Time: 2 hours
- Category: Dessert
- Method: No-Bake
- Cuisine: American
- Diet: Vegetarian
Nutrition
- Serving Size: 1 bar (1/16 of recipe)
- Calories: 195
- Sugar: 11g
- Sodium: 85mg
- Fat: 10g
- Saturated Fat: 3g
- Unsaturated Fat: 6g
- Trans Fat: 0g
- Carbohydrates: 24g
- Fiber: 3g
- Protein: 5g
- Cholesterol: 0mg
Tips & Variations
Flavor Variations:
- Chocolate Peanut Butter Bars: Use peanut butter, add ½ cup mini chocolate chips, and drizzle melted dark chocolate on top after chilling.
- Tropical Paradise Bars: Add ½ cup shredded coconut, ⅓ cup chopped dried pineapple, ¼ cup macadamia nuts, and use coconut oil and almond butter.
- Apple Cinnamon Bars: Add ½ cup dried apple pieces, ½ teaspoon cinnamon, ¼ cup chopped walnuts, and a pinch of nutmeg.
- Cherry Almond Bars: Use almond butter, add ½ cup dried cherries, ⅓ cup sliced almonds, and ¼ teaspoon almond extract.
- Pumpkin Spice Bars: Add 2 tablespoons pumpkin puree to the wet mixture, ½ teaspoon pumpkin pie spice, ⅓ cup pepitas, and ¼ cup dried cranberries.
- Protein Power Bars: Add 3-4 tablespoons vanilla or chocolate protein powder, reduce oats by the same amount, and include hemp seeds and chia seeds.
- Trail Mix Bars: Combine peanuts, raisins, M&Ms or chocolate chips, and sunflower seeds for that classic trail mix flavor.
- Lemon Blueberry Bars: Add 1 tablespoon lemon zest, ½ cup dried blueberries, ¼ cup white chocolate chips, and 2 tablespoons poppy seeds.
Dietary Modifications:
- Lower Sugar: Reduce honey to ⅓ cup and increase nut butter to ⅔ cup. Add unsweetened dried fruit sparingly.
- Higher Protein: Use protein powder, add hemp seeds, increase nut butter, and include nuts over dried fruit.
- Nut-Free for Schools: Use sunflower seed butter, sunflower seeds, pumpkin seeds, and oats as your base. Add allergy-friendly chocolate chips if desired.
- Paleo-Friendly: Replace oats with unsweetened coconut flakes and chopped nuts. Use honey and almond butter.
Pro Chef Tips
Toast your oats first: For deeper, nuttier flavor, spread your oats on a baking sheet and toast them at 350°F for 8-10 minutes until fragrant and lightly golden before mixing with other ingredients. Let them cool completely before proceeding. This single step elevates the flavor dramatically.
Temperature matters: Make sure your honey mixture is warm when you pour it over the oats. Warm honey is much more pourable and coats the oats more thoroughly than cold honey. However, don’t let it boil or get too hot, as this can make the bars too hard once cooled.
The press-and-chill technique: Professional bakers know that proper compression is everything. After pressing the mixture into the pan, place another piece of parchment paper on top and use a flat-bottomed object (like another baking pan or a book wrapped in plastic) to press down evenly with significant pressure for 30 seconds. This creates perfectly compact bars.
Moisture balance: Different nut butters have different moisture contents. If your mixture seems too dry and crumbly after mixing, add 1-2 tablespoons more honey. If it seems too wet and won’t hold shape, add 2-4 tablespoons more oats.
Chop mix-ins small: Large chunks of nuts or big pieces of dried fruit create weak spots where bars can break. Chop everything into small, uniform pieces (about the size of a chocolate chip) for bars that hold together perfectly.
The clean-cut trick: For professional-looking bars with clean edges, refrigerate the slab until very firm, then let it sit at room temperature for just 5 minutes before cutting. This slight warming makes cutting easier while the bars are still firm enough to hold their shape. Wipe your knife clean and warm it under hot water between each cut.
Flavor layering: Create a more complex flavor profile by using two types of nut butter (half peanut, half almond), combining honey and maple syrup, or adding multiple extracts (vanilla plus a touch of almond or coconut extract).
Storage optimization: If stacking bars in a container, place parchment or wax paper between layers to prevent them from sticking together and losing their shape.
Common Mistakes to Avoid
Not pressing firmly enough: This is the number one reason homemade granola bars fall apart! You really need to compact the mixture firmly and evenly into the pan. Use serious pressure – much more than feels comfortable. The mixture should be densely packed with no air pockets, and the surface should be completely smooth and level. If your bars crumble when you cut them, insufficient pressing was likely the culprit.
Cutting too soon: Patience is crucial! If you cut the bars before they’re completely chilled and set, they’ll fall apart no matter how well you pressed them. The mixture needs at least 2 full hours in the refrigerator (or 45-60 minutes in the freezer) to firm up properly. The bars should feel solid and cold to the touch before cutting. When in doubt, chill longer rather than shorter.
Using the wrong oats: Quick oats or instant oats will make your bars gummy and overly dense because they absorb more liquid than old-fashioned rolled oats. Steel-cut oats won’t work at all because they’re too hard and won’t bind. Only old-fashioned rolled oats provide the right texture and structure. Make sure you’re using the right type!
Skimping on the honey or nut butter: It’s tempting to reduce these ingredients to make the bars “healthier,” but they’re essential for binding. The honey and nut butter work together to glue all the dry ingredients into bars that actually hold their shape. If you use too little, your bars will be dry, crumbly, and fall apart. Follow the measurements as written, especially on your first batch.
Adding too many mix-ins: More isn’t always better! If you add more than 2 cups of mix-ins, you’ll overwhelm the oat base and the bars won’t hold together properly. The oats need to be the dominant ingredient to provide structure. Aim for about 1½ to 2 cups total add-ins, evenly distributed throughout.
Not stirring the mixture thoroughly: Every single oat needs to be coated with the honey mixture for the bars to hold together. This requires vigorous stirring for 1-2 minutes. Don’t just give it a few quick stirs – really work the mixture with your spoon until you don’t see any dry spots and everything looks evenly moistened and sticky.
Storage & Meal Prep
Refrigerator Storage: Store your homemade granola bars in an airtight container in the refrigerator for the best texture and longest shelf life. They’ll stay fresh for up to 2 weeks, though they rarely last that long! Separate layers with parchment paper to prevent sticking. The cold temperature keeps them perfectly chewy and prevents the honey from making them too soft.
Room Temperature Storage: If you prefer softer bars, you can store them at room temperature in an airtight container for 5-7 days. They’ll be more tender and easier to bite through but may be slightly more fragile. This works best in cooler weather; in hot or humid conditions, stick with refrigeration.
Individual Wrapping: For grab-and-go convenience, wrap each bar individually in plastic wrap, parchment paper, or place in small zip-top bags. This makes them perfect for lunchboxes, purses, gym bags, or car snacks. Write the date on the wrapper so you know when you made them.
Meal Prep Sunday: These bars are ideal for weekly meal prep. Make a batch every Sunday and you’ll have healthy snacks ready for the entire week. Double the recipe if you have a large family or eat them frequently – they take the same amount of time to make whether you’re making one batch or two.
Freshness Tips: The bars stay freshest when kept cold and in an airtight container. If they seem to be drying out, try storing them with a small piece of bread or apple in the container (not touching the bars) to maintain moisture. Replace the bread/apple every few days.
Make-Ahead & Freezer Notes
Make-Ahead Success: One of the best things about these healthy granola bars is that they’re actually better after sitting for a day! The flavors meld together and the texture becomes even more perfectly chewy. Make them 1-2 days before you need them for the absolute best results. They’ll stay fresh in the refrigerator for up to 2 weeks.
Freezer-Friendly Snacks: These bars freeze beautifully for up to 3 months! Once completely chilled and cut, wrap each bar individually in plastic wrap, then place all the wrapped bars in a large freezer bag or airtight container. Label with the date and flavor. This is perfect for making multiple batches in different flavors and having variety on hand.
Thawing Methods: For a cold snack, eat them straight from the freezer – they’re surprisingly soft even when frozen. For a softer texture, let them thaw at room temperature for 15-20 minutes or in the refrigerator for 1 hour. You can also take them out in the morning and they’ll be perfectly thawed by lunchtime or snack time.
Quick Grab-and-Go: Keep a few bars in your freezer wrapped individually for those mornings when you’re running late. Toss a frozen bar in your bag and it’ll thaw perfectly by the time you’re ready to eat it, keeping other items cool in the meantime. This is a lifesaver for busy families!
Batch Freezing Strategy: Make several batches in different flavor combinations and freeze them all. This gives you variety without the need to make fresh bars every week. Try chocolate chip, dried fruit, and nut varieties so everyone in the family has their favorite.
Freezing Before Cutting: You can also freeze the entire uncut slab if preferred. Wrap it tightly in plastic wrap, then aluminum foil. When ready to use, thaw in the refrigerator overnight, then cut into bars. This method is great if you want to make bars well in advance for a special event.
Serving Suggestions
These versatile homemade granola bars work for so many eating occasions beyond just standalone snacks!
Breakfast Ideas: Serve a granola bar alongside Greek yogurt and fresh berries for a balanced breakfast. Crumble a bar over yogurt parfaits or smoothie bowls for added crunch and nutrition. Pair with a piece of fruit and string cheese for a complete morning meal when you’re short on time.
Lunchbox Champion: These bars are perfect for school lunches, work lunches, or picnic baskets. Pack alongside sandwiches, fresh veggies with hummus, and fruit for a well-rounded meal. They’re sturdy enough to survive being tossed in a bag without crumbling.
Workout Fuel: Eat a bar 30-60 minutes before workouts for sustained energy, or immediately after exercise to refuel. Pair with a protein shake or chocolate milk for optimal post-workout recovery. The combination of carbs, protein, and healthy fats makes them ideal for active lifestyles.
Afternoon Snack: Keep hunger at bay between meals by enjoying a bar with a cup of coffee, tea, or cold milk. They’re substantial enough to tide you over without spoiling your appetite for dinner. Add an apple or banana for extra fullness.
Dessert Alternative: When sweet cravings hit, these bars satisfy without the guilt of traditional desserts. The chocolate chip variety especially hits the spot when you want something sweet. Serve with a small scoop of vanilla ice cream for a special treat that’s still relatively wholesome.
Beverage Pairings: These bars pair beautifully with coffee, especially cold brew or iced coffee for breakfast. For kids, serve with cold milk (dairy or non-dairy). Herbal teas like chamomile or mint are lovely for afternoon snacks. For adults, they’re surprisingly good with a light beer or cider at casual gatherings.
Travel and Hiking: These bars are sturdy, non-perishable (for short trips), and provide sustained energy, making them perfect for road trips, hiking, camping, or any outdoor adventure. They won’t melt in moderate heat like chocolate bars and provide better nutrition than most packaged snacks.
FAQs Section
Why are my granola bars falling apart?
The most common reason for crumbly bars is not pressing the mixture firmly enough into the pan. You really need to use significant pressure to compact everything together tightly. Other causes include not using enough honey or nut butter (the binding agents), using quick oats instead of old-fashioned oats, or cutting the bars before they’re fully chilled and set. Make sure you refrigerate for a full 2 hours before cutting. If your bars still crumble, try adding 2-3 more tablespoons of honey or nut butter next time.
Can I use quick oats instead of old-fashioned oats?
No, quick oats are not recommended for this recipe. Quick oats are pre-cooked and broken into smaller pieces, so they absorb liquid differently and create a gummy, dense texture rather than the chewy texture you want. Old-fashioned rolled oats are essential for the right structure. Steel-cut oats won’t work either as they’re too hard. Stick with old-fashioned rolled oats for best results.
How can I make these bars hold together better?
Start by pressing the mixture very firmly into the pan – this is the most important factor. Make sure your honey mixture is warm when you add it to the oats so it coats everything thoroughly. Use the full amount of honey and nut butter as these are your binding agents. Chop all mix-ins into small pieces so they integrate better. Finally, make absolutely sure the bars are completely chilled before cutting. Some people also find that adding 2 tablespoons of ground flaxseed helps with binding.
Can I make these without nuts for school lunches?
Absolutely! These bars are easy to make completely nut-free. Replace the nut butter with sunflower seed butter, tahini, or even soy nut butter. For mix-ins, use sunflower seeds, pumpkin seeds, dried fruit, chocolate chips (check the label to ensure they’re processed in a nut-free facility), shredded coconut, and extra oats. The texture and taste will be just as good, and they’ll be safe for nut-free schools.
What’s the best way to cut clean bars?
First, make sure the bars are completely firm from refrigeration. Remove the entire slab from the pan using the parchment paper overhang. Use a large, sharp knife and warm it under hot water, then dry it completely. Make your first cut, then wipe the knife clean and warm it again before the next cut. This prevents sticking and creates clean edges. Cutting from edge to edge in one smooth motion rather than sawing back and forth also helps. Some people find that dental floss works well too!
Can I reduce the sugar to make them healthier?
You can reduce the honey or maple syrup to about ⅓ cup minimum, but keep in mind that the sweetener isn’t just for taste – it’s essential for binding the bars together. If you reduce it too much, your bars will be dry and crumbly. To compensate, you might need to increase the nut butter slightly. Also consider that using less sweet mix-ins like nuts and seeds instead of chocolate chips and dried fruit will reduce overall sugar without affecting texture.
How long do these bars last?
When stored properly in an airtight container in the refrigerator, these homemade granola bars stay fresh for up to 2 weeks. At room temperature, they’ll last 5-7 days in a cool, dry place. In the freezer, they keep beautifully for up to 3 months. The bars won’t really go “bad” within these timeframes, but they may gradually lose their chewy texture and become harder. If you notice any signs of mold (rare, but possible if moisture got into the container), discard the batch.
Conclusion
There you have it – the ultimate guide to making perfect chewy homemade granola bars that actually taste amazing and hold together beautifully! These no-bake healthy snacks are proof that wholesome eating doesn’t have to be complicated, expensive, or time-consuming. With just a handful of simple ingredients and about 15 minutes of active time, you can create nutritious bars that blow any store-bought version out of the water.
The beauty of this recipe is in its flexibility. Once you master the basic technique, you can customize these bars endlessly to suit your family’s preferences, dietary needs, and whatever ingredients you have on hand. Make them chocolatey for the kids, pack them with protein for athletes, keep them nut-free for school lunches, or load them with superfoods for maximum nutrition. Every batch can be a new adventure!
These homemade granola bars aren’t just snacks – they’re an investment in your health, your budget, and your peace of mind. You’ll know exactly what your family is eating, you’ll save money compared to buying premium bars at the store, and you’ll always have a healthy option ready when hunger strikes. Plus, there’s something deeply satisfying about making real food with your own hands.
So what are you waiting for? Clear a spot in your fridge, pull out your mixing bowl, and get ready to make the best granola bars you’ve ever tasted. Your future self (and your hungry family members) will thank you!
Ready to make these? Save this recipe to your Pinterest boards and let me know in the comments what mix-in combination you’re most excited to try! Don’t forget to share a photo when you make them – I love seeing your creations!