Italian Sliders Recipe: Easy Party Sandwiches Everyone Will Devour

If you’re looking for the ultimate crowd-pleasing appetizer that’s guaranteed to disappear in minutes, these Italian sliders are about to become your new entertaining secret weapon. Picture this: soft Hawaiian rolls loaded with layers of Italian deli meats, melty provolone cheese, and a buttery garlic herb topping that bakes into pure golden perfection. These baked Italian sliders are easy to make, endlessly customizable, and perfect for game day parties, potlucks, family gatherings, or any occasion when you need to feed a hungry crowd without spending hours in the kitchen!
Introduction of Recipe
Italian sliders are mini sandwiches made by layering sliced Italian meats (like salami, pepperoni, and ham), provolone cheese, and sometimes vegetables between Hawaiian sweet rolls, then topping everything with a seasoned butter mixture before baking until warm, melty, and irresistible. These party sliders take the classic Italian sub sandwich concept and transform it into a shareable, bake-and-serve format that’s perfect for entertaining.
What makes these sliders so popular is their incredible versatility and foolproof nature—they’re virtually impossible to mess up, yet they taste like you spent hours preparing them. The sweet Hawaiian rolls provide the perfect contrast to savory Italian meats, while the garlic butter topping adds richness and helps the tops get beautifully golden and crispy.
Serve these Italian party sliders at Super Bowl parties, birthday celebrations, holiday gatherings, graduation parties, or casual weeknight dinners when you want something fun and different. They’re also fantastic for potlucks since they travel well, can be made ahead, and are easy to serve. Kids and adults alike love them, making them a true crowd-pleaser that bridges all age groups and tastes. Whether you’re feeding 12 or 120, this recipe scales beautifully!
History / Background
The concept of sliders has an interesting American history that dates back to the early 1900s. The term “slider” was originally coined by sailors in the U.S. Navy, referring to small burgers that were so greasy they “slid” down easily. The White Castle hamburger chain, founded in 1921, is often credited with popularizing the slider concept in mainstream American cuisine, serving small, square burgers on small buns that became an iconic fast-food staple.
However, the Italian slider variation we know and love today is a more modern creation, likely emerging from the fusion of two beloved American food trends: the Italian sub sandwich and the Hawaiian roll. Italian submarine sandwiches themselves have roots in Italian-American communities, particularly in the Northeast United States during the early-to-mid 20th century. Italian immigrants brought their traditions of cured meats, aged cheeses, and quality bread, adapting them to American ingredients and tastes.
The genius of using Hawaiian rolls for sliders came much later, probably in the 1990s or early 2000s, when home cooks and party planners discovered that these slightly sweet, soft rolls were perfect for creating shareable, pull-apart sandwich experiences. The sweetness of Hawaiian bread (originally from Portugal, not Hawaii, despite the name!) pairs beautifully with savory Italian ingredients, creating a flavor contrast that’s utterly addictive.
The baked slider format—where you assemble a whole pan of mini sandwiches and bake them together—gained tremendous popularity through food blogs and Pinterest in the 2010s. This method streamlined party prep, allowing hosts to make dozens of sandwiches at once rather than assembling them individually. Today, Italian sliders represent the perfect marriage of Italian-American deli tradition, Hawaiian bread innovation, and modern entertaining efficiency.
What makes this recipe special is how it captures the essence of a classic Italian sub—that perfect combination of multiple Italian meats, tangy peppers, melted cheese, and aromatic seasonings—while making it accessible, shareable, and party-ready. It’s comfort food that feeds a crowd!
Why You’ll Love This Recipe
These Italian party sliders are the definition of maximum flavor with minimum effort, and once you make them, they’ll become your go-to recipe for any gathering. The combination of sweet, soft rolls with savory meats and that incredible garlic butter topping creates a flavor experience that’s truly irresistible—people literally can’t stop at just one!
Here’s why Italian sliders deserve a spot at your next gathering:
- Ridiculously Easy: Just layer, brush, bake—no complicated techniques required
- Ready in 30 Minutes: From start to finish, you’re looking at minimal time investment
- Feeds a Crowd: One pan makes 12 sliders, and the recipe doubles or triples easily
- Make-Ahead Friendly: Assemble hours ahead and bake when guests arrive
- Budget-Friendly: Uses affordable deli meats and simple pantry ingredients
- Crowd-Pleasing: Universally loved by kids and adults alike
- Customizable: Endless variations to suit different tastes and dietary needs
- No Individual Assembly: Make them all at once instead of building sandwich by sandwich
- Perfect for Potlucks: Travels well and stays warm in the pan
- Impressive Presentation: Looks fancy but requires minimal effort
- Minimal Cleanup: Everything happens in one baking dish
- Guaranteed Empty Pan: These always disappear first at any party!
Ingredient Notes
Understanding your ingredients helps you make the best possible Italian sliders and customize them to your preferences:
Hawaiian Sweet Rolls: These soft, slightly sweet rolls are essential to the recipe’s success. The 12-count package of King’s Hawaiian Original Hawaiian Sweet Rolls is standard and fits perfectly in a 9×13 baking dish. The sweetness balances the salty meats beautifully. Substitution: Slider buns or potato rolls work, but you’ll lose that signature sweet contrast.
Italian Deli Meats: Traditional options include Genoa salami, pepperoni, and deli ham, creating layers of different flavors and textures. Buy from the deli counter for better quality and ask for it sliced medium-thin—not shaved, not thick. Substitution: Use any combination of Italian meats you prefer: mortadella, capicola, prosciutto, or even turkey-based Italian meats for a lighter option.
Provolone Cheese: This mild, melty Italian cheese is traditional and creates those beautiful cheese pulls. Deli-sliced provolone is ideal. Substitution: Mozzarella (mild and stretchy), fontina (nutty and creamy), or even American cheese work well. For sharper flavor, try aged provolone.
Butter: Forms the base of that incredible topping. Use real butter—not margarine—for best flavor. Salted or unsalted both work; just adjust the added salt accordingly.
Garlic: Fresh minced garlic gives the best flavor and aroma. Use 2-3 cloves for noticeable garlic presence without overwhelming. Substitution: Garlic powder (½-1 teaspoon) works in a pinch but lacks fresh garlic’s punch.
Italian Seasoning: This herb blend typically contains oregano, basil, thyme, and rosemary—perfect for Italian flavors. Substitution: Make your own by combining equal parts dried oregano, basil, and a pinch of thyme.
Banana Peppers or Pepperoncini: These pickled peppers add tang, slight heat, and authentic Italian sub flavor. They’re optional but highly recommended. Substitution: Roasted red peppers (for sweetness), jalapeños (for heat), or omit entirely.
Dijon Mustard (optional): Adds tanginess and depth when spread on the bottom rolls. Substitution: Yellow mustard, spicy brown mustard, or Italian dressing.
Equipment Needed
You’ll need minimal equipment for these easy Italian sliders—just a few basic kitchen tools:
- 9×13-inch Baking Dish or pan (glass, ceramic, or metal all work)
- Sharp Serrated Knife (for cutting the rolls and slicing the finished sliders)
- Cutting Board
- Small Saucepan or microwave-safe bowl (for melting butter mixture)
- Pastry Brush or spoon (for applying butter topping)
- Aluminum Foil (for covering during baking)
- Measuring Spoons
- Garlic Press or Knife (for mincing garlic)
- Optional: Parchment Paper (for easier cleanup)

Italian Sliders Recipe
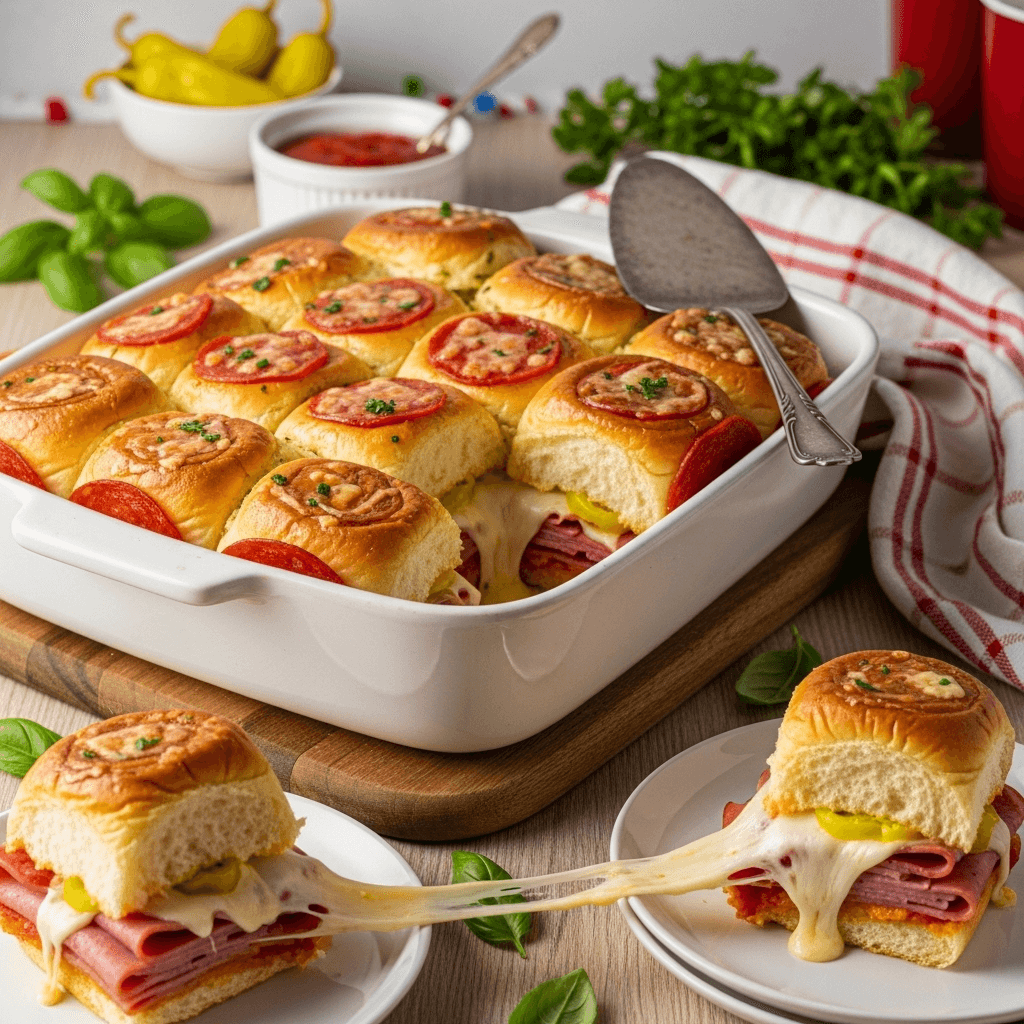
These easy Italian sliders feature layers of Italian deli meats and melted provolone cheese on sweet Hawaiian rolls, topped with a garlic herb butter and baked until golden. Perfect party food that feeds a crowd with minimal effort!
- Total Time: 30 minutes
- Yield: 12 sliders 1x
Ingredients
For the Sliders:
- 1 package (12 count) Hawaiian sweet rolls
- ½ pound sliced deli salami
- ½ pound sliced deli ham
- ¼ pound sliced pepperoni
- 8-10 slices provolone cheese
- ½ cup sliced banana peppers or pepperoncini (optional but recommended)
- 2 tablespoons Dijon mustard (optional)
For the Garlic Butter Topping:
- ½ cup (1 stick) unsalted butter
- 3 cloves garlic, minced
- 1 tablespoon Italian seasoning
- ½ teaspoon onion powder
- ¼ teaspoon salt
- ¼ teaspoon black pepper
- 2 tablespoons grated Parmesan cheese (optional)
- 1 tablespoon fresh parsley, chopped (optional)
Instructions
- Preheat and Prep: Preheat your oven to 350°F (175°C). Lightly spray a 9×13-inch baking dish with cooking spray or line with parchment paper for easier cleanup.
- Slice the Rolls: Without separating the individual rolls, use a large serrated knife to slice the entire block of Hawaiian rolls horizontally, creating a top half and bottom half. Keep the rolls connected—this makes assembly easier and creates that signature pull-apart effect. Place the bottom half of the rolls in your prepared baking dish.
- Add Mustard Layer (Optional): If using, spread the Dijon mustard evenly across the bottom layer of rolls. This adds a tangy kick that complements the meats beautifully.
- Layer the Meats: Start building your sliders by layering the meats. Fold each slice of salami in quarters and arrange evenly across the rolls. Do the same with the ham and pepperoni, creating even layers that cover all the rolls. Don’t worry about perfection—rustic layering works great and ensures every slider gets plenty of meat.
- Add Cheese and Peppers: Lay the provolone cheese slices over the meats, tearing pieces as needed to cover the entire surface. If using banana peppers or pepperoncini, scatter them evenly over the cheese layer. The peppers add authentic Italian sub flavor, so don’t skip them if you like a little tang!
- Top the Sliders: Place the top half of the rolls over the filling, creating a complete “sandwich slab.” Press down gently to compact everything slightly.
- Make the Garlic Butter: In a small saucepan over low heat (or in a microwave-safe bowl), melt the butter. Add the minced garlic, Italian seasoning, onion powder, salt, and pepper. Stir to combine and let it sit for 1-2 minutes to allow the flavors to infuse. The garlic will become fragrant and start to soften slightly.
- Brush the Topping: Using a pastry brush, generously brush the entire top of the rolls with the garlic butter mixture. Make sure to get into all the crevices between rolls—this ensures maximum flavor! If you have extra butter mixture, brush it on the sides of the rolls too. Sprinkle with Parmesan cheese and fresh parsley if using.
- Cover and Bake: Cover the baking dish tightly with aluminum foil. This is important—the foil traps steam, which helps the cheese melt and keeps the sliders moist. Bake covered for 10 minutes.
- Uncover and Finish: Remove the foil and continue baking for an additional 5-7 minutes, or until the tops are golden brown and the cheese is fully melted. The tops should be slightly crispy while the insides remain soft and gooey.
- Slice and Serve: Remove from the oven and let rest for 2-3 minutes (this makes slicing easier and prevents burns). Using a sharp serrated knife, cut along the lines between the rolls to separate into individual sliders. Serve immediately while warm and melty!
Notes
- Don’t Separate Rolls: Keep the rolls connected throughout assembly and baking—this is what makes them “sliders” and creates the pull-apart experience everyone loves.
- Meat Quantities: The amounts listed are guidelines. You want roughly 2-3 slices of meat per slider. Adjust based on your preference for meat-to-bread ratio.
- Cheese Coverage: Make sure cheese covers all the rolls. Overlap slices and tear pieces as needed to avoid any bare spots.
- Butter Application: Be generous with the garlic butter! It’s what makes these sliders truly special. Brush it thoroughly and don’t skip the edges.
- Foil is Important: Covering during the first part of baking creates steam that melts the cheese perfectly. Uncovering at the end crisps the tops.
- Serving Timing: These are best served immediately while the cheese is melty, but they’re still delicious at room temperature for up to 2 hours.
- Prep Time: 15 minutes
- Cook Time: 15 minutes
- Category: Appetizer
- Method: Baking
- Cuisine: Italian-American
- Diet: Gluten Free
Nutrition
- Serving Size: 1 slider
- Calories: 285
- Sugar: 6g
- Sodium: 890mg
- Fat: 16g
- Saturated Fat: 8g
- Unsaturated Fat: 7g
- Trans Fat: 0g
- Carbohydrates: 21g
- Fiber: 6g
- Protein: 14g
- Cholesterol: 45mg
Tips & Variations
The beauty of Italian sliders is their versatility—customize them to match your preferences or what you have available:
Meat Variations:
- Classic Italian Sub: Use mortadella, capicola, and prosciutto for an authentic Italian experience
- All Pepperoni: Kids often prefer simple all-pepperoni sliders—just use ½ pound pepperoni
- Turkey Italian: Substitute turkey salami, turkey ham, and turkey pepperoni for a lighter option
- Meatball Sliders: Skip the deli meats and use sliced meatballs with marinara sauce and mozzarella
- Chicken Parmesan: Use breaded chicken cutlets, marinara, and mozzarella for a twist
Cheese Options:
- Three Cheese: Combine provolone, mozzarella, and fontina for ultimate meltiness
- Spicy: Add pepper jack cheese for heat
- Sharp: Use aged provolone or add sliced sharp cheddar
- Authentic: Try Asiago or pecorino Romano for more authentic Italian flavor
Flavor Boosters:
- Extra Veggies: Add thin tomato slices, fresh basil leaves, or arugula after baking
- More Tang: Brush the bottom rolls with Italian dressing before adding meats
- Spicy Kick: Add sliced jalapeños, hot giardiniera, or a drizzle of hot honey
- Pesto: Spread pesto on the bottom rolls instead of or in addition to mustard
- Sun-Dried Tomatoes: Add chopped sun-dried tomatoes between the meat layers
Dietary Adaptations:
- Gluten-Free: Use gluten-free slider buns (you’ll need to assemble individually since they don’t come connected)
- Lower Sodium: Use low-sodium deli meats and reduce the salt in the butter mixture
- Vegetarian: Use grilled vegetables (zucchini, eggplant, bell peppers) instead of meats
- Keto-Friendly: Skip the rolls and make “unwich” style by wrapping fillings in lettuce
Pro Chef Tips
Take your Italian sliders from good to restaurant-quality with these professional insights:
1. Room Temperature Ingredients: Let your deli meats and cheese sit at room temperature for 15-20 minutes before assembly. Cold meats don’t layer as nicely and can cause condensation that makes the bottom rolls soggy. Room temp ingredients also melt more evenly during baking.
2. Strategic Meat Folding: Don’t just stack flat slices of meat—fold them in quarters or loosely ruffle them. This creates air pockets that lead to better texture and more even distribution of flavors. Plus, folded meats stay in place better when you cut the sliders.
3. Butter Temperature Matters: Your garlic butter should be warm but not hot when you brush it on. If it’s too hot, it soaks through too quickly and can make the tops soggy. Warm butter sits on the surface better, creating that beautiful golden crust.
4. Score Before Assembly: Using a sharp knife, lightly score the top of the rolls along the separation lines before adding the butter. This creates natural breaking points and makes serving much easier without squishing the sliders.
5. Double Butter Brush: For maximum flavor and crispiness, brush half the garlic butter on before covering with foil, then brush the remaining butter on during the last few minutes of baking. This creates incredible flavor depth and a superior golden crust.
6. Strategic Pepper Placement: If using banana peppers or pepperoncini, pat them dry with paper towels first. Excess moisture can make the rolls soggy. Also, place them under the cheese rather than on top—the cheese acts as a barrier preventing moisture from reaching the bread.
7. The Resting Period: After removing from the oven, resist the urge to cut immediately. Let the sliders rest for 2-3 minutes. This allows the cheese to set slightly, making cleaner cuts and preventing all the melty goodness from running out.
Common Mistakes to Avoid
Even though Italian sliders are forgiving, watch out for these common pitfalls:
1. Separating the Rolls: The biggest mistake is separating the individual rolls before assembly. The connected roll format is what makes sliders unique—they steam together under the foil, creating that soft, pull-apart texture everyone loves. Keep them connected throughout the entire process and only separate after baking and resting.
2. Skimping on the Butter: That garlic butter topping isn’t just for flavor—it creates moisture, helps the tops brown beautifully, and adds richness that balances the sweet rolls. Use the full amount called for and make sure you brush it generously across the entire surface, including the edges.
3. Over-Stuffing: While it’s tempting to pile on the meats and cheese, too much filling can prevent proper heating throughout and makes the sliders difficult to bite through. Aim for 2-3 slices of each meat per slider—that’s plenty! Remember, the ratio of bread to filling should be balanced.
4. Baking Uncovered the Entire Time: If you skip the foil-covered baking step, the tops will brown too quickly while the cheese remains unmelted in the center. Always cover for the first part of baking to trap steam and ensure even melting, then uncover to crisp the tops.
5. Using Low-Quality Ingredients: Since this recipe has relatively few ingredients, quality matters tremendously. Avoid pre-packaged, processed “lunchbox” meats—instead, get fresh-sliced deli meats. Use real butter, not margarine. These simple upgrades make a noticeable difference in the final result.
Storage & Meal Prep
Italian sliders are best fresh from the oven, but proper storage allows you to enjoy leftovers:
Refrigerator Storage: Let leftover sliders cool completely to room temperature. Store in an airtight container or wrap tightly in aluminum foil. Refrigerate for up to 3 days. The rolls will soften somewhat as they absorb moisture from the fillings, but they’ll still taste delicious.
Reheating Method: For best results, reheat sliders in a 300°F oven for 10-12 minutes, covered with foil to prevent the tops from over-browning. This warms them through while keeping the rolls soft. You can also microwave individual sliders for 30-45 seconds, though they won’t be as crispy. An air fryer works beautifully—reheat at 320°F for 4-5 minutes.
Room Temperature Serving: If serving at a party, these sliders hold well at room temperature for up to 2 hours. After that, refrigerate any leftovers for food safety.
Meal Prep Strategy: While best assembled and baked fresh, you can prep components ahead. Slice the rolls and prep the garlic butter mixture up to 1 day ahead. Store rolls wrapped tightly and keep butter mixture refrigerated. Assemble and bake when ready to serve.
Avoiding Soggy Sliders: The biggest storage issue is soggy bottom rolls. To minimize this, pat any wet ingredients (like peppers) very dry before assembly, and store leftovers uncovered in the refrigerator for the first 30 minutes to allow steam to escape, then cover.
Make-Ahead & Freezer Notes
These Italian party sliders are excellent for make-ahead entertaining:
Advance Assembly: You can fully assemble the sliders (including the garlic butter topping) up to 4 hours before baking. Cover tightly with plastic wrap and refrigerate. When ready to serve, let the pan sit at room temperature for 15 minutes, then bake as directed, adding 2-3 extra minutes to the covered baking time to account for the cold start.
Overnight Prep: For even more advance planning, assemble the sliders the night before your event, but don’t add the garlic butter topping yet. Cover the assembled sliders tightly with plastic wrap and refrigerate overnight. The next day, let them sit at room temperature for 20 minutes, brush with the butter mixture, and bake as directed.
Freezer-Friendly Details: You can freeze unbaked assembled sliders for up to 1 month. Wrap the entire pan tightly in plastic wrap, then cover with aluminum foil to prevent freezer burn. Don’t add the garlic butter yet. When ready to bake, you can bake from frozen (add 10-15 minutes to the covered baking time) or thaw overnight in the refrigerator, then brush with freshly made garlic butter and bake as directed.
Freezing Baked Sliders: While possible, freezing already-baked sliders results in softer, less appealing texture. If you must freeze leftovers, wrap individual sliders tightly in plastic wrap, place in a freezer bag, and freeze for up to 1 month. Reheat from frozen in a 325°F oven for 15-20 minutes.
Best Reheating Method: For frozen unbaked sliders, bake covered at 350°F for 20 minutes, then uncover and bake 5-7 minutes more until golden. For refrigerated assembled sliders, follow the standard baking time but add 2-3 minutes.
Serving Suggestions
Italian sliders are incredibly versatile and pair well with numerous sides and accompaniments:
Classic Pairings:
- Italian Pasta Salad: Cold pasta tossed with Italian dressing, olives, tomatoes, and mozzarella
- Caesar Salad: Crisp romaine with creamy dressing balances the richness of sliders
- Marinara Dipping Sauce: Serve warm marinara on the side for dipping—it adds moisture and flavor
- Kettle Chips or Potato Chips: The crunch contrasts nicely with soft sliders
- Pickles: Dill pickles, pickled vegetables, or an antipasto platter
Soup Pairings:
- Minestrone Soup: Classic Italian vegetable soup complements the sandwiches perfectly
- Tomato Basil Soup: Warm and comforting alongside sliders
- Italian Wedding Soup: Creates a complete Italian-themed meal
Party Spread Ideas: Serve Italian sliders as part of a larger spread with: antipasto platter (olives, marinated vegetables, cheeses), caprese skewers, bruschetta, garlic breadsticks, and fresh fruit tray. For beverages, pair with Italian sodas, lemonade, iced tea, beer, or red wine.
Game Day Setup: These are perfect football food! Set up a slider bar with various toppings on the side: extra pepperoncini, sliced tomatoes, shredded lettuce, red onion, Italian dressing, and hot sauce. Let guests customize their own.
Lunch Box Idea: Pack individual sliders for lunch boxes with a side of grapes, carrot sticks, and a small container of marinara for dipping.
Breakfast-for-Dinner Twist: For a fun variation, serve Italian sliders alongside roasted vegetables and a simple green salad for an easy, satisfying dinner the whole family will love.
FAQs Section
Q: Can I make Italian sliders without Hawaiian rolls?
A: Yes, though Hawaiian rolls are traditional for their slight sweetness that contrasts beautifully with savory meats. You can substitute regular slider buns, dinner rolls, potato rolls, or even ciabatta rolls. Just note that other rolls won’t come in the connected format, so you’ll need to assemble them individually and arrange them close together in the pan for the same effect. The baking time remains the same.
Q: Do I have to use all three types of meat?
A: Not at all! You can use any combination of Italian meats you prefer, or even just one type. Many people make all-pepperoni sliders for kids or stick to just salami and ham. The total amount of meat should stay roughly the same (about 1-1.25 pounds total), but you can distribute it however you like. Some people even use rotisserie chicken or turkey for lighter options.
Q: Can I make these sliders vegetarian?
A: Absolutely! For vegetarian Italian sliders, skip the meats and load up on grilled or roasted vegetables like zucchini, eggplant, bell peppers, and mushrooms. Add extra cheese (mozzarella, provolone, fontina), sliced tomatoes, fresh basil, and perhaps a spread of pesto or sun-dried tomato paste. The garlic butter topping remains the same. They’re just as delicious!
Q: How do I keep the bottom rolls from getting soggy?
A: Several techniques help prevent soggy bottoms: Pat any wet ingredients (like peppers) thoroughly dry before adding them. Use mustard or pesto as a barrier on the bottom rolls—they create a protective layer. Don’t over-sauce or add too many wet ingredients. Bake immediately after assembly rather than letting them sit. If making ahead, add wet ingredients just before baking rather than during initial assembly.
Q: Can I double this recipe for a larger crowd?
A: Yes! This recipe doubles or even triples easily. You’ll need multiple 9×13 baking dishes or large baking sheets. Keep in mind that you’ll need multiple packages of Hawaiian rolls (each package makes 12 sliders). Double or triple all ingredients proportionally. You can bake multiple pans simultaneously if your oven has space, or bake them in batches. The baking time remains the same.
Q: What’s the best way to transport Italian sliders to a party?
A: For best results, bake the sliders at home, keep them in the baking dish, and cover tightly with foil while still slightly warm (the residual heat helps keep them soft). Transport in an insulated carrier or cooler (without ice packs if still warm). They’ll stay delicious at room temperature for up to 2 hours. Alternatively, assemble them completely at home, transport them unbaked in the covered pan, and bake at your destination.
Q: Can I use a different type of cheese?
A: Definitely! While provolone is traditional and melts beautifully, you can substitute mozzarella for milder flavor and excellent melt, fontina for nutty richness, Swiss for classic deli taste, or cheddar for sharper flavor. For best results, use sliced cheese from the deli counter rather than pre-packaged sandwich slices—it melts more smoothly and tastes fresher. You can even use a combination of cheeses!
Q: Do these sliders need to be served warm?
A: While Italian sliders are absolutely best served warm and melty right out of the oven, they’re still quite good at room temperature. This makes them practical for parties and potlucks where you can’t always serve immediately. If they’ve cooled completely, simply reheat in a 300°F oven for 8-10 minutes before serving to restore that melty cheese and soft texture.
Conclusion
There you have it—everything you need to know to make absolutely perfect Italian sliders that will have your family and friends begging for the recipe! These baked Italian party sliders are proof that the best entertaining recipes don’t have to be complicated. With simple ingredients, minimal prep time, and foolproof instructions, you can create crowd-pleasing sandwiches that look impressive and taste even better.
What makes this recipe truly special is its versatility. Whether you’re hosting a casual Super Bowl party, need a quick weeknight dinner solution, planning a graduation celebration, or contributing to a potluck, these Italian sliders fit every occasion. The make-ahead flexibility means you can prep them when it’s convenient and bake them when guests arrive, filling your home with that irresistible aroma of garlic butter and melting cheese.
I love how this recipe brings people together—there’s something about breaking apart warm, melty sliders and sharing them with loved ones that creates instant comfort and connection. Kids love them, adults devour them, and the person who made them gets all the glory with minimal effort. That’s a winning combination in my book!
The customization options mean you’ll never get bored with this recipe. Try different meats, experiment with cheeses, add your favorite toppings, and make them your own. Once you master the basic technique, you’ll find yourself making Italian sliders for every gathering, tweaking the recipe to match the season, occasion, or crowd you’re feeding.
Ready to make the best party food ever? Try these Italian sliders this weekend and watch them disappear before your eyes! I’d love to hear about your experience—what meat combination did you use? Did you add any special toppings? Leave a comment below and let me know how they turned out! Don’t forget to PIN this recipe to your favorite Pinterest board so you can find it easily whenever you need a crowd-pleasing appetizer. And please share this recipe with your friends who love easy, delicious party food—they’ll thank you!
Happy slider making, friends! 🥖🧀🍖