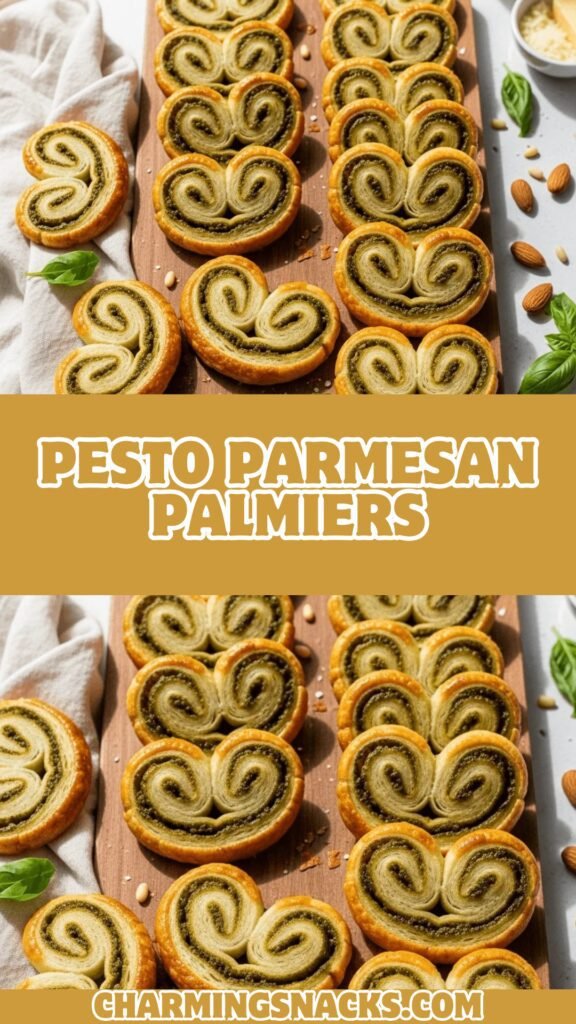
Easy Pesto Parmesan Palmiers (Crispy Puff Pastry Appetizer!)
Get ready to become everyone’s favorite party guest with these stunning pesto parmesan palmiers! These elegant little pastries look like they came from a French bakery, but I’m going to let you in on a secret – they’re incredibly easy to make at home with just a handful of ingredients. Imagine buttery, flaky puff pastry swirled with vibrant basil pesto and nutty Parmesan cheese, baked until golden and crispy. These pesto puff pastry bites are absolutely irresistible and disappear faster than you can say “pass the appetizers!” Whether you’re hosting a holiday gathering, need an impressive last-minute appetizer, or just want to treat yourself to something special, these crispy pesto palmiers are about to become your go-to recipe.
Introduction to Pesto Parmesan Palmiers
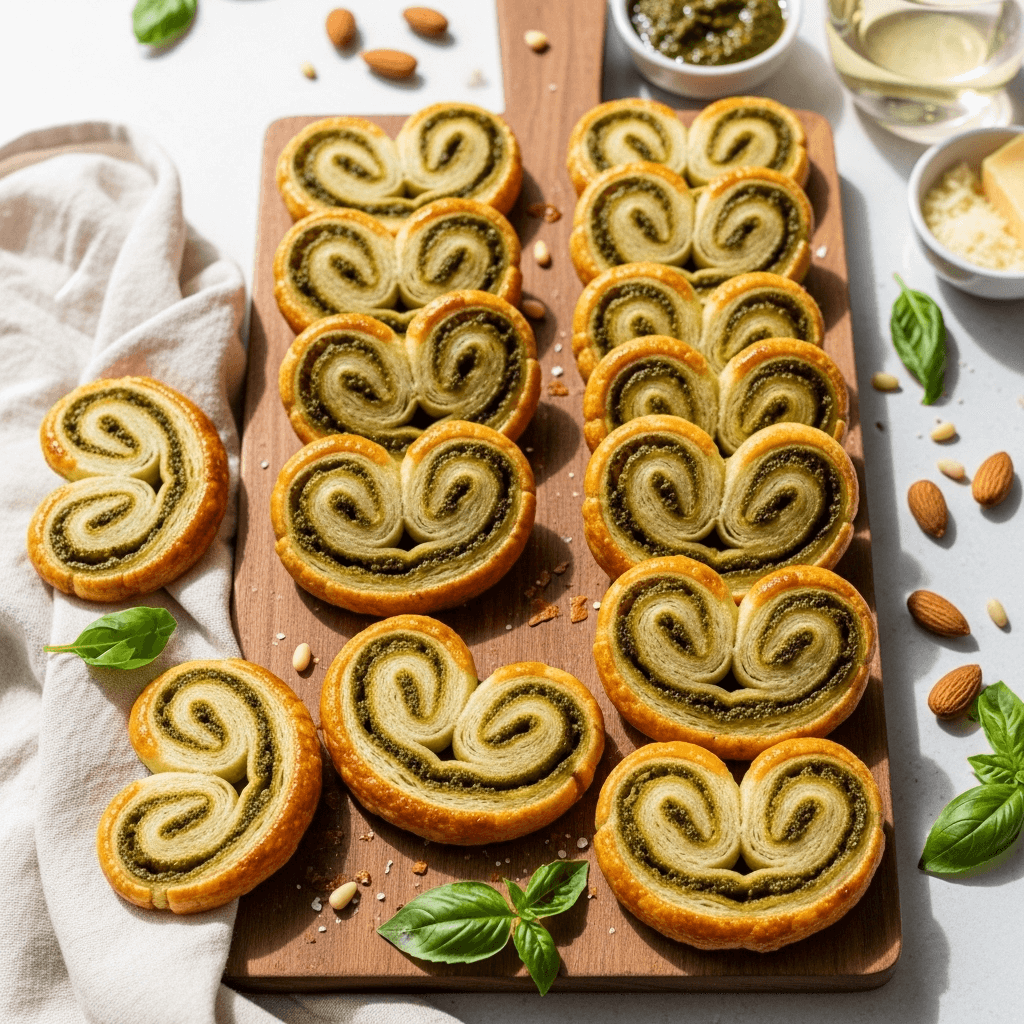
Pesto parmesan palmiers are delicate, butterfly-shaped pastries made from puff pastry that’s been slathered with fresh pesto and sprinkled generously with Parmesan cheese, then rolled from both ends to create that distinctive heart or palm leaf shape. When sliced and baked, they transform into crispy, golden spirals with layers upon layers of flaky pastry, bright pesto flavor, and savory cheese goodness. These French-inspired appetizers are perfect for virtually any occasion – serve them at cocktail parties, wine tastings, bridal showers, holiday gatherings, or alongside soup for an elevated lunch. They’re fancy enough to impress guests at formal events yet simple enough to whip up for casual game day snacks. The combination of herbaceous pesto and salty Parmesan creates an addictive flavor profile that pairs beautifully with wine, cocktails, or even just as an afternoon treat with tea. Best of all, these elegant pesto palmiers can be made ahead and frozen, making them the ultimate stress-free entertaining solution!
History & Background of Palmiers
Palmiers (pronounced “pahl-mee-AY”) are classic French pastries that have been delighting people for over a century. The name “palmier” means “palm tree” in French, referring to the pastry’s distinctive shape that resembles a palm leaf or elephant ear. They’re also sometimes called “palm hearts” or “elephant ears” depending on where you are in the world.
These elegant pastries originated in France, likely in the early 1900s, though their exact origin is debated among culinary historians. Some credit Parisian pâtissiers with their creation, while others believe they came from the French countryside. What we do know is that palmiers were originally sweet pastries, made by rolling puff pastry in sugar before baking, creating a caramelized, crispy treat that’s still popular in French bakeries today.
The technique of making palmiers showcases the French mastery of puff pastry, or “pâte feuilletée,” which dates back even further to the 17th century. The meticulous process of creating hundreds of delicate, buttery layers through repeated folding and rolling is the foundation of many French pastries. Traditional palmiers rely on this incredible lamination to create their characteristic crispy, shattering texture.
The savory adaptation of palmiers is a more modern innovation, likely emerging in the late 20th century as chefs began experimenting with appetizer versions of classic sweet pastries. Adding pesto – that vibrant Italian sauce from Genoa made with basil, pine nuts, garlic, Parmesan, and olive oil – creates a perfect marriage of French technique and Italian flavor. Today, savory palmiers have become a staple at parties and gatherings across America, with home cooks embracing them for their impressive appearance and surprisingly simple preparation. These pesto parmesan palmiers represent the beautiful fusion of European culinary traditions made accessible for modern home kitchens!
Why You’ll Love This Pesto Parmesan Palmiers Recipe
These aren’t just any appetizers – they’re the kind that make people stop mid-conversation to ask for the recipe! What makes these pesto palmiers so special is how they manage to look absolutely bakery-worthy while being shockingly easy to prepare. With store-bought puff pastry doing most of the heavy lifting, you get to look like a culinary genius without spending hours in the kitchen.
Here’s why this recipe is absolutely irresistible:
- Incredibly Easy – Just spread, roll, slice, and bake! Even beginners can master these
- Only 4 Main Ingredients – Puff pastry, pesto, Parmesan, and an egg wash for shine
- Make-Ahead Friendly – Assemble days ahead or freeze for up to 3 months
- Impressive Presentation – Look like they came from an upscale French bakery
- Crowd-Pleaser – Everyone loves these, from kids to picky eaters to food snobs
- Versatile – Perfect for any occasion from fancy dinner parties to casual movie nights
- Quick Prep – Active prep time is only about 15 minutes
- Customizable – Easy to adapt with different fillings and flavors
- Budget-Friendly – Makes about 40 appetizers for under $10
- No Special Skills Required – If you can use a knife and an oven, you’re golden
- Great for Gifting – Bake and package as thoughtful homemade gifts
- Addictively Delicious – The perfect balance of buttery, herby, savory, and crispy
Ingredient Notes
Let’s talk about the simple ingredients that create these show-stopping appetizers:
Puff Pastry – This is your foundation, and I highly recommend using frozen puff pastry sheets (like Pepperidge Farm) for convenience and consistent results. Store-bought puff pastry is pre-laminated with hundreds of butter layers, which is incredibly time-consuming to make from scratch. You’ll typically find it in the freezer section in boxes of two sheets. Each sheet makes about 20 palmiers. Make sure to thaw it properly – about 40 minutes at room temperature or overnight in the refrigerator. Don’t let it get too warm or it becomes sticky and hard to work with. If you’re committed to homemade, rough puff pastry can be made in advance, but honestly, store-bought is fantastic and what most professional caterers use!
Pesto – Use your favorite basil pesto, whether homemade or store-bought. I love using prepared pesto from the refrigerated section (brands like Buitoni or Costco’s Kirkland pesto are excellent) because it’s typically more vibrant and fresher-tasting than shelf-stable jarred versions. Homemade pesto is wonderful if you have fresh basil on hand! The oil content in pesto helps keep the pastry moist and adds rich flavor. For best results, drain excess oil from store-bought pesto by spooning it onto paper towels briefly – too much oil can make the pastry soggy. You’ll need about ½ to ¾ cup per sheet of puff pastry.
Parmesan Cheese – Freshly grated Parmesan is essential here! The pre-grated stuff in the green can won’t give you the same melty, nutty, savory result. Buy a wedge of Parmigiano-Reggiano and grate it yourself using a box grater or food processor. It takes just a minute and makes a huge difference. The cheese creates a delicious salty crust and helps the pesto adhere to the pastry. You can substitute with Pecorino Romano for a sharper, saltier flavor, or use a combination of both.
Egg Wash – One egg beaten with a tablespoon of water creates a beautiful golden shine on your palmiers and helps them achieve that professional bakery look. The proteins in the egg create a glossy, bronzed finish. You can substitute with milk or cream in a pinch, though egg gives the best color. Some people skip this, but I highly recommend it for appearance.
Optional Add-ins – While not required, a sprinkle of red pepper flakes adds a nice kick, or fresh cracked black pepper adds depth. Some people like to add a thin layer of sun-dried tomatoes or a sprinkle of garlic powder for extra flavor.
Equipment Needed
The beautiful thing about this recipe is that you probably already have everything you need:
- Rolling pin – For gently rolling out the puff pastry to even thickness
- Sharp knife – Essential for clean cuts; a dull knife will squish the pastry
- Cutting board – Provides a stable surface for slicing
- Baking sheets – Two large baking sheets work best
- Parchment paper or silicone baking mats – Prevents sticking and ensures easy cleanup
- Pastry brush – For applying egg wash evenly
- Small bowl – For mixing your egg wash
- Measuring cups and spoons – For portioning pesto and other ingredients
- Spatula or offset spatula – Makes spreading pesto easier and more even
- Wire cooling rack – Allows air circulation so bottoms don’t get soggy
- Plastic wrap (optional) – For wrapping logs if making ahead
- Fork – For beating your egg wash

Pesto Parmesan Palmiers
These elegant pesto parmesan palmiers are buttery, flaky puff pastry spirals loaded with basil pesto and nutty Parmesan cheese. They’re incredibly easy to make, perfect for entertaining, and can be prepared ahead or frozen. These crispy pesto puff pastry bites look bakery-worthy but come together in just 15 minutes of active prep time!
- Total Time: 33 minutes
- Yield: About 40 palmiers (approximately 20 servings) 1x
Ingredients
- 2 sheets frozen puff pastry (one 17.3 oz package), thawed according to package directions
- ¾ cup basil pesto (homemade or store-bought), excess oil drained
- 1 cup freshly grated Parmesan cheese, divided
- 1 large egg
- 1 tablespoon water
- Optional: ¼ teaspoon red pepper flakes or black pepper
Instructions
- Prepare Your Workspace: Line two baking sheets with parchment paper and set aside. If your puff pastry isn’t thawed, let it sit at room temperature for about 40 minutes until it unfolds easily but is still cold.
- Roll the Pastry: Lightly flour your work surface. Unfold one sheet of puff pastry and gently roll it with a rolling pin to smooth out the creases and create an even rectangle, approximately 10×12 inches. Don’t roll too thin or the layers won’t puff properly.
- Spread the Pesto: Using an offset spatula or the back of a spoon, spread half of the pesto (about 6 tablespoons) evenly over the entire surface of the pastry, leaving a small ½-inch border on the two short ends. Don’t be shy – you want good coverage for flavor in every bite.
- Add the Cheese: Sprinkle ½ cup of the freshly grated Parmesan evenly over the pesto layer. Press it gently into the pesto so it adheres well. Add a light sprinkle of red pepper flakes or black pepper if using.
- Create the Rolls: Starting from one long edge, tightly roll the pastry toward the center of the sheet. Then start from the opposite long edge and roll toward the center until both rolls meet in the middle. You should have two parallel rolls touching each other. Press them together gently so they stick.
- Chill the Log: Wrap the double roll tightly in plastic wrap and refrigerate for at least 30 minutes (or up to 24 hours). This firming step is crucial – it makes slicing much cleaner and helps the palmiers hold their shape. Repeat with the second sheet of puff pastry.
- Prepare Egg Wash: When ready to bake, preheat your oven to 400°F (200°C). In a small bowl, whisk together the egg and water until well combined.
- Slice the Palmiers: Remove one log from the refrigerator. Using a sharp knife, slice the log into ½-inch thick pieces. You should get about 20 palmiers per log. If the pastry squishes when cutting, it’s too warm – pop it back in the fridge for 10 minutes.
- Arrange on Baking Sheets: Place the palmiers cut-side up on your prepared baking sheets, spacing them about 2 inches apart (they will expand). Gently brush the tops with egg wash for a beautiful golden finish. Sprinkle with any remaining Parmesan.
- Bake to Perfection: Bake for 16-18 minutes, rotating the pans halfway through, until the palmiers are puffed, golden brown, and crispy. The bottoms should be deeply golden. Don’t underbake – you want them crispy, not soft.
- Cool and Serve: Transfer to a wire rack and let cool for about 5 minutes. They’re best served warm or at room temperature. The pastry will crisp up even more as it cools.
Notes
- Thawing Puff Pastry: Never microwave puff pastry to thaw – it will become soggy. Thaw in the refrigerator overnight or at room temperature for 40 minutes.
- Pesto Oil: If your pesto is very oily, spoon it onto paper towels for a minute to absorb excess oil, which can make the pastry soggy.
- Sharp Knife is Key: A sharp knife gives clean cuts. Wipe the blade between cuts for the neatest slices.
- Size Matters: Don’t slice thicker than ½ inch or thinner than ⅜ inch for best results.
- Space Them Out: These puff up significantly, so give them room on the baking sheet.
- Crispiness: If they’re not crispy enough after baking, return them to the oven for 2-3 more minutes.
- Scaling: This recipe easily doubles or triples for large gatherings.
- Prep Time: 15 minutes
- Cook Time: 18 minutes
- Category: Appetizer
- Method: Baking
- Cuisine: French-Italian Fusion
- Diet: Vegetarian
Nutrition
- Serving Size: 2 palmiers
- Calories: 165
- Sugar: 1g
- Sodium: 205mg
- Fat: 11g
- Saturated Fat: 3g
- Unsaturated Fat: 6g
- Trans Fat: 0g
- Carbohydrates: 13g
- Fiber: 1g
- Protein: 4g
- Cholesterol: 18mg
Tips & Variations
The classic pesto parmesan version is fantastic, but here are creative ways to customize your palmiers:
Flavor Variations:
- Sun-Dried Tomato Pesto Palmiers: Use sun-dried tomato pesto instead of basil pesto
- Olive Tapenade Palmiers: Spread with black olive tapenade and add feta cheese
- Spinach Artichoke: Mix ¼ cup each of chopped spinach and artichokes into cream cheese, spread on pastry
- Caramelized Onion & Gruyere: Replace pesto with caramelized onions and use Gruyere cheese
- Pesto & Goat Cheese: Add crumbled goat cheese along with the Parmesan
- Roasted Red Pepper: Mix roasted red peppers into your pesto before spreading
Make Them Special:
- Sprinkle with pine nuts before rolling for added crunch
- Add a thin layer of prosciutto over the pesto for a meat version
- Brush with garlic butter instead of egg wash for extra flavor
- Top with fresh basil leaves immediately after baking
- Drizzle with balsamic glaze before serving
Dietary Adaptations:
- Gluten-Free: Use gluten-free puff pastry (check frozen section)
- Vegan: Use vegan pesto and nutritional yeast instead of Parmesan, brush with plant milk instead of egg
- Nut-Free: Make sure your pesto doesn’t contain pine nuts or use a nut-free pesto alternative
Pro Chef Tips
Want bakery-perfect palmiers every single time? These professional secrets will take your game to the next level:
Temperature Control is Everything: Keep your puff pastry cold throughout the process. If it starts getting warm and sticky while you’re working, pop it in the freezer for 5-10 minutes. Warm pastry won’t puff properly and becomes difficult to handle. The butter layers need to stay distinct and cold for maximum rise and flakiness.
The Tighter the Roll, The Better: When rolling from the edges toward the center, roll as tightly as possible without stretching the dough. Tight rolls create more defined spirals and prevent gaps in the finished palmiers. Press firmly as you roll to eliminate air pockets.
Freeze Before Slicing for Perfect Cuts: Here’s a pro trick – after chilling your rolled log in the refrigerator, transfer it to the freezer for 15 minutes before slicing. This firms it up even more and prevents any squishing when you cut. Your slices will be pristine and uniform.
Score the Bottom Before Baking: For extra insurance against unraveling, use a knife to make a small shallow cut on the bottom where the two rolls meet. This helps them stay together during baking.
Rotation and Temperature Monitoring: Rotate your baking sheets 180 degrees halfway through baking to ensure even browning. Every oven has hot spots. Also, if your palmiers are browning too quickly on top but aren’t cooked through, reduce the temperature to 375°F and bake a few minutes longer.
The Parchment Paper Trick: If your palmiers start to unravel slightly during baking, place another sheet of parchment paper on top for the first 8 minutes of baking. The weight helps them keep their shape until they set.
Double Bake for Extra Crispiness: Want ultra-crispy palmiers like the bakeries make? After your first bake and a brief cool, return them to a 300°F oven for another 5-8 minutes. This dries them out even more and creates incredible crunch.
Common Mistakes to Avoid
Learn from these common pitfalls so your palmiers turn out picture-perfect:
Mistake #1: Working with Warm Puff Pastry – This is the number one issue! Warm pastry becomes sticky, tears easily, and won’t puff properly in the oven. The butter in the layers needs to stay solid and distinct. If your pastry feels soft or warm, refrigerate or freeze it briefly. Always work quickly and keep it cool.
Mistake #2: Spreading Too Much Pesto – While you want good coverage, too much pesto makes the pastry soggy and causes the rolls to slip and unravel. Aim for a thin, even layer – about ⅛ inch thick. Also, make sure to drain excess oil from store-bought pesto first.
Mistake #3: Slicing Too Thick – Palmiers thicker than ½ inch won’t cook through properly and will be doughy in the center. They also won’t have as many beautiful spiral layers showing. Aim for a consistent ½-inch thickness using a ruler as a guide if needed.
Mistake #4: Skipping the Chill Time – I know you’re excited to bake them, but rushing this step leads to messy slices and palmiers that unravel in the oven. The 30-minute minimum chill time allows the butter to firm up again and the rolls to set. This patience pays off in gorgeous, perfect palmiers.
Mistake #5: Overcrowding the Pan – Give each palmier room to breathe! They expand significantly during baking – sometimes doubling in size. Place them at least 2 inches apart or they’ll bake into each other and lose their distinct shape.
Mistake #6: Using Pre-Grated Parmesan – The cellulose added to pre-grated cheese prevents clumping but also prevents proper melting. Freshly grated cheese melts beautifully and creates a superior flavor and texture. Take the extra two minutes to grate your own – it matters!
Storage & Meal Prep
One of the best features of palmiers is how well they store and travel:
Room Temperature Storage: Once completely cooled, store baked palmiers in an airtight container at room temperature for up to 3 days. Layer them with parchment paper to prevent sticking. They’ll stay crispy for the first day or two, then may soften slightly – just re-crisp them in a 350°F oven for 5 minutes.
Refrigerator Storage: While not necessary, you can refrigerate baked palmiers in an airtight container for up to 5 days. Let them come to room temperature before serving, or warm them in the oven to restore crispiness.
Re-Crisping: If your palmiers have softened, spread them on a baking sheet and bake at 350°F for 5-7 minutes until crispy again. This refreshes them beautifully and makes day-old palmiers taste fresh-baked.
Transporting: These travel remarkably well! Layer them in a sturdy container with parchment paper between layers. They’re perfect for potlucks, picnics, or bringing to parties.
Signs of Staleness: If the palmiers taste rancid or the pastry has become very soft and won’t crisp up with reheating, it’s time to make a fresh batch.
Make-Ahead & Freezer Notes
This is where palmiers really shine – they’re incredibly make-ahead friendly at multiple stages:
Refrigerator Make-Ahead: After rolling and before slicing, wrap your logs tightly in plastic wrap and refrigerate for up to 48 hours. This is perfect for party prep – do all the work two days before, then just slice and bake the day of your event.
Unbaked Freezer Method (Best Option): This is my favorite approach! After rolling and wrapping the logs, freeze them for up to 3 months. When ready to bake, slice while still frozen (actually easier than slicing thawed!), arrange on baking sheets, and bake straight from frozen. Add 2-3 minutes to the baking time. No thawing required, and they taste absolutely fresh!
Pre-Sliced Freezer Method: Slice the palmiers, arrange them on a parchment-lined baking sheet, and freeze until solid (about 1 hour). Transfer to a freezer bag or container for up to 3 months. Bake directly from frozen, adding 2-3 minutes to the baking time. This is perfect when you want to bake just a few at a time.
Baked and Frozen: You can also freeze fully baked palmiers for up to 1 month. Cool completely, layer with parchment paper in an airtight container, and freeze. Thaw at room temperature and re-crisp in a 350°F oven for 5-8 minutes. While this works, I prefer freezing them unbaked for the freshest taste and best texture.
Thawing: If you prefer to thaw before baking (not necessary), move unbaked palmiers to the refrigerator for 2-3 hours or until thawed but still cold.
Serving Suggestions
These versatile palmiers work for so many occasions! Here’s how to serve them:
As an Appetizer:
- Arrange on a wooden board with other finger foods
- Serve on a tiered platter for elegant presentation
- Offer alongside a cheese board with grapes and nuts
- Present on individual cocktail napkins at standing receptions
- Include in an antipasto platter with Italian meats and marinated vegetables
Beverage Pairings:
- Wine: Pairs beautifully with Pinot Grigio, Sauvignon Blanc, Prosecco, or light Chianti
- Cocktails: Excellent with Aperol Spritz, gin and tonic, or martinis
- Non-Alcoholic: Sparkling water with lemon, iced tea, or Italian soda
- Beer: Light lagers or wheat beers complement without overpowering
Meal Accompaniments:
- Serve alongside tomato soup or butternut squash soup for lunch
- Add to a salad plate for a light dinner
- Include in a brunch spread with fruit and quiche
- Pair with roasted vegetables for a vegetarian meal
Dipping Options:
- Marinara sauce for Italian flair
- Balsamic reduction for elegance
- Garlic aioli for richness
- Herb-infused olive oil
Party Presentation Ideas:
- Stack them in a tall glass for visual interest
- Arrange in a spiral pattern on a round platter
- Present in paper cones for a casual gathering
- Display on vintage china for formal events
- Package in clear boxes as party favors
Frequently Asked Questions
Can I use rough puff pastry or homemade puff pastry instead of store-bought? Absolutely! Homemade or rough puff pastry works beautifully in this recipe. Just make sure it’s well-chilled before rolling and spreading. The only difference is that homemade won’t puff quite as dramatically as commercial all-butter puff pastry, but it will still taste fantastic and be wonderfully flaky.
Why did my palmiers unravel during baking? This usually happens when the rolls weren’t tight enough, the palmiers were sliced too thick, or they weren’t chilled adequately before baking. Make sure to roll tightly, chill for at least 30 minutes, and consider pressing the two rolls together firmly where they meet. You can also use a small dab of water or egg wash to “glue” them together before chilling.
Can I make sweet palmiers using this same technique? Yes! The rolling and shaping technique is identical. Simply omit the pesto and Parmesan, and instead sprinkle the pastry generously with cinnamon sugar (¼ cup sugar mixed with 1 tablespoon cinnamon) before rolling. You can also add chopped nuts, chocolate chips, or jam. Bake the same way for classic sweet palmiers.
My palmiers taste great but didn’t puff up much. What happened? Several factors affect puffing: warm pastry (keep it cold!), overworking the dough, not enough heat in the oven, or old puff pastry. Make sure your oven is fully preheated to 400°F, work quickly with cold pastry, and check the expiration date on your puff pastry package. Also, rolling the pastry too thin can compress the layers.
Can I use a different type of pesto? Definitely! This recipe is very flexible. Try red pesto (sun-dried tomato), arugula pesto, kale pesto, or even store-bought pesto varieties. Just make sure whatever you use isn’t too liquidy – drain excess oil first. The flavor will change, but the technique remains the same.
How far in advance should I bake these for a party? Ideally, bake them the morning of your event or within 4-6 hours of serving for maximum crispiness. If you need to bake them the day before, store in an airtight container and re-crisp in a 350°F oven for 5 minutes before serving. However, I recommend using the make-ahead freezer method – prep everything in advance, then bake fresh right before your party for the best results.
What if I don’t have time to chill the rolled logs? While I strongly recommend the chilling step for best results, if you’re really in a pinch, you can put the rolled logs in the freezer for just 10-15 minutes instead of refrigerating for 30 minutes. Use a very sharp knife and work quickly. Your slices may not be quite as clean, but they’ll still bake up delicious. Just know that skipping this step entirely will result in squished, uneven palmiers.
Conclusion
There you have it – everything you need to know to create absolutely stunning pesto parmesan palmiers that will make you look like a professional pastry chef! These elegant, buttery spirals prove that impressive doesn’t have to mean complicated. With just a handful of ingredients and a little rolling and slicing, you can create beautiful, bakery-worthy appetizers that taste every bit as good as they look.
The best part? These crispy pesto puff pastry appetizers are as practical as they are delicious. Make them ahead, freeze them for months, pull them out whenever you need something special – they’re the ultimate entertaining secret weapon. Once you master the basic technique, you can customize them endlessly with different fillings, cheeses, and flavors to suit any occasion or taste preference.
I can’t wait to hear how your palmiers turn out! Please leave a comment below sharing your experience, any creative variations you tried, or questions you have. If you love this recipe, give it a five-star rating and don’t forget to pin it to your Pinterest boards so you can find it easily when party planning season rolls around. And please share it with your friends who love to entertain – these pesto palmiers are too good not to spread the word! Happy baking!