Ranch Oyster Crackers: The Addictive 4-Ingredient Snack Everyone Can’t Stop Eating

Let me tell you about the snack that’s been quietly taking over party tables, lunchboxes, and late-night cravings across America: ranch oyster crackers. These impossibly crunchy, ranch-seasoned little crackers are about to become your new obsession, and I’m not even slightly exaggerating.
This recipe transforms humble oyster crackers into a flavor-packed, addictively seasoned snack that’s perfect for literally any occasion. Game day spreads, holiday parties, afternoon snacking, road trips, care packages, soup toppers, salad croutons – these seasoned oyster crackers do it all. The best part? You only need four simple ingredients and about 15 minutes of hands-on time to create batches and batches of this crunchy, ranch-flavored goodness.
The beauty of ranch oyster crackers lies in their versatility and shelf-stability. Make a big batch on Sunday, and you’ll have ready-to-go snacks for the entire week. Pack them in lunchboxes, set them out for unexpected guests, or (let’s be honest) hide them in your pantry for those moments when you need something salty and satisfying. These seasoned crackers hit that perfect sweet spot between homemade and convenient – they taste like you put in serious effort, but the reality is refreshingly simple.
Whether you call them ranch oyster crackers, seasoned oyster crackers, or hidden valley oyster crackers, one thing’s for certain: once you try these, you’ll never look at plain crackers the same way again.
History / Background
Oyster crackers themselves have been an American pantry staple since the 1800s. Despite their name, they’ve never contained oysters – the “oyster” reference comes from their traditional pairing with oyster stews and chowders that were popular in 19th-century New England. These small, round crackers were specifically designed to float on top of soups and absorb the delicious broth without getting soggy too quickly.
The tradition of seasoning oyster crackers really took off in the American South and Midwest during the 1970s and 1980s, coinciding with the rise of ranch dressing as America’s favorite flavor profile. Ranch dressing itself was invented in the 1950s by Steve Henson, a plumber-turned-cowboy who created the buttermilk-herb dressing at his dude ranch in California. By the 1980s, Hidden Valley Ranch had become a household name, and home cooks started getting creative with the powdered seasoning packets.
The concept of coating oyster crackers in oil and ranch seasoning likely originated from church potlucks and community gatherings where hosts needed to create inexpensive, crowd-pleasing snacks that could be made in large quantities. The recipe spread through handwritten recipe cards, church cookbooks, and eventually the internet, where it exploded in popularity on Pinterest and food blogs.
Today, seasoned oyster crackers are considered a quintessential “Southern snack,” though they’re beloved across all regions of the United States. They represent that beautiful intersection of convenience, economy, and absolutely delicious flavor that defines so much of American home cooking. The recipe has spawned countless variations – from spicy Cajun versions to Italian herb blends – but the classic ranch version remains the most popular and the gateway recipe for most people.
Why You’ll Love This Recipe
Here’s the thing about ranch oyster crackers: they’re one of those recipes that seems almost too simple to be as good as they are. But trust me, these little crackers pack a seriously flavorful punch that will have everyone asking for the recipe (and you can smile and say “it’s so easy!”).
Here’s why this recipe deserves a permanent spot in your snack rotation:
- Ridiculously Simple: Four ingredients, one bowl, minimal effort. If you can stir, you can make these.
- Budget-Friendly: Costs just a few dollars to make a huge batch that feeds a crowd.
- Dangerously Addictive: That perfect combination of crunchy, salty, herby, and garlicky keeps you reaching for “just one more.”
- Make-Ahead Friendly: These actually get better after sitting for a day or two, making them perfect for meal prep and party planning.
- Kid-Approved: Even picky eaters love these crunchy, flavorful crackers.
- Customizable: The base recipe is just the beginning – add heat, switch up seasonings, or keep it classic.
- Long Shelf Life: Stores for weeks in an airtight container, so you can always have homemade snacks on hand.
- No-Bake Option: While baking is traditional, you can also make these without turning on the oven.
- Perfect Gift: Package these in mason jars with a ribbon for thoughtful, homemade gifts that people actually want.
- Versatile Usage: Snack on them plain, top your soup, add to salads, or serve alongside chili.
Ingredient Notes
The genius of this recipe is its simplicity, but each ingredient plays an important role. Here’s what you need to know:
Oyster Crackers: These are small, round, slightly salted crackers traditionally served with soup. You’ll find them in the soup or cracker aisle of any grocery store. Westminster and OTC are the most common brands. One standard bag is usually 9-12 ounces. Substitutions: In a pinch, you can use saltine crackers broken into pieces, goldfish crackers (for a fun twist), or even Chex cereal, though the result will be different from the traditional recipe.
Ranch Dressing Mix (Dry Powder): This is the flavor powerhouse of the recipe. Use the packets of dry ranch seasoning mix (like Hidden Valley Ranch), not bottled ranch dressing. Each packet is typically 1 ounce and seasons one batch perfectly. The mix contains buttermilk powder, herbs (dill, parsley, chives), garlic, onion, and salt. Substitutions: You can make homemade ranch seasoning mix, use other dry seasoning blends like Italian dressing mix or onion soup mix, or go wild with Cajun or taco seasoning.
Vegetable Oil or Canola Oil: The oil acts as the vehicle that carries the ranch seasoning onto every surface of the crackers. You need enough to coat but not saturate. Vegetable oil is neutral in flavor and allows the ranch to shine. Substitutions: Canola oil, avocado oil, or even melted coconut oil work well. Some people use melted butter for extra richness, though this changes the texture slightly and reduces shelf life. Olive oil works but can add a distinct flavor that some find overpowering with ranch.
Dill Weed (Dried): While technically optional, dried dill adds that classic “ranch” taste and a pop of herby flavor that makes these crackers irresistible. Just a teaspoon or two makes a noticeable difference. Substitutions: You can omit if you don’t have it, but I highly recommend keeping it. No fresh dill substitute works well here – stick with dried.
Optional Add-Ins: Garlic powder (for extra garlicky punch), red pepper flakes (for heat), grated Parmesan cheese (for savory depth), or lemon pepper seasoning (for brightness).
Equipment Needed
This is one of the most low-maintenance recipes you’ll ever make. Here’s your minimal equipment list:
- Large Mixing Bowl: Big enough to toss crackers without them flying everywhere
- Measuring Cups and Spoons: For accurate measurements
- Whisk or Fork: To mix the oil and seasonings together
- Large Rimmed Baking Sheet: For baking the crackers (or you can skip baking entirely)
- Parchment Paper or Aluminum Foil (optional): Makes cleanup easier
- Airtight Container or Resealable Bags: For storage
- Wooden Spoon or Rubber Spatula: For stirring and tossing the crackers
That’s it! No fancy appliances, no special tools required.
Print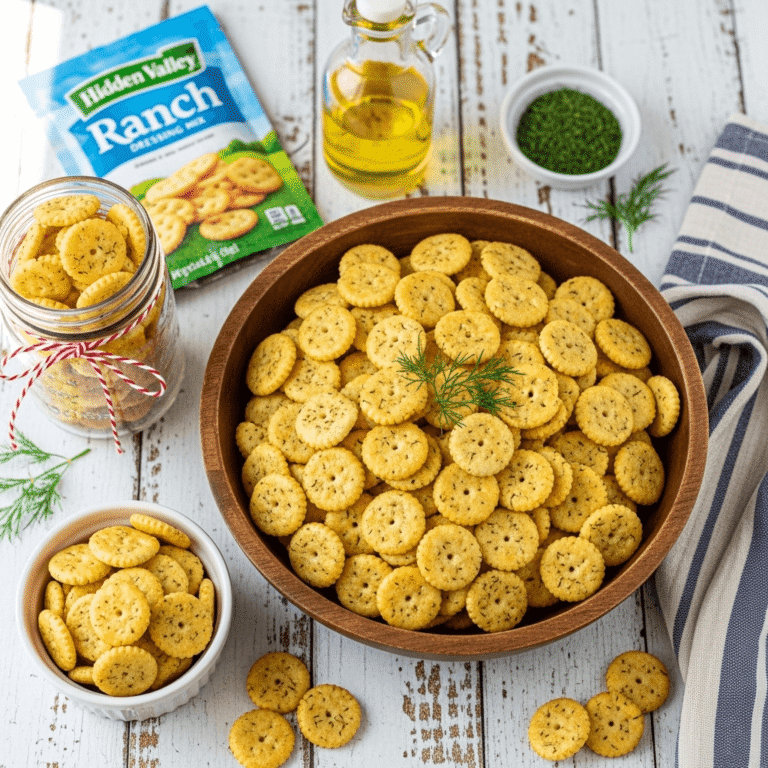
Ranch Oyster Crackers
These addictive ranch oyster crackers are coated in ranch seasoning, oil, and dill, then baked until perfectly crispy. An easy 4-ingredient snack that’s perfect for parties, lunchboxes, or anytime snacking. These seasoned crackers are crunchy, flavorful, and dangerously hard to stop eating!
- Total Time: 20 minutes
- Yield: 12 servings (about 6 cups) 1x
Ingredients
- 1 bag (10-12 ounces) oyster crackers (about 5-6 cups)
- ½ cup vegetable oil or canola oil
- 1 packet (1 ounce) dry ranch dressing mix (like Hidden Valley)
- 1-2 teaspoons dried dill weed
- ½ teaspoon garlic powder (optional, for extra flavor)
- ¼ teaspoon red pepper flakes (optional, for a spicy kick)
Instructions
- Preheat Your Oven: Set your oven to 250°F (120°C). This low temperature allows the crackers to dry out and become extra crispy without burning. If you prefer the no-bake method, skip this step entirely.
- Prepare Your Baking Sheet: Line a large rimmed baking sheet with parchment paper or aluminum foil for easier cleanup. If you don’t have either, a light spray of cooking spray works too.
- Mix the Seasoning: In a large mixing bowl, whisk together the vegetable oil, ranch dressing mix, dried dill, and any optional seasonings (garlic powder, red pepper flakes). Whisk vigorously for about 30 seconds until everything is well combined and the oil is fully incorporated with the dry seasonings. You want a uniform, slightly thick mixture.
- Add the Crackers: Pour all of the oyster crackers into the bowl with the seasoned oil mixture. Using a rubber spatula or large spoon, gently toss and stir the crackers, making sure every single cracker gets coated with the seasoned oil. This takes about 2-3 minutes of gentle stirring. Be thorough – well-coated crackers are evenly flavored crackers.
- Spread on Baking Sheet: Transfer the coated crackers to your prepared baking sheet, spreading them out in an even single layer. Don’t overcrowd them – if needed, use two baking sheets.
- Bake Low and Slow: Place the baking sheet in your preheated oven and bake for 15-20 minutes, stirring every 5 minutes to ensure even coating and prevent burning. The crackers should look slightly toasted and smell incredibly fragrant. They won’t look dramatically different, but they’ll be crispier and the seasoning will have set.
- Cool Completely: Remove from the oven and let the crackers cool completely on the baking sheet. They’ll continue to crisp up as they cool. This is crucial – warm crackers will be slightly soft, but they’ll become perfectly crunchy once cooled.
- Store and Enjoy: Once completely cool, transfer to an airtight container or large resealable bag. These will stay fresh and crunchy for up to 3 weeks at room temperature.
Notes
- No-Bake Method: If you don’t want to heat your oven, simply toss the crackers with the seasoned oil and let them sit in the bowl, stirring every 10 minutes for about an hour. They’ll absorb the oil and seasonings without baking. They’ll be slightly less crispy but still delicious.
- Don’t Skip the Stirring: If you bake them, stirring every 5 minutes is important to prevent burning and ensure even seasoning distribution.
- Oil Amount: The ½ cup measurement is perfect for one bag of crackers. Too much oil makes them greasy; too little means uneven seasoning.
- Seasoning Variations: Feel free to adjust the ranch mix to taste. Some brands are saltier than others, so start with the full packet and adjust in future batches if needed.
- Freshness Matters: These taste best after sitting for at least 4-6 hours, allowing the flavors to meld and the crackers to fully absorb the seasoning.
- Prep Time: 5 minutes
- Cook Time: 15 minutes
- Category: Snack
- Method: Baking
- Cuisine: American
- Diet: Vegetarian
Nutrition
- Serving Size: ½ cup
- Calories: 165
- Sugar: 0g
- Sodium: 380mg
- Fat: 10g
- Saturated Fat: 1g
- Unsaturated Fat: 9g
- Trans Fat: 0g
- Carbohydrates: 16g
- Fiber: 0g
- Protein: 2g
- Cholesterol: 0mg
Ranch Oyster Crackers: The Addictive 4-Ingredient Snack Everyone Can’t Stop Eating
Introduction of Recipe
Let me tell you about the snack that’s been quietly taking over party tables, lunchboxes, and late-night cravings across America: ranch oyster crackers. These impossibly crunchy, ranch-seasoned little crackers are about to become your new obsession, and I’m not even slightly exaggerating.
This recipe transforms humble oyster crackers into a flavor-packed, addictively seasoned snack that’s perfect for literally any occasion. Game day spreads, holiday parties, afternoon snacking, road trips, care packages, soup toppers, salad croutons – these seasoned oyster crackers do it all. The best part? You only need four simple ingredients and about 15 minutes of hands-on time to create batches and batches of this crunchy, ranch-flavored goodness.
The beauty of ranch oyster crackers lies in their versatility and shelf-stability. Make a big batch on Sunday, and you’ll have ready-to-go snacks for the entire week. Pack them in lunchboxes, set them out for unexpected guests, or (let’s be honest) hide them in your pantry for those moments when you need something salty and satisfying. These seasoned crackers hit that perfect sweet spot between homemade and convenient – they taste like you put in serious effort, but the reality is refreshingly simple.
Whether you call them ranch oyster crackers, seasoned oyster crackers, or hidden valley oyster crackers, one thing’s for certain: once you try these, you’ll never look at plain crackers the same way again.
History / Background
Oyster crackers themselves have been an American pantry staple since the 1800s. Despite their name, they’ve never contained oysters – the “oyster” reference comes from their traditional pairing with oyster stews and chowders that were popular in 19th-century New England. These small, round crackers were specifically designed to float on top of soups and absorb the delicious broth without getting soggy too quickly.
The tradition of seasoning oyster crackers really took off in the American South and Midwest during the 1970s and 1980s, coinciding with the rise of ranch dressing as America’s favorite flavor profile. Ranch dressing itself was invented in the 1950s by Steve Henson, a plumber-turned-cowboy who created the buttermilk-herb dressing at his dude ranch in California. By the 1980s, Hidden Valley Ranch had become a household name, and home cooks started getting creative with the powdered seasoning packets.
The concept of coating oyster crackers in oil and ranch seasoning likely originated from church potlucks and community gatherings where hosts needed to create inexpensive, crowd-pleasing snacks that could be made in large quantities. The recipe spread through handwritten recipe cards, church cookbooks, and eventually the internet, where it exploded in popularity on Pinterest and food blogs.
Today, seasoned oyster crackers are considered a quintessential “Southern snack,” though they’re beloved across all regions of the United States. They represent that beautiful intersection of convenience, economy, and absolutely delicious flavor that defines so much of American home cooking. The recipe has spawned countless variations – from spicy Cajun versions to Italian herb blends – but the classic ranch version remains the most popular and the gateway recipe for most people.
Why You’ll Love This Recipe
Here’s the thing about ranch oyster crackers: they’re one of those recipes that seems almost too simple to be as good as they are. But trust me, these little crackers pack a seriously flavorful punch that will have everyone asking for the recipe (and you can smile and say “it’s so easy!”).
Here’s why this recipe deserves a permanent spot in your snack rotation:
- Ridiculously Simple: Four ingredients, one bowl, minimal effort. If you can stir, you can make these.
- Budget-Friendly: Costs just a few dollars to make a huge batch that feeds a crowd.
- Dangerously Addictive: That perfect combination of crunchy, salty, herby, and garlicky keeps you reaching for “just one more.”
- Make-Ahead Friendly: These actually get better after sitting for a day or two, making them perfect for meal prep and party planning.
- Kid-Approved: Even picky eaters love these crunchy, flavorful crackers.
- Customizable: The base recipe is just the beginning – add heat, switch up seasonings, or keep it classic.
- Long Shelf Life: Stores for weeks in an airtight container, so you can always have homemade snacks on hand.
- No-Bake Option: While baking is traditional, you can also make these without turning on the oven.
- Perfect Gift: Package these in mason jars with a ribbon for thoughtful, homemade gifts that people actually want.
- Versatile Usage: Snack on them plain, top your soup, add to salads, or serve alongside chili.
Ingredient Notes
The genius of this recipe is its simplicity, but each ingredient plays an important role. Here’s what you need to know:
Oyster Crackers: These are small, round, slightly salted crackers traditionally served with soup. You’ll find them in the soup or cracker aisle of any grocery store. Westminster and OTC are the most common brands. One standard bag is usually 9-12 ounces. Substitutions: In a pinch, you can use saltine crackers broken into pieces, goldfish crackers (for a fun twist), or even Chex cereal, though the result will be different from the traditional recipe.
Ranch Dressing Mix (Dry Powder): This is the flavor powerhouse of the recipe. Use the packets of dry ranch seasoning mix (like Hidden Valley Ranch), not bottled ranch dressing. Each packet is typically 1 ounce and seasons one batch perfectly. The mix contains buttermilk powder, herbs (dill, parsley, chives), garlic, onion, and salt. Substitutions: You can make homemade ranch seasoning mix, use other dry seasoning blends like Italian dressing mix or onion soup mix, or go wild with Cajun or taco seasoning.
Vegetable Oil or Canola Oil: The oil acts as the vehicle that carries the ranch seasoning onto every surface of the crackers. You need enough to coat but not saturate. Vegetable oil is neutral in flavor and allows the ranch to shine. Substitutions: Canola oil, avocado oil, or even melted coconut oil work well. Some people use melted butter for extra richness, though this changes the texture slightly and reduces shelf life. Olive oil works but can add a distinct flavor that some find overpowering with ranch.
Dill Weed (Dried): While technically optional, dried dill adds that classic “ranch” taste and a pop of herby flavor that makes these crackers irresistible. Just a teaspoon or two makes a noticeable difference. Substitutions: You can omit if you don’t have it, but I highly recommend keeping it. No fresh dill substitute works well here – stick with dried.
Optional Add-Ins: Garlic powder (for extra garlicky punch), red pepper flakes (for heat), grated Parmesan cheese (for savory depth), or lemon pepper seasoning (for brightness).
Equipment Needed
This is one of the most low-maintenance recipes you’ll ever make. Here’s your minimal equipment list:
- Large Mixing Bowl: Big enough to toss crackers without them flying everywhere
- Measuring Cups and Spoons: For accurate measurements
- Whisk or Fork: To mix the oil and seasonings together
- Large Rimmed Baking Sheet: For baking the crackers (or you can skip baking entirely)
- Parchment Paper or Aluminum Foil (optional): Makes cleanup easier
- Airtight Container or Resealable Bags: For storage
- Wooden Spoon or Rubber Spatula: For stirring and tossing the crackers
That’s it! No fancy appliances, no special tools required.
📋 Recipe Card
Prep Time: 5 minutes
Cook Time: 15 minutes
Total Time: 20 minutes
Yield: 12 servings (about 6 cups)
Category: Snack
Method: Baking
Cuisine: American
Diet: Vegetarian
Description
These addictive ranch oyster crackers are coated in ranch seasoning, oil, and dill, then baked until perfectly crispy. An easy 4-ingredient snack that’s perfect for parties, lunchboxes, or anytime snacking. These seasoned crackers are crunchy, flavorful, and dangerously hard to stop eating!
Ingredients
- 1 bag (10-12 ounces) oyster crackers (about 5-6 cups)
- ½ cup vegetable oil or canola oil
- 1 packet (1 ounce) dry ranch dressing mix (like Hidden Valley)
- 1-2 teaspoons dried dill weed
- ½ teaspoon garlic powder (optional, for extra flavor)
- ¼ teaspoon red pepper flakes (optional, for a spicy kick)
Instructions
- Preheat Your Oven: Set your oven to 250°F (120°C). This low temperature allows the crackers to dry out and become extra crispy without burning. If you prefer the no-bake method, skip this step entirely.
- Prepare Your Baking Sheet: Line a large rimmed baking sheet with parchment paper or aluminum foil for easier cleanup. If you don’t have either, a light spray of cooking spray works too.
- Mix the Seasoning: In a large mixing bowl, whisk together the vegetable oil, ranch dressing mix, dried dill, and any optional seasonings (garlic powder, red pepper flakes). Whisk vigorously for about 30 seconds until everything is well combined and the oil is fully incorporated with the dry seasonings. You want a uniform, slightly thick mixture.
- Add the Crackers: Pour all of the oyster crackers into the bowl with the seasoned oil mixture. Using a rubber spatula or large spoon, gently toss and stir the crackers, making sure every single cracker gets coated with the seasoned oil. This takes about 2-3 minutes of gentle stirring. Be thorough – well-coated crackers are evenly flavored crackers.
- Spread on Baking Sheet: Transfer the coated crackers to your prepared baking sheet, spreading them out in an even single layer. Don’t overcrowd them – if needed, use two baking sheets.
- Bake Low and Slow: Place the baking sheet in your preheated oven and bake for 15-20 minutes, stirring every 5 minutes to ensure even coating and prevent burning. The crackers should look slightly toasted and smell incredibly fragrant. They won’t look dramatically different, but they’ll be crispier and the seasoning will have set.
- Cool Completely: Remove from the oven and let the crackers cool completely on the baking sheet. They’ll continue to crisp up as they cool. This is crucial – warm crackers will be slightly soft, but they’ll become perfectly crunchy once cooled.
- Store and Enjoy: Once completely cool, transfer to an airtight container or large resealable bag. These will stay fresh and crunchy for up to 3 weeks at room temperature.
Notes
- No-Bake Method: If you don’t want to heat your oven, simply toss the crackers with the seasoned oil and let them sit in the bowl, stirring every 10 minutes for about an hour. They’ll absorb the oil and seasonings without baking. They’ll be slightly less crispy but still delicious.
- Don’t Skip the Stirring: If you bake them, stirring every 5 minutes is important to prevent burning and ensure even seasoning distribution.
- Oil Amount: The ½ cup measurement is perfect for one bag of crackers. Too much oil makes them greasy; too little means uneven seasoning.
- Seasoning Variations: Feel free to adjust the ranch mix to taste. Some brands are saltier than others, so start with the full packet and adjust in future batches if needed.
- Freshness Matters: These taste best after sitting for at least 4-6 hours, allowing the flavors to meld and the crackers to fully absorb the seasoning.
Nutrition Facts Table
Serving Size: ½ cup
Calories: 165
Sugar: 0g
Sodium: 380mg
Fat: 10g
Saturated Fat: 1g
Unsaturated Fat: 9g
Trans Fat: 0g
Carbohydrates: 16g
Fiber: 0g
Protein: 2g
Cholesterol: 0mg
Nutrition information is approximate and based on standard ingredients. Values may vary depending on specific brands used.
Tips & Variations
The basic ranch oyster crackers are phenomenal, but here are some fun ways to customize this addictive snack:
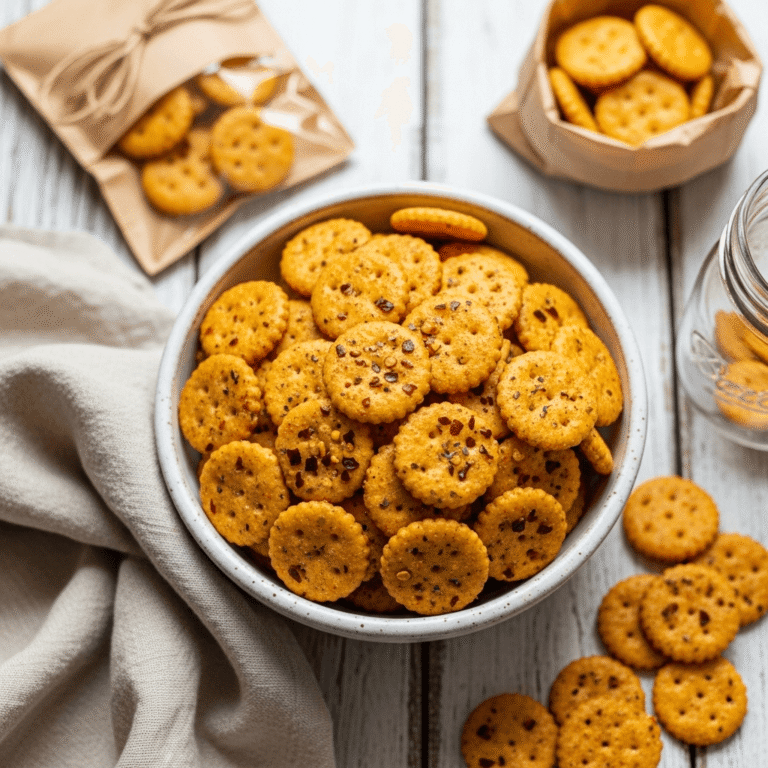
Spicy Ranch Crackers: Add ½-1 teaspoon of cayenne pepper or 1 teaspoon of hot sauce to the oil mixture. You can also sprinkle red pepper flakes generously over the crackers before baking. For seriously spicy lovers, use a spicy ranch mix or add a tablespoon of your favorite hot sauce.
Cheesy Ranch Crackers: Toss in ¼ cup of grated Parmesan cheese after coating with the oil mixture. The cheese will toast slightly in the oven and add incredible savory depth. Nutritional yeast is a great vegan alternative that adds cheesy, umami flavor.
Italian Herb Crackers: Swap the ranch mix for Italian dressing mix, add extra dried oregano and basil, and finish with Parmesan. These are amazing with pasta dishes or minestrone soup.
Buffalo Ranch Crackers: Add 2-3 tablespoons of Frank’s RedHot sauce to the oil mixture and reduce the oil slightly. These have that perfect buffalo wing tang that’s absolutely addictive.
Garlic Parmesan Crackers: Skip the ranch mix entirely and use 2 tablespoons garlic powder, 1 tablespoon onion powder, ½ cup Parmesan, and 1 teaspoon Italian seasoning. Incredible!
Everything Bagel Crackers: Use everything bagel seasoning instead of ranch mix for a different flavor profile that’s equally addictive.
Lemon Pepper Ranch: Add 1-2 tablespoons of lemon pepper seasoning to the ranch mixture for a bright, zesty variation.
Sweet and Salty: Add 1 tablespoon of sugar to the mix for a sweet-savory combo that’s surprisingly delicious.
Pro Chef Tips
Want to take your ranch oyster crackers from good to absolutely irresistible? Here are insider secrets that make all the difference:
Temperature Matters: Baking at 250°F instead of higher temperatures is the secret to perfectly crispy crackers that don’t burn. Low and slow dries them out without browning too quickly. Higher temperatures can cause the oil to splatter and the seasonings to burn before the crackers crisp up.
The Stirring Technique: When coating crackers with the seasoned oil, use a folding motion rather than aggressive stirring. Too much force breaks the crackers. Gently lift from the bottom and fold over, rotating the bowl as you go. Take your time – 2-3 minutes of thorough, gentle tossing ensures every cracker is evenly coated.
Double Seasoning Method: For maximum flavor, add half the ranch seasoning to the oil, coat the crackers, then sprinkle the remaining seasoning over the coated crackers before baking. This creates layers of flavor – some baked-in, some sitting on top for an immediate flavor punch.
The Resting Period: Let your finished crackers sit for at least 4-6 hours (or overnight) before serving. The flavors meld and intensify during this time, and the crackers continue to crisp up. Day-old ranch crackers are significantly better than freshly made ones.
Oil Distribution Secret: After whisking your oil and seasonings, let the mixture sit for 2-3 minutes before adding crackers. This allows the dried herbs to hydrate slightly in the oil, which helps them stick better to the crackers.
Storage Trick: Store with a small piece of bread in the container. The bread will absorb any excess moisture, keeping your crackers crispy for weeks.
Batch Sizing: Don’t try to double or triple this recipe in one bowl – the crackers won’t get evenly coated. Instead, make multiple batches. It only takes 5 minutes of hands-on time per batch anyway.
The Toast Test: Your crackers are done baking when they smell incredibly fragrant and one cracker, when cooled for 30 seconds and bitten, is completely crispy through the center. If there’s any soft center, bake a few more minutes.
Common Mistakes to Avoid
Even simple recipes have pitfalls. Here’s how to avoid the most common issues:
Using Too Much or Too Little Oil: The ½ cup measurement for one bag of crackers is crucial. Too much oil makes them greasy and heavy (and they’ll never fully crisp up). Too little means some crackers won’t be seasoned and the coating will be patchy. Measure carefully and use the amount specified.
Skipping the Stirring During Baking: If you choose to bake, you absolutely must stir every 5 minutes. Crackers on the edges and bottom can burn quickly at any temperature, while center crackers stay underseasoned. Stirring redistributes everything and ensures even crisping.
Storing While Still Warm: This is huge. If you seal warm crackers in an airtight container, the trapped steam will make them soggy within hours. Always let them cool completely – spread them on the counter for 30-45 minutes after baking. They should be room temperature before storage.
Using Bottled Ranch Dressing Instead of Dry Mix: Don’t make this mistake! Bottled ranch dressing contains water and will make your crackers soggy. You need the dry, powdered ranch seasoning mix packets. They’re usually found in the salad dressing aisle.
Overcrowding the Baking Sheet: Cramming too many crackers onto one sheet means they steam instead of crisp. Give them space, use two sheets if needed, and rotate sheet positions halfway through baking if using multiple sheets.
Opening the Container Too Soon: Once you’ve made them, resist eating them immediately. These taste significantly better after sitting sealed for several hours. The patience pays off with deeper flavor and better texture.
Storage & Meal Prep
Let’s talk about keeping these crunchy, flavorful crackers at their absolute best:
Room Temperature Storage: Store completely cooled ranch oyster crackers in an airtight container or large resealable bag at room temperature for up to 3 weeks. They actually improve over the first 2-3 days as flavors develop. Keep them away from heat and direct sunlight, which can make the oil go rancid faster.
Maintaining Crispness: The enemy of crispy crackers is moisture. Always ensure they’re completely cool before storing. If you live in a humid climate, consider adding a small silica gel packet (the kind that comes in vitamin bottles) to your storage container, or store a piece of white bread in the container – it will absorb excess moisture.
Portioning for Meal Prep: These are perfect for meal prep! Portion into individual snack-size bags for lunchboxes or grab-and-go snacks. They stay perfectly crispy in small bags for up to 2 weeks.
Reviving Slightly Stale Crackers: If your crackers lose some crispness, spread them on a baking sheet and pop them in a 200°F oven for 5-7 minutes. Let cool completely before re-storing. This re-crisps them beautifully.
Batch Cooking: This recipe is perfect for making several batches at once. You can easily make 4-5 batches in an afternoon, store in separate containers, and have snacks for weeks or gifts ready to go.
Signs They’ve Gone Bad: Ranch oyster crackers will stay good for 3 weeks easily, sometimes longer. They’ve gone bad if they smell rancid (the oil has oxidized), taste stale or off, or have any visible mold (rare but possible if moisture got in).
Make-Ahead & Freezer Notes
Here’s everything you need to know about preparing these seasoned crackers in advance:
Make-Ahead Timeline: These are actually BETTER when made ahead! Make them 1-3 days before you need them for the best flavor. The seasoning has time to fully penetrate the crackers, and the flavors meld beautifully. They’re still good immediately after making, but day-old ranch crackers are superior.
Freezer Storage: Good news – ranch oyster crackers freeze beautifully! Store completely cooled crackers in freezer-safe bags or containers for up to 3 months. Remove as much air as possible from the bag before sealing. They’ll maintain their crunch and flavor perfectly.
Thawing Method: Here’s the best part – you don’t need to thaw them! Serve frozen crackers directly from the freezer. They’ll come to room temperature within 15-20 minutes and taste freshly made. You can also pop them in a 200°F oven for 5 minutes if you want to serve them slightly warm and extra crispy.
Gift-Giving Tip: These make fantastic homemade gifts for holidays, teacher appreciation, neighbors, or hostess gifts. Make a big batch 1-2 weeks before you need to give them, and they’ll be at peak flavor. Package in mason jars with ribbon, or use cellophane bags tied with festive bows.
Party Planning: Making these for a party? Prepare them up to 2 weeks in advance and store in airtight containers. The day before or morning of your event, portion into serving bowls. They’ll taste amazing and you’ll have one less thing to stress about.
No Reheating Necessary: Unlike many make-ahead recipes, ranch oyster crackers don’t need any refreshing or reheating before serving. Just open the container and serve at room temperature. They’re perfect as-is.
Serving Suggestions
Ranch oyster crackers are incredibly versatile. Here’s how to serve them for maximum enjoyment:
As a Standalone Snack: Set out in bowls at parties, game day gatherings, or movie nights. They’re perfect finger food that requires no plates or utensils. Pair with other snacks like cheese cubes, pepperoni slices, and fresh veggies for a snack board.
Soup Topper: Use these instead of regular crackers on top of tomato soup, creamy potato soup, chicken noodle soup, or chili. The ranch flavor adds incredible dimension to simple soups.
Salad Croutons: Crush them slightly and use as flavorful croutons on garden salads, Caesar salads, or spinach salads. They’re especially good on ranch-dressed salads (ranch on ranch – it works!).
Party Mix Addition: Combine with pretzels, peanuts, M&Ms, and Chex cereal for an upgraded party mix. The ranch crackers add a savory element that balances sweet additions.
Lunchbox Staple: Pack in small containers or snack bags for school lunches, work snacks, or road trip munchies. Kids and adults love them equally.
Beverage Pairings: Serve with ice-cold beer (especially light lagers or pilsners), iced tea, lemonade, or sodas. For adults, they’re surprisingly good with crisp white wine or light cocktails.
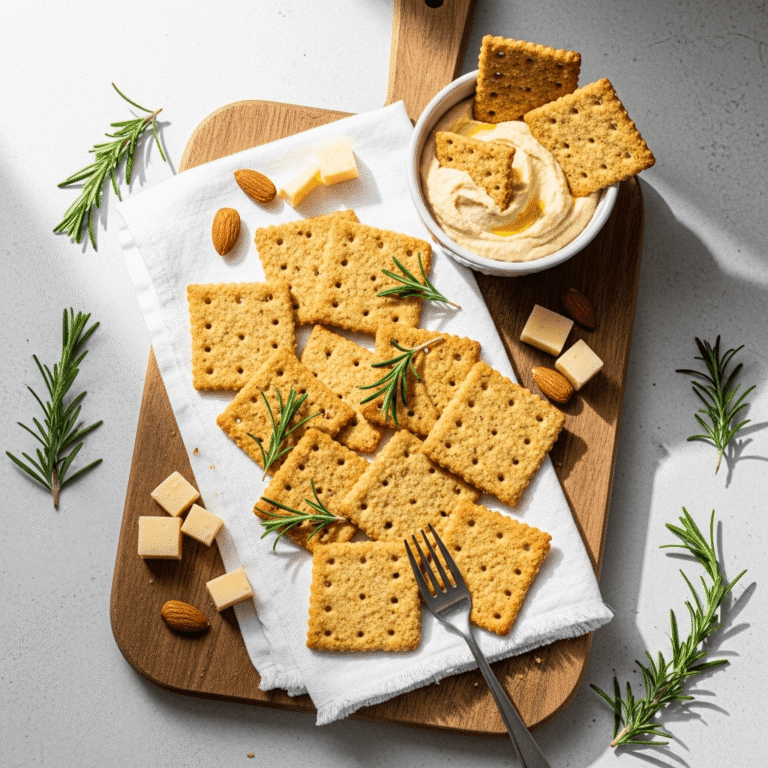
Appetizer Platter: Include on charcuterie boards alongside cheeses, cured meats, pickles, and olives. The crunchy, seasoned crackers provide textural contrast.
Potluck Perfect: Bring to potlucks, picnics, or church gatherings. They travel well, don’t need refrigeration, and everyone loves them.
Hot Dish Topping: Sprinkle on top of casseroles, baked mac and cheese, or green bean casserole before baking for a crunchy, flavorful topping.
Gift Packaging: Layer in mason jars with a recipe card attached, package in decorative tins, or fill cellophane bags tied with ribbon for edible gifts.
FAQs Section
Q: Can I make these without baking them?
A: Absolutely! The no-bake method works great. Simply toss the crackers with the seasoned oil mixture and let them sit in a bowl or spread on a baking sheet at room temperature. Stir every 10-15 minutes for about an hour. The crackers will absorb the oil and seasonings without any baking required. They’ll be slightly less crispy than baked versions but still delicious and much easier if you don’t want to use your oven.
Q: Why are my crackers soggy instead of crispy?
A: The most common cause is storing them before they’re completely cool. Warm crackers release steam, which gets trapped in sealed containers and makes everything soggy. Always let them cool to room temperature first (30-45 minutes after baking). Another cause is using too much oil or storing in a humid environment. If this happens, spread them on a baking sheet and re-crisp in a 200°F oven for 5-7 minutes.
Q: Can I use a different type of cracker?
A: Yes! While oyster crackers are traditional, you can use saltines (broken into pieces), Goldfish crackers for a fun kid-friendly version, Cheez-Its for extra cheese flavor, or even Chex cereal for a different texture. The seasonings work with any sturdy cracker or cereal. Cooking times and oil amounts might need slight adjustments depending on what you use.
Q: How can I make these less salty?
A: Ranch seasoning mix can be salty. Use a “reduced sodium” version if available, or make your own ranch seasoning and control the salt. You can also use only ½-¾ of the seasoning packet instead of the full packet. Another option is to mix unsalted oyster crackers with regular ones to reduce overall sodium content.
Q: Can I make a big batch for a crowd?
A: Definitely! This recipe scales beautifully. However, don’t try to make more than double the recipe in one bowl – the crackers won’t coat evenly. Instead, make multiple separate batches. For a crowd of 20-30 people, I’d make 4-5 batches. You can bake multiple trays at once (just rotate their positions halfway through) or do batches sequentially. Total time for 5 batches is still under an hour.
Q: What’s the difference between baking at 250°F vs. higher temperatures?
A: Lower temperature (250°F) dries out the crackers and sets the seasoning without burning the herbs or making the crackers too brown. Higher temperatures (350°F+) can work faster but require very close monitoring – the outside can burn before the inside crisps, and the dried herbs can turn bitter. If you’re short on time, you can bake at 300°F for 12-15 minutes, but 250°F gives the most consistent, professional results.
Q: My seasoning isn’t sticking to the crackers. What went wrong?
A: This usually means you didn’t mix the oil and dry seasonings together thoroughly before adding the crackers. The ranch powder needs to be suspended in the oil so it can coat the crackers. Whisk vigorously for 30-45 seconds until you have a uniform mixture with no dry pockets. Also, make sure you’re tossing the crackers thoroughly – every single one should have visible seasoning on it before baking.
Conclusion
And there you have it – the easiest, most addictive snack you’ll ever make! Ranch oyster crackers prove that simple recipes can absolutely be the most delicious ones. With just four ingredients and about 20 minutes total, you’ll have crunchy, flavorful, ranch-seasoned crackers that disappear faster than you can make them.
These seasoned crackers have been a hit at every single party, potluck, and gathering I’ve brought them to. People genuinely cannot believe how easy they are to make – they taste like something you’d buy at a gourmet food shop, not something you whipped up in your kitchen with pantry staples. The flavor is bold, the crunch is perfect, and the versatility makes them useful for everything from casual snacking to elegant entertaining.
Whether you stick with the classic ranch version or get creative with the variations, you’re going to love having homemade seasoned crackers in your repertoire. Make a batch this weekend and watch them disappear. Then make another batch, and maybe another, because once people taste these, they’ll be requesting them constantly!
I’d love to hear about your ranch oyster cracker adventures! Did you try the spicy version? Use them on soup? Give them as gifts? Drop a comment below and let me know! And if this recipe becomes a staple in your house like it has in mine, please share it on Pinterest so other snack-lovers can discover it. Pin it to your “Easy Snacks,” “Party Food,” or “Make-Ahead Recipes” boards – your followers will be so glad you did!
Happy snacking, and get ready to become the hero of every party you attend! 🧂