Crispy Roasted Lemon Pepper Cauliflower Recipe (Low-Carb Side Dish!)
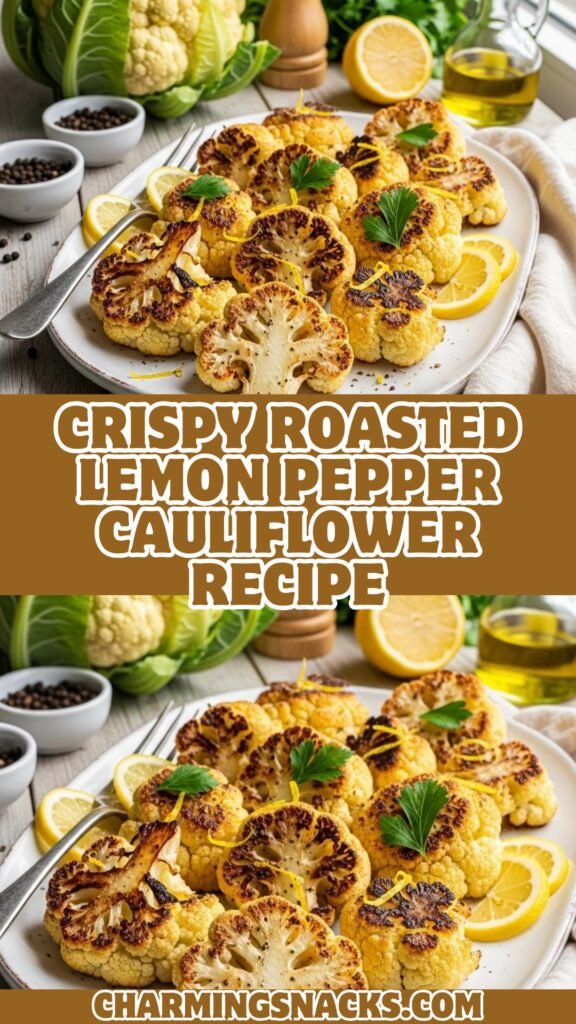
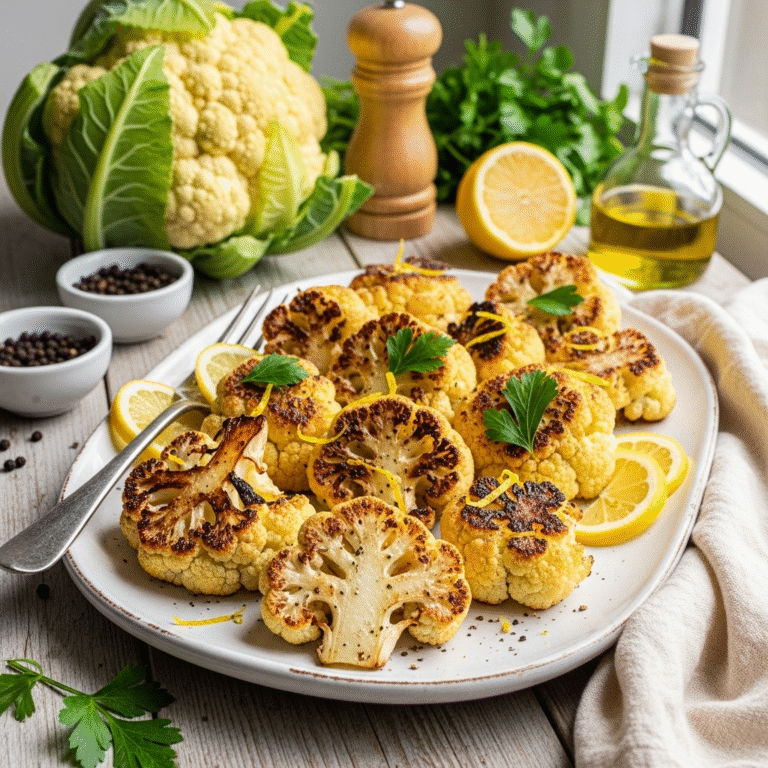
There’s something absolutely magical about crispy roasted lemon pepper cauliflower—those golden-brown florets with caramelized edges, bright citrus notes, and the perfect kick of black pepper that makes this humble vegetable completely irresistible. This easy lemon pepper cauliflower recipe transforms plain cauliflower into a restaurant-quality side dish that even veggie skeptics will devour. The combination of high-heat roasting and zesty lemon pepper seasoning creates a dish that’s crispy on the outside, tender on the inside, and bursting with flavor.
What makes this roasted cauliflower recipe so appealing is how it takes a vegetable that’s often overlooked and turns it into the star of the plate. The lemon pepper seasoning adds bold, bright flavors without any complicated steps or hard-to-find ingredients. Unlike bland, boiled cauliflower that many of us remember from childhood, this version is crispy, flavorful, and actually exciting to eat.
Perfect as a healthy side dish for weeknight dinners, a low-carb substitute for roasted potatoes, a crowd-pleasing addition to holiday meals, meal prep for the week ahead, or a simple yet impressive dish for entertaining, this lemon pepper roasted cauliflower works for any occasion. It pairs beautifully with grilled chicken, roasted salmon, steak, or any protein you’re serving. Plus, it’s naturally vegetarian, vegan, gluten-free, keto-friendly, and Whole30 compliant—checking all the boxes for various dietary preferences.
History / Background
Cauliflower, a member of the Brassica family alongside broccoli, cabbage, and Brussels sprouts, has been cultivated for over 2,000 years, with origins in the Mediterranean region. The vegetable gained prominence in Europe during the 16th century and was brought to America by early colonists. However, for much of modern history, cauliflower suffered from a reputation as a bland, mushy vegetable—typically boiled until soft and served plain or with cheese sauce.
The cauliflower renaissance began in the 2010s when chefs and home cooks rediscovered high-heat roasting as a cooking method. Roasting at temperatures above 400°F caramelizes the natural sugars in cauliflower, creating crispy, golden-brown edges and nutty, complex flavors that boiling simply cannot achieve. This transformation in cooking technique turned cauliflower from a forgettable side dish into a celebrated vegetable.
The rise of low-carb and keto diets further propelled cauliflower into the spotlight, as health-conscious eaters sought vegetable-based alternatives to starchy sides like potatoes and rice. Cauliflower’s mild flavor and versatile texture made it perfect for these applications, and creative recipes like cauliflower rice, cauliflower pizza crust, and roasted cauliflower steaks became mainstream.
Lemon pepper seasoning itself has an interesting American history. While the combination of citrus and pepper has been used in cooking for centuries across various cultures, the commercialized “lemon pepper” seasoning blend became popular in the United States during the 1970s and 80s. Originally associated with seafood (particularly lemon pepper fish), the seasoning blend expanded to chicken, vegetables, and more.
The pairing of lemon pepper with roasted cauliflower is a more recent innovation, emerging from the intersection of the roasted vegetable trend and the search for bold, simple seasonings that enhance healthy foods. Food bloggers and recipe developers discovered that the bright, zesty lemon pepper combination perfectly complemented cauliflower’s mild flavor and roasted nuttiness, creating a dish that’s both healthy and craveable.
Why You’ll Love This Recipe
This isn’t just another boring vegetable side dish—this is the crispy, flavorful, actually-exciting roasted cauliflower that will convert even the most dedicated veggie haters. Every bite delivers that perfect contrast of crispy caramelized edges and tender centers with bright lemon flavor and peppery kick.
Here’s why this easy cauliflower recipe will become a weekly staple:
- Incredibly Simple – Just toss, season, and roast. No complicated techniques or multiple steps required
- Ready in 30 Minutes – From cutting board to dinner table faster than ordering takeout
- Naturally Healthy – Low in calories and carbs, high in fiber and nutrients, with no guilt required
- Universally Dietary-Friendly – Vegan, vegetarian, gluten-free, keto, paleo, and Whole30 compliant
- Budget-Friendly – Cauliflower is affordable year-round and this recipe stretches one head to feed 4-6 people
- Meal Prep Perfect – Makes excellent leftovers and reheats beautifully throughout the week
- Kid-Approved – The crispy texture and familiar lemon flavor appeal even to picky eaters
- Elegant Enough for Guests – Looks and tastes restaurant-quality with minimal effort
- Versatile Pairing – Complements virtually any protein or main dish you’re serving
- Addictively Delicious – That crispy, caramelized flavor makes it hard to stop eating
Ingredient Notes
Understanding your ingredients helps you achieve the perfect crispy lemon pepper cauliflower every time. Let’s explore each component.
Cauliflower – One large head (about 2-2.5 pounds) yields approximately 4-6 servings. Choose cauliflower with tight, compact florets that are creamy white without brown spots or soft areas. The leaves should be bright green and crisp, not wilted. While white cauliflower is most common, colored varieties (purple, orange, or green romanesco) work equally well and add visual interest.
Olive Oil – Extra virgin olive oil adds flavor and is essential for achieving crispy, golden-brown edges through roasting. The oil conducts heat, helping cauliflower caramelize beautifully. You’ll need about 3-4 tablespoons for one head of cauliflower—enough to coat but not drench. Avocado oil works well as a substitute with its higher smoke point, or use melted coconut oil for a slightly different flavor profile.
Lemon – Both fresh lemon zest and juice provide that signature bright, citrusy flavor. You’ll need one large lemon or two small lemons. Fresh is essential—bottled lemon juice lacks the aromatic oils and fresh flavor. The zest contains essential oils that pack intense lemon flavor, while the juice adds acidity that brightens the entire dish. Always zest before juicing!
Black Pepper – Freshly ground black pepper is non-negotiable for true lemon pepper flavor. Pre-ground pepper that’s been sitting in your cabinet for months has lost most of its essential oils and pungency. Use a pepper mill or grinder for maximum flavor and aroma. For this recipe, you want coarsely ground pepper—visible flecks that provide texture and occasional peppery bites.
Salt – Enhances all other flavors and draws out moisture to help achieve crispiness. Coarse kosher salt or sea salt works best for even distribution and proper seasoning.
Garlic Powder – Adds savory depth without the risk of burning that fresh garlic poses at high roasting temperatures. Granulated garlic works similarly, or omit if you prefer pure lemon pepper flavor.
Optional Add-Ins – A pinch of red pepper flakes adds heat, dried Italian herbs add complexity, or a sprinkle of Parmesan cheese after roasting adds savory richness (though this makes it no longer vegan/dairy-free).
Equipment Needed
Making perfect roasted cauliflower requires minimal equipment:
- Large Baking Sheet – A rimmed baking sheet (half-sheet pan, typically 18×13 inches) provides ample space for cauliflower to roast without overcrowding. Dark-colored pans promote better browning than shiny aluminum.
- Sharp Chef’s Knife – For breaking down cauliflower into even-sized florets.
- Cutting Board – A large, stable cutting board makes cauliflower prep easier.
- Large Mixing Bowl – For tossing cauliflower with oil and seasonings. A bowl ensures even coating better than tossing directly on the pan.
- Microplane or Zester – For zesting lemon to capture those aromatic oils.
- Citrus Juicer (Optional) – Makes extracting lemon juice easier, though you can squeeze by hand.
- Measuring Spoons – For accurate seasoning amounts.
- Spatula or Tongs – For flipping cauliflower halfway through roasting.
- Parchment Paper or Silicone Mat (Optional) – Makes cleanup easier, though not essential for the recipe.
Roasted Lemon Pepper Cauliflower Recipe
Crispy roasted cauliflower tossed with olive oil, fresh lemon zest and juice, and plenty of black pepper. This easy lemon pepper cauliflower is healthy, flavorful, and ready in just 35 minutes—the perfect low-carb side dish.
- Total Time: 35 minutes
- Yield: 4-6 servings 1x
Ingredients
For the Roasted Cauliflower:
- 1 large head cauliflower (about 2-2.5 pounds)
- 3-4 tablespoons olive oil
- Zest of 1 large lemon
- 2 tablespoons fresh lemon juice
- 1½ teaspoons coarsely ground black pepper (or to taste)
- 1 teaspoon salt
- ½ teaspoon garlic powder
- ¼ teaspoon red pepper flakes (optional, for heat)
For Garnish:
- Fresh parsley, chopped
- Extra lemon wedges
- Flaky sea salt (optional)
Instructions
- Preheat the Oven: Preheat your oven to 425°F (220°C). This high temperature is crucial for achieving crispy, caramelized edges. Position a rack in the middle of the oven for even heat distribution.
- Prepare the Cauliflower: Remove outer leaves from the cauliflower and rinse under cold water. Place cauliflower stem-side down on a cutting board. Using a sharp knife, cut vertically through the core to quarter the head. Cut away and discard the thick core from each quarter. Break or cut the cauliflower into bite-sized florets, approximately 1½ to 2 inches each. Try to keep pieces relatively uniform in size so they roast evenly. Pat florets dry with paper towels if they’re very wet—excess moisture prevents browning.
- Season the Cauliflower: In a large bowl, combine cauliflower florets, olive oil, lemon zest, lemon juice, black pepper, salt, garlic powder, and red pepper flakes if using. Toss thoroughly with your hands or a large spoon, ensuring every piece is evenly coated with oil and seasonings. The florets should glisten with oil but not be dripping—if they seem dry, add another tablespoon of oil.
- Arrange on Baking Sheet: Spread seasoned cauliflower in a single layer on a large baking sheet, leaving space between pieces. Crowding causes steaming instead of roasting, preventing that desired crispiness. Use two baking sheets if necessary to avoid overcrowding. Pour any remaining oil and seasonings from the bowl over the cauliflower.
- Roast: Place baking sheet on the middle rack of preheated oven. Roast for 12-15 minutes without disturbing. After this initial roasting, remove from oven and use a spatula or tongs to flip the cauliflower florets. Return to oven and continue roasting for another 10-15 minutes, until cauliflower is golden brown with crispy, caramelized edges. The florets should be tender when pierced with a fork but still have some resistance—not mushy. Total roasting time is 25-30 minutes depending on floret size and your oven.
- Check for Doneness: Cauliflower is done when edges are deeply golden brown (almost charred in spots—that’s the good stuff!), and the vegetable is tender but not falling apart. If you prefer extra-crispy cauliflower, broil for 2-3 minutes at the end, watching carefully to prevent burning.
- Garnish and Serve: Transfer roasted cauliflower to a serving platter or bowl. Garnish with fresh chopped parsley, an extra squeeze of fresh lemon juice, and a sprinkle of flaky sea salt if desired. Serve immediately while hot and crispy.
Notes
- Floret Size: Keep pieces uniform (1½-2 inches) for even cooking. Larger pieces need longer roasting time.
- Don’t Overcrowd: Cauliflower needs space to roast, not steam. Use two pans if necessary.
- High Heat is Essential: Don’t reduce the temperature—425°F is necessary for caramelization and crispiness.
- Pepper Amount: Adjust black pepper to taste—1½ teaspoons provides noticeable but not overwhelming pepper flavor.
- Make it Spicy: Add cayenne pepper or increase red pepper flakes for heat lovers.
- Prep Time: 10 minutes
- Cook Time: 25 minutes
- Category: Side Dish
- Method: Roasting
- Cuisine: American
- Diet: Vegan
Nutrition
- Serving Size: About 1 cup
- Calories: 110
- Sugar: 3g
- Sodium: 420mg
- Fat: 8g
- Saturated Fat: 1g
- Unsaturated Fat: 7g
- Trans Fat: 0g
- Carbohydrates: 9g
- Fiber: 4g
- Protein: 3g
- Cholesterol: 0mg
Tips & Variations
The beauty of roasted cauliflower is its versatility. Here are delicious ways to customize:
Parmesan Lemon Pepper Cauliflower – Toss hot roasted cauliflower with ½ cup freshly grated Parmesan cheese immediately after removing from oven. The residual heat melts the cheese slightly, creating an irresistible coating.
Spicy Lemon Pepper Cauliflower – Double the red pepper flakes to ½ teaspoon, add ¼ teaspoon cayenne pepper to the seasoning mix, or drizzle with hot sauce before serving.
Herb Lemon Cauliflower – Add 1 teaspoon dried Italian herbs or fresh thyme leaves to the seasoning mix for an herby variation.
Asian-Inspired Version – Replace lemon with lime, add 1 teaspoon sesame oil to the olive oil, and sprinkle with sesame seeds after roasting.
Buffalo Cauliflower – Toss roasted cauliflower with buffalo sauce after cooking for spicy buffalo “wings.”
Curry Roasted Cauliflower – Replace lemon pepper with curry powder, turmeric, and cumin for Indian-inspired flavors.
Maple Balsamic Cauliflower – Drizzle with 1 tablespoon each maple syrup and balsamic vinegar before roasting for sweet-tangy flavor.
Air Fryer Method – Cook in air fryer at 400°F for 15-18 minutes, shaking basket halfway through, for even crispier results.
Pro Chef Tips
Want to elevate your roasted cauliflower from good to absolutely restaurant-perfect? These professional techniques make all the difference:
Dry the Cauliflower Thoroughly – After washing, let cauliflower air-dry for 10-15 minutes or pat very dry with paper towels. Surface moisture creates steam that prevents browning. Some chefs even leave cut florets uncovered in the refrigerator for an hour to dry the surface completely.
Use High Heat Without Fear – Don’t be afraid of 425°F or even 450°F. High heat creates the Maillard reaction—that beautiful browning and complex flavor development. Lower temperatures just cook the cauliflower without caramelizing it.
Cut Flat Sides for Maximum Browning – When breaking down cauliflower, try to create some flat sides on florets. These flat surfaces make maximum contact with the hot pan, creating more of those delicious caramelized areas.
Don’t Flip Too Early – Let cauliflower roast undisturbed for the full 12-15 minutes before flipping. Flipping too early prevents proper caramelization. The florets need time to develop that golden crust before they’re moved.
Use a Preheated Pan – For extra crispiness, place your empty baking sheet in the oven while it preheats, then carefully add seasoned cauliflower to the hot pan. The immediate sizzle jumpstarts caramelization.
Add Acid After, Not Before – While we add lemon juice before roasting in this recipe, some chefs prefer adding it after roasting to maintain maximum brightness. Try both methods and see which you prefer.
Season Generously – Vegetables need more seasoning than you think. Don’t be shy with salt and pepper—cauliflower can handle it and needs it to shine.
Zest Directly Over the Bowl – Zest the lemon directly over your mixing bowl so those aromatic oils drop right onto the cauliflower rather than being lost on your cutting board.
Broil for Extra Char – If you love deeply caramelized, almost-charred edges, finish under the broiler for 2-3 minutes. Watch carefully—broilers work fast!
Common Mistakes to Avoid
Even experienced cooks make these common errors with roasted cauliflower:
Overcrowding the Pan – This is the number one mistake! When florets touch each other, they steam instead of roast, resulting in soft, pale cauliflower instead of crispy, golden perfection. Give each piece space. Better to use two pans than cram everything onto one.
Cutting Pieces Too Small – Tiny florets turn mushy and can even burn before developing flavor. Aim for 1½ to 2-inch pieces that have enough mass to stay tender inside while crisping outside.
Using Insufficient Oil – Cauliflower is like a sponge and needs enough oil to coat properly. Underseasoned, dry cauliflower won’t brown well and tastes bland. Each piece should glisten with oil.
Not Preheating the Oven – Starting in a cold oven means cauliflower cooks rather than roasts, missing that crucial caramelization. Always fully preheat to 425°F before adding your pan.
Opening the Oven Door Repeatedly – Every time you open the oven, you release heat and lower the temperature, extending cooking time and affecting browning. Check once at the halfway point to flip, otherwise leave it alone.
Roasting at Too Low Temperature – 350°F or 375°F won’t cut it for this recipe. You need 425°F minimum for proper caramelization. Lower temperatures just cook the vegetable without creating that delicious browned crust.
Storage & Meal Prep
Roasted cauliflower makes excellent meal prep and stores beautifully when handled properly:
Refrigerator Storage – Let cauliflower cool completely, then transfer to an airtight container. Refrigerate for up to 4-5 days. The flavor actually improves after a day as seasonings penetrate deeper. Note that cauliflower loses some crispiness when stored, which is normal.
Reheating for Best Results – The oven is best for restoring crispiness. Spread cauliflower on a baking sheet and reheat at 400°F for 8-10 minutes until hot and crispy edges return. Air fryer works wonderfully too—375°F for 5-7 minutes. Avoid microwaving if possible as it makes cauliflower soggy, but if you must, use 50% power in short intervals.
Cold Serving – Leftover roasted cauliflower is actually delicious cold! Add to salads, grain bowls, or eat as a snack straight from the fridge. The lemon pepper flavor is still excellent even when chilled.
Meal Prep Strategy – Roast a double or triple batch on Sunday for easy sides all week. Portion into containers with your proteins and other sides for complete grab-and-go meals.
Batch Cooking – This recipe easily doubles or triples. Use multiple baking sheets and rotate their positions halfway through roasting for even cooking.
Make-Ahead & Freezer Notes
While best fresh, you can prepare components ahead for convenience:
Prepping Ahead – Cut cauliflower into florets up to 2 days ahead. Store in an airtight container in the refrigerator. Toss with seasonings just before roasting for best results.
Season in Advance – For ultimate meal prep, toss cut florets with all seasonings, store in a container or bag, and refrigerate for up to 24 hours. When ready to cook, spread on baking sheet and roast—no additional prep needed.
Freezing Raw Cauliflower – Raw cauliflower can be frozen after cutting into florets. Spread on a baking sheet, freeze until solid, then transfer to freezer bags. Freeze for up to 3 months. Roast directly from frozen, adding 5-10 minutes to cooking time.
Freezing Cooked Cauliflower – Honestly, roasted vegetables don’t freeze particularly well—they lose their texture and become mushy when thawed. If you must freeze leftovers, store in airtight containers for up to 2 months. Thaw in refrigerator overnight and reheat in a hot oven to restore some crispiness.
Not Recommended – Preparing completely and then freezing doesn’t work well. The texture suffers significantly. Better to prep components separately or simply make fresh batches as needed—it only takes 35 minutes!
Serving Suggestions
Lemon pepper cauliflower is incredibly versatile and pairs beautifully with numerous dishes:
Protein Pairings:
- Chicken: Grilled, roasted, or pan-seared chicken breast or thighs
- Fish: Salmon, cod, halibut, or any white fish
- Steak: Perfect alongside grilled steak or beef roasts
- Pork: Pork chops, tenderloin, or roasted pork loin
- Lamb: Complements lamb’s rich flavor beautifully
- Tofu or Tempeh: For vegetarian/vegan meals
Complete Meal Ideas:
- Mediterranean Plate: Serve with grilled chicken, hummus, olives, and pita bread
- Sheet Pan Dinner: Roast alongside salmon fillets and asparagus for a complete one-pan meal
- Keto Dinner: Pair with butter-basted steak and creamed spinach
- Buddha Bowl: Add to grain bowls with quinoa, chickpeas, and tahini dressing
- Meal Prep Bowls: Combine with grilled chicken, brown rice, and mixed greens
Other Side Dishes:
- Simple green salad with vinaigrette
- Roasted sweet potatoes or butternut squash
- Garlic mashed potatoes (for non-keto meals)
- Sautéed green beans or Brussels sprouts
- Wild rice or quinoa pilaf
Beverage Pairings:
- Wine: Sauvignon Blanc, Pinot Grigio, or unoaked Chardonnay
- Beer: Light lagers or wheat beers
- Non-Alcoholic: Sparkling water with lemon, iced tea, or lemonade
Creative Uses:
- Chop and add to omelets or frittatas
- Toss with pasta and Parmesan for a vegetarian main
- Add to grain salads or Buddha bowls
- Use as a pizza topping
- Serve as an appetizer with dipping sauce
FAQs Section
Q: Can I use frozen cauliflower instead of fresh?
A: Yes, but with caveats. Frozen cauliflower contains more moisture and won’t get quite as crispy as fresh. If using frozen, don’t thaw it first—roast directly from frozen and expect to add 5-10 extra minutes to cooking time. Pat away any ice crystals before tossing with oil and seasonings.
Q: Why isn’t my cauliflower getting crispy?
A: The most common reasons are: overcrowding the pan (pieces need space), oven temperature too low (needs to be 425°F minimum), not using enough oil, cauliflower was too wet when it went into the oven, or pieces were cut too small. Ensure proper spacing and high heat for crispy results.
Q: Can I make this without lemon?
A: Yes! The lemon provides signature flavor, but you can substitute with lime juice and zest for a different citrus profile, or omit citrus entirely and season with garlic, herbs, or Parmesan for Italian-inspired roasted cauliflower. The black pepper alone still creates delicious results.
Q: Is this recipe keto-friendly?
A: Absolutely! Cauliflower is very low in carbs (only 5g net carbs per cup) and high in fiber. This entire recipe is keto, paleo, Whole30, and fits most low-carb diets perfectly. It’s an excellent substitute for higher-carb roasted potatoes.
Q: How do I know when cauliflower is done roasting?
A: Look for deeply golden-brown edges with some darker, almost charred spots—that’s where the flavor is! The florets should be tender when pierced with a fork but still have a slight bite, not mushy. Total time is usually 25-30 minutes at 425°F.
Q: Can I add Parmesan cheese to this?
A: Definitely! Toss hot roasted cauliflower with ½ cup freshly grated Parmesan immediately after removing from the oven. The heat will melt it slightly. Note that adding cheese makes it no longer vegan or dairy-free, but it’s absolutely delicious.
Q: What other vegetables can I roast with this seasoning?
A: Lemon pepper seasoning works beautifully on broccoli, Brussels sprouts, green beans, asparagus, zucchini, and carrots. Adjust roasting times based on the vegetable—denser vegetables like carrots need longer, while tender vegetables like zucchini need less time.
Conclusion
There you have it—everything you need to make the most delicious, crispy, perfectly seasoned lemon pepper cauliflower! This simple roasted vegetable proves that healthy eating doesn’t have to be boring. With just a few ingredients, high heat, and about 30 minutes, you can transform humble cauliflower into a side dish that steals the show.
Whether you’re looking for a healthy low-carb side, trying to eat more vegetables, meal-prepping for the week, or simply want something different from the usual steamed veggies, this easy roasted cauliflower recipe delivers every single time. It’s the kind of versatile, foolproof recipe that works for busy weeknights and elegant dinner parties alike.
I’d absolutely love to hear how your lemon pepper cauliflower turned out! What did you serve it with? Did you try any of the variations? Drop a comment below sharing your experience, and don’t forget to rate the recipe if it became a new favorite. If you found this recipe helpful, please share it on Pinterest so other home cooks can discover that cauliflower can actually be exciting!
Here’s to crispy edges, bright flavors, and vegetables that make you actually excited for dinner!