Crispy Keto Tortilla Chips – Only 3 Ingredients!

Say goodbye to carb-heavy snacking and hello to these incredible keto tortilla chips that are so crispy, flavorful, and satisfying, you won’t believe they’re low-carb! Made with just three simple ingredients – cheese, almond flour, and seasoning – these chips deliver all the crunch and satisfaction of traditional tortilla chips without derailing your keto lifestyle. Whether you’re dipping them into guacamole, salsa, or queso, these homemade low-carb chips are about to become your new go-to snack.
What makes these keto chips so amazing? They’re incredibly versatile, ridiculously easy to make, and taste a thousand times better than store-bought alternatives. Plus, you can customize the flavors to your heart’s content – think ranch, everything bagel, spicy jalapeño, or classic lime and salt. These easy keto chips are perfect for game day, movie nights, meal prep snacking, or whenever those chip cravings hit. And the best part? They’re naturally gluten-free, grain-free, and packed with protein and healthy fats to keep you satisfied for hours. Get ready to revolutionize your keto snacking game!
History / Background
The concept of keto tortilla chips is a relatively modern innovation born from the ketogenic diet movement that gained massive momentum in the 2010s. While traditional tortilla chips have been a beloved staple of Mexican and Tex-Mex cuisine since the 1940s, the keto-friendly version represents creative problem-solving by home cooks who refused to give up their favorite crunchy snacks.
Traditional tortilla chips trace their roots to Mexican cuisine, where frying cut-up corn tortillas was a practical way to use up stale or leftover tortillas. The commercial production of tortilla chips began in Los Angeles in the 1940s, where they quickly became associated with Tex-Mex restaurants and casual dining culture throughout the United States. By the 1960s and 70s, packaged tortilla chips became a grocery store staple, forever changing American snacking habits.
However, traditional corn-based tortilla chips are high in carbohydrates – typically containing 15-20 grams of carbs per serving – making them completely off-limits for anyone following a ketogenic diet, which restricts daily carb intake to typically 20-50 grams. This created a significant challenge for keto dieters who missed the satisfying crunch and versatility of chips.
Enter the innovative world of keto baking and alternative ingredients. As the ketogenic diet exploded in popularity around 2015-2020, creative home cooks and food bloggers began experimenting with cheese-based recipes to replicate beloved high-carb foods. The discovery that shredded cheese could be transformed into crispy, chip-like crackers was revolutionary. These “cheese crisps” or “cheese chips” had been around in various forms, but adapting them specifically as tortilla chip replacements with the right thickness, texture, and flavor profile became an art form.
The addition of almond flour to the cheese base was a game-changer. It created a dough that could be rolled thin, cut into triangles, and baked into chips that more closely mimicked the texture and appearance of traditional tortilla chips. This innovation made keto-friendly tortilla chips accessible to home cooks everywhere, allowing them to enjoy nachos, dips, and all their favorite chip-based snacks while maintaining ketosis.
Today, homemade keto chips represent the perfect marriage of traditional snacking culture with modern dietary needs, proving that following a restrictive diet doesn’t mean sacrificing flavor or satisfaction. They’ve become a Pinterest sensation, with thousands of variations shared by the keto community worldwide.
Why You’ll Love This Recipe
These crispy keto tortilla chips are an absolute game-changer for anyone following a low-carb lifestyle, and they’ve quickly become one of the most popular keto recipes on Pinterest for excellent reasons!
Here’s why this recipe will become your new obsession:
- Only 3 main ingredients – Seriously! Shredded cheese, almond flour, and seasoning create chip perfection
- Under 2 net carbs per serving – Enjoy chips again without the guilt or blood sugar spike
- Incredibly crispy texture – They snap and crunch just like real tortilla chips, not soft or rubbery
- Budget-friendly – Much cheaper than store-bought keto chips that cost $6-8 per tiny bag
- Ready in 20 minutes – From mixing bowl to snacking in less time than it takes to run to the store
- Naturally gluten-free and grain-free – Perfect for multiple dietary restrictions beyond just keto
- Customizable flavors – Make them spicy, cheesy, tangy, or savory to match your cravings
- High in protein and healthy fats – These actually satisfy hunger instead of leaving you wanting more
- No special equipment needed – Just basic kitchen tools you already own
- Kid-approved – Even non-keto family members love these chips!
- Perfect for meal prep – Make a big batch and have snacks ready all week long
- Versatile serving options – Nachos, dipping, snacking, or crushing as a breadcrumb substitute
Whether you’re a keto veteran or just starting your low-carb journey, these chips prove that healthy eating doesn’t have to be boring or restrictive. They’re perfect for anyone who misses the satisfying crunch of chips but wants to stay on track with their health goals.
Ingredient Notes
Let’s break down the simple but powerful ingredients that create these amazing keto chips. Each one plays a crucial role in achieving that perfect chip texture and flavor.
Shredded Mozzarella Cheese (or Mexican Blend) – This is the foundation of your chips! Mozzarella creates a neutral, mild base that crisps beautifully when baked. The low-moisture variety works best because it contains less water, resulting in crispier chips. Pre-shredded cheese is convenient, but freshly shredded cheese from a block melts more smoothly and creates a better texture because it doesn’t contain anti-caking agents. Mexican blend cheese (cheddar, Monterey Jack, asadero, and queso quesadilla) adds more flavor complexity and a slightly yellower color that looks more like traditional tortilla chips. You can also use all cheddar for a sharper, cheesier flavor, though the chips may be slightly more brittle.
Almond Flour (Superfine/Blanched) – This is what transforms melted cheese into a workable dough that can be rolled and cut into chip shapes. Almond flour adds structure, helps absorb moisture, and creates that satisfying crunch factor. Important: Use superfine blanched almond flour, NOT almond meal. Almond meal has larger particles and includes the skins, which creates a grittier texture and affects the color. Bob’s Red Mill, Blue Diamond, or Kirkland brands work wonderfully. If you have a nut allergy, you can substitute with sunflower seed flour or coconut flour (use only ⅓ cup coconut flour as it absorbs much more moisture).
Seasonings – This is where you customize! At minimum, you’ll want salt to enhance the cheese flavor. Many recipes include garlic powder and onion powder for savory depth, plus cumin and chili powder to replicate that classic tortilla chip taste. Lime zest adds authentic Mexican flavor. Don’t skip the seasonings – they’re what make these taste like tortilla chips rather than just cheese crackers!
Optional: Egg – Some recipes include one egg to help bind the dough and make it easier to roll thin. While not absolutely necessary, it does create a sturdier chip that’s less likely to break. If you’re trying to keep it super simple, you can skip it, but the texture will be slightly different.
Optional: Xanthan Gum – Just a tiny pinch (⅛ teaspoon) can help improve the dough’s elasticity and make it easier to work with, but it’s not essential. Many home cooks skip this entirely.
Equipment Needed
You don’t need any fancy gadgets to make perfect keto tortilla chips! Here’s what you’ll need:
- Large microwave-safe bowl (for melting cheese)
- Parchment paper or silicone baking mat (absolutely essential for non-stick baking)
- Baking sheet (standard half-sheet pan works perfectly)
- Rolling pin (for rolling dough thin and even)
- Pizza cutter or sharp knife (for cutting chip triangles)
- Mixing spoon or spatula (for combining dough)
- Measuring cups and spoons (for accurate measurements)
- Small bowl (for mixing seasonings)
- Wire cooling rack (optional but helps chips stay crispy)
- Second piece of parchment paper (for rolling dough between two sheets to prevent sticking)
Optional but helpful:
- Food processor (makes mixing dough even easier)
- Pastry scraper (helps transfer dough)
- Ruler (for even chip cutting)
Keto Tortilla Chips
Crispy, crunchy keto tortilla chips made with just three main ingredients! These low-carb chips taste just like traditional tortilla chips but with only 2g net carbs per serving. Perfect for dipping in guacamole, salsa, or queso, or loading up with toppings for keto-friendly nachos!
- Total Time: 20 minutes
- Yield: 4 servings (approximately 40-50 chips) 1x
Ingredients
For the Chips:
- 2 cups shredded mozzarella cheese (or Mexican cheese blend)
- ¾ cup superfine blanched almond flour
- 1 large egg (optional, but recommended for easier handling)
- ½ teaspoon salt
- ½ teaspoon garlic powder
- ½ teaspoon onion powder
- ½ teaspoon ground cumin
- ¼ teaspoon chili powder
- Pinch of cayenne pepper (optional, for heat)
- ½ teaspoon lime zest (optional, for authentic flavor)
For Serving:
- Guacamole
- Salsa
- Queso dip
- Sour cream
- Pico de gallo
Instructions
Step 1: Preheat and Prepare
Preheat your oven to 400°F (200°C). Line a large baking sheet with parchment paper or a silicone baking mat. This step is absolutely crucial – without it, your chips will stick terribly and be impossible to remove. Set aside another piece of parchment paper for rolling.
Step 2: Melt the Cheese
Place the shredded mozzarella cheese in a large microwave-safe bowl. Microwave on high for 1 minute, then stir. Continue microwaving in 30-second intervals, stirring between each, until the cheese is completely melted and smooth. This usually takes 1.5 to 2 minutes total. The cheese should be fluid and stretchy. Alternatively, you can melt the cheese in a double boiler on the stovetop if you prefer.
Step 3: Make the Dough
Working quickly while the cheese is still hot and pliable, add the almond flour, egg (if using), salt, garlic powder, onion powder, cumin, chili powder, cayenne (if using), and lime zest to the melted cheese. Stir vigorously with a spoon or spatula until a thick dough forms. The mixture will be sticky at first but will come together as you mix. If the cheese starts to cool and becomes difficult to work with, microwave for another 10-15 seconds to soften it. Once combined, use your hands to knead the dough a few times in the bowl until it’s smooth and uniform. The dough should be slightly warm, pliable, and not too sticky.
Step 4: Roll Out the Dough
Place the dough ball on your prepared parchment paper-lined baking sheet. Place another piece of parchment paper on top of the dough. Using a rolling pin, roll the dough out as thin as possible – ideally about ⅛ inch thick or even thinner. The thinner you roll it, the crispier your chips will be! Roll evenly to ensure uniform baking. If the dough is sticking to the rolling pin or parchment, it’s too warm – let it cool for a minute or two. Aim for a large rectangle or square shape to minimize waste.
Step 5: Cut into Triangles
Remove the top piece of parchment paper. Using a pizza cutter or sharp knife, cut the dough into chip-sized triangles. Traditional tortilla chip size is about 2-3 inches per side. You can cut straight lines to make squares first, then cut diagonally to create triangles, or cut into any shape you prefer! Don’t separate the pieces yet – leave them touching for now. This makes them easier to handle before baking.
Step 6: Pre-Bake (Optional but Recommended)
For extra crispy chips, pre-bake the entire sheet of connected chips for 5 minutes. Remove from the oven and gently separate the pieces, spreading them apart slightly so they’re no longer touching. This allows air to circulate around each chip.
Step 7: Bake Until Crispy
Return to the oven and bake for 6-8 more minutes (or 10-12 minutes total if you skipped the pre-bake step), watching carefully. The chips are done when they’re golden brown around the edges and firm to the touch. Some darker spots are fine and add flavor, but watch carefully in the final minutes to prevent burning. They’ll continue to crisp up as they cool, so don’t overbake. Remove any chips that are done early to prevent burning while others finish.
Step 8: Cool Completely
Transfer the chips to a wire cooling rack (or leave on the baking sheet) and let them cool for at least 5-10 minutes. This cooling period is essential – the chips will be soft when hot but will become crispy and crunchy as they cool. Resist the urge to eat them immediately! Once completely cool, they’ll have that perfect tortilla chip snap.
Notes
- Thickness matters: The thinner you roll the dough, the crispier your chips will be. Aim for ⅛ inch or thinner for maximum crunch.
- Work quickly: The cheese dough is easiest to work with while still warm. If it cools too much and becomes difficult to roll, pop it in the microwave for 10-15 seconds to soften.
- Watch closely during baking: Chips can go from perfectly golden to burnt quickly in the final minutes. Check them at the 8-minute mark and every minute after.
- Net carbs: This recipe contains approximately 2g net carbs per serving (10-12 chips), making it perfect for keto diets.
- Cheese matters: Use good-quality, low-moisture mozzarella for best results. Cheap cheese with lots of additives may not melt as smoothly.
- Storage is key: Keep chips in an airtight container with a paper towel to absorb any moisture and maintain crispiness.
- Prep Time: 10 minutes
- Cook Time: 10 minutes
- Category: Appetizer
- Method: Baking
- Cuisine: American
- Diet: Gluten Free
Nutrition
- Serving Size: 10-12 chips (¼ of recipe)
- Calories: 245
- Sugar: 1g
- Sodium: 425mg
- Fat: 19g
- Saturated Fat: 6g
- Unsaturated Fat: 11g
- Trans Fat: 0g
- Carbohydrates: 6g
- Fiber: 4g
- Protein: 14g
- Cholesterol: 65mg
Tips & Variations
The beauty of homemade keto tortilla chips is how easily you can customize them! Here are delicious ways to make this recipe your own:
Ranch Flavored Chips: Add 1 tablespoon of ranch seasoning mix to the dough instead of the Mexican-inspired seasonings. These are incredible with buffalo chicken dip!
Everything Bagel Chips: Sprinkle everything bagel seasoning on top of the rolled dough before cutting and baking. Perfect for keto “everything bagel” lovers.
Nacho Cheese Chips: Use all sharp cheddar cheese instead of mozzarella for an intense cheese flavor. Add an extra ¼ teaspoon of chili powder for that nacho cheese chip taste.
Spicy Jalapeño Chips: Add 2 tablespoons of finely diced pickled jalapeños to the dough and increase cayenne to ½ teaspoon. Serve with cool ranch dip to balance the heat.
Cool Ranch Style: Mix 1 tablespoon dried dill, 1 teaspoon dried parsley, extra garlic powder, and onion powder into the dough for a ranch-inspired chip.
Pizza Chips: Add Italian seasoning, dried oregano, and a pinch of red pepper flakes. Serve with warm marinara sauce for dipping – it’s like pizza without the crust!
Lime & Salt: Keep seasonings minimal (just salt) and add fresh lime zest to the dough. Squeeze fresh lime juice over the chips right after baking for authentic Mexican flavor.
Parmesan Twist: Replace ½ cup of the mozzarella with finely grated Parmesan cheese for a nuttier, more complex flavor profile.
Cinnamon Sugar Dessert Chips: Skip all savory seasonings and instead mix 2 tablespoons powdered erythritol (keto sweetener) with 1 teaspoon cinnamon. Sprinkle over rolled dough before baking. Serve with sugar-free chocolate dip!
Extra Crispy Method: After rolling the dough, brush the top lightly with beaten egg white before seasoning and baking. This creates an even crispier texture.
Colored Chips: Add ½ teaspoon turmeric for yellow chips, or ½ teaspoon paprika for orange-tinted chips that look more like traditional tortilla chips.
Pro Chef Tips
Want to take your keto chips from good to absolutely restaurant-quality? Here are professional techniques that make all the difference:
Use parchment paper between the dough and rolling pin. This prevents sticking without needing to add extra flour, which would change the texture and increase carbs. Roll directly on the baking sheet to avoid transferring the delicate dough later, which can cause tearing and frustration.
Ensure your cheese is completely melted and smooth. Any unmelted cheese chunks will create hard spots in your chips that won’t crisp properly. Take the extra 30 seconds to ensure the cheese is uniformly melted before adding other ingredients.
Let the dough rest for 2-3 minutes after mixing. This brief rest allows the almond flour to fully hydrate, making the dough easier to roll and creating a better final texture. It’s a small step that makes a noticeable difference.
Roll the dough thinner than you think you should. The dough puffs slightly during baking, so what looks impossibly thin before baking becomes the perfect thickness after. Aim for translucent-thin if you want restaurant-style crispy chips. Thicker chips are chewier and less satisfying.
Don’t separate the cut chips until after pre-baking. Cutting the dough into triangles but leaving them touching during the first 5 minutes of baking helps them hold their shape better. The edges will set slightly, making them much easier to separate without breaking.
Bake in batches if needed rather than crowding. If your chips are touching or overlapping, they’ll steam instead of crisp. Use multiple baking sheets or bake in batches for the crispiest results. The time investment is worth it.
Cool on a wire rack for ultimate crispiness. Leaving chips on the baking sheet traps steam underneath, creating a soggy bottom. Transfer to a wire rack so air can circulate all around, ensuring every chip is uniformly crispy.
Season twice for maximum flavor. Mix most seasonings into the dough, then lightly sprinkle a bit more seasoning over the rolled dough just before baking. This creates layers of flavor – some inside, some on the surface – just like commercial chips.
Save and re-roll scraps. Any dough leftover after cutting can be gathered, re-rolled, and cut into more chips. Don’t waste a single bite of this precious keto dough!
Common Mistakes to Avoid
Even simple recipes can go wrong without proper technique. Here are the most common keto chip pitfalls and how to prevent them:
Using almond meal instead of almond flour: This is the #1 mistake! Almond meal has a coarse, gritty texture and includes the dark almond skins, creating grainy, dark-speckled chips with an inferior texture. Always use superfine blanched almond flour (which is very finely ground and made from blanched almonds without skins) for smooth, light-colored chips.
Not rolling thin enough: Thick chips never get properly crispy – they end up chewy and dense. Many beginners are afraid to roll the dough thin, but super-thin is key to achieving that satisfying crunch. Think tortilla-thin, not cookie-thick. If you can almost see through the dough when holding it up to light, you’re getting close!
Skipping the parchment paper: This is absolutely non-negotiable. Without parchment or a silicone mat, your chips will weld themselves to the baking sheet, and you’ll destroy them trying to remove them. Save yourself the heartbreak and always use parchment paper.
Pulling them from the oven too early: Underbaked chips will be soft and floppy, never achieving that crispy texture you’re craving. They should be golden brown with slightly darker edges and feel firm when gently pressed. Remember, they’ll crisp up even more as they cool, but they need to be properly baked first.
Not letting them cool completely: Hot chips are deceptively soft! You might panic and think you’ve failed, but patience is essential. As the chips cool, they’ll firm up and become crispy. Give them the full 10 minutes to cool before judging (or eating) them. This is when the magic happens.
Using pre-shredded cheese with too many additives: Some pre-shredded cheese contains high amounts of cellulose and anti-caking agents that prevent smooth melting. While pre-shredded is convenient, if your dough seems grainy or won’t come together smoothly, try shredding cheese from a block next time.
Storing while still warm: Trapping any residual heat and steam in a container will make your beautifully crispy chips turn soft and soggy within hours. Always let chips cool completely to room temperature before storing.
Storage & Meal Prep
Proper storage is crucial for maintaining that perfect crunch! Here’s how to keep your keto chips crispy and delicious:
Room Temperature Storage: Store completely cooled chips in an airtight container at room temperature for up to 5-7 days. Place a folded paper towel in the bottom of the container and another on top of the chips to absorb any moisture that might develop. This simple trick keeps them crispy much longer! Keep the container in a cool, dry place away from heat and humidity.
Signs They’ve Gone Soft: If your chips lose their crispness, you can revive them! Spread them in a single layer on a baking sheet and bake at 350°F for 3-5 minutes until they crisp back up. Let them cool completely before eating or storing again.
Meal Prep Strategy: These chips are fantastic for meal prep! Make a large batch (double or triple the recipe) on Sunday and portion them into individual serving-sized bags or containers for grab-and-go snacks throughout the week. This helps with portion control and ensures you always have keto-friendly snacks ready.
Humidity is the Enemy: If you live in a humid climate, your chips may soften more quickly. Store them with silica gel packets (like the ones that come in vitamin bottles) to absorb moisture, or keep them in the refrigerator in an airtight container with paper towels.
Avoid Refrigeration Unless Necessary: While you can refrigerate chips to extend their life slightly, the moisture in the refrigerator can make them lose crispness faster. Room temperature storage with moisture absorbers is usually best.
Make-Ahead & Freezer Notes
Yes, you can prep these chips ahead! Here’s how to do it successfully:
Freezing Unbaked Dough: The cheese dough freezes beautifully! After mixing the dough but before rolling, wrap it tightly in plastic wrap and place in a freezer-safe bag. Freeze for up to 2 months. When ready to use, thaw in the refrigerator overnight, then microwave for 15-20 seconds to make it pliable enough to roll. This is perfect for having chip dough ready whenever cravings hit!
Freezing Baked Chips: Fully cooled baked chips can be frozen in an airtight container or freezer-safe bags for up to 1 month. Layer them with parchment paper to prevent sticking. When ready to eat, let them thaw at room temperature for 15 minutes, then crisp them up in a 350°F oven for 3-5 minutes. They’ll taste freshly made!
Make-Ahead for Parties: If you’re serving these at a gathering, make them up to 2 days in advance and store in an airtight container with paper towels. Refresh them in a low oven (300°F for 5 minutes) about an hour before guests arrive for maximum crispiness.
Pre-Cutting for Quick Baking: Roll out the dough, cut it into triangles, and freeze the entire baking sheet. Once frozen solid, transfer the pre-cut unbaked chips to a freezer bag. When you want fresh chips, bake directly from frozen, adding just 2-3 extra minutes to the baking time.
Best Method for Maximum Freshness: For the absolute crispiest chips, make them fresh. The whole process takes just 20 minutes from start to finish, so it’s easy to whip up a batch whenever you need them rather than relying on stored chips that have lost some crispness.
Serving Suggestions
These crispy keto chips are incredibly versatile! Here are delicious ways to serve them:
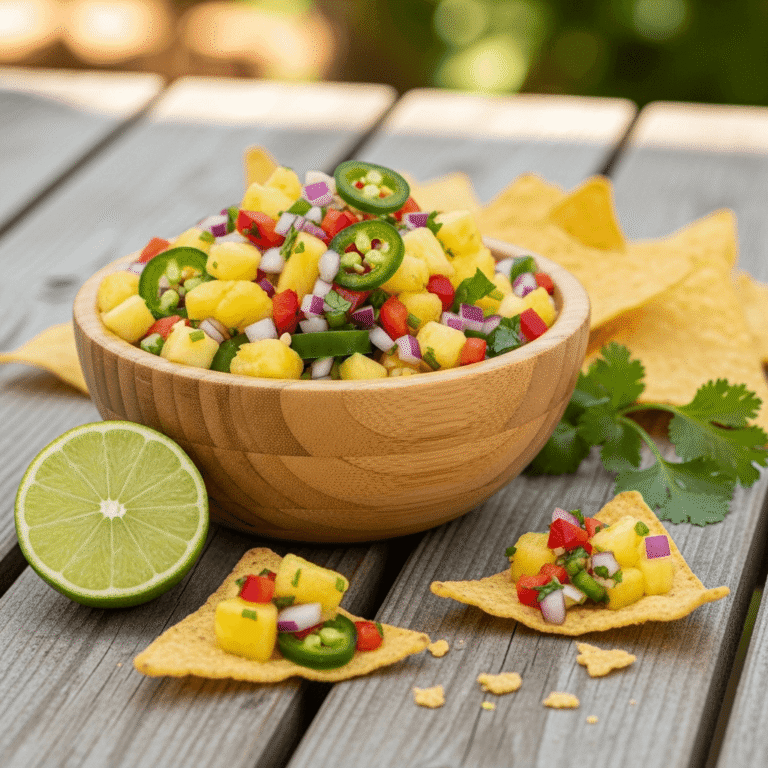
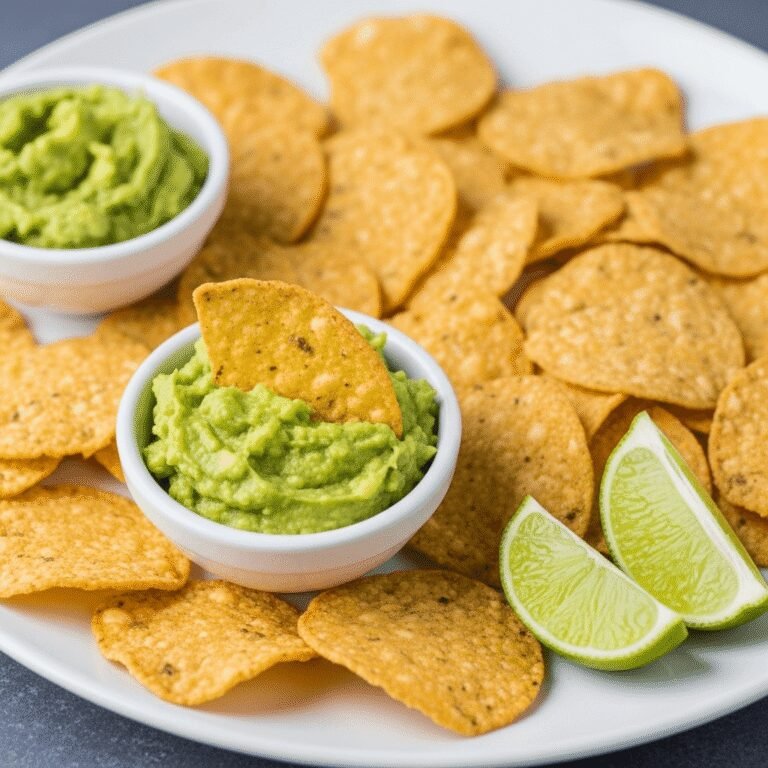
Classic Dip Trio: Arrange chips on a platter with bowls of guacamole, fresh salsa, and sour cream for a traditional chip-and-dip experience. Add lime wedges for squeezing over the chips.
Loaded Keto Nachos: Layer chips on a baking sheet, top with seasoned ground beef or shredded chicken, extra cheese, diced jalapeños, tomatoes, and onions. Bake at 350°F for 5 minutes until cheese melts. Top with sour cream, guacamole, and cilantro for epic keto nachos!
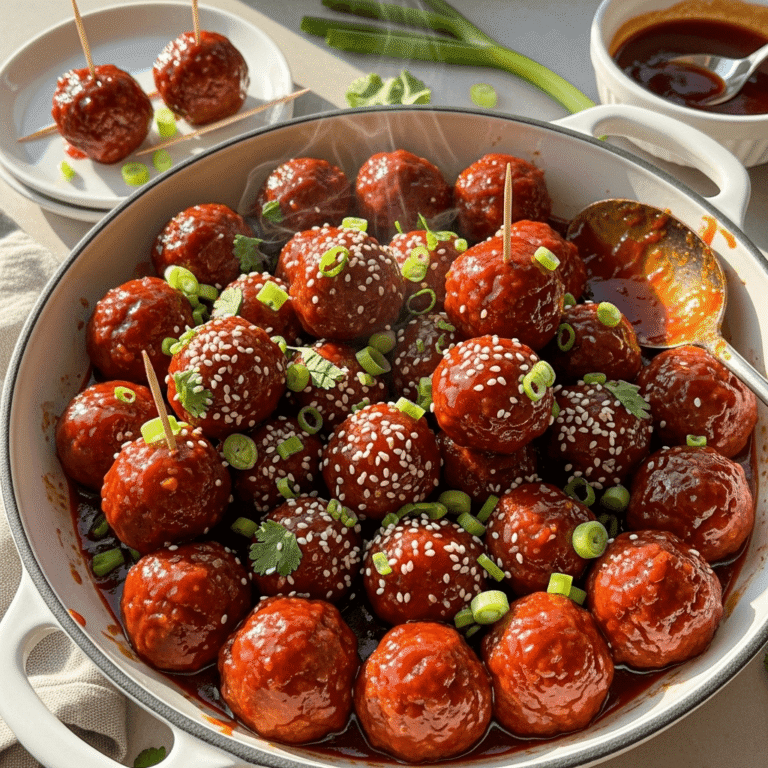
Chip and Queso Bar: Serve chips with warm queso dip, keto-friendly buffalo chicken dip, spinach artichoke dip, or bacon jalapeño dip for a party spread that’ll wow your guests.
Taco Salad Toppers: Crush chips and use them as crunchy topping for keto taco salad in place of traditional crushed tortilla chips. Adds amazing texture!
Chip-Crusted Chicken: Crush chips finely and use as a breading for chicken tenders or fish. It creates a low-carb, crispy coating that’s gluten-free and delicious.
Soup Garnish: Float a few chips on top of keto tortilla soup, chicken enchilada soup, or taco soup for added crunch and visual appeal.
Perfect Pairings:
- Fresh guacamole with extra lime
- Keto-friendly salsa (watch for added sugars)
- Queso blanco or yellow queso dip
- Sour cream mixed with taco seasoning
- Pico de gallo
- Spinach artichoke dip
- Buffalo chicken dip
- Seven-layer dip (made with keto ingredients)
- Jalapeño popper dip
- Warm nacho cheese sauce
Beverage Pairings: Serve with margaritas (made with sugar-free mixers), Mexican beer (in moderation for keto), sparkling water with lime, or unsweetened iced tea.
Snack Boards: Create a keto snack board with these chips, cheese cubes, salami, olives, cherry tomatoes, cucumber slices, and various dips for easy entertaining.
FAQs Section
Can I make these without almond flour?
Yes, but you’ll need a substitute. Coconut flour can work but use only ⅓ cup instead of ¾ cup because it’s much more absorbent. The texture will be slightly different – denser and less pliable. Sunflower seed flour is the best nut-free alternative and can be used in a 1:1 ratio. Some people use pork rind dust, though this creates a very different (but still delicious) chip.
Why are my chips chewy instead of crispy?
This usually happens for three reasons: (1) the dough was rolled too thick, (2) they weren’t baked long enough, or (3) they weren’t allowed to cool completely. The chips should be golden brown and feel firm before removing from the oven. Remember, they continue crisping as they cool, but they must be properly baked first. If they’re chewy after cooling, put them back in a 350°F oven for 3-5 more minutes.
Can I use other types of cheese?
Absolutely! Cheddar creates a sharper, more intense flavor. Mexican blend gives you that classic nacho cheese taste. Pepper jack adds spice. Provolone works well too. Avoid very soft cheeses like brie or fresh mozzarella, which are too high in moisture. Best results come from low-moisture, firm cheeses that melt smoothly.
How many carbs are in these chips?
Each serving (10-12 chips) contains approximately 6g total carbs and 4g fiber, resulting in 2g net carbs. This is dramatically lower than regular tortilla chips, which contain about 15-18g net carbs per serving. Always check your specific ingredient brands, as nutritional values can vary.
Can I make these in an air fryer?
Yes, but it’s trickier! Roll the dough very thin and cut into small triangles (air fryers have limited space). Cook at 350°F for 5-7 minutes, checking frequently. Work in small batches as overcrowding prevents crisping. The oven method is more reliable and allows you to make more chips at once, but air frying does work if that’s your preference.
Do these taste like real tortilla chips?
They have a similar crunch and can be seasoned to taste very close to tortilla chips, especially with lime, cumin, and chili powder. However, they do have a subtle cheese flavor that traditional corn chips don’t have. Most people find them equally satisfying, and many actually prefer them! They’re different but delicious in their own right.
Why is my dough too sticky to work with?
The cheese might have been too hot when you added the almond flour, or you may have used a cheese with very high moisture content. Let the dough cool for a minute or two – it becomes less sticky as it cools slightly. You can also add 1-2 tablespoons more almond flour if needed, though this will increase the carb count slightly. Rolling between two pieces of parchment paper prevents sticking issues.
Conclusion
And there you have it – everything you need to know to make absolutely perfect keto tortilla chips that’ll revolutionize your low-carb snacking! These crispy, crunchy, flavor-packed chips prove that following a ketogenic diet doesn’t mean sacrificing the foods you love. With just three simple ingredients and about 20 minutes, you can enjoy all the satisfaction of traditional tortilla chips while staying firmly in ketosis.
Whether you’re dipping them into guacamole, loading them up for keto nachos, or just crunching away during movie night, these homemade low-carb chips deliver every single time. The best part? They’re so much better than expensive store-bought keto chips, and you control exactly what goes into them. No weird preservatives, no questionable ingredients, just real food that tastes incredible.
I can’t wait to hear how your batch turns out! Did you try any of the flavor variations? What’s your favorite way to serve them? Drop a comment below and share your experience – I read every single comment and love connecting with fellow keto enthusiasts! If these chips changed your keto snacking game like they did mine, please save this recipe to your Pinterest boards and share it with your low-carb friends. Let’s spread the word that healthy eating can be absolutely delicious!
Now grab that cheese and let’s get crispy! Your taste buds (and your waistline) will thank you. Happy snacking!