Easy Homemade Peppermint Bark – Festive, Creamy & Perfect for Holiday Gifting!
If there’s one treat that instantly captures the magic of the holiday season, it’s peppermint bark. This stunning layered confection combines rich dark chocolate, smooth white chocolate, and refreshing crushed candy canes into one irresistible treat that looks as impressive as it tastes. Whether you’re searching for easy Christmas candy recipes, homemade holiday gifts, or a festive dessert that requires no baking, this peppermint bark recipe checks all the boxes.
What makes peppermint bark so beloved during the holidays? It’s the perfect combination of elegant presentation and simple preparation. You don’t need any special candy-making skills or fancy equipment—just three main ingredients and about 20 minutes of active time. The result is a gorgeous two-toned chocolate bark with festive red and white candy cane pieces scattered on top that looks like it came straight from a gourmet chocolatier.
Peppermint bark is incredibly versatile too. Break it into rustic pieces for holiday cookie platters, package it in cellophane bags tied with ribbon for neighbor gifts, add it to hot chocolate for an extra-special treat, or simply keep a batch in your fridge for when those chocolate-peppermint cravings hit. It’s a foolproof recipe that delivers professional-looking results every single time, making it perfect for both experienced bakers and complete beginners alike.
History / Background
While peppermint bark feels like a timeless Christmas tradition, it’s actually a relatively modern confection with a fascinating origin story. The commercial version we know and love today was popularized by Williams Sonoma in the late 1990s. The iconic kitchenware company began selling their signature peppermint bark during the 1998 holiday season, and it quickly became one of their most requested seasonal items, with customers lining up year after year to get their hands on this festive treat.
However, the combination of chocolate and peppermint has much deeper roots in culinary history. Peppermint has been used to flavor candies and confections since the 18th century, particularly in Europe where peppermint creams and chocolate-covered peppermint candies were popular Victorian-era treats. The tradition of candy canes dates back even further, with the distinctive red-and-white striped version becoming widespread in America by the early 20th century.
The genius of peppermint bark lies in its American ingenuity—taking these classic holiday flavors and presenting them in an entirely new format that’s both easier to make at home and more visually striking than traditional peppermint candies. The layered presentation of dark and white chocolate creates a beautiful marbled effect when broken into pieces, while the crushed candy canes add both texture and that iconic holiday flavor.
Today, peppermint bark has transcended its Williams Sonoma origins to become a beloved holiday tradition across America. Home cooks have embraced this recipe because it delivers gourmet results without requiring any specialized candy-making techniques like tempering chocolate or using candy thermometers. It’s a true example of how simple ingredients, when combined thoughtfully, can create something truly special that brings joy to both the maker and the recipient.
Why You’ll Love This Recipe
This homemade peppermint bark recipe is about to become your go-to holiday treat, and once you make it, you’ll understand why it’s so incredibly popular. It combines minimal effort with maximum impact, creating a confection that looks professionally made but requires only basic kitchen skills. Plus, it’s completely customizable and makes wonderful gifts that everyone on your list will appreciate.
Here’s why this peppermint bark recipe is absolutely irresistible:
- Ridiculously Easy – Only 3 main ingredients and no baking required; ready in about 30 minutes plus chilling time
- Budget-Friendly – Much more affordable than store-bought gourmet versions, yet tastes even better
- Perfect for Gifting – Makes beautiful homemade Christmas gifts that look expensive and thoughtful
- No Special Skills Needed – No tempering, no candy thermometers, no complicated techniques required
- Crowd-Pleaser – Universally loved flavor combination that appeals to kids and adults alike
- Customizable – Easy to adapt with different chocolates, extracts, and toppings
- Make-Ahead Friendly – Stays fresh for weeks, perfect for early holiday prep
- Impressive Presentation – Looks like it came from a fancy chocolatier with minimal effort
- Allergy-Friendly Options – Can be made gluten-free and adapted for various dietary needs
- Great for Cookie Exchanges – Something different from typical cookies that always gets rave reviews
- Stress-Free Holiday Baking – No oven monitoring, no dough chilling, no rolling or shaping required
Whether you’re preparing for cookie swaps, filling holiday gift boxes, or just want a special treat to enjoy while watching Christmas movies, this peppermint bark delivers every single time without the stress.
Ingredient Notes
Let’s break down what you’ll need to create this stunning peppermint bark. The beauty of this recipe is in its simplicity—quality ingredients shine when you’re working with so few components.
Dark Chocolate: Use high-quality dark chocolate or semi-sweet chocolate chips for the bottom layer. I recommend chocolate with 60-70% cacao for the best flavor balance—not too bitter, but deep enough to contrast beautifully with the sweet white chocolate layer. Ghirardelli, Guittard, or even Trader Joe’s pound-plus bars work wonderfully. Avoid using chocolate chips if possible, as bar chocolate melts more smoothly, but if chips are all you have, they’ll work in a pinch.
White Chocolate: This is where quality really matters! Use real white chocolate (check that cocoa butter is listed in the ingredients), not white candy melts or almond bark. Ghirardelli, Lindt, or Baker’s white chocolate bars give you that creamy, smooth texture and true white chocolate flavor. White chocolate chips can be used, but bar chocolate melts more smoothly and creates a glossier finish.
Candy Canes or Peppermint Candies: Traditional red-and-white striped candy canes are classic, but any hard peppermint candies work beautifully. You’ll need about 6-8 standard-sized candy canes or equivalent peppermint candies. Make sure they’re fresh and crunchy—stale candy canes that have absorbed moisture won’t crush properly and can make your bark sticky.
Peppermint Extract (Optional): While candy canes provide peppermint flavor, adding ½ teaspoon of pure peppermint extract to each chocolate layer intensifies the minty freshness. This is optional but highly recommended if you love strong peppermint flavor. Use pure extract, not imitation, for the best taste.
Vegetable Oil or Coconut Oil (Optional): Adding ½ teaspoon of oil per 8 ounces of chocolate helps create an ultra-smooth, glossy finish and makes the chocolate easier to spread. This is a professional trick that’s completely optional but yields beautiful results.
Substitutions: For dairy-free bark, use dairy-free dark chocolate and dairy-free white chocolate. For a different flavor twist, try mint chocolate chips in place of some dark chocolate, or add a layer of milk chocolate in the middle for triple-layer bark.
Equipment Needed
You’ll need just a few basic kitchen items to create beautiful peppermint bark:
- Baking Sheet – A standard 9×13-inch rimmed baking sheet or similar; half-sheet pans work perfectly
- Parchment Paper or Silicone Baking Mat – Essential for easy removal and preventing sticking
- Microwave-Safe Bowls – Two medium bowls for melting chocolate (or use a double boiler if you prefer)
- Rubber Spatula – For spreading chocolate smoothly and evenly
- Offset Spatula (Optional) – Makes spreading even easier and more professional-looking
- Ziplock Bags – For crushing candy canes; heavy-duty freezer bags work best
- Rolling Pin or Meat Mallet – For crushing the candy canes into small pieces
- Measuring Cups and Spoons – For accurate measurements of extracts and oils
- Knife or Bench Scraper – For cutting the finished bark into pieces
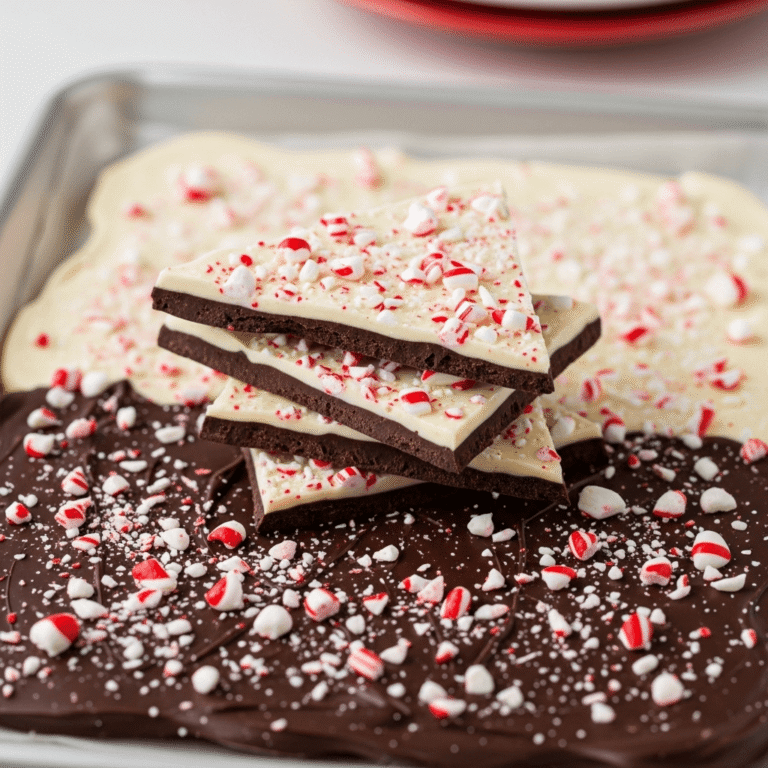
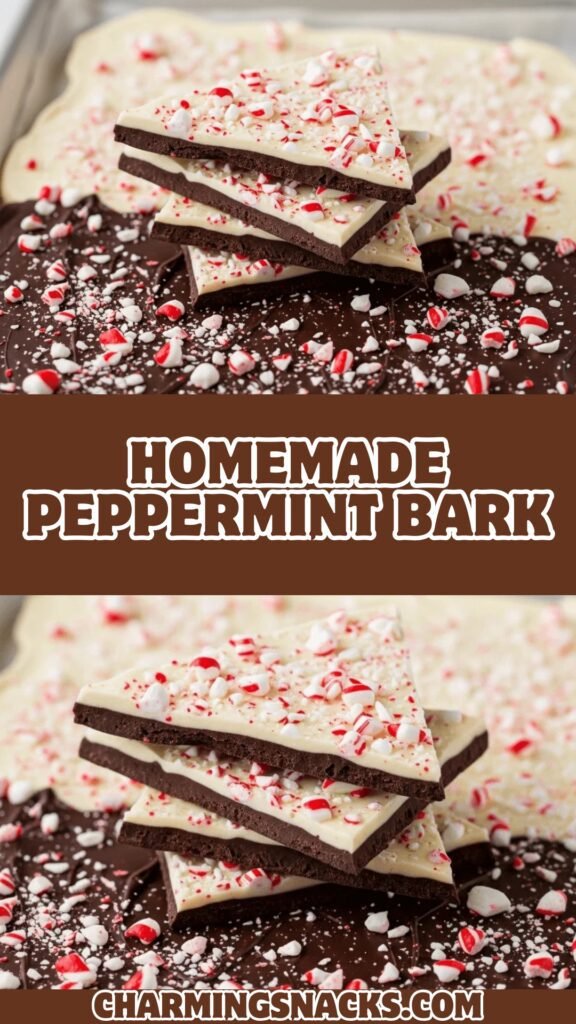
Homemade Peppermint Bark
This easy homemade peppermint bark features layers of rich dark chocolate and creamy white chocolate topped with crushed candy canes. It’s the perfect festive treat for holiday gifting, cookie platters, or enjoying with hot cocoa!
- Total Time: 1 hour 20 minutes
- Yield: About 40 pieces (approximately 1½ pounds) 1x
Ingredients
For the Dark Chocolate Layer:
- 12 ounces (340g) dark chocolate or semi-sweet chocolate, chopped (or chips)
- ½ teaspoon pure peppermint extract (optional)
- ½ teaspoon vegetable oil or coconut oil (optional, for smoothness)
For the White Chocolate Layer:
- 12 ounces (340g) white chocolate, chopped (or chips)
- ½ teaspoon pure peppermint extract (optional)
- ½ teaspoon vegetable oil or coconut oil (optional, for smoothness)
For the Topping:
- 6-8 standard candy canes (about ½ cup crushed), or ¾ cup peppermint candies
- Extra crushed candy canes for garnish (optional)
Instructions
- Prep Your Pan: Line a 9×13-inch baking sheet with parchment paper, allowing the paper to hang over the edges for easy removal later. Make sure the parchment lies flat against the pan. Set aside.
- Crush the Candy Canes: Unwrap the candy canes and place them in a heavy-duty ziplock bag. Seal the bag, pressing out excess air. Using a rolling pin or meat mallet, crush the candy canes into small pieces—you want a mix of fine crumbs and slightly larger chunks for texture. Set aside, keeping some whole for a final garnish if desired.
- Melt the Dark Chocolate: Place the chopped dark chocolate in a microwave-safe bowl. Microwave in 30-second intervals, stirring between each interval, until the chocolate is completely melted and smooth (usually 1½-2 minutes total). Alternatively, use a double boiler over simmering water. Stir in the peppermint extract and oil if using.
- Spread the Dark Chocolate Layer: Pour the melted dark chocolate onto the prepared baking sheet. Using a rubber spatula or offset spatula, spread it into an even layer, leaving about a 1-inch border from the edges (the chocolate will spread slightly as you add layers). The layer should be about ⅛-¼ inch thick.
- Chill the First Layer: Place the baking sheet in the refrigerator for about 10-15 minutes, just until the dark chocolate is set but not completely hardened. You want it firm to the touch but still slightly tacky so the white chocolate layer adheres properly. Don’t skip this step or let it get too hard.
- Melt the White Chocolate: While the dark chocolate chills, melt the white chocolate using the same method as the dark chocolate—microwave in 30-second intervals, stirring between each, until smooth. White chocolate scorches more easily than dark, so watch it carefully and use slightly shorter intervals if needed. Stir in peppermint extract and oil if using.
- Add the White Chocolate Layer: Remove the pan from the refrigerator. Pour the melted white chocolate over the set dark chocolate layer. Quickly spread it into an even layer using a clean spatula, working gently to avoid disturbing the dark chocolate underneath. Make sure the white chocolate extends to cover the dark chocolate completely.
- Add the Candy Cane Topping: Immediately sprinkle the crushed candy canes evenly over the white chocolate layer while it’s still wet. Gently press the candy pieces into the white chocolate with your hand or the back of a spatula to help them adhere. Work quickly before the white chocolate begins to set.
- Chill Until Set: Refrigerate the peppermint bark for at least 1 hour, or until completely firm and set. For faster setting, you can place it in the freezer for 20-30 minutes.
- Break into Pieces: Once fully set, remove the bark from the pan by lifting the parchment paper. Place on a cutting board and use a large knife or break it into irregular rustic pieces with your hands. Store in an airtight container with parchment paper between layers.
Notes
- Use high-quality chocolate for the best flavor and texture—this is especially important for the white chocolate layer.
- Don’t overheat the chocolate! Overheated chocolate becomes grainy and seizes. Low and slow is the key.
- Make sure the dark chocolate layer is slightly tacky when you add the white chocolate, or the layers won’t bond properly.
- If your kitchen is very warm, chill the bark in 2-3 minute increments after adding candy canes to prevent them from sliding off.
- For gift-giving, package in clear cellophane bags tied with festive ribbon, or arrange in decorative tins lined with parchment paper.
- Bark can be made up to 3 weeks ahead and stored in a cool, dry place.
- Prep Time: 15 minutes
- Cook Time: 5 minutes
- Category: Dessert
- Method: No-Bake
- Cuisine: American
- Diet: Gluten Free
Nutrition
- Serving Size: 1 piece (about 20g)
- Calories: 95 kcal
- Sugar: 11g
- Sodium: 15mg
- Fat: 6g
- Saturated Fat: 3g
- Unsaturated Fat: 2g
- Trans Fat: 0g
- Carbohydrates: 11g
- Fiber: 0g
- Protein: 1g
- Cholesterol: 2mg
Tips & Variations
The basic peppermint bark recipe is wonderful on its own, but here are some creative ways to customize it for different tastes and occasions:
Triple Layer Bark: Add a middle layer of milk chocolate between the dark and white layers for an extra-decadent three-layer treat. Use 8 ounces each of dark, milk, and white chocolate.
Mint Chocolate Chip: Mix mini chocolate chips into the white chocolate layer before spreading for added texture and chocolate flavor throughout.
Salted Peppermint Bark: Sprinkle flaky sea salt (like Maldon) over the white chocolate layer along with the candy canes for a sophisticated sweet-salty combination.
Cookies and Cream: Add crushed Oreo cookies to the white chocolate layer along with the peppermint for a cookies-and-cream twist.
Espresso Peppermint Bark: Add 1 teaspoon instant espresso powder to the dark chocolate layer for a mocha-mint flavor combination.
Peanut Butter Peppermint: Swirl 2-3 tablespoons of melted peanut butter into the white chocolate layer before adding candy canes.
Red Velvet Bark: Replace 2 tablespoons of white chocolate with melted red candy melts and swirl through the white layer for a festive red and white marbled effect.
Nutty Version: Sprinkle chopped toasted almonds, pistachios, or pecans along with the candy canes for added crunch and flavor.
Dairy-Free: Use dairy-free dark chocolate and dairy-free white chocolate for a vegan-friendly version that tastes just as amazing.
Sugar-Free: Use sugar-free chocolate and sugar-free peppermint candies for a lower-sugar alternative.
Pro Chef Tips
Take your peppermint bark from homemade to professional-quality with these expert techniques:
Temperature Control is Everything: The biggest secret to glossy, smooth chocolate is proper temperature control. Never microwave chocolate on high power—use 50% power for better control. Chocolate should be warm to the touch but not hot (around 90-95°F for dark chocolate, 85-90°F for white chocolate).
The “Tacky Test” for Perfect Layers: Before adding the white chocolate layer, touch the dark chocolate surface lightly with your finger. It should feel set but still slightly tacky—like a Post-it note. This ensures perfect adhesion between layers without mixing.
Prevent Candy Cane Bleeding: Sometimes candy canes can “bleed” their red stripes into white chocolate, creating pink streaks. To prevent this, crush candy canes at least 1 hour before using and let them sit on a paper towel to absorb any excess moisture or color. Alternatively, add the candy canes to partially set white chocolate (wait 2-3 minutes after spreading).
Create Professional Edges: For cleaner, more uniform pieces, score the bark with a knife while it’s partially set (after about 30 minutes of chilling). Then, once fully hardened, break along the scored lines for neat, straight-edged pieces.
The Gentle Press: After sprinkling candy canes, gently press them into the white chocolate with a piece of parchment paper rather than your hand. This prevents fingerprints and helps candy adhere without pushing it too deep into the chocolate.
Room Temperature Assembly: Let melted chocolate cool for 2-3 minutes before spreading. Slightly cooled chocolate spreads more easily and creates a thicker, more luxurious layer that’s less prone to cracking.
Storage Secret: Add a small piece of parchment or wax paper between layers when storing to prevent sticking and preserve that beautiful glossy finish.
Common Mistakes to Avoid
Learn from these common pitfalls to ensure perfect peppermint bark every time:
Overheating the Chocolate: This is the most common mistake! Overheated chocolate becomes thick, grainy, and can even seize into a clumpy mess. Always melt chocolate slowly in short intervals, stirring frequently. White chocolate is especially sensitive and can scorch quickly.
Using Low-Quality White “Chocolate”: White candy melts, almond bark, or vanilla-flavored coatings are NOT the same as white chocolate. They lack cocoa butter and won’t give you that creamy, smooth texture and true white chocolate flavor. Always check the ingredients—real white chocolate lists cocoa butter.
Adding Candy Canes Too Late: If you wait until the white chocolate has set before adding candy canes, they won’t stick and will fall right off. Sprinkle them immediately after spreading the white chocolate layer while it’s still liquid and tacky.
Letting the Dark Chocolate Get Too Hard: If the dark chocolate layer is completely cold and hard when you add the white chocolate, the layers won’t bond properly and may separate when broken. The dark layer should be set but still slightly warm and tacky.
Working in a Humid Kitchen: Chocolate is extremely sensitive to moisture. Even a drop of water can cause chocolate to seize (turn thick and grainy). Make sure all utensils are completely dry, avoid steamy kitchens, and don’t cover warm chocolate (condensation will form).
Crushing Candy Canes Too Fine: If all your candy cane pieces are powder-fine, they’ll dissolve into the chocolate and create a sticky mess. You want a variety of sizes—mostly small pieces with some larger chunks for texture and visual appeal.
Storing Improperly: Don’t leave peppermint bark at room temperature in warm conditions or it will become soft and the layers may separate. Store in a cool, dry place or refrigerate in airtight containers.
Storage & Meal Prep
Peppermint bark stores beautifully, making it perfect for make-ahead holiday preparations:
Room Temperature Storage: In cool climates (below 70°F), store peppermint bark in an airtight container or ziplock bags for up to 2 weeks. Place parchment paper between layers to prevent sticking. Keep away from heat sources and direct sunlight.
Refrigerator Storage: For longer storage or in warmer environments, refrigerate bark in airtight containers for up to 3-4 weeks. Let it come to room temperature for 10-15 minutes before serving for the best texture and flavor.
Protect from Moisture: Chocolate absorbs odors and is sensitive to humidity. Store bark away from foods with strong smells, and if refrigerating, make sure containers are completely airtight to prevent moisture exposure.
Gift Packaging Timeline: If packaging as gifts, assemble gift bags or boxes no more than 1 week before giving to ensure maximum freshness. Store packaged gifts in a cool, dry place until delivery.
Serving Temperature: Peppermint bark is best enjoyed at cool room temperature. If stored in the refrigerator, remove it 10-15 minutes before serving so the chocolate isn’t too hard and the flavors can fully develop.
Make-Ahead & Freezer Notes
Peppermint bark is one of the most make-ahead-friendly treats you can prepare for the holidays:
Advance Preparation: Make peppermint bark up to 3-4 weeks before you need it. This makes it perfect for early holiday preparation when you’re trying to get ahead on baking and candy-making. Store in airtight containers in the refrigerator, with parchment paper between layers.
Freezer Storage (Best for Long-Term): Peppermint bark freezes beautifully for up to 3 months! Break or cut into pieces, then layer in airtight containers or freezer bags with parchment paper between layers. For best results, wrap the container in an extra layer of plastic wrap or aluminum foil to prevent freezer burn.
Thawing Instructions: Remove frozen bark from the freezer and let it thaw in the refrigerator for 2-3 hours, or at room temperature for 30-45 minutes. Don’t unwrap it until it reaches room temperature to prevent condensation from forming on the chocolate.
Freezing for Gifting: Freeze bark pieces in portions that match your gift sizes. When ready to give, remove from freezer, let thaw completely, then package immediately. This ensures maximum freshness for your recipients.
Holiday Planning Strategy: I like to make 2-3 batches of peppermint bark in early December and freeze them. Then I can pull out portions as needed throughout the month for different occasions—cookie exchanges, teacher gifts, neighbor treats, and family gatherings—without last-minute stress.
Serving Suggestions
Peppermint bark is incredibly versatile and can be enjoyed in numerous ways:
Classic Presentation: Arrange broken pieces on a festive platter or in decorative tins lined with parchment paper. Mix with other holiday cookies and candies for a beautiful dessert spread.
Hot Chocolate Bar: Set up a hot chocolate station with peppermint bark pieces on the side. Drop a piece into hot cocoa and stir as it melts—it creates the most amazing peppermint hot chocolate!
Ice Cream Topping: Chop peppermint bark into smaller pieces and sprinkle over vanilla ice cream, peppermint ice cream, or chocolate ice cream for an instant sundae upgrade.
Coffee Enhancement: Place a small piece of peppermint bark in hot coffee or a latte for a festive peppermint mocha effect.
Cookie Platter Companion: Include peppermint bark on holiday cookie platters alongside chocolate chip cookies, sugar cookies, gingerbread, and other seasonal treats for variety.
Elegant Gift Presentation: Package in clear cellophane bags tied with red and white baker’s twine, or arrange in small decorative tins lined with tissue paper. Add a handwritten recipe card for a personal touch.
Dessert Charcuterie Board: Include peppermint bark on a dessert board alongside fresh berries, chocolate truffles, shortbread cookies, and nuts for an impressive holiday dessert display.
Party Favors: Package individual pieces in small glassine bags or boxes as party favors for holiday gatherings, cookie exchanges, or winter celebrations.
Beverage Pairing: Serve alongside peppermint tea, hot cocoa, coffee, or even a glass of cold milk for dipping. For adults, pair with peppermint schnapps-spiked hot chocolate or Irish coffee.
FAQs Section
Can I use chocolate chips instead of bar chocolate?
Yes, chocolate chips will work, though bar chocolate typically melts more smoothly and creates a glossier finish. If using chips, consider adding ½ teaspoon of coconut oil or vegetable oil per cup of chips to improve the texture and make spreading easier. White chocolate chips especially benefit from this addition.
Why is my white chocolate seizing or becoming thick and clumpy?
White chocolate is extremely sensitive to heat and moisture. It can seize if overheated, if even a tiny drop of water gets into it, or if melted at too high a temperature. Always melt white chocolate at 50% power in short 20-30 second intervals, stirring between each. Make sure all bowls and utensils are completely dry.
Can I make peppermint bark without peppermint extract?
Absolutely! The crushed candy canes provide plenty of peppermint flavor on their own. The extract just intensifies the mint taste, but it’s completely optional. If you skip it, the bark will still taste delicious and festive.
How do I prevent the candy canes from turning the white chocolate pink?
Sometimes the red dye from candy canes can bleed into white chocolate. To prevent this, crush candy canes ahead of time and let them sit on paper towels for 30-60 minutes to absorb excess moisture. You can also wait 2-3 minutes after spreading the white chocolate before adding candy canes—this gives the chocolate time to start setting so it doesn’t absorb as much moisture from the candies.
What’s the best way to break peppermint bark into pieces?
Once fully chilled and hardened, lift the bark out of the pan using the parchment paper overhang. Place it on a cutting board. You can either use a large chef’s knife to cut it into squares or rectangles, or simply break it into irregular rustic pieces with your hands (my preferred method for a more artisanal look).
Can I make this dairy-free or vegan?
Yes! Use dairy-free dark chocolate and dairy-free white chocolate (brands like Enjoy Life or Hu Kitchen make excellent options). Make sure your candy canes are vegan-friendly (most are, but check labels). The result is just as delicious as the traditional version.
My chocolate layers separated when I broke the bark. What happened?
This usually means the dark chocolate layer was too cold or completely hardened when you added the white chocolate. The dark layer should be set but still slightly tacky when you add the second layer. If your kitchen is cold, work more quickly, or let the dark chocolate sit at room temperature for 2-3 minutes after it feels set before adding the white chocolate.
Conclusion
And there you have it—everything you need to create absolutely stunning, delicious homemade peppermint bark that rivals anything you’d find at fancy chocolate shops! This recipe proves that you don’t need complicated candy-making skills or expensive equipment to create something truly special during the holidays. With just three main ingredients and a little patience while the chocolate sets, you’ll have gorgeous, festive treats that make perfect gifts and impressive additions to any holiday dessert spread.
The best part about peppermint bark is how it fills your kitchen with the aroma of chocolate and peppermint, instantly creating that cozy holiday atmosphere we all crave. Whether you’re making it for the first time or you’re a seasoned bark-maker, this recipe delivers consistent, beautiful results that will have everyone asking for your secret (spoiler: it’s just good chocolate and a little love!).
I can’t wait to hear about your peppermint bark adventures! Will you stick with the classic version or try one of the fun variations? Are you making it for gifts or keeping it all for yourself (no judgment here!)? Drop a comment below and share your experience, and don’t forget to let me know what you paired it with—hot chocolate? Coffee? Straight from the fridge at midnight? I want to hear all about it!
Love this easy peppermint bark recipe? Pin it to your Holiday Baking and Christmas Treats boards so you can find it every year! Follow me for more simple, festive recipes that make the holidays special without the stress. Happy holidays, and happy chocolate making! 🍫