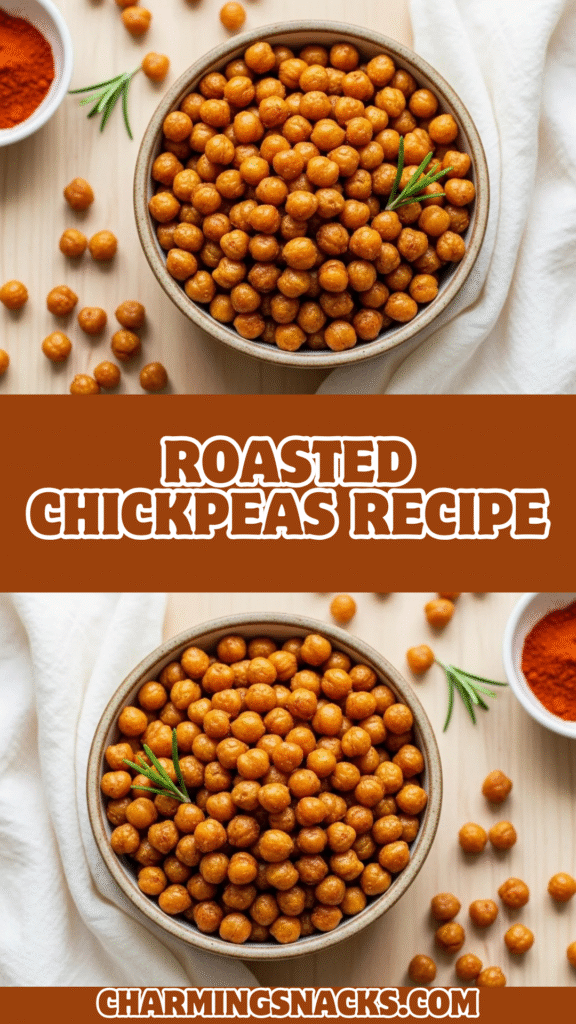
Crispy Roasted Chickpeas Recipe: The Perfect Crunchy Snack for Any Occasion
Roasted chickpeas are the ultimate versatile snack that’s taken the healthy eating world by storm. These crispy, crunchy little bites are made by tossing canned or cooked chickpeas in olive oil and your favorite seasonings, then roasting them in the oven until they’re golden and perfectly crispy. They’re an incredible alternative to chips, pretzels, or other processed snacks, and they’re packed with protein and fiber to keep you satisfied.
What makes roasted chickpeas so special is their incredible versatility. You can serve them as a standalone snack for movie nights, sprinkle them over salads for added crunch, toss them into trail mix, or serve them as a healthy appetizer at parties. They’re perfect for meal prep, lunchbox additions, or even as a protein-packed topping for soups and grain bowls. Whether you’re craving something savory, spicy, or even sweet, roasted chickpeas can be customized to match any flavor profile you’re in the mood for.
This recipe has become a staple in kitchens across America, especially among health-conscious families, busy professionals, and anyone looking for a guilt-free snacking option that doesn’t compromise on taste or satisfaction.
History / Background
Chickpeas, also known as garbanzo beans, have been cultivated for over 7,500 years, making them one of the oldest legumes known to humanity. They originated in the Middle East, specifically in the region that is now modern-day Turkey and Syria, and quickly spread throughout the Mediterranean, India, and eventually the entire world.
The practice of roasting chickpeas dates back centuries in Middle Eastern and Mediterranean cultures. In countries like Turkey, roasted chickpeas called “leblebi” have been a traditional street food snack for generations. These crispy treats were originally roasted in large batches and sold by street vendors, becoming a beloved snack that transcended social classes. In India, roasted chickpeas known as “chana” are a popular teatime snack, often spiced with turmeric, chili powder, and chat masala.
The modern Western version of roasted chickpeas gained popularity in the early 2010s as part of the clean eating and plant-based food movements. Health food bloggers and nutritionists began promoting them as a healthier alternative to potato chips and other processed snacks. What started as a niche health food quickly became mainstream, with roasted chickpeas now available in grocery stores across the United States in countless flavors.
Today, roasted chickpeas represent the perfect intersection of ancient tradition and modern healthy eating. They’ve become a Pinterest favorite, with home cooks sharing countless variations and flavor combinations, making this humble legume a superstar in contemporary American kitchens.
Why You’ll Love This Recipe
This crispy roasted chickpeas recipe is going to become your new favorite go-to snack, and I’m confident you’ll be making it on repeat once you try it. It’s one of those recipes that seems almost too simple to be true, but the results are absolutely addictive. The chickpeas come out incredibly crunchy on the outside while maintaining a slightly creamy texture inside, and they’re so customizable that you’ll never get bored.
Here’s why this recipe is a total game-changer:
- Ridiculously Easy – Only 4 basic ingredients and about 5 minutes of prep work. If you can open a can and turn on an oven, you can make these!
- Budget-Friendly – Canned chickpeas are incredibly affordable, usually under $2 per can, and one batch makes enough for multiple snacking sessions.
- Protein-Packed – Each serving contains about 6 grams of protein and 5 grams of fiber, making these a nutritious snack that actually keeps you full.
- Endlessly Customizable – Sweet, savory, spicy, or smoky – you can flavor these however your heart desires.
- Meal Prep Champion – Make a big batch on Sunday and have healthy snacks ready for the entire week.
- Allergy-Friendly – Naturally gluten-free, dairy-free, vegan, and nut-free, making them perfect for almost any dietary restriction.
- Kid-Approved – Even picky eaters love the satisfying crunch, and you can feel good about what they’re snacking on.
- Perfect for Parties – These make an impressive and healthy appetizer that guests always rave about.
Ingredient Notes
The beauty of this roasted chickpeas recipe is its simplicity. You only need a handful of basic ingredients, but each one plays an important role in creating that perfect crispy texture and delicious flavor.
Chickpeas (Garbanzo Beans): The star of the show! I recommend using canned chickpeas for convenience, but you can absolutely use home-cooked chickpeas if you prefer. The key is to drain and rinse them thoroughly, then dry them as much as possible. Any moisture left on the chickpeas will prevent them from getting crispy. Look for low-sodium or no-salt-added varieties if you want to control the sodium content. One 15-ounce can yields about 1.5 cups of chickpeas once drained.
Olive Oil: This helps the chickpeas crisp up and allows the seasonings to adhere. Extra virgin olive oil works great, but you can also use avocado oil, coconut oil, or vegetable oil if that’s what you have on hand. You only need about 1-2 tablespoons for a whole can of chickpeas – just enough to coat them lightly without making them soggy.
Sea Salt: Essential for bringing out the flavors and adding that addictive savory quality. I prefer fine sea salt or kosher salt because they distribute more evenly. Start with less than you think you need – you can always add more after roasting, but you can’t take it away!
Seasonings: This is where you can get creative! For the basic recipe, I’m using garlic powder, onion powder, and paprika, but the possibilities are endless. Ground cumin, curry powder, ranch seasoning, cinnamon and sugar, chili powder, Italian herbs – whatever sounds good to you will work beautifully.
Equipment Needed
You don’t need any fancy kitchen gadgets to make perfect roasted chickpeas. Here’s everything you’ll need:
- Baking Sheet – A standard half-sheet pan (18×13 inches) works perfectly. Avoid using dark-colored pans as they can cause the chickpeas to burn more easily.
- Parchment Paper or Silicone Baking Mat – This prevents sticking and makes cleanup a breeze. You can also lightly spray the pan with cooking spray if you don’t have either.
- Can Opener – For opening your chickpea cans, unless you’re using the pop-top variety.
- Colander or Strainer – For draining and rinsing the chickpeas.
- Clean Kitchen Towel or Paper Towels – Essential for drying the chickpeas thoroughly.
- Large Mixing Bowl – For tossing the chickpeas with oil and seasonings.
- Measuring Spoons – For measuring oil and seasonings accurately.
- Oven – The star appliance for this recipe! Make sure it’s fully preheated for best results.
Roasted Chickpeas Recipe
Perfectly crispy roasted chickpeas seasoned to perfection – a healthy, protein-packed snack that’s endlessly customizable and incredibly addictive. These crunchy little bites are perfect for snacking, salad toppers, or party appetizers.
- Total Time: 45 minutes
- Yield: 4 servings 1x
Ingredients
- 2 (15-ounce) cans chickpeas, drained and rinsed
- 2 tablespoons extra virgin olive oil
- 1 teaspoon sea salt
- 1 teaspoon garlic powder
- 1 teaspoon onion powder
- 1 teaspoon smoked paprika
- ½ teaspoon black pepper
- Optional: ¼ teaspoon cayenne pepper for heat
Instructions
- Preheat Your Oven: Set your oven to 400°F (200°C). This high temperature is crucial for achieving maximum crispiness. Line your baking sheet with parchment paper or a silicone baking mat.
- Drain and Dry the Chickpeas: Open your cans of chickpeas and pour them into a colander. Rinse them thoroughly under cold water to remove any excess sodium and the slightly slimy liquid (called aquafaba). This step is essential for crispiness.
- Remove the Skins (Optional but Recommended): Here’s a pro tip that makes a huge difference – gently rub the chickpeas with a clean kitchen towel or paper towels. Many of the loose skins will come off easily. You don’t need to remove every single skin, but getting rid of most of them helps them crisp up significantly better. Don’t worry if some skins remain – they’ll still taste great!
- Dry Thoroughly: Spread the chickpeas on your kitchen towel or several layers of paper towels. Pat them very dry and let them air dry for about 5 minutes. The drier they are, the crispier they’ll become. This is the most important step for success!
- Season the Chickpeas: Transfer the dried chickpeas to a large mixing bowl. Drizzle with olive oil and toss until they’re evenly coated. Add all your seasonings (salt, garlic powder, onion powder, paprika, black pepper, and cayenne if using). Toss everything together until the chickpeas are evenly coated with the seasoning mixture.
- Arrange on Baking Sheet: Spread the seasoned chickpeas in a single layer on your prepared baking sheet. Make sure they’re not touching or overlapping – they need space to crisp up properly. If they’re crowded, use two baking sheets.
- Roast: Place the baking sheet in your preheated oven and roast for 30-40 minutes, shaking the pan every 10 minutes to ensure even roasting. The chickpeas are done when they’re golden brown and crispy. They should make a slight rattling sound when you shake the pan.
- Cool Completely: This is crucial – let the chickpeas cool completely on the baking sheet. They’ll continue to crisp up as they cool. Don’t sample them right away or they’ll seem soft and disappointing. Give them at least 10-15 minutes to reach their full crispy potential.
- Adjust Seasoning: Taste a cooled chickpea and add more salt or seasonings if needed. Toss to combine.
- Serve and Enjoy: Transfer to a serving bowl or storage container and enjoy! They’re best eaten within the first day or two while at peak crispiness.
Notes
- Drying is Everything: The secret to ultra-crispy chickpeas is removing as much moisture as possible before roasting. Take your time with this step.
- Don’t Overcrowd: Give your chickpeas space on the baking sheet. Crowding creates steam, which prevents crispiness.
- Oven Variations: Every oven is different. Start checking at 30 minutes, but they may need up to 45 minutes depending on your oven.
- Storage: Store in an airtight container at room temperature for up to 3 days. They’ll lose some crispiness over time, but you can re-crisp them in a 350°F oven for 5-7 minutes.
- Flavor After Roasting: For maximum crunch, add delicate seasonings like nutritional yeast or finely grated Parmesan after roasting, not before.
- Prep Time: 10 minutes
- Cook Time: 35 minutes
- Category: Snack
- Method: Roasting
- Cuisine: American
- Diet: Vegan
Nutrition
- Serving Size: ½ cup (about 85g)
- Calories: 180
- Sugar: 3g
- Sodium: 620mg
- Fat: 6g
- Saturated Fat: 4g
- Unsaturated Fat: 24g
- Trans Fat: 0g
- Carbohydrates: 24g
- Fiber: 6g
- Protein: 8g
- Cholesterol: 0mg
Tips & Variations
One of the best things about roasted chickpeas is how easily you can customize them to suit any craving or dietary preference. Here are some of my favorite variations:
Spicy Buffalo: Toss roasted chickpeas with 2 tablespoons of buffalo sauce and return to the oven for 5 minutes. Perfect for game day!
Sweet Cinnamon Sugar: Skip the savory seasonings and instead toss with 2 tablespoons of coconut sugar, 2 teaspoons of cinnamon, and a pinch of sea salt for a dessert-like treat.
Ranch Style: Use ranch seasoning mix (homemade or store-bought) for an addictive flavor that tastes just like ranch chips.
Italian Herb: Mix together dried oregano, basil, rosemary, thyme, and a pinch of red pepper flakes for a Mediterranean-inspired snack.
Curry Spiced: Combine curry powder, turmeric, cumin, and a touch of brown sugar for an Indian-inspired version.
Taco Seasoned: Use your favorite taco seasoning blend for a Mexican-style snack that’s perfect on taco salads.
Everything Bagel: After roasting, toss with everything bagel seasoning for a trendy, savory option.
Honey Sriracha: Mix 1 tablespoon of honey with 1 teaspoon of sriracha and toss with the chickpeas halfway through roasting for a sweet-heat combination.
Pro Chef Tips
Want to take your roasted chickpeas from good to absolutely restaurant-quality? Here are some professional techniques that make all the difference:
Temperature is Critical: A 400°F oven is the sweet spot. Lower temperatures will dry out the chickpeas without crisping them, while higher temperatures can burn the outside before the inside is crispy.
The Two-Stage Method: For the absolute crispiest chickpeas, try this technique used by professional chefs: roast plain chickpeas (no oil or seasonings) for 20 minutes first, then add your oil and seasonings and roast for another 15-20 minutes. This ensures the moisture evaporates before the oil is added.
Cornstarch Secret: For extra-crispy chickpeas that rival store-bought versions, toss the dried chickpeas with 1-2 teaspoons of cornstarch along with your oil and seasonings. The cornstarch creates an ultra-crispy coating.
Convection Setting: If your oven has a convection setting, use it! The circulating air helps dry out the chickpeas more efficiently and creates even crispiness.
Fresh Spices Matter: Use fresh spices rather than ones that have been sitting in your cabinet for years. Fresh spices have more volatile oils and create much more flavorful chickpeas.
Add Acid at the End: A spritz of lemon juice or a tiny pinch of citric acid added after roasting brightens the flavors and makes them taste more complex.
The Resting Period: Professional snack makers know that chickpeas need time to cool completely. The cooling process is when they achieve maximum crispiness as the remaining moisture evaporates. Resist the urge to eat them hot!
Common Mistakes to Avoid
Even though this recipe is simple, there are a few common pitfalls that can prevent your chickpeas from reaching their full crispy potential. Here’s what to watch out for:
Not Drying Them Enough: This is the number one mistake! Wet chickpeas will steam in the oven instead of roasting, leaving you with soft, chewy beans instead of crispy snacks. Take the extra time to dry them thoroughly.
Using Too Much Oil: It’s tempting to drench them, but too much oil will make them soggy. You only need enough to barely coat them – about 1-2 tablespoons per can is plenty.
Skipping the Pan Shake: If you don’t shake or stir the chickpeas every 10 minutes, they’ll brown unevenly and some will burn while others stay soft. Set a timer to remind yourself!
Crowding the Pan: When chickpeas are piled on top of each other, they steam instead of roast. Use two pans if necessary to give them proper space.
Eating Them Too Soon: I know it’s hard to wait, but chickpeas that seem soft when hot will crisp up beautifully as they cool. Give them at least 10-15 minutes after removing from the oven before you judge their crispiness.
Storing While Warm: If you store chickpeas while they’re still warm, condensation will form in the container and make them soggy. Always let them cool completely first.
Expecting Chip-Level Crispiness: Homemade roasted chickpeas will never be quite as crispy as store-bought versions (which often use commercial dehydrators), but they’ll still be delightfully crunchy and much fresher-tasting!
Storage & Meal Prep
Proper storage is key to maintaining the crispiness of your roasted chickpeas as long as possible.
Room Temperature Storage: Store completely cooled roasted chickpeas in an airtight container at room temperature for up to 3 days. A glass jar with a tight-fitting lid or a plastic container with a good seal works best. Avoid storing them in the refrigerator, as the humidity will make them soft.
Keeping Them Crispy: Even with perfect storage, roasted chickpeas will gradually lose their crispiness over time. To help maintain their crunch, you can add a small silica gel packet (the kind that comes in vitamin bottles) to the storage container to absorb any excess moisture.
Re-Crisping: If your chickpeas have gone soft, don’t throw them away! Spread them on a baking sheet and pop them back in a 350°F oven for 5-7 minutes. Let them cool completely again, and they’ll regain much of their crispiness.
Meal Prep Strategy: Roasted chickpeas are excellent for meal prep, but plan to make fresh batches 2-3 times per week rather than one massive batch on Sunday. They’re best within the first 48 hours.
Portion Control: Divide your chickpeas into individual serving sizes (about ½ cup each) in small containers or snack bags for grab-and-go convenience and portion control.
Make-Ahead & Freezer Notes
Make-Ahead: You can definitely prep the chickpeas in advance to streamline your cooking process. Drain, rinse, dry, and remove the skins up to 24 hours ahead. Store the prepped chickpeas in a covered bowl in the refrigerator. When ready to roast, let them come to room temperature, pat them dry again if any moisture has accumulated, and proceed with the recipe as written.
Freezing: I don’t recommend freezing roasted chickpeas as the freezing and thawing process will destroy their crispy texture, leaving you with mushy beans. However, if you have leftover chickpeas that have already lost their crispiness and you’re not planning to eat them as a snack, you can freeze them and use them later in soups, stews, or grain bowls where texture isn’t as important.
Long-Term Storage: If you want to have roasted chickpeas available for longer periods, your best bet is to keep canned chickpeas in your pantry and make fresh batches as needed. The actual roasting process is so quick (mostly hands-off time) that it’s easy to whip up a batch whenever you need one.
Serving Suggestions
Roasted chickpeas are incredibly versatile and can be enjoyed in so many different ways beyond just snacking straight from the bowl. Here are some of my favorite ways to serve and use them:
As a Standalone Snack: The most obvious use! Serve them in small bowls for movie nights, game days, or afternoon snacking. They’re perfect for road trips and packed lunches too.
Salad Topper: Sprinkle roasted chickpeas over green salads, grain bowls, or Buddha bowls for a satisfying crunch and protein boost. They’re especially delicious on Mediterranean salads, Caesar salads, or kale salads.
Soup Garnish: Use them as a crispy garnish for creamy soups like butternut squash soup, tomato soup, or cauliflower soup. The textural contrast is amazing!
Mezze Platter: Include roasted chickpeas on a mezze platter alongside hummus, pita bread, olives, feta cheese, cucumber slices, and cherry tomatoes for a beautiful Mediterranean appetizer spread.
Trail Mix: Mix roasted chickpeas with nuts, seeds, dried fruit, and dark chocolate chips for a protein-packed trail mix.
Party Mix: Combine with pretzels, crackers, nuts, and dried fruit for a healthier version of traditional party mix.
Rice Bowl Topping: Sprinkle over rice bowls, burrito bowls, or poke bowls for added protein and crunch.
Drinks: Pair your roasted chickpeas with sparkling water, iced tea, craft beer, or your favorite cocktail for an elevated snacking experience.
FAQs Section
Can I use dried chickpeas instead of canned?
Absolutely! You’ll need to soak and cook dried chickpeas first. Use about 1 cup of dried chickpeas, which will yield approximately the same amount as two 15-ounce cans once cooked. The advantage of using home-cooked chickpeas is that you can control the texture and they often crisp up slightly better than canned.
Why aren’t my roasted chickpeas getting crispy?
The most common reason is moisture. Make sure you’re drying them thoroughly after rinsing, removing as many skins as possible, and not using too much oil. Also ensure your oven is fully preheated and that you’re not overcrowding the pan. Some chickpeas may simply have higher moisture content – try roasting them a bit longer.
How long do roasted chickpeas stay crispy?
In ideal storage conditions (airtight container at room temperature), they’ll stay reasonably crispy for about 2-3 days. They’re at their absolute best within the first 24 hours. After that, they’ll gradually soften but can be re-crisped in the oven as described in the storage section.
Are roasted chickpeas healthy?
Yes! They’re an excellent source of plant-based protein, fiber, vitamins, and minerals. They’re naturally low in fat (unless you add a lot of oil), contain no cholesterol, and are much healthier than chips or other processed snacks. Just watch your portion sizes and sodium content, especially if you’re adding a lot of salt.
Can I make these in an air fryer?
Definitely! Air fryers work wonderfully for roasted chickpeas. Preheat your air fryer to 390°F, add the seasoned chickpeas in a single layer, and cook for 12-15 minutes, shaking the basket every 5 minutes. They may crisp up even better than oven-roasting!
Why do I need to remove the skins?
The thin papery skins on chickpeas contain more moisture and can prevent the chickpeas from getting as crispy as possible. Removing them (at least most of them) helps achieve better texture. However, it’s not absolutely necessary – your chickpeas will still be good even if you skip this step.
Can I season them before or after roasting?
Most seasonings should go on before roasting so they adhere and develop flavor during cooking. However, delicate seasonings like nutritional yeast, finely grated cheese, or fresh herbs are best added after roasting to prevent burning. You can also add a second layer of seasonings after roasting for extra flavor intensity.
Conclusion
There you have it – everything you need to know to make absolutely perfect crispy roasted chickpeas at home! This simple recipe has become one of my most-made snacks because it checks every box: it’s healthy, budget-friendly, endlessly customizable, and genuinely delicious. Whether you’re looking for a nutritious alternative to chips, a protein-packed salad topper, or an impressive party appetizer, roasted chickpeas deliver every single time.
The beauty of this recipe is that once you master the basic technique, you can experiment with countless flavor combinations to keep things interesting. Try a different seasoning blend each week, and you’ll never get bored. Your family will love having these healthy snacks available, and you’ll feel great knowing you’re providing them with wholesome, homemade goodness instead of processed foods.
I’d love to hear how your roasted chickpeas turn out! What’s your favorite flavor combination? Did you discover any tips or tricks that worked especially well for you? Leave a comment below and let me know. And if you loved this recipe as much as I do, please share it on Pinterest so other home cooks can discover it too. Don’t forget to pin it to your healthy snacks board for easy reference!
Happy roasting, and here’s to many batches of perfectly crispy chickpeas in your future!