Homemade Jalapeño Cheddar Bread: Soft, Spicy, and Cheesy Perfection
There’s something absolutely magical about slicing into a warm loaf of homemade jalapeño cheddar bread—the golden, crusty exterior giving way to a soft, pillowy interior studded with melted cheese pockets and perfectly spiced jalapeño pieces. This savory artisan-style bread combines the sharp, tangy flavor of cheddar cheese with the bright heat of fresh jalapeños, creating a loaf that’s impossible to resist and disappears faster than you can say “can I have another slice?”
Jalapeño cheddar bread is the ultimate savory bread recipe that transforms simple ingredients into something truly spectacular. Unlike plain sandwich bread, this flavorful loaf brings excitement to every bite with pockets of gooey melted cheese and just the right amount of spicy kick from jalapeños. The beauty of this homemade bread is that it looks and tastes like something from an upscale bakery, yet it’s surprisingly approachable for home bakers of all skill levels.
This cheesy jalapeño bread is incredibly versatile—serve thick slices alongside chili or soup for the ultimate comfort food pairing, toast it for breakfast with butter and eggs, turn it into extraordinary grilled cheese sandwiches, or simply enjoy it warm from the oven with a generous smear of butter. It’s perfect for potlucks, holiday gatherings, weekend brunch, game day spreads, or any time you want to impress family and friends with your baking skills.
What makes this spicy cheese bread truly special is the incredible aroma that fills your kitchen as it bakes—that intoxicating combination of yeasty bread, sharp cheddar, and roasted jalapeños will have everyone gathering in the kitchen asking when it’ll be ready. Trust me, you’ll want to make a double batch because one loaf is never enough!
History / Background
The combination of jalapeños and cheese in bread is a relatively modern innovation that reflects America’s growing love affair with bold, Southwestern-inspired flavors. While bread-making itself dates back thousands of years, the specific pairing of jalapeños and cheddar represents the fusion of traditional European bread-baking techniques with Mexican ingredients and flavors that became popular in American cuisine, particularly in the Southwest.
Jalapeño peppers are native to Mexico, specifically named after the city of Xalapa (also spelled Jalapa) in Veracruz. These bright green peppers have been cultivated for thousands of years and are fundamental to Mexican cuisine. When Spanish explorers arrived in the Americas, they encountered these peppers and eventually spread them throughout the world. However, the specific practice of baking them into yeasted bread is distinctly American.
The Tex-Mex food movement of the 1970s and 1980s brought Mexican flavors into mainstream American cooking in new and creative ways. As Americans became more adventurous with spicy foods, chefs and home cooks began experimenting with incorporating jalapeños into traditionally non-Mexican dishes. The iconic jalapeño popper—cream cheese stuffed jalapeños wrapped in bacon—emerged during this era and became wildly popular, demonstrating Americans’ enthusiasm for the jalapeño-cheese combination.
Artisan bread-making experienced a renaissance in America during the 1990s and early 2000s, with home bakers discovering the joy of creating rustic, European-style loaves. Enterprising bakers began adding creative mix-ins to traditional bread recipes, and the jalapeño-cheddar combination was a natural evolution. The pairing works beautifully because the sharpness and fat content of cheddar cheese balances the heat and acidity of jalapeños, while the bread itself provides a neutral canvas that lets both ingredients shine.
Today, jalapeño cheddar bread has become a staple at artisan bakeries across America, particularly in the Southwest and Western states. You’ll find variations everywhere from Texas to California, with some bakeries making it their signature item. The bread has also become popular in home baking communities, with countless variations shared across food blogs, Pinterest boards, and baking forums.
What makes this particular bread special is how it represents the American tradition of taking diverse culinary influences and creating something new and delicious. It’s not trying to be authentic Mexican pan dulce or traditional European sourdough—it’s unapologetically American, combining the best elements of different food cultures into one irresistible loaf that’s become a beloved classic in its own right.
Why You’ll Love This Recipe
This easy jalapeño cheddar bread recipe delivers bakery-quality results without requiring professional baking experience or a sourdough starter. It’s one of those wonderful recipes that makes you look like a baking genius while actually being quite straightforward.
Here’s why this homemade cheese bread will become your new favorite:
- No-Knead Option Available – This recipe works beautifully with or without kneading, making it accessible whether you have a stand mixer or prefer hands-off methods.
- Beginner-Friendly Yeast Bread – If you’re intimidated by yeast baking, this forgiving recipe is the perfect place to start. The dough is easy to work with and very forgiving.
- Incredible Flavor Combination – The sharpness of aged cheddar perfectly balances the bright heat of jalapeños, creating a complex flavor profile that’s sophisticated yet crowd-pleasing.
- Bakery-Quality at Home – Save money by making artisan bread at home. One loaf from a bakery costs $6-8, but you can make this for about $3 in ingredients.
- Impressive Presentation – This beautiful golden loaf studded with visible cheese and jalapeño pieces looks like it came from an upscale bakery.
- Customizable Heat Level – Easily adjust the spiciness by using more or fewer jalapeños, removing seeds, or choosing milder peppers.
- Perfect for Gifting – Wrap a cooled loaf in parchment and a ribbon for a thoughtful homemade gift that anyone would love to receive.
- Makes Amazing Leftovers – Toasts beautifully, makes incredible sandwiches, and stays fresh for days when properly stored.
- Freezer-Friendly – Make multiple loaves and freeze them for fresh-baked bread whenever you want it.
- Versatile Serving Options – Works for breakfast, lunch, dinner, or snacks. Pair with virtually anything from eggs to chili to barbecue.
Ingredient Notes
Understanding your ingredients ensures the best possible jalapeño cheddar bread. Here’s what you need to know:
All-Purpose Flour or Bread Flour – The foundation of your loaf. Bread flour (with higher protein content around 12-14%) creates a chewier, more structured crumb, while all-purpose flour (10-12% protein) yields a slightly softer, more tender loaf. Both work beautifully—bread flour is ideal for rustic, artisan-style loaves, while all-purpose is perfect if you want something closer to sandwich bread texture. You’ll need about 3½ to 4 cups. Measure by weight if possible (about 420-480g) for most consistent results, or use the spoon-and-level method rather than scooping directly.
Active Dry Yeast or Instant Yeast – The magical ingredient that makes your bread rise! Active dry yeast needs to be dissolved in warm water first (around 110°F), while instant yeast can be mixed directly with flour. Either works perfectly—I use instant yeast for convenience. One packet (2¼ teaspoons) is standard for this recipe. Make sure your yeast is fresh (check expiration date) or it won’t rise properly. Store opened yeast in the refrigerator or freezer for longest life.
Warm Water – Activates the yeast and brings the dough together. Temperature matters: too cold and yeast won’t activate, too hot (above 120°F) and you’ll kill the yeast. Aim for 105-110°F, which should feel like warm bath water on your wrist. You can substitute milk for richer flavor and softer texture, though water creates a crustier exterior.
Sugar or Honey – Feeds the yeast and adds subtle sweetness that balances the savory elements. Just 1-2 tablespoons is perfect. Sugar dissolves faster, while honey adds complexity. This small amount won’t make the bread noticeably sweet—it just enhances overall flavor.
Salt – Essential for flavor development and controlling yeast activity. Don’t skip it or reduce it significantly—bread without enough salt tastes flat. Use 1½ to 2 teaspoons of fine sea salt or table salt. Kosher salt works too, but use slightly more due to larger crystals.
Olive Oil or Melted Butter – Adds richness, helps create a tender crumb, and contributes to a golden crust. About ¼ cup (4 tablespoons) is ideal. Olive oil creates a slightly more rustic, artisan-style loaf, while butter makes it richer and more tender. You can even use half of each.
Sharp Cheddar Cheese – The star ingredient! Sharp or extra-sharp cheddar provides the most flavor. You’ll need 1½ to 2 cups, shredded. Freshly shredded cheese melts better and has superior flavor compared to pre-shredded (which contains anti-caking agents). Medium cheddar works too but lacks the same tangy punch. For best results, use high-quality block cheese and shred it yourself.
Fresh Jalapeños – Provide the signature heat and bright pepper flavor. You’ll need 2-4 jalapeños depending on size and your heat preference. Fresh jalapeños are infinitely better than jarred—they have more flavor and better texture. The seeds and membranes contain most of the heat, so remove them for milder bread or leave them in for extra spice. Some people like to roast jalapeños first for smoky, complex flavor (highly recommended!).
Optional Add-Ins – Consider garlic powder (1 teaspoon), cumin (½ teaspoon), or fresh cilantro (¼ cup chopped) for extra flavor dimension. Some bakers add pickled jalapeños in addition to fresh, or include diced bacon for a smoky, savory touch.
Equipment Needed
Baking bread requires surprisingly minimal equipment. Here’s what you’ll need:
- Large Mixing Bowl – For combining ingredients and allowing dough to rise
- Measuring Cups and Spoons – For accurate measurements (or better yet, a kitchen scale)
- Wooden Spoon or Danish Dough Whisk – For mixing ingredients initially
- Stand Mixer with Dough Hook (Optional) – Makes kneading easier, but hand-kneading works perfectly fine
- Clean Kitchen Towel or Plastic Wrap – For covering dough during rising
- 9×5-inch Loaf Pan or Dutch Oven – A standard loaf pan creates classic sandwich bread shape; a Dutch oven produces artisan-style round loaves with exceptional crust
- Sharp Knife or Bread Lame – For scoring the top before baking
- Pastry Brush – For brushing with butter or egg wash (optional)
- Instant-Read Thermometer (Helpful) – To check water temperature and ensure bread is fully baked (internal temp should reach 190-200°F)
- Cooling Rack – Essential for allowing bread to cool properly without becoming soggy
- Parchment Paper – Makes transferring dough easier and cleanup simpler
- Kitchen Scale (Highly Recommended) – For most accurate measurements, especially with flour

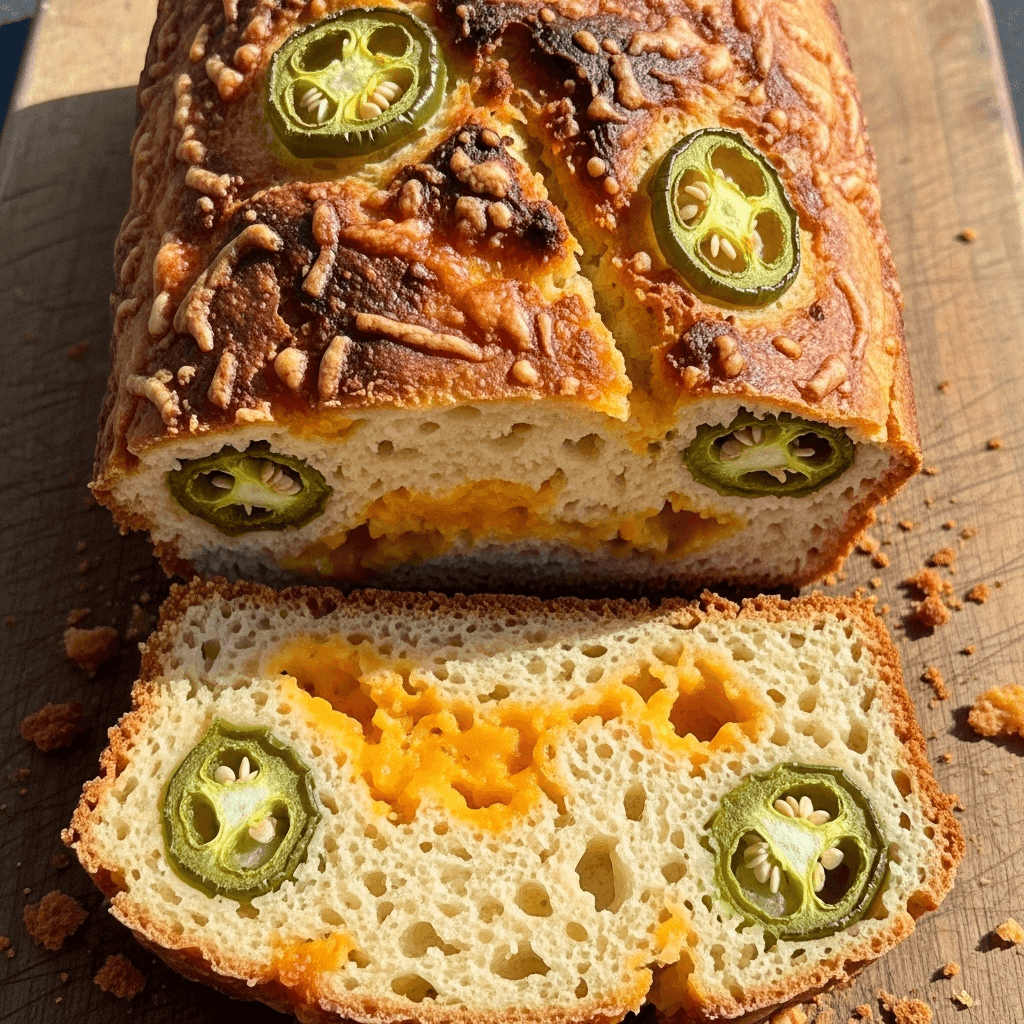
Jalapeño Cheddar Bread
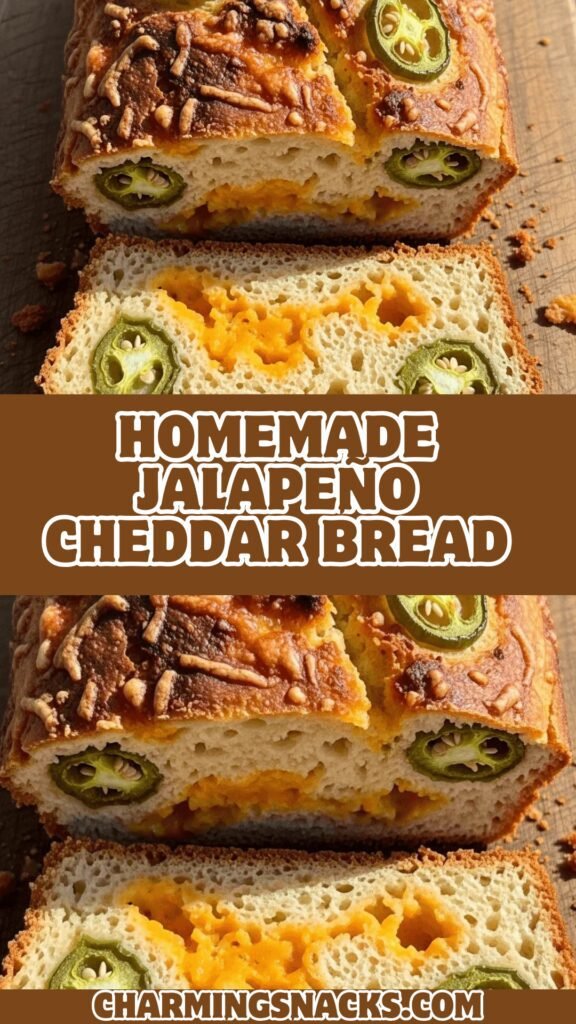
This homemade jalapeño cheddar bread features a soft, fluffy interior studded with sharp cheddar cheese and spicy jalapeño pieces, all wrapped in a golden, slightly crusty exterior. Perfect for serving with soups, chili, or enjoying on its own with butter!
- Total Time: 2 hours 30 minutes
- Yield: 1 loaf (12-14 slices) 1x
Ingredients
For the Dough:
- 3½ cups (420g) all-purpose flour or bread flour, plus more for dusting
- 2¼ teaspoons (1 packet) instant yeast or active dry yeast
- 2 tablespoons granulated sugar or honey
- 1½ teaspoons fine sea salt
- 1¼ cups (300ml) warm water (105-110°F)
- 3 tablespoons olive oil or melted butter, plus more for brushing
For the Mix-Ins:
- 1½ cups (170g) sharp cheddar cheese, shredded (divided)
- 3-4 fresh jalapeños, seeded and finely diced (about ¾ cup)
- ½ teaspoon garlic powder (optional)
- ¼ teaspoon ground cumin (optional, for extra warmth)
For Topping:
- 1 tablespoon melted butter for brushing
- 2 tablespoons shredded cheddar cheese
- Few jalapeño slices for decoration (optional)
Instructions
- Prepare the Jalapeños – Wash jalapeños, cut them in half lengthwise, and remove seeds and membranes (or leave some in for extra heat). Dice finely. Set aside. For extra flavor, you can roast them first: place under the broiler for 5-7 minutes until slightly charred, then dice.
- Activate Yeast (if using active dry) – In a small bowl, combine warm water and sugar. Sprinkle yeast over top and let sit for 5-10 minutes until foamy. If using instant yeast, skip this step and add yeast directly to flour.
- Mix Dry Ingredients – In a large bowl or stand mixer bowl, whisk together flour, salt, garlic powder, and cumin (if using). If using instant yeast, add it to the flour mixture now.
- Combine Wet and Dry – Make a well in the center of flour mixture. Pour in warm water mixture (with activated yeast) and olive oil. Stir with a wooden spoon until a shaggy dough forms and no dry flour remains.
- Knead the Dough – Turn dough out onto a lightly floured surface and knead for 8-10 minutes until smooth and elastic (it should bounce back when poked). Alternatively, use a stand mixer with dough hook on medium speed for 6-8 minutes. The dough should be slightly tacky but not sticky—add flour 1 tablespoon at a time if too wet, or water if too dry.
- Add Mix-Ins – Flatten dough into a rectangle. Sprinkle 1 cup of shredded cheese and the diced jalapeños over the surface. Fold dough over itself and knead gently for 2-3 minutes to distribute cheese and jalapeños throughout. Some pieces will poke through—that’s perfect!
- First Rise – Shape dough into a ball and place in a lightly oiled bowl, turning once to coat. Cover with a damp kitchen towel or plastic wrap. Let rise in a warm, draft-free spot for 1 hour or until doubled in size. (Pro tip: Turn on your oven for 1 minute, then turn it off—the warm oven is perfect for rising.)
- Shape the Loaf – Punch down dough to release air. Turn out onto a lightly floured surface. Shape into a loaf: flatten into a rectangle about 9 inches wide, then roll up tightly from the short end, pinching seams to seal. Place seam-side down in a greased 9×5-inch loaf pan. Alternatively, shape into a round and place in a parchment-lined Dutch oven.
- Second Rise – Cover and let rise for 30-45 minutes until dough rises about 1 inch above the rim of the pan (for loaf pan) or increases by 50% (for Dutch oven).
- Preheat Oven – While dough rises, preheat oven to 375°F (190°C). Position rack in the center of oven.
- Prepare for Baking – Using a sharp knife or bread lame, score the top with 3-4 diagonal slashes or one long slash down the center. Brush with melted butter and sprinkle remaining ½ cup cheese on top. Add jalapeño slices if desired.
- Bake – For loaf pan: Bake for 35-40 minutes until deep golden brown and internal temperature reaches 190-200°F. For Dutch oven: Bake covered for 25 minutes, then uncovered for 15-20 minutes until golden. If top browns too quickly, tent with foil.
- Cool – Remove from oven and brush with additional melted butter for extra soft crust. Let cool in pan for 10 minutes, then turn out onto a cooling rack. Allow to cool for at least 30 minutes before slicing (this is hard, but important for texture!).
Notes
- Jalapeño Heat: For mild bread, remove ALL seeds and membranes. For spicy bread, leave seeds in. Taste a small piece of raw jalapeño to gauge heat.
- Cheese Distribution: Reserve some cheese for topping so you get gooey melted cheese on the crust.
- Altitude Adjustments: At high altitude (above 3,500 feet), reduce yeast by ¼ teaspoon and increase liquid by 2-3 tablespoons.
- Testing Doneness: Tap the bottom of the loaf—it should sound hollow when fully baked.
- Make it Dairy-Free: Use vegan cheese and substitute olive oil for butter.
- Prep Time: 20 minutes
- Cook Time: 1 hour 30 minutes
- Category: Bread
- Method: Baking
- Cuisine: American
- Diet: Vegetarian
Nutrition
- Serving Size: 1 slice (1/12 of loaf)
- Calories: 215
- Sugar: 2g
- Sodium: 385mg
- Fat: 8g
- Saturated Fat: 4g
- Unsaturated Fat: 3g
- Trans Fat: 0g
- Carbohydrates: 28g
- Fiber: 1g
- Protein: 8g
- Cholesterol: 18mg
Tips & Variations
This versatile bread recipe welcomes creativity and customization:
Heat Level Variations:
- Mild: Use 1-2 jalapeños with all seeds removed, or substitute poblano peppers
- Medium: Recipe as written with 3 jalapeños, seeds removed
- Hot: Use 4-5 jalapeños with some seeds included, or add ½ teaspoon cayenne to dough
- Extra Hot: Include habanero or serrano peppers mixed with jalapeños
Cheese Variations:
- Pepper Jack: Substitute for cheddar for extra spice and creamy texture
- Mexican Blend: Use a combination of cheddar, Monterey Jack, and queso quesadilla
- Smoked Gouda: Adds incredible smoky depth
- Combination: Try half sharp cheddar, half Monterey Jack for mild, creamy flavor
- Extra Cheesy: Increase cheese to 2½ cups for ultimate cheese lovers
Add-In Ideas:
- Bacon Jalapeño Cheddar: Add ½ cup cooked, crumbled bacon
- Southwest Style: Add ½ cup corn kernels and 2 tablespoons chopped cilantro
- Garlic Lover’s: Increase garlic powder to 1 tablespoon or add roasted garlic cloves
- Herb Garden: Add 1 tablespoon fresh rosemary or thyme
- Green Chili: Substitute diced green chiles for jalapeños
Shape Variations:
- Dinner Rolls: Divide dough into 12-16 pieces, shape into rolls, bake at 375°F for 18-22 minutes
- Baguette Style: Shape into two long loaves, score deeply, bake for 25-30 minutes
- Pull-Apart Bread: Cut dough into pieces, layer in bundt pan with cheese between layers
- Braided Loaf: Divide into three ropes, braid together for impressive presentation
Whole Grain Options:
- Substitute up to 1 cup all-purpose flour with whole wheat flour (may need extra water)
- Add 2 tablespoons ground flaxseed or wheat germ for nutrition boost
- Use half all-purpose, half white whole wheat flour for healthier bread that’s still soft
Pro Chef Tips
Professional bakers use these techniques for exceptional jalapeño cheddar bread:
Toast Your Spices – If using cumin or other dried spices, toast them in a dry skillet for 30 seconds before adding to dough. This releases essential oils and intensifies flavor dramatically. The bread will have much more complex, aromatic depth.
Roast Your Jalapeños First – Professional bakeries often roast jalapeños before adding them to bread. Place whole jalapeños under the broiler or directly over a gas flame until skin blisters and chars (5-7 minutes), then seal in a plastic bag for 10 minutes. The skin peels off easily, and the flesh develops incredible smoky-sweet complexity. This extra step elevates the bread from good to extraordinary.
Hydration Matters – Professional bakers measure flour by weight, not volume, because it’s far more accurate. If measuring by volume, use the spoon-and-level method: spoon flour into measuring cup and level with a knife. Scooping directly from the bag compacts flour, leading to dry, dense bread. The dough should be slightly tacky but not sticky—it should clear the sides of the bowl but slightly stick to the bottom.
Create Steam for Better Crust – Bakeries use steam-injected ovens for crispy, golden crusts. At home, create steam by placing a metal pan on the bottom oven rack while preheating. When you put bread in, immediately add 1 cup hot water to the pan and quickly close the door. The steam keeps the crust from setting too quickly, allowing maximum oven spring (rise) and creating that coveted crackly exterior.
The Windowpane Test – To know if dough is properly kneaded, take a small piece and stretch it between your fingers. If you can stretch it thin enough to see light through it without tearing (like a windowpane), the gluten is fully developed. If it tears immediately, knead for another 2-3 minutes.
Score with Confidence – Use a very sharp knife or bread lame and cut decisively in one smooth motion. Hesitant, sawing motions create ragged scores. Cut at a 30-degree angle rather than straight down for professional-looking “ears” on your cuts. Score just before baking—if dough sits too long after scoring, cuts will seal.
Let It Cool (Really!) – This is the hardest tip to follow, but crucial: hot bread is still “cooking” from residual heat. The interior needs time to set properly. Slicing hot bread results in gummy, compressed texture. Wait at least 30 minutes, ideally an hour. I know it’s torture, but your patience will be rewarded with perfect texture!
Common Mistakes to Avoid
Even experienced bakers can stumble with yeasted breads. Here’s what to watch for:
Killing Your Yeast with Hot Water – This is the most common mistake! Water that’s too hot (above 120°F) kills yeast instantly, and your bread simply won’t rise. Too cold (below 95°F) and yeast won’t activate properly, leading to dense, flat bread. Test water temperature on your wrist—it should feel like a comfortable bath. If you don’t have a thermometer, err on the side of cooler rather than hotter. Lukewarm works; scalding doesn’t.
Not Kneading Long Enough – Proper kneading develops gluten, which creates bread’s structure and chewy texture. Under-kneaded bread is dense and crumbly. Knead by hand for 8-10 minutes or with a stand mixer for 6-8 minutes. Your arms will get tired—that’s normal! The dough should transform from shaggy and rough to smooth, elastic, and slightly tacky. Do the windowpane test to confirm proper gluten development.
Skipping the Second Rise – Some bakers, eager to get bread in the oven, skip the second rise after shaping. Don’t! This crucial step allows the dough to relax after shaping and provides the final rise that creates light, fluffy texture. Without it, bread will be dense and heavy. Always allow 30-45 minutes for the second rise.
Adding Too Much Flour – When dough feels sticky, the instinct is to add more flour. Resist! Bread dough should be slightly tacky. Adding too much flour creates dry, dense bread. If dough is genuinely too wet (spreading rather than holding shape), add flour 1 tablespoon at a time, mixing thoroughly between additions. Stop as soon as dough holds together and clears the sides of the bowl.
Cutting Before Cooling – I get it—fresh bread smells incredible and you want to slice into it immediately. But hot bread hasn’t finished its cooking process. The interior needs time to set and fully develop its crumb structure. Cutting too early results in gummy, dense texture and compressed slices. The bread will also dry out faster. Show some restraint and wait at least 30 minutes!
Not Measuring Ingredients Properly – Baking is science, and precision matters. Too much flour makes dry bread; too little makes it dense and gummy. Either measure by weight (most accurate) or use the spoon-and-level method for flour. Never scoop directly from the bag. Similarly, make sure your yeast is fresh—expired yeast won’t rise properly.
Storage & Meal Prep
Homemade bread stays fresh and delicious with proper storage:
Room Temperature Storage: Once completely cooled, wrap jalapeño cheddar bread tightly in plastic wrap or place in a plastic bag with air pressed out. Store at room temperature for 3-4 days. The bread will gradually lose moisture and the crust will soften, but it remains delicious. For longer storage, refrigerate or freeze.
Refrigerator Storage: While refrigeration extends shelf life to about a week, it also causes bread to stale faster due to starch retrogradation (don’t worry, reheating reverses this). Wrap tightly in plastic wrap and store in the fridge if your kitchen is very warm or humid, or if you won’t finish the loaf within 3-4 days.
Reviving Stale Bread: Don’t throw away day-old bread! Wrap the whole loaf or individual slices in aluminum foil and warm in a 300°F oven for 10-15 minutes. The heat redistributes moisture, making bread taste fresh-baked again. For slices, toast them—they make incredible toast with butter or turned into grilled cheese sandwiches.
Reheating Slices: For best results, toast slices in a toaster, toaster oven, or under the broiler. The edges will crisp up beautifully while the center warms through. You can also warm slices in a dry skillet over medium heat for 1-2 minutes per side.
Preventing Mold: Always let bread cool completely before storing—wrapping warm bread traps moisture and encourages mold growth. In humid climates or during summer, consider refrigerating bread to prevent mold. Adding a piece of celery to the storage bag can help maintain moisture without encouraging mold.
Make-Ahead & Freezer Notes
This bread is wonderfully freezer-friendly, making it perfect for advance preparation:
Freezing Baked Bread:
- Cool bread completely to room temperature (at least 2 hours)
- Wrap tightly in plastic wrap, then wrap again in aluminum foil or place in a freezer bag
- Label with date and freeze for up to 3 months
- To thaw: Leave wrapped at room temperature for 2-3 hours, or unwrap and thaw in a 300°F oven for 20-25 minutes
- For slices: Freeze individually with parchment between slices, then toast directly from frozen
Freezing Unbaked Dough:
- After first rise, punch down dough and shape into a loaf
- Wrap shaped dough tightly in plastic wrap and freeze in a freezer bag for up to 1 month
- To bake: Thaw in refrigerator overnight, let come to room temperature and complete second rise (1-2 hours), then bake as directed
- This method produces bread that tastes completely fresh-baked
Make-Ahead Dough (Refrigerator Method):
- After first rise, punch down dough, shape into a loaf, and place in greased loaf pan
- Cover tightly with plastic wrap and refrigerate for up to 24 hours
- When ready to bake: Remove from fridge, let sit at room temperature for 45-60 minutes until risen, then bake
- This slow, cold rise develops deeper, more complex flavor
Par-Baked Method:
- Bake bread for only 20-25 minutes until set but pale
- Cool completely, then wrap and freeze
- To finish: Thaw, then bake at 375°F for 15-20 minutes until golden
- This gives you fresh-baked bread in under 30 minutes
Best Reheating from Frozen: Wrap frozen loaf in foil and place in a 300°F oven for 35-40 minutes until heated through. Unwrap for the last 5 minutes to crisp the crust. For slices, toast directly from frozen—they’ll taste just-baked!
Serving Suggestions
Jalapeño cheddar bread pairs beautifully with countless dishes:
Soup & Stew Pairings:
- Chili con carne or white chicken chili (the ultimate combo!)
- Loaded baked potato soup
- Tomato soup or tomato bisque
- Tortilla soup or posole
- Hearty beef stew or vegetable soup
- Cream of mushroom or broccoli cheddar soup
Breakfast & Brunch:
- Toast with butter and scrambled eggs
- Make French toast with a savory twist
- Create breakfast sandwiches with eggs, bacon, and avocado
- Serve alongside omelets or frittatas
- Top with poached eggs and hollandaise for a twist on eggs Benedict
Lunch Ideas:
- Ultimate grilled cheese sandwiches
- Turkey and avocado sandwiches
- BLT with extra jalapeño slices
- Tuna or chicken salad sandwiches with extra zing
- Panini pressed with ham and more cheese
Dinner Sides:
- Barbecue ribs, brisket, or pulled pork
- Grilled steaks or burgers
- Roasted or fried chicken
- Mexican-inspired dishes like fajitas or enchiladas
- Fish tacos or blackened fish
Appetizer Transformations:
- Cube and toast for homemade croutons
- Make crostini topped with cream cheese and jalapeño jelly
- Create bread bowls for dips like spinach artichoke or queso
- Slice thin and make jalapeño cheddar crisps in the oven
- Bread pudding with a savory twist
Beverage Pairings:
- Cold beer (especially lagers or Mexican lagers like Corona)
- Margaritas or palomas
- Iced tea or lemonade
- Red wine (Zinfandel or Malbec complement the spice)
- Cold milk (for cooling the heat!)
FAQs Section
Can I make this bread in a bread machine? Yes! Add ingredients to your bread machine in the order specified by your machine’s manual (usually liquids first, then dry ingredients, with yeast added last in a well). Use the “basic” or “white bread” setting with a light crust. Add the cheese and jalapeños when the machine beeps for add-ins (usually toward the end of kneading). The texture will be slightly different from hand-shaped bread but still delicious.
How can I tell when my bread is fully baked? There are three reliable methods: (1) The internal temperature should reach 190-200°F when tested with an instant-read thermometer, (2) The loaf should be deep golden brown and sound hollow when tapped on the bottom, (3) The bread should feel firm and spring back slightly when pressed. If you’re unsure, bake an extra 5 minutes—over-baked is better than under-baked, which can be gummy.
Can I use jarred jalapeños instead of fresh? You can, but fresh is significantly better. Jarred jalapeños have a pickled flavor and different texture that changes the character of the bread. If using jarred, drain them very well and pat completely dry with paper towels—excess moisture will make your bread soggy. You’ll need about ½ to ⅔ cup drained, diced jarred jalapeños. The flavor will be tangier and less fresh-tasting than with fresh peppers.
Why didn’t my bread rise? Several factors can prevent rising: (1) Dead yeast (check expiration date and proof it in warm water to test), (2) Water temperature too hot (killed the yeast) or too cold (yeast didn’t activate), (3) Too much salt added directly to yeast (salt kills yeast on contact), (4) Not enough time or warm enough environment for rising, (5) Old flour with low protein content. Make sure your rising spot is draft-free and warm (75-80°F is ideal).