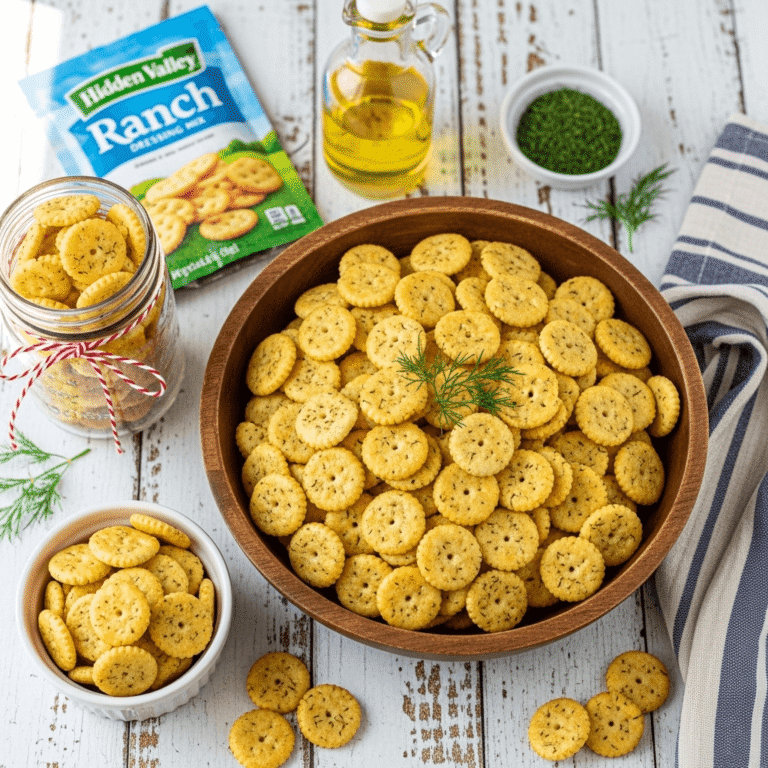
Addictive Ranch Pretzels (No-Bake Snack!)

Get ready to meet your new favorite addictive snack! These irresistible ranch pretzels are crunchy, savory, perfectly seasoned, and so easy to make you’ll wonder why you’ve never tried them before. This no-bake ranch pretzel recipe transforms ordinary pretzels into flavor-packed bites that are perfect for parties, game day, road trips, or anytime snacking. They’re often called “crack pretzels” because once you start munching, you seriously can’t stop!
These seasoned pretzels are made by coating pretzel twists in a magical mixture of ranch dressing mix, vegetable oil, and seasonings, then baking them low and slow until every piece is perfectly coated and crunchy. The result is an incredibly flavorful snack that hits all the right notes—salty, tangy, herby, and satisfying with every bite.
Whether you’re hosting a Super Bowl party, need a teacher gift, want easy homemade snacks for road trips, or simply crave something salty and delicious, these ranch seasoned pretzels deliver every time. They’re budget-friendly, use simple pantry ingredients, require no special equipment, and make a huge batch that feeds a crowd. Plus, they keep for weeks in an airtight container, making them perfect for meal prep or gift-giving. Once you try this easy ranch pretzel recipe, it’ll become your go-to snack that everyone begs you to make!
History / Background
The ranch pretzels recipe is a beautiful example of American home cooking creativity that emerged from the potluck and party snack culture of the 1970s-1990s. While the exact origin is unclear, this recipe belongs to a category of “seasoned snack mixes” that became wildly popular across the United States during this era.
Ranch seasoning itself was invented by Steve Henson in the 1950s when he worked as a plumbing contractor in Alaska. He created the buttermilk-herb seasoning blend to serve at his California ranch (Hidden Valley Ranch), where it became so popular that guests started requesting packets to take home. In 1972, Henson sold Hidden Valley Ranch to Clorox, and ranch seasoning became a supermarket staple. By the 1990s, ranch had become America’s favorite dressing and seasoning.
The concept of seasoned pretzels likely evolved from the tradition of homemade snack mixes like Chex Mix, which dates back to the 1950s when Chex cereal printed the first official recipe on their boxes. Home cooks began experimenting with different snack coatings and flavor combinations, and someone discovered that coating pretzels in ranch seasoning and oil created an absolutely addictive snack.
These ranch pretzels spread through word-of-mouth, church cookbooks, community recipe exchanges, and later through food blogs and Pinterest. They became a staple at Southern potlucks, Midwest gatherings, tailgate parties, and holiday celebrations across America. The recipe’s appeal lies in its simplicity—just a few ingredients and minimal effort create maximum flavor.
What makes this recipe special is how it transforms an ordinary ingredient (plain pretzels) into something extraordinary. It represents American ingenuity in home cooking: taking accessible ingredients and creating something crave-worthy that brings people together. Today, ranch pretzels remain a beloved snack that spans generations, showing up at everything from kids’ birthday parties to adult game nights!
Why You’ll Love This Recipe
These addictive ranch pretzels are dangerously delicious! They’re crunchy, perfectly seasoned with that classic ranch flavor everyone loves, and so easy to make that you’ll find yourself whipping up batch after batch. Every handful delivers that satisfying crunch and bold flavor that makes them impossible to resist.
Here’s why these easy ranch pretzels will become your new favorite snack:
- Incredibly Easy – Just toss ingredients together and bake, no cooking skills required!
- No-Bake Simplicity – No actual cooking involved, just coating and warming in the oven
- Addictively Delicious – That perfect balance of salty, tangy, herby ranch flavor
- Budget-Friendly – Uses inexpensive ingredients to make a huge batch
- Makes a Big Batch – One recipe makes 16 cups, perfect for feeding crowds
- Perfect for Gifting – Package in mason jars or bags for homemade gifts people actually want
- Long Shelf Life – Stays fresh for 2-3 weeks in an airtight container
- Crowd-Pleaser – Kids and adults alike devour these seasoned pretzels
- Customizable – Easy to adjust heat level or add different seasonings
- Great for Parties – Perfect for game day, holidays, potlucks, and gatherings
- No Special Equipment – Just needs a bowl and baking sheet you already own
- Hands-Off Cooking – Minimal active time, mostly just baking
Whether you’re making these ranch seasoned pretzels for a party, as homemade gifts, for snacking throughout the week, or just because you’re craving something salty and delicious, they always deliver. The combination of ranch seasoning, garlic, and dill creates a flavor that’s utterly irresistible!
Ingredient Notes
Let’s break down what makes these ranch pretzels so incredibly tasty. The simplicity is what makes them genius!
Pretzels – The base of your snack! Use 16 ounces (one pound) of mini pretzel twists. The small twists work best because they have maximum surface area for coating. You can also use pretzel sticks, pretzel rods broken into pieces, or a combination. Stick with plain salted pretzels—avoid flavored varieties. Substitution: Gluten-free pretzels work if you need them to be gluten-free.
Vegetable Oil – The carrier that helps seasonings stick to every pretzel. You’ll need 1 cup of vegetable oil, canola oil, or any neutral-flavored oil. The oil coats the pretzels and helps the seasonings adhere during baking. Don’t use olive oil—its strong flavor overpowers the ranch. Substitution: Canola, safflower, or sunflower oil all work perfectly.
Ranch Dressing Mix – This is the star flavor! Use one 1-ounce packet of dry ranch dressing mix (like Hidden Valley Ranch). The powdered mix contains buttermilk, herbs (dill, parsley, chives), garlic, onion, and seasonings that create that classic ranch taste. Don’t use liquid ranch dressing—only the dry mix works. You can also use homemade ranch seasoning mix if you prefer.
Dill Weed – Dried dill adds that distinctive pickle-like, herby flavor that makes these pretzels so addictive. Use 1 tablespoon of dried dill weed. This amplifies the dill already in the ranch mix. Fresh dill doesn’t work here—stick with dried.
Garlic Powder – Adds savory depth and aromatic punch. Use 1-2 teaspoons of garlic powder (not garlic salt, which would make them too salty). Garlic powder is more concentrated and distributes evenly throughout the coating.
Onion Powder – Provides sweet-savory umami that rounds out the flavor profile. Use 1 teaspoon of onion powder. Like garlic powder, it distributes evenly and adds complexity without chunks.
Red Pepper Flakes – Optional but adds a subtle warmth and complexity. Start with ½ teaspoon if you want just a hint of heat, or increase to 1 teaspoon for more kick. You can omit entirely for kids or heat-sensitive folks.
Lemon Pepper Seasoning – Optional addition that adds bright, citrusy notes and extra pepper kick. Use 1 teaspoon if including. This isn’t traditional but many people love the addition.
Equipment Needed
You need almost nothing to make these ranch pretzels—just basic kitchen items!
- Large Mixing Bowl or 2-Gallon Ziplock Bag – For tossing pretzels with oil and seasonings. A bag makes mixing easier and less messy.
- Large Baking Sheet(s) – For spreading pretzels to bake. You’ll need 2-3 baking sheets, or you can bake in batches.
- Measuring Cups and Spoons – For accurate measurements of oil and seasonings.
- Wooden Spoon or Spatula – For stirring pretzels during baking (if using bowl method).
- Small Bowl – For mixing all the seasonings together before adding to oil.
- Airtight Container or Jars – For storing finished pretzels.
Optional but Helpful:
- Parchment paper or aluminum foil for easier cleanup
- Large roasting pan if you want to bake the entire batch at once
- Funnel for pouring pretzels into jars for gifting
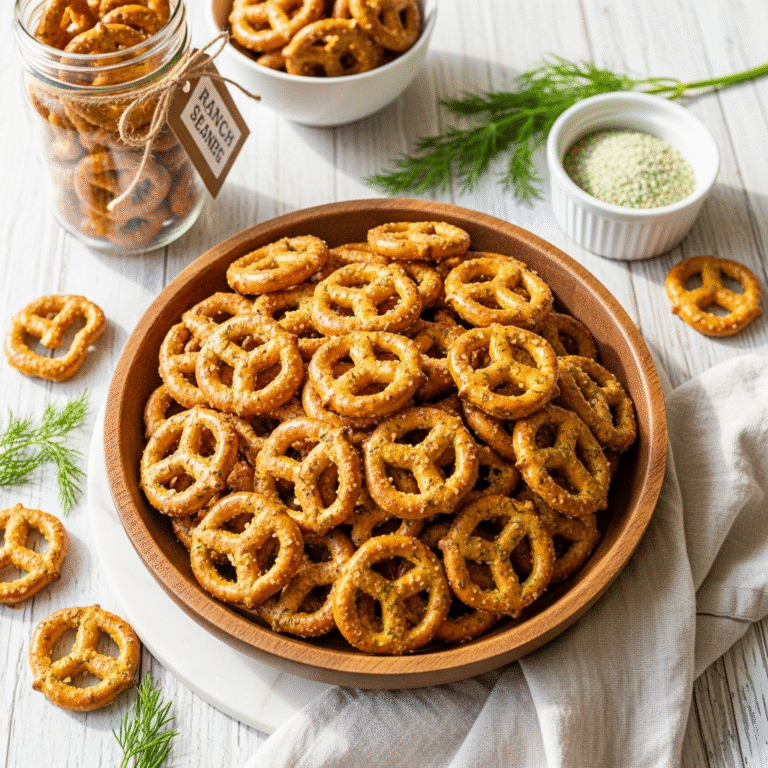
Ranch Pretzels
These addictive ranch pretzels are crunchy, savory, and perfectly seasoned with ranch dressing mix, dill, and garlic. This easy no-bake snack recipe requires just 5 minutes of prep and creates the ultimate party snack that everyone devours. Perfect for game day, gifts, or anytime you need a delicious homemade snack!
- Total Time: 1 hour 10 minutes
- Yield: 16 cups (about 32 servings) 1x
Ingredients
- 16 ounces (1 pound) mini pretzel twists
- 1 cup vegetable oil or canola oil
- 1 packet (1 ounce) dry ranch dressing mix
- 1 tablespoon dried dill weed
- 2 teaspoons garlic powder
- 1 teaspoon onion powder
- ½ teaspoon red pepper flakes (optional, adjust to taste)
Optional Add-Ins:
- 1 teaspoon lemon pepper seasoning
- ½ teaspoon cayenne pepper (for extra heat)
Instructions
Step 1: Preheat and Prep
Preheat your oven to 250°F (120°C). This low temperature allows the pretzels to absorb the seasoning mixture without burning. If using baking sheets, no need to line them, but you can use parchment paper or foil for easier cleanup if desired.
Step 2: Mix the Seasonings
In a small bowl, combine the ranch dressing mix, dried dill weed, garlic powder, onion powder, and red pepper flakes (if using). Whisk together until evenly mixed. This ensures even distribution of seasonings. Set aside.
Step 3: Combine Oil and Seasonings
Pour the vegetable oil into a large mixing bowl or 2-gallon ziplock bag. Add the seasoning mixture to the oil and whisk or shake vigorously until well combined. The oil will turn slightly cloudy and fragrant—this is your coating mixture that will make the pretzels amazing!
Step 4: Coat the Pretzels
Add all the pretzel twists to the oil and seasoning mixture. If using a bowl, stir thoroughly with a wooden spoon or your hands (you can wear food-safe gloves if you don’t want oily hands) until every pretzel is coated. If using a ziplock bag, seal it and shake vigorously for 1-2 minutes, turning the bag to ensure even coating. Every pretzel should be glistening with the seasoned oil.
Step 5: Spread on Baking Sheets
Spread the coated pretzels in a single layer across 2-3 large baking sheets. Don’t pile them up—they need to be in a single layer for even baking. If you don’t have enough baking sheets, you can bake in batches or use a large roasting pan.
Step 6: Bake and Stir
Place baking sheets in the preheated 250°F oven. Bake for 1 hour total, stirring the pretzels every 15 minutes. This regular stirring ensures every pretzel gets evenly coated and dried. The low heat allows the oil to be absorbed without burning the seasonings. After 1 hour, the pretzels should look dry (not greasy) and smell incredibly fragrant.
Step 7: Cool Completely
Remove from oven and let the pretzels cool completely on the baking sheets. They’ll crisp up even more as they cool. Don’t try to store them while warm or they’ll become soggy. Once completely cool (about 30 minutes), they’re ready to devour!
Step 8: Store and Enjoy
Transfer cooled ranch pretzels to an airtight container, mason jars, or ziplock bags. They’ll stay fresh and crunchy for 2-3 weeks at room temperature. If you can resist eating them all at once, that is!
Notes
- Low Temperature is Key: Don’t be tempted to increase oven temperature to speed things up. The low 250°F temperature allows oil absorption without burning seasonings.
- Stirring is Essential: Stir every 15 minutes without fail. This prevents sticking, ensures even coating, and helps oil distribute properly.
- Oil Amount: The full cup of oil might seem like a lot, but the pretzels absorb it during baking. They won’t taste greasy when done.
- Cooling: Make sure pretzels are completely cool before storing. Storing warm pretzels creates condensation that makes them soggy.
- Scaling: This recipe easily doubles or triples for big batches. Just bake in batches if needed.
- Flavor Adjustment: Taste after baking and if you want more ranch flavor, you can toss with additional dry ranch mix while still warm.
- Prep Time: 10 minutes
- Cook Time: 1 hour
- Category: Appetizer
- Method: Baking
- Cuisine: American
- Diet: Vegetarian
Nutrition
- Serving Size: ½ cup
- Calories: 145
- Sugar: 1g
- Sodium: 385mg
- Fat: 8g
- Saturated Fat: 1g
- Unsaturated Fat: 7g
- Trans Fat: 0g
- Carbohydrates: 17g
- Fiber: 1g
- Protein: 2g
- Cholesterol: 0mg
Tips & Variations
Spicy Ranch Pretzels: Increase red pepper flakes to 1-2 teaspoons, add ½ teaspoon cayenne pepper, or include hot sauce-flavored seasoning for serious heat lovers.
Everything Bagel Ranch Pretzels: Add 2 tablespoons of everything bagel seasoning to the mix for a delicious twist with sesame seeds, poppy seeds, and extra garlic.
Cheesy Ranch Pretzels: Toss finished pretzels with ¼ cup grated Parmesan cheese while still warm for extra cheesy goodness.
Buffalo Ranch Pretzels: Add 2-3 tablespoons of buffalo wing sauce powder or buffalo seasoning to the oil mixture for tangy, spicy buffalo-ranch flavor.
Lemon Pepper Ranch: Add 2 teaspoons lemon pepper seasoning and reduce regular pepper for bright, citrusy notes.
Healthier Version: Use olive oil instead of vegetable oil (flavor will be stronger), and look for low-sodium pretzel options if concerned about salt.
Mix-In Version: Add 2 cups of oyster crackers, bagel chips, or cheese crackers to the pretzel mix for variety.
Sweet and Savory: Add 1 tablespoon of honey or maple syrup to the oil mixture for subtle sweetness that balances the savory.
Garlic Lover’s: Double the garlic powder and add ½ teaspoon of dried minced garlic for intense garlic flavor.
Italian Herb Ranch: Replace dill with Italian seasoning blend and add extra Parmesan for Italian-inspired pretzels.
Pro Chef Tips
Use a Bag for Even Coating: Professional snack makers know that using a large ziplock bag instead of a bowl creates the most even coating with least effort. The bag allows you to shake vigorously without spilling, and gravity helps the oil mixture reach every surface. This method is particularly great if you’re making this with kids—it’s fun and mess-free!
Low and Slow is Non-Negotiable: While it might be tempting to crank up the heat to save time, the low 250°F temperature is crucial. Higher heat causes the seasonings (especially garlic powder) to burn, creating bitter flavors. The slow bake allows oil absorption without burning, resulting in perfectly seasoned pretzels without any burnt taste.
Stir Like You Mean It: Don’t just casually push pretzels around. Really stir them up, flipping them from bottom to top every 15 minutes. This ensures even oil distribution and prevents the bottom layer from getting over-saturated while the top stays dry. Set a timer—it’s easy to forget!
Fresh Seasonings Matter: Check expiration dates on your ranch mix, dill, and garlic powder. Stale seasonings have muted flavors and won’t deliver that punch you want. Fresh seasonings make a noticeable difference in the final product’s flavor intensity.
Cool Completely Before Storing: This is a make-or-break step. Warm pretzels release steam, and trapped steam in a closed container equals soggy pretzels. Always let them cool to room temperature (at least 30 minutes) before sealing in containers. Patience here preserves that perfect crunch for weeks.
Toast Before Gifting: If making these as gifts days ahead, you can refresh them by spreading on a baking sheet and warming at 200°F for 10 minutes, then cooling again. This brings back peak crunchiness and aroma.
Layer Your Flavors: For more complex flavor, add half the seasoning mixture before baking and toss the hot pretzels with the remaining seasoning right when they come out of the oven. This creates layers of flavor—some baked in, some fresh on the surface.
Common Mistakes to Avoid
Skipping the Stirring: If you don’t stir every 15 minutes, the pretzels on the bottom will be oversaturated with oil while those on top remain under-seasoned. The result is uneven flavor and texture. Set a timer and stir religiously—it only takes 30 seconds each time and makes all the difference.
Using Too High a Temperature: Baking at temperatures higher than 250-275°F will burn the garlic powder and create bitter, acrid flavors while the oil doesn’t absorb properly. The pretzels might look done faster, but they’ll taste burnt. Trust the low temperature—it works!
Not Mixing Seasonings First: Adding seasonings directly to oil without mixing them together first causes clumping. Some pretzels get huge flavor bombs while others taste plain. Always blend dry seasonings together before adding to oil for even distribution.
Storing While Still Warm: This creates condensation inside your container, which makes the pretzels lose their crunch and become chewy or stale faster. Even if you’re in a hurry, wait for complete cooling. Your future snacking self will thank you!
Using Stale Pretzels: Starting with stale or soft pretzels means you’ll never achieve that perfect crunch, no matter how long you bake. Use fresh, crispy pretzels from a newly opened bag for best results.
Overcrowding the Pan: Piling pretzels in thick layers prevents even coating and drying. They need to be in a single layer (or close to it) to bake properly. Use multiple pans or bake in batches rather than overcrowding.
Storage & Meal Prep
Room Temperature Storage: Store completely cooled ranch pretzels in airtight containers, mason jars, or ziplock bags at room temperature for 2-3 weeks. The key is “airtight”—exposure to air makes them stale faster. They maintain their crunch beautifully when properly stored.
Portioning for Snacks: Portion into smaller containers or snack-sized ziplock bags (about ½ to 1 cup portions) for grab-and-go snacks. These are perfect for lunchboxes, road trips, office snacks, or portion-controlled munching.
Gifting Storage: Layer pretzels in mason jars, tie with ribbon, and attach a cute tag. They look beautiful and keep fresh. For shipping, use bubble-wrapped containers and ship in padded boxes to prevent crushing.
Avoiding Staleness: If pretzels lose crispness over time, refresh them by spreading on a baking sheet and warming at 200°F for 5-10 minutes. Let cool completely before storing again. This brings back the crunch!
Long-Term Storage: While they keep well at room temperature, you can extend shelf life by refrigerating (up to 1 month) or freezing (up to 3 months) in airtight containers. Let come to room temperature or warm briefly before serving.
Make-Ahead & Freezer Notes
Perfect Make-Ahead Snack: These ranch pretzels are THE ideal make-ahead snack because they actually improve over the first day or two as flavors meld. Make them up to 3 weeks ahead of when you need them—they’ll stay perfectly fresh in airtight containers.
Batch Cooking: Many people make double or triple batches and store in multiple containers so they always have homemade snacks on hand. The recipe scales beautifully and doesn’t require more active time for larger batches.
Freezing: Freeze cooled pretzels in freezer-safe bags or containers for up to 3 months. They maintain their texture and flavor beautifully. No need to thaw—just grab handfuls straight from the freezer for snacking, or let sit at room temperature for 10 minutes if you prefer.
Holiday Prep: Make these 2-3 weeks before holidays and store in airtight containers. This frees up time closer to the event while ensuring you have homemade snacks ready. Perfect for Thanksgiving, Christmas, or New Year’s parties.
Gift-Giving Timeline: For gift-giving, make 1-2 weeks ahead and store in gift containers. The flavors will be fully developed and they’ll still be perfectly crunchy. Include a “best by” date of 2 weeks from when you packaged them.
No Reheating Needed: Unlike many make-ahead foods, these don’t need reheating unless they’ve lost crunch. Just store properly and they’re ready to serve anytime.
Serving Suggestions
Game Day Spread: Serve in large bowls alongside buffalo wings, pizza bites, cheese dip with chips, veggie tray, and other classic game day foods. The pretzels are perfect for munching between plays!
Party Mix Station: Create a snack bar with ranch pretzels, plain pretzels, nuts, M&Ms, popcorn, and other munchies for guests to mix their own snack combos.
Movie Night: Portion into small bowls for each person during movie night. They’re less messy than popcorn and more flavorful!
Road Trip Snacks: Pack in ziplock bags or containers for long car rides. They’re not messy, don’t need refrigeration, and satisfy salty cravings perfectly.
Appetizer Table: Serve in a pretty bowl as part of an appetizer spread with cheese and crackers, crudités, and dips before dinner parties.
Lunch Box Addition: Add a small bag to kids’ or adults’ lunches as a satisfying, crunchy snack that’s more exciting than plain pretzels.
Beer Pairing: These pair wonderfully with cold beer! The salty, savory flavors complement lagers, IPAs, and wheat beers beautifully.
Salad Topper: Crushed ranch pretzels make an incredible crunchy topping for green salads, adding texture and flavor (similar to croutons but better!).
Soup Accompaniment: Serve alongside tomato soup, chili, or creamy soups instead of crackers for extra flavor and crunch.
Tailgate Essential: These travel well and don’t need to stay cold, making them perfect for parking lot parties before games.
FAQs Section
Can I make these without baking them?
While you technically could just coat pretzels in the seasoning mixture and serve, baking is what makes them truly special. The low, slow baking allows the oil and seasonings to be absorbed into the pretzels rather than sitting on the surface. This creates deeper flavor and better texture. The un-baked version would be greasier and the seasonings would fall off. The one-hour baking time is hands-off and worth it!
Why do my pretzels taste burnt or bitter?
This usually happens from baking at too high a temperature. Garlic powder and ranch mix burn easily, creating bitter flavors. Always bake at 250°F (no higher than 275°F). Also check that your garlic powder isn’t old and oxidized, which can taste bitter even before baking. Follow the low temperature and stirring schedule for best results.
Can I use a different type of oil?
Yes! Any neutral-flavored oil works—canola, vegetable, safflower, or sunflower oil are all fine. Avoid olive oil as its strong flavor can overpower the ranch seasoning. Some people use melted coconut oil, though it will add a slight coconut flavor. For best results that let the ranch shine through, stick with neutral vegetable-based oils.
How do I make these less salty?
Use unsalted pretzels if you can find them (though they’re rare). You can also rinse regular pretzels briefly under water, pat very dry, and let air dry for an hour before coating. Or simply reduce the amount of ranch mix by half. Keep in mind that salt is part of what makes these addictive, so less salt means less flavor punch overall.
Can I make these gluten-free?
Absolutely! Just substitute gluten-free pretzels for regular pretzels. Everything else in the recipe is naturally gluten-free. The texture and flavor will be nearly identical. Make sure your ranch mix doesn’t contain any gluten-containing additives (most don’t, but check labels if you’re very sensitive).
Why are my pretzels greasy instead of crunchy?
This happens if you don’t bake long enough, bake at too low a temperature, or don’t stir regularly. The pretzels need the full hour at 250°F with stirring every 15 minutes to fully absorb the oil. If they’re still greasy after an hour, bake 15-20 minutes longer. Also ensure you’re letting them cool completely—they crisp up during cooling.
Can I double this recipe?
Yes! This recipe scales beautifully. Double or triple all ingredients proportionally. You’ll just need to work in batches or use extra baking sheets since they need to be in a single layer. Baking time stays the same—just stir each pan every 15 minutes. Many people make huge batches to give as gifts or keep stocked for weeks.
Conclusion
There you have it—everything you need to make the most addictive, crave-worthy ranch pretzels that’ll have everyone asking for your recipe! These easy ranch seasoned pretzels are proof that simple ingredients can create something absolutely spectacular. With just pretzels, oil, and a few seasonings, you’ve got a snack that rivals anything you’d buy at a specialty store, but tastes fresher and costs a fraction of the price.
Whether you’re making these no-bake ranch pretzels for game day parties, holiday gatherings, homemade gifts, or simply to have delicious snacks on hand all week, this recipe never disappoints. The combination of ranch seasoning, dill, and garlic creates a flavor that’s utterly irresistible and keeps people coming back for “just one more handful” until the bowl is empty!
I’d absolutely love to hear how your ranch pretzels turn out! Did you add any fun variations? Are you gifting them or keeping them all for yourself? How long did they last in your house before disappearing? Leave a comment below and share your experience! And if this recipe helped you create the perfect addictive snack, please pin it to Pinterest so other home cooks can discover these amazing seasoned pretzels too. Your pins help support this blog and inspire me to keep creating easy, delicious recipes for you!
Now grab those pretzels, preheat that oven, and get ready to make the snack that’ll have everyone begging for the recipe. Warning: they’re called “crack pretzels” for a reason—they’re seriously addictive! Happy snacking! 🥨